Recent Posts

Showing posts with label lemon. Show all posts

Tuesday, August 6, 2013

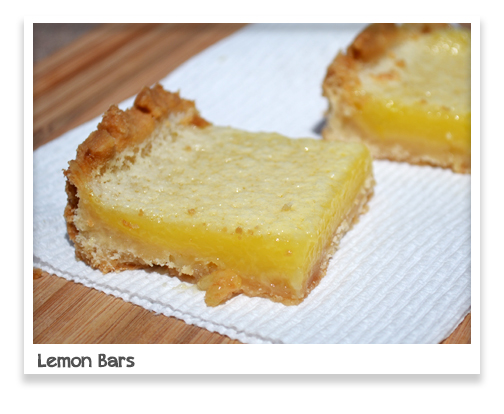
Classic Lemon Bars

Summer is winding down here in Central Florida.  Even though it is only early August and we still have quite a few months of hot summer weather left, school is about to start back up so it seems that time spent sitting by the poolside is pretty much at an end.  ...But one more tart, citrusy summer recipe couldn't hurt, though, right?  We made these Classic Lemon Bars recently and they have a wonderfully tart, tangy taste that just screams of summer.  These were delicious as is, but were even more amazing when served with freshly prepared whipped cream.  For my favorite vanilla whipped cream recipe, scroll down to the end of this post. 


Classic Lemon Bars, adapted from Food Network
Ingredients for the crust:
Oil for greasing the pan
1 1/2 stucks unsalted butter, diced
2 cups all purpose flour
1/4 cup packed light brown sugar
1/2 cup confectioner's sugar, plus more for garnishing
1/4 teaspoon fine sea salt

Ingredients for the filling:
4 large eggs plus 2 egg yolks, room temperature
2 cups granulated sugar
1/2 cup all purpose flour, sifted
1 teaspoon grated lemon zest
1 cup fresh lemon juice (from about 6 - 8 lemons)

To make the crust:
Preheat the oven to 350 F.  Grease a 9 x 13 pan with oil and line with parchment, leaving an overhang on the 2 long sides.  Lightly grease the parchment with oil.  
In a food processor, pulse butter, flour, both sugars and salt until the dough comes together, about 1 minute.  Press evenly into the pan and up the sides about 1/2 inch making sure there are no cracks.  Bake until lightly golden, about 20 - 25 minutes.

To make the filling:
While the crust is baking, prepare the filling. Whisk eggs, yolks, sugar, and flour in a bowl until smooth.  Whisk in lemon zest and guide.  Remove the crust from the oven and reduce oven temperature to 300 F.  Pour filling over the warm crust and put back in the oven.  Bake until just set, about 30 - 35 minutes.  

Allow the bars to cool in the pan on a rack, then refrigerate until firm for at least 2 hours.  Using a knife or spatula, trace around the outside of the bars to release them from the sides of the pan.  Lift the bars out of the pan with parchment and slice.  If desired, dust with confectioner's sugar prior to serving.  

Vanilla Whipped Cream:
Ingredients:
1 cup cold heavy whipping cream
2 tsp mexican vanilla
1/8 C granulated sugar + additional, if desired

Beat all ingredients together, on high, until mixture reaches light and fluffy consistency. Add more sugar if desired to reach desired sweetness.

Friday, December 16, 2011

Gingerbread Cake Bites with Lemon Frosting


Around this time of year about 5 or 6 years ago, a neighbor brought over a platter of homemade petit fours for the holidays.  It had a few different flavors of cake cut into adorable little squares, each topped with a different type of frosting. I can't remember anything that was on that platter besides one: gingerbread cake with lemon frosting.  I only ate one of the tiny one inch cake bites, but it was so good I still remember it to this day.  

When I got word of Hodgson Mill's holiday recipe contest, "Have a Grain Holiday!" I felt short on good ideas.  I tried out a few different recipes using both their Bread Flour and their Whole Wheat flour but I wasn't thrilled with anything.  Finally, I thought about those gingerbread cake bites and I started trying to make my own version of the bite sized dessert.  I don't know how these would compare to those little bites from a few years ago, but these are pretty delicious.  The gingerbread cake is spicy and moist, and the tangy lemon frosting serves is a nice complement.  Plus, since it uses Hodgson Mill's Whole Wheat Graham flour, it is nutritious, too.  With this type of flour, "the entire natural bran and germ are stone ground, preserving all of the grain's natural nutrients and great taste, with no artificial colors, flavors, or preservatives." 

Gingerbread Cake Bites with Lemon Frosting, serving size: 40-50 bite sized squares.
Preparation time: approximately 2 hours
Ingredients:
1 ½ cups Hodgson Mill Whole Wheat flour
½ cup cornstarch
1 teaspoon baking powder
¾ teaspoon baking soda
½ teaspoon fine sea salt
1 teaspoon ground ginger
¼ teaspoon cinnamon
¼ teaspoon grated nutmeg
¼ teaspoon cloves
a pinch of ground pepper
¾ stick of unsalted butter (6 Tablespoons), room temperature
2/3 cup brown sugar packed
¼ cup molasses
¼ light corn syrup
1 egg, beaten
½ teaspoon pure vanilla extract
½ cup boiling water
2 Tablespoons milk

For the Gingerbread Cake:
Spray a 9 x 13 pan with nonstick spray and line with parchment paper and preheat the oven to 325 F.
Mix the flour, cornstarch, baking powder, soda, salt, spices and pepper together and set aside.
In the bowl of an electric mixer, cream the butter.  Gradually add the brown sugar and cream thoroughly. Beat in molasses and corn syrup.
In a separate bowl, beat the egg until foamy.  Then, add it to the butter mixture. Stir in the vanilla.
Add the dry ingredients to the creamed mixture and mix just until combined, being careful not to overbeat. 
Slowly, pour in the boiling water and the milk.  Mixture will be very runny.  Pour the mixture into the prepared pan and spread with a spatula.
Bake for about 30-35 minutes or until a cake tester comes out clean.  Allow to cool all the way, and then chill in the refrigerator.

For the Lemon Frosting:
2 sticks unsalted butter, softened
zest from ½ a large lemon
juice from ½ a large lemon
1/2 teaspoon pure vanilla extract
3 cups powdered sugar
Lemon peel for garnish, optional

In the bowl of an electric mixer, cream the butter until light and fluffy.  Add the zest and vanilla.  Slowly add the powdered sugar.  Add the lemon juice and beat on medium-high for 5 minutes.  When the cake is chilled and  slightly firm to the touch, spread the frosting on the cake with an offset spatula.  Using a pizza cutter, cute the cake into small squares.  If desired, top each square with a small strip of lemon zest to garnish.  


Wednesday, June 1, 2011

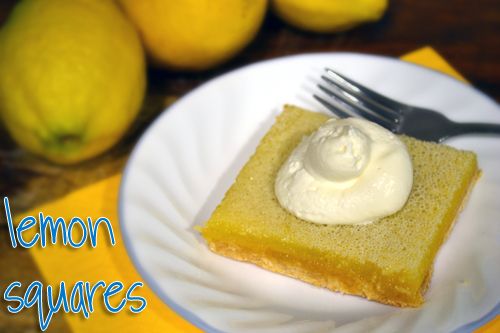
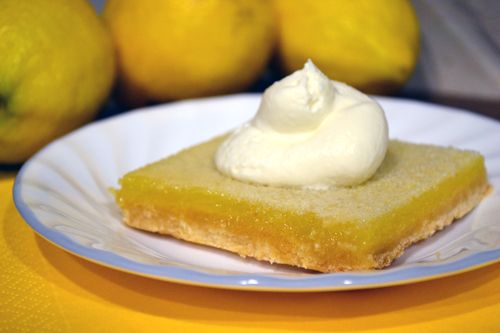
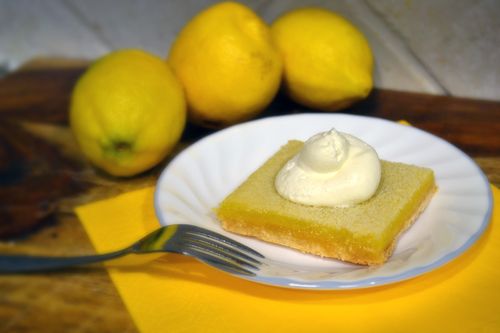
Lemon Squares


Here in Florida, summer has definitely arrived.  For a little while now it has been in the high 80's, sometimes breaking past the 90 mark.  So on top of new homemade ice cream recipes (at least one of which is coming soon) and other frozen treats to keep us cool, I have a feeling a bunch of citrus and lemony recipes will be on the way.  When it's hot out, there is something very refreshing about biting into a tangy, tart lemon dessert.  This is the first lemon recipe of the season, and it was a good one.  These bars were my first attempt at lemon squares and it was largely a success.  My only complaint is that it was a bit thin.  While we enjoyed it very very much, next time I might double the filling and 1.5x the crust... or just bake it in a smaller pan for a little extra height.  


Lemon Squares, adapted from Epicurious
Shortbread base:
1 1/2 sticks unsalted butter, room temp
2 cups all purpose flour
1/2 cup packed light brown sugar
1/2 tsp fine sea salt

Ingredients:
4 large eggs, room temp
1 1/2 cups granulated sugar
3/4 cup + 2 Tablespoons freshly squeezed lemon juice (strained, to eliminate seeds/pulp)
1/3 cup all-purpose flour
1 recipe pre-baked shortbread base

Line a 9 x 13 inch pan (or smaller for thicker bars) with parchment paper.  Preheat oven to 350.
Cut butter into 1/4 - 1/2 inch thick slices.  Combine all ingredients in a food process with the dough blade, and process until mixture begins to form small lumps.  Use a spatula to wipe down sides of bowl when necessary.  
Break up the mixture into the prepared pan and press down evenly.  Bake in the middle of the oven until golden, about 20 minutes.
While shortbread is in the oven, prepare the lemon filling.
In a bowl, whisk the room temperature eggs and granulated sugar together until combined.  Then, stir in the lemon juice and flour.  Pour the lemon mixture over the hot shortbread.  Reduce oven to 300 and bake until set, approximately 30 minutes.
Cool completely in the pan and then chill.  When chilled, cut into squares.  Lemon squares keep, covered and chilled, about 3 days.  Serve topped with homemade whipped cream.


Sunday, September 19, 2010

SMS: Lemon Blueberry Buttermilk Pie

Photobucket

This week, Melissa of Lulu the Baker selected Lemon Blueberry Buttermilk Pie as the recipe for Sweet Melissa Sundays.  Thanks for picking this recipe, Melissa!  This was a fun one.  I don't think I'd ever made a buttermilk pie before!


I prepared this recipe exactly as Melissa Murphy says in the Sweet Melissa Baking Book - no substitutions and alterations!  In fact, it was the first time I baked with actual buttermilk instead of substituting buttermilk powder. It was almost a success!  (and the buttermilk pancakes that were the result of having left over buttermilk were VERY much a success... I think I may have found a new favorite pancake recipe! More on that later!)   I simply decreased the amount of blueberries for the topping to 12 ounces because I thought 1.5 pints was a bit of overkill.  


Everything went very well, though there was a significant amount of clear liquid (butter maybe?) flowing out of the pie and onto the cookie sheet during the last minutes in the oven.  And I think the liquid made the crust a bit too soggy, because it wouldn't come out of the pie plate!  It did wind up being quite a mess, but it was a DELICIOUS mess.  Everyone enjoyed it at dinner tonight!


Thanks for hosting, Melissa!  I liked this one quite a bit.  Go to Melissa's blog Lulu the Baker for the recipe.  And be sure to visit the list of this week's participants to see if the other bakers had a less messy experience than I did!

Sunday, August 22, 2010

SMS: Sweet Almond Cake with Lemon Curd and Lemon Mascarpone Frosting

Photobucket

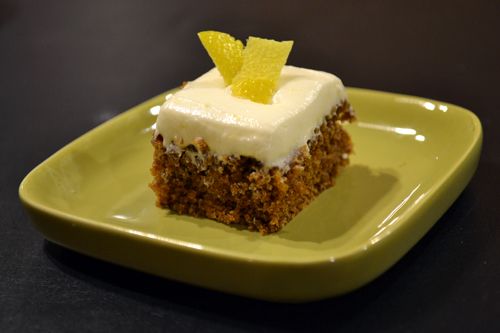
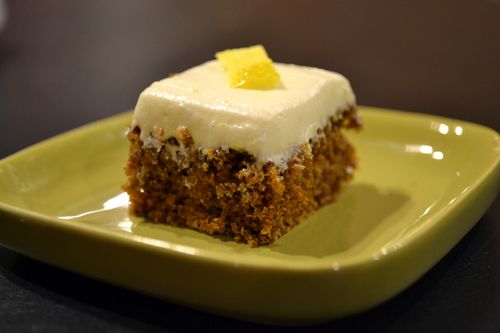
Sometimes adding a garnish can make or break the appearance of a cake.  A cake can be absolutely delicious, but if it doesn't look appealing and inviting, everyone might pass on it.  Which of these would you rather dig into?

Photobucket

or 

Photobucket

Yep, definitely the one with the cute garnish.  I'm glad I added the chopped almonds to the top or else people may have passed on this seemingly plain cake and they would have missed out on the out-of-the-box complex flavor of this week's Sweet Melissa Sundays recipe.  Everyone here who taste-tested it seemed to enjoy it.  It definitely doesn't taste like something I make all the time.  And the change was welcomed.

There were a lot of steps to this dessert, but everything went rather smoothly.  No hiccups or hurdles in this cake making.  But... a lot of ingredients did go in to this cake.  I mean...

Photobucket
Woah, butter.

Photobucket
And woah, egg whites.

Photobucket
A lot of egg whites means a lot of meringue!

But I think it was worth it.  I even learned a new technique for cutting cake layers in half.  Thanks, Melissa Murphy!  And thanks Dan, my wonderful fiance and sous chef whose hands appear in the following pictures :)

Photobucket

Photobucket

I loved the toothpick marking technique to cutting a cake layer straight mentioned in the cookbook!

Photobucket

Photobucket
Look how nice and even the split layers are!

After it was frosted, I laid a small bowl lightly on the surface of the cake to mark off the area I wanted to keep the chopped almond garnish off.

Photobucket

Photobucket
And it worked pretty good!

Photobucket

Photobucket

Boy was it a heavy cake!  Carrying it in the cake carrier to family dinner was definitely a two handed procedure.  But it was definitely good.  The lemon curd filling was pretty easy to throw together and had a wonderful tart lemony taste.  The cake was nice and moist and have a great almond flavor.  And the frosting... oh the frosting.  The lemon mascarpone frosting was surprisingly subtle in the lemon department and it wasn't overly heavy despite the mascarpone.

Thanks for picking this recipe and hosting this week, Katie!  Check out katiecakes, Katie's blog for the recipe.  And see the list of this week's SMS participants here.

Sunday, July 11, 2010

Sweet Melissa Sundays: Sour Cherry and Almond Biscotti


Photobucket


Do you love breakfast?  I do.  I rarely begin my day without some sort of breakfast.  No matter how busy I am or what kind of a rush I'm in, it always involves coffee.  When I'm running behind I grab my to-go mug of coffee and whatever is on the counter which is usually just a banana or apple.  On those rushy-rush days I'd love to be able to grab one of these freshly baked biscotti on my way out the door.  They were just the right thing first thing in the morning... or any time of day for that matter. 


Photobucket


This week, Tracey of Made by Tray Tray chose our recipe for Sweet Melissa Sundays: Sour Cherry and Almond Biscotti.  Though I couldn't find Dried Sour Cherries anywhere, I picked up some regular Dried Cherries, and instead of simmering them in Orange Juice, I used Lemon Juice to try to add some of that Sour-Tartness I'd be missing.  Other than that and scaling it down by half, I made this recipe exactly as is.  Which I'm glad about because they came out perfect.

Dan doesn't love super crunchy things, so I made some of them as "Biscotti" - twice baked, and the others I only baked once, so I call them "Unscotti".  These ones weren't dried out entirely, so they still had a little bit of chew left in them.


Photobucket


Photobucket

After I simmered my Dried Cherries in Lemon Juice, I saw how much Cherriness had seeped into the Lemon Juice.  I decided it would be a tragedy to throw this away, so I stuck it in a measuring cup (it was about 2 ounces total) and stuck it in the frig.  I grabbed 2 ounces water and 1/4 cup granulated sugar and made a simple syrup with it, and then let that cool to room temperature.  After it's all cooled, add 6 ounces ice cold water, and a bunch of ice cubes and what do you get?


Photobucket
Only the most delicious Cherry-Lemonade EVER!!

Cherry Lemonade - I didn't include measurements because this can be scaled to make your desired amount.  Mine above yielded two glasses.
Ingredients:
Dried Cherries
Lemons, juiced
Sugar
Cold Water
Ice Cubes

*Combine equal parts Dried Cherries and lemon juice (Example: 1/2 cup of Cherries and 1/2 cup of lemon juice). 
*Simmer over medium heat until the color of the lemon juice is murky and brownish-red.  Remove from heat and strain out the Cherries (now would be a good time to make some Sour Cherry Almond Biscotti!). Pour into a measuring glass and allow to cool.  Note the amount of Lemon-Cherry juice mixture after simmering. Chill in the frig 30-40 minutes.
*Measure out equal parts water and sugar (each equal to what the Lemon-Cherry Juice mixture was after simmering. So if you yielded 1/2 C Lemon-Cherry Juice after simmering before, take 1/2 C water and 1/2 C sugar).  Boil together until the sugar dissolves and you have a simple syrup.  Set aside and allow to cool.
*Add all ingredients together and stir.  Add cold water (the amount of ice water is your Lemon-Cherry Juice mixture amount x 3.  So if you had yielded 1/2 C Lemon-Cherry Juice earlier, add 1 1/2 C cold water now).  
*Serve over ice cubes and ENJOY!


Thanks for hosting this week, Tracey!  We enjoyed these biscotti thoroughly!  Head over to Made by Tray Tray to check out the recipes.  And click here to see the list of this week's participants!

Don't forget about my GIVEAWAY.  Umm.. free dove ice cream miniatures, anyone?  Click over to this post for the details!  I'll be giving away TEN free product coupons, so there's a good chance you could win one!!!

Tuesday, June 29, 2010

Ice Cream Sandwiches: Gingersnap Cookie and Lemon Ice Cream

Photobucket


I've always wanted to make my own ice cream sandwiches, but was intimidated. They're so cute! Plus, with homemade cookies of your choice and homemade ice cream in the wildest flavor you can think of, they'd be so much more delicious than the store bought ones. And so cute! Did I mention I think they're just adorable? The process of making them seems fairly easy, but is it one of those things that looks easy but turns out to be anything but? Well, I finally decided to give it a go and find out. Turns out it actually is quite easy.

Monday, May 3, 2010

Ice Cream Cupcakes: Banana Pound Cake with Mango-Lemon Ice Cream & Blood Orange-Orange Syrup

Photobucket


Ice Cream Cake is one of those simple treats that are an absolute favorite in this house. In all honesty, if Dan had his choice, our wedding cake would be a giant Fudgie The Whale cake from Carvel. I'm not gonna lie, I wouldn't be opposed to it either... And no, I'm not getting paid to promote Fudgie the Whale... though I would gladly accept a cake as payment.
If we love ice cream cake so much, and I so often make cake and ice cream, why oh why have I never tried to make my own ice cream cake before?? More importantly, why have I never tried to make my own ICE CREAM CUPCAKES before?? Ice Cream Cupcakes are just like Ice Cream cakes except better because they're tiny, adorable, and you get to eat the whole thing. When I saw that Cupcake Project is now doing her annual Ice Cream Cupcake Contest, I vowed to make a new ice cream cupcake every week for the month of May, to select the best one to use as my entry into the contest.

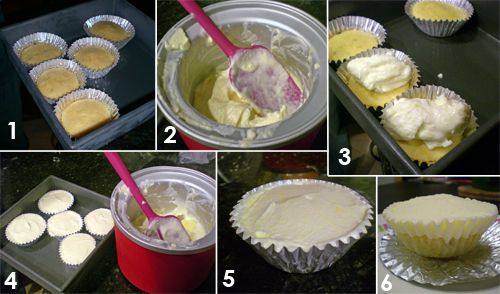
So, how does you make ice cream cupcakes? I took pictures of the process...
Photobucket

1. Make cupcakes, but put half as much batter in as you normally would. You need room for ice cream! Bake, let cool completely, then throw in the freezer.
2. Make homemade ice cream.
3. After churning and before chilling said ice cream, so it is still a little soft, put a dollop on to the half-full, frozen cupcakes.
4. Spread smooth with an offset spatula. Dip the spatula in warm water before smoothing if necessary.
5. Freeze cupcakes until firm.
6. Peel and enjoy your very own Ice Cream Cupcake!

For my first attempt at making Ice Cream Cupcakes, we came up with... Banana Pound Cake with Mango-Lemon Ice Cream and Blood Orange-Orange Syrup. Yu-u-um.

Banana Pound Cake Recipe adapted from The Dutch Baker's Daughter
Ingredients:
1 stick unsalted butter, room temperature
3/4 cup sugar
2 eggs
1 C mashed ripe banana (around 1 - 1 1/2 medium bananas)
1 1/4 cups cake flour
3/4 teaspoons baking powder
1/8 teaspoon fine sea salt
1/4 teaspoon ground ginger
1 teaspoon vanilla
1/4 cup 2% milk
1 1/2 teaspoon freshly grated orange peel, lightly packed

Preheat oven to 350 degrees F. Line cupcake pan with 19-21 standard size cupcake liners, or if using foil liners, place on a cookie sheet.
Cream butter with an electric mixer. Gradually add sugar, beating on low, then increase speed to high and beat until light and fluffy.
Add the eggs one at a time, scraping down the bowl after each addition. Beat several minutes on high until the mixture is smooth. Mix in the bananas.
With a whisk, mix flour, baking powder, salt and ginger. In a separate bowl, combine milk and vanilla. Beating on low, add dry ingredients, alternating with milk-vanilla mixture. Stir in the orange peel.
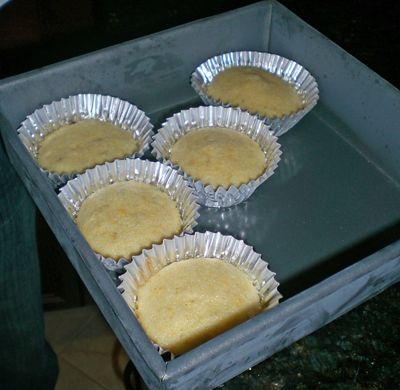
Divide the batter between the cupcake liners, filling each liner up about half as full as you normally would to make regular cupcakes. Bake for 14 - 18 minutes. Let cool completely and then pop them in the freezer and begin making the ice cream.
Photobucket


Mango-Lemon Ice Cream with Blood Orange-Orange Syrup adapted from Dianasaur Dishes
Ingredients:
1-2 mangoes, depending on your desired mangoiness.
Most of the zest from one lemon (the rest from about 3/4 of a lemon)
1 cup heavy whipping cream, cold
4 egg whites
4 tablespoons sugar

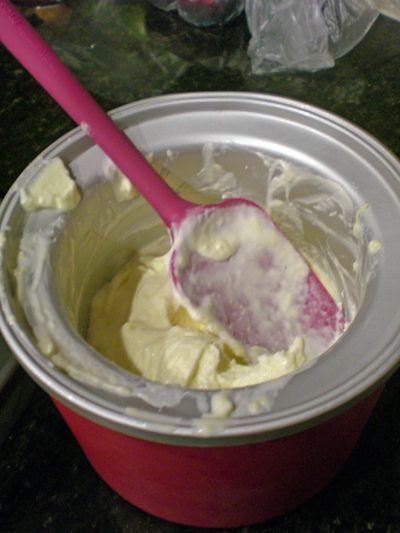
Peel mango and cut into cubes (click here for mango cutting 411 if you've never cut a mango before!). Using a food processor, blend the mango well to a smooth consistency. Add lemon zest and pulse until incorporated. While blade is running, pour in the cream and beat until mixed.
In a separate large bowl, beat the egg whites until frothy, and then add in the sugar gradually. Fold in the mango-cream mixture. Churn according to your ice cream maker's instructions.
Photobucket


And just so you know...
Photobucket

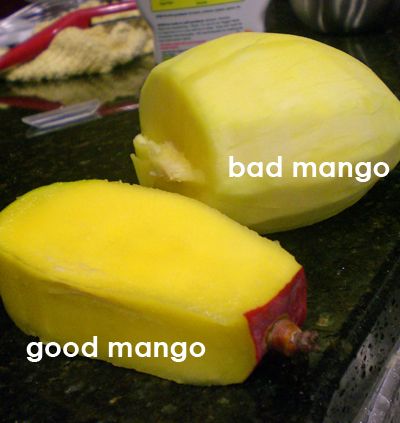
If you can BARELY get a knife into your mango because it is too hard, your mango isn't ready for use. Your mango should be darker in color, moist, and relatively easy to cut in to.

When your ice cream maker is done churning your ice cream, spread the still-soft ice cream on to the tops of your frozen cupcakes. Spread smooth with an offset spatula, dipping the spatula into warm water occasionally if necessary. Then, return the cupcakes to the freezer while you prepare your syrup.
Photobucket


Blood Orange-Orange Syrup also adapted from Dianasaur Dishes
Ingredients:
1 blood orange
1 naval orange
1 heaping tablespoon sugar
1/2 tsp blood orange zest, packed

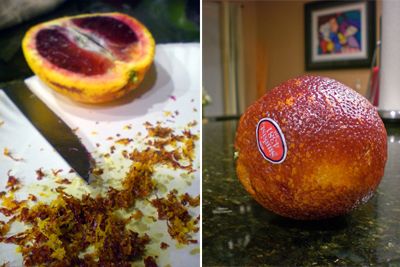
Zest and juice the blood orange. Mine didn't yield much juice (maybe a half a tablespoon!) so I juiced a naval orange as well. Add juice from both oranges, sugar and zest to a small saucepan and bring to a boil. Reduce and let simmer for 4-8 minutes until thick, about the consistency of maple syrup. Refrigerate and serve over ice cream. This syrup is POTENT, and though the recipe didn't make so much, it was enough for all of the cupcakes. You really only need about 1 teaspoon at the most per cupcake.
create avatar


This recipe was a total success. It was enjoyed by everyone who tried it! The banana pound cake and the mango-lemon ice cream was delicious and refreshing, and the syrup complimented all of the flavors, tying them all together nicely. I can't wait to try another Ice Cream Cupcake recipe!


Sunday, April 4, 2010

Sweet Melissa Sundays: Pecan Shortbread Crust and Key Lime Filling

Mmm cookies. I will never turn down an opportunity to make (or eat) a cookie. So I jumped at this week's Sweet Melissa Sundays recipe, chosen by Lara of The Lab: Pecan Shortbread Cookies. My boy isn't much of a fan of dry, crumbly shortbreadish cookies, so I took Nina's idea and ran with it - use it as a crust for a bar cookie! Good idea, Nina!

I prepared Melissa's recipe for Pecan Shortbread cookies exactly as the book stated, and spread it into the bottom of a prepared, greased and parchment-lined 8x8 pan. I baked it for about 20, 25 minutes until lightly golden. Then I let it cool completely while I prepared the filling.
Photobucket

We are big key lime fans in this house. And I've seen many recipes for Lemon and Lime bars and loved the idea but never got around to make them. So, I thought this was my opportunity! I used THIS recipe from Pat and Gina Neely for the lime filling. The Neelys' recipe was fo a 9 x 13 pan (which holds 12 ounces) and I was using a 8x8 (which holds 8 ounces) so I scaled down the recipe to use about 3/4 of the original recipe. Let me just tell you this was a bit of a disaster from the very beginning.

First, I make an ENORMOUS mistake. After I added all the ingredients, I saw the recipe said, "Pour the lime topping over the cooled crust." Well... my dough was SO THICK that it was practically busting my kitchenaid mixer open... definitely NOT pourable. It turns outttttttt, I had added 4.5 CUPS of flour, when the recipe really called for TABLESPOONS. Haha, OOPSSS. So I set aside my disaster dough for a while and re-zested limes, re-juiced limes, and re-made the filling. :) I poured it into the cooled pan and let it bake for 25 minutes. I removed it when the filling looked set.

I let it cool, like the recipe said, and then tried to cut it. It seems my filling never set up right... maybe I didn't bake it long enough? Or maybe I did something wrong? I'm not sure, but it OOZED out when I tried to cut it.
I wound up saving the dessert by transforming it into a refrigerated treat... it cut much easier and didn't ooze when it was chilled. And it still tasted quite good cold!
Photobucket

Photobucket

Photobucket

Photobucket

With the little bit of remaining Pecan Shortbread crust I had left over from making the bar cookie base, I made some regular ol' cookies the way The Sweet Melissa Baking Book said... only problem is it was wayyyy too crumbly. After baked and cooled, I could barely pick them up without them crumbling into a million pieces. Anyone else have this problem? Maybe this just wasn't my day in the kitchen. :)

So whatever happened to all the OOPS key lime dough? The one where I added CUPS instead of TABLESPOONS of flour? I had to at least try baking it before throwing it away! The result?
Photobucket
Little cookie-balls. They maintained their exact shape while baking. I rolled the balllies in confectioners sugar and let em finish cooling. They turned out kinda soft, kinda chewy and have just the right amount of tangy lime-ness. Not THE best cookies in the world, but not the worst either. :)

Today was just one of those days I needed to put the towel down and get out of the kitchen. Maybe its all the allergy medicine.

Anyway, have a HAPPY EASTER! I hope everyone else's baking went more smoothly than mine!! Check out the blogroll to see how everyone else fared with this week's recipe. And see Lara's blog for the recipe. Thanks for hosting, Lara!!

Sunday, February 21, 2010

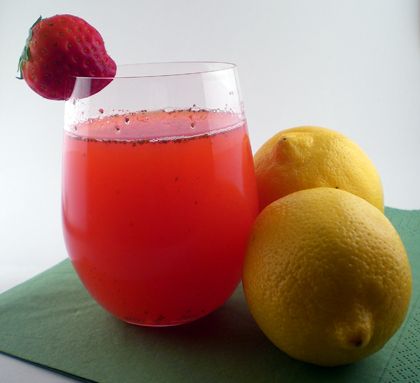
Sweet Melissa Sundays: Strawberry Lemonade & Strawberry Lemonade with Truvia


It is nice to put my kitchen to use for things other than brownies, cupcakes, blondies and cookies sometimes. Those are definitely the most common things to come out of my oven. Sweet, chocolately, caramelly, peanut buttery goodies. And while they are always appreciated and devoured, sometimes making something completely different is a nice, welcomed change.

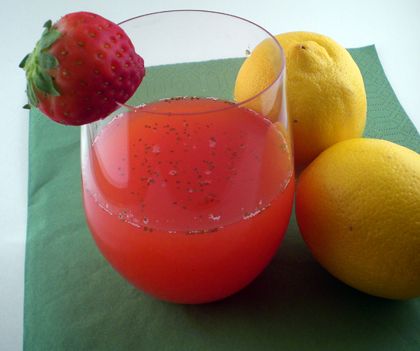
In comes Strawberry Lemonade. It's not served warm straight from the oven and smothered in vanilla ice cream like many of our other favorites, but I knew it would be warmly received in my house. The entire one and a half quarts of it was gone in about two days. Perfectly sweet and tart and very refreshing.

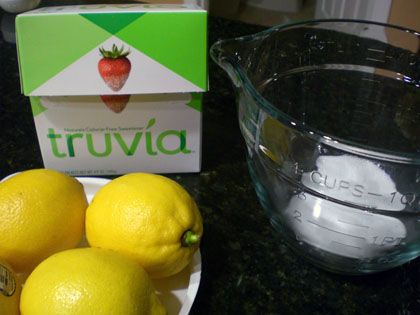
I've made one full recipe, but divided it in half and prepared it two ways: One - standard (see the Sweet Melissa Baking Book page 85 or visit Jessica of My Baking Heart for the recipe), and Two - with Truvia Natural Sweetener substituted for sugar. I even conducted a blind taste test with the two recipes.

How do I know how much Truvia I need to replace the Sugar called for in my recipe?
1 tsp of sugar = 1/2 packet of truvia (or 3/8 tsp truvia)
2 tsp sugar = 1 packet of truvia (3/4 tsp)
1 tblspn sugar = 1 1/2 packets truvia (1 1/4 tsp)
1/2 c sugar = 12 packets (3 tblspn + 3/4 tsp)
For a full conversion chart for Truvia to Sugar, see Truvia's website HERE.


Sugar-Free Strawberry Lemonade made with Truvia
makes about 3/4 of a quart, adapted from Sweet Melissa Baking Book

Ingredients for truvia strawberry sauce
1/2 a pint of fresh strawberries, rinsed and hulled
1 1/2 packets of truvia (or 1 1/4 tsp of Truvia)
1/2 tsp fresh lemon juice
1 tablespoon cold water

In a food processor, blend the berries, truvia, lemon juice and water until smooth. Strain it into a bowl, cover it and refrigerate.

Ingredients for Truvia strawberry lemonade
12 packets truvia
1/2 cup very hot water
1/2 up freshly squeezed lemon juice
2 1/4 cup cold water
1 recipe of truvia strawberry sauce (above)

Combine 9 packets of truvia and the very hot water and stir until the truvia has dissolved. Stir in the lemon juice and cold water.
Add the truvia strawberry sauce and stir to combine. Add additional truvia to taste (I added 3 more packets at this point).


So, on to the TASTE TEST... you're really curious right?


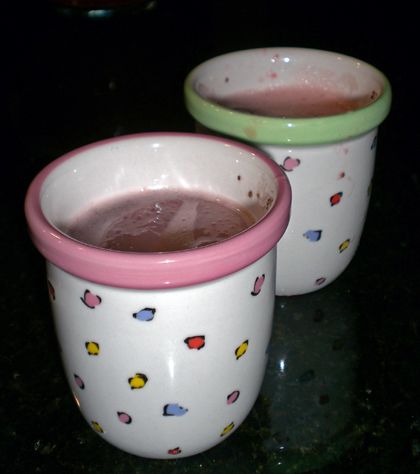
I poured Daniel two glasses and made him guess which was which. He said he could tell which was the Truvia, but that he actually liked it BETTER. Then I made him pour me two glasses and I had to guess which was which. And I guessed wrong every time. So... its a success!

Make sure to visit Jessica's blog, My Baking Heart to see this week's recipe from the Sweet Melissa Baking Book. And check out the blogroll to see how the lemonade came out for all the rest of the bakers!

Saturday, January 16, 2010

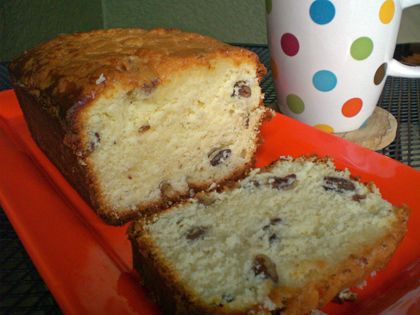
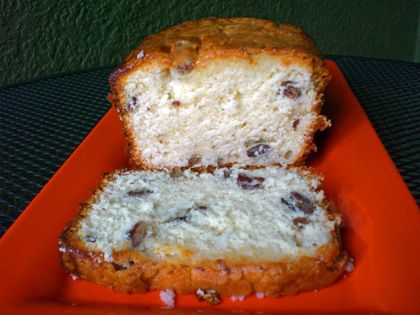
Sweet Melissa Sundays: Lemon Walnut Sour Cream Pound Cake


Sour Patch Kid Pound Cake. That's what I'm calling this. No one else on the P&Q for Sweet Melissa Sundays said their Lemon Walnut Sour Cream Pound Cake's glaze was super duper duper sour and tart, so perhaps something in mine didn't come out right? But the top of my pound cake, where all the glaze is concentrated, is soo tart it makes my face go all squinchy when I eat it. Mine and Daniel's lips puckered, our eyes closed uncontrollably, and all this from us sour lemon lovin' people! So maybe my glaze was sour-er than everyone else's. Not sure! I'm interested to see everyone else's results.
UPDATE: Ok, I re-tasted the cake a day or so later, and it tasted much less sour! Maybe when we initially tried it, it was toooo fresh and the lemon glaze didn't have a chance to mingle with the other flavors of the cake yet. Now it tastes pleasantly lemony! Yey! I have my Dad and brother here visiting, and everyone enjoyed it.


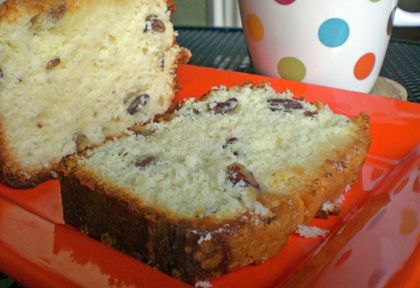
Lemon Walnut Sour Cream Pound Cake was chosen by Raeann of Basically, Baby Boots for this week's Sweet Melissa Sundays recipe. Like many others I subbed in Pecans for the Walnuts (Yum). Be sure to check our her blog for the recipe! I thought the pound cake itself was very very good. It had a nice crumb, it was nice and moist, and it was not too heavy and dense, and not too light either. Though I think next time I might either use only a very small amount of glaze, or I'd leave the glaze off entirely. Or maybe even use just a plain ol' powdered sugar and water glaze, mmm.


Be sure to see what the other SMS Bakers came up with - visit the blogroll!

Sunday, July 19, 2009

Sweet Melissa Sundays: Whole Lemon Cake with Lemon Glaze


Yummm, I love lemon flavored things. Especially this time of year. When it's super hot out, sometimes the idea of a lemony dessert is much more appealing than a deep, dark, chocolatey one. Ok, even when it's hot I can eat chocolate, but every now and then lemon is a nice change. And this week for Sweet Melissa Sundays, Melissa of Lulu the Baker chose the Whole Orange Poppy Seed Cake, which Melissa Murphy nicely provided a lemon substitution for in her book. Perfect!

I had read on the P&Q section of SMS that perhaps the cake was a little too tart when you use the full amount of lemons. Well I like it tart and lemony! But since I'm bringing this to a family dinner, I thought I'd tone it down a litttttttle bit (but not too much). So, rather than use one and a half lemons she recommended, I use one whole lemon, and half of another lemon - minus the juice part. So I threw one whole lemon in the food processor (cut up of course :) and then cut another one in half, juiced it, and then threw the peel in the food processor. I also left out the poppy seeds simply because I didn't feel like going out to find any. :)

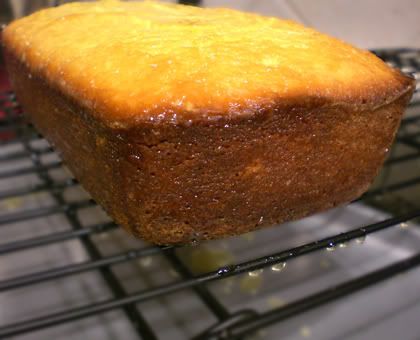
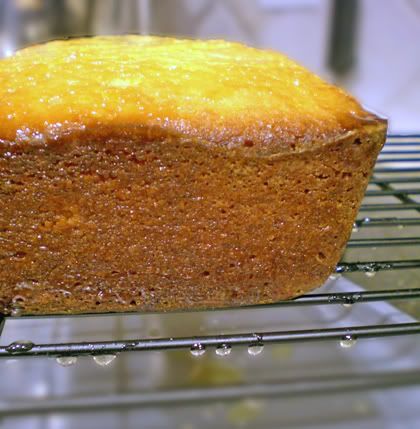
The result? A perfectly lemony cake. Not too tart at all. I made one loaf and one little cupcake, so that we'd be able to taste it before bringing it over for others to try. I always feel a little weird about bringing a new recipe over to share with people when: A.) I've never made it before and B.) I haven't tried it. So after we prepared the glaze, we brushed it on the tester cupcake, let it sit for a minute and then gave it a try. OOOH, the glaze was super tart! Since I haven't tried it again yet when the glaze has had time to set, I'm not sure if it was only super-duper tart because it was just made or not. But either way, Daniel loved loved loved it. He sat there for about a minute just licking the glaze off his cupcake. And this morning, the first thing he said when he woke up was, "I kinda wanna lick the loaf". So I think this recipe is a winner, no? Can't wait to try it again later and see how the flavor has changed.


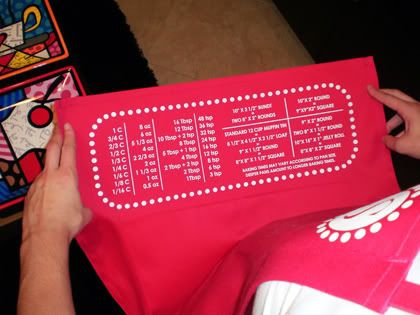
Ok, and now the GRAND REVEAL. Me and Daniel have spent months in research and development coming up with this item (and by research and development, I mean in the kitchen eating desserts). I don't know about any of you other bakers out there, but I scale my recipes a lot. I halve recipes, I quarter big recipes when I only want a little, I double recipes when I want more, and sometimes I'm even super complicated and a 1.5 a recipe when I want more than the original recipe but not quite double. Whew! This calls for some complicated math. I sometimes have to double measurements like 1 1/3 C. So how many ounces are in 2/3 of a cup? ORRRR when I'm reducing a recipe, sometimes I'll need to halve 1/8 of a cup. 1/16 of a cup? That's nearly impossible to measure in a measuring cup! So, how many tablespoons are in 1/16 of a cup? I have a chart in my kitchen with ALLL this information that I refer to constantly.

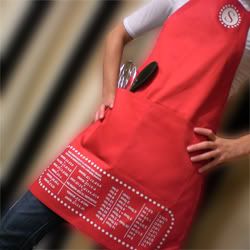
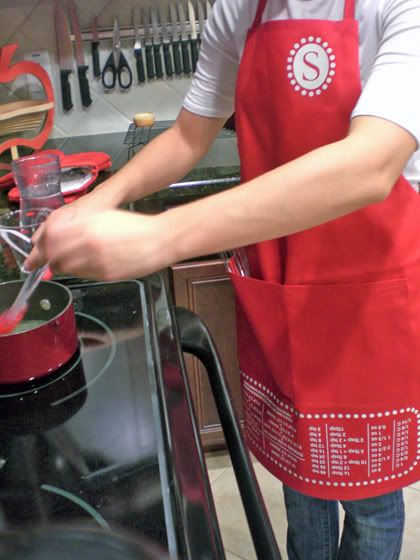
With this in mind, we've developed That's Smart! Measurements Apron! Yes that's right! We've put it on Etsy, go check it out. I'd really love your feedback, too - what you think about our new product.

The conversion chart helps you quickly convert cups to ounces to tablespoons to teaspoons as well as common baking pan substitutions. All you have to do is look down! The charts are upside down, so it can be easily read by the baker who is wearing it. It comes monogrammed with the first initial of you or your favorite baker and its fancy straps are adjustable to go as high up on your chest as you like, and can fit any size baker.


Let me know what you think about our apron!!! We're selling it for an introductory price to my blog readers and their friends. :)
And make sure you check out the other Sweet Melissa Sundays bakers' posts on Whole Orange/Lemon Cake!

LinkWithin

Related Posts with Thumbnails