Recent Posts

Showing posts with label cupcake of the week. Show all posts

Saturday, November 8, 2008

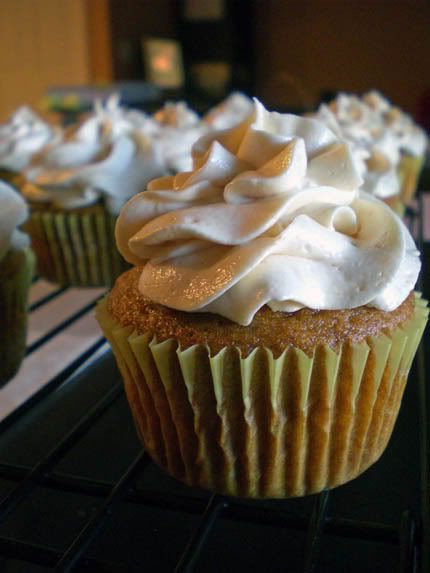
Pumpkin Cupcakes with Honey-Caramel Buttercream Frosting


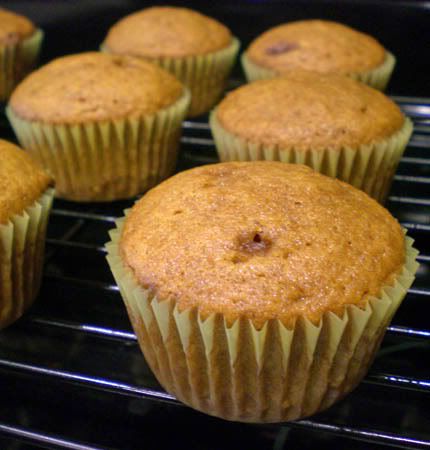
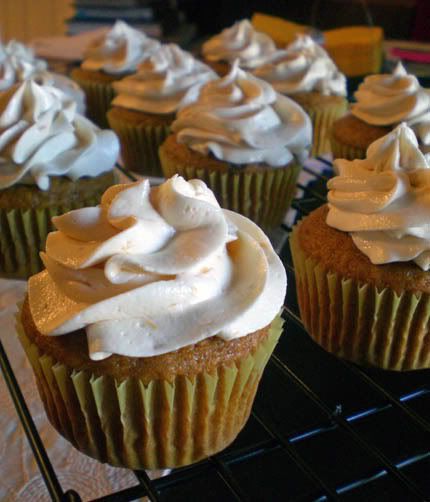
It's Fall! Though it doesn't feel like it so much here in Florida, judging from all the Thanksgiving (and Christmas) decorations that adorn the stores, it must be fall. Oh and plus, it's my birthday on Sunday, so its gotta be that time of year :) I am still enjoying the lull in my thesis work, so I had time to make a batch of Cupcake-of-the-Weeks. And this week.. mmboy. These are the best I've made in a while. Even Daniel was quite taken aback by these absolutely delicious fall-ish Pumpkin Cupcakes with Honey-Caramel Frosting. The pumpkin cupcakes were very moist, with subtle spices, and the frosting was abbbbsolutely gorgeous. Sweet, slightly caramelly & honey-y, with flecks of caramel streaked throughout. I know, you're jealous.

Pumpkin Cupcakes adapted from MarthaStewart.com. Makes 12 cupcakes.
Ingredients:
1 stick butter
1 cup Cake flour
1/2 tsp baking soda
1/2 tsp baking powder
1/2 tsp salt
1 tsp cinnamon
1/2 tsp ground gingers
Heaping pinch (if that even exists) of Nutmeg
2 eggs, room temperature
1/2 C light brown sugar
1/2 C granulated sugar
about 7 - 7.5 ounces canned Pure Pumpkin
1/2 tsp maple syrup

Preheat to 350. Put paper liners in 12 wells of a cupcake pan.

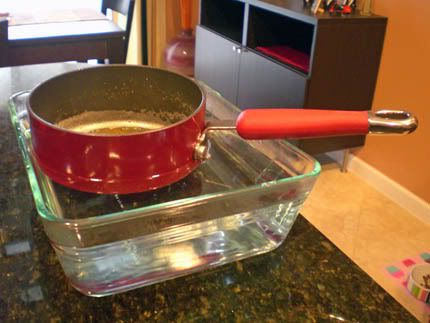
In a small pot, melt the butter over medium-low heat. Once it has all melted, slowly raise the temperature up to medium, stirring occasionally. Cook until it turns brown (for more instructions on that, see this site and this site). Make sure to keep an eye on it, because it takes a little bit of time... but it goes from yellowy to brown real quick! I followed that second instructional site on how to brown butter... and when it reached the desired color, I took my pot off the store and shoved it in to cold water to stop the cooking immediately:


Set melted brown butter aside and let it cool.
In a small bowl, combine the flour, baking soda, baking powder, and spices together. Whisk to combine.
In another bowl, beat the eggs lightly. Whisk in the two sugars and the cooled butter. Add the dry ingredients and whisk/fold it in...Do not overmix! Whisk in pumpkin and maple syrup.

Bake about 20 minutes, when a toothpick inserted into the cakes should come out clean. Allow to cool for 5 minutes in pan on wire rack, then remove cakes and set directly on wire rack to cool.


Honey-Caramel Buttercream Frosting enough to frost 12 cupcakes nicely.
1 stick of unsalted butter, softened
2 Tblspn honey
2 Tblspn melted Kraft Caramel bits, or whatever caramel you have on hand
1 teaspoon clear vanilla extract
2 cups confectioners sugar

Combine all ingredients in a medium bowl. Beat with an electric mixer slowly at first to incorporate all ingredients. Then, increase speed to high to get light and fluffy. Beat for 3 - 5 minutes.


s

Saturday, October 18, 2008

Cupcakes for a Cause


WHEW! Life is moving very quickly. My thesis writing is thoroughly under-way (thus the absence of posts). The rough drafts of my first two body sections are done, and the first half of the very detailed outline for my next section is done. I have to finish the rest of that outline, actually write the section, do the same for the last body section, write an intro and conclusion, format it to UCF and the binding company's specifications, make a notice of defense to be signed by my committee members, write a proposal and get that signed by my committee members, have an initial format review, a final format review, a proposal review and a slew of other requirements... All before early - mid November. Ah hah hah! It's ok, I'm surviving. At the end, I will have a nice little bound book, written by yours truly, with its own call number for the library and everything. So it's worth it... I think. :)
Anyways, so that is why you haven't been seeing many posts lately. It's sad. But as soon as this is over, I'll be back in the kitchen, whipping up some goodies to try to make my boyfriend fat again.

For now, I'll show you what I have been doing in the kitchen. No new recipes, though. Mi dispiace, not yet.
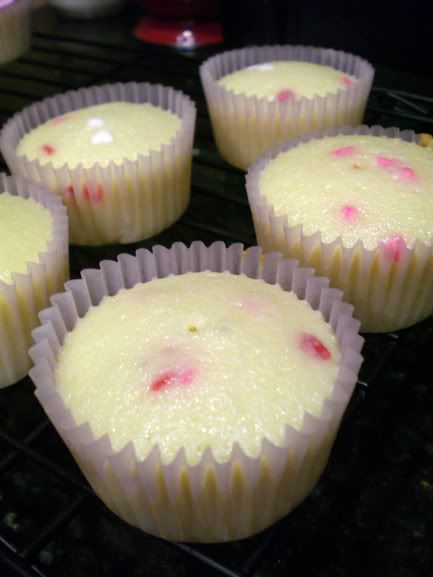
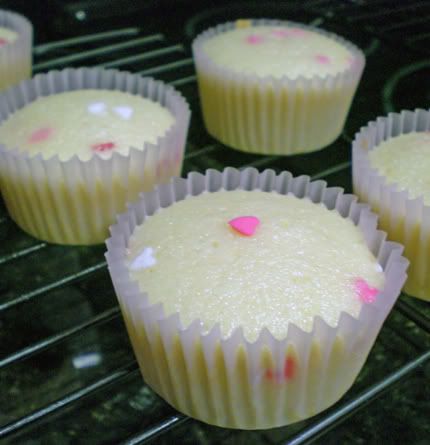
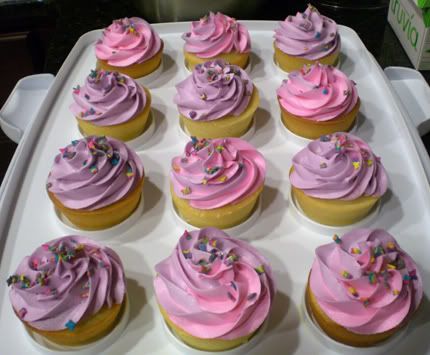
Last week, I had to do 25 cupcakes for birthday parties (woohoo!!). Luckily, all three parties wanted to same color combination, so it went rather swimmingly. All three little girls wanted pink and purple, so I started by making these cupcakes a little extra-special by putting pink heart shaped sprinkles right in to the batter:


I figured all kiddies like surprises, and little girls would definitely like being surprised by seeing little pink hearts when they bite into their cupcakes :)

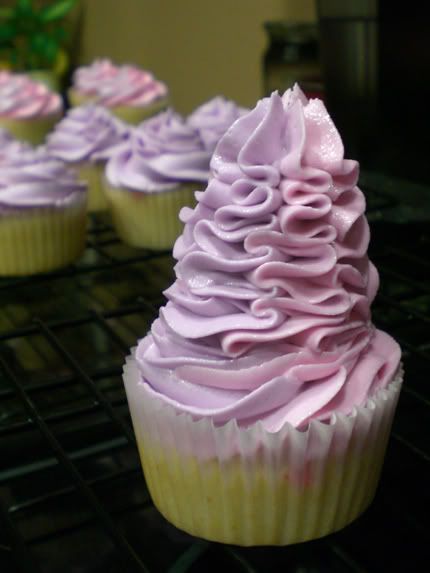
Then, I made two different color frostings: pink and purple, and I put them side by side in the piping bag:
>
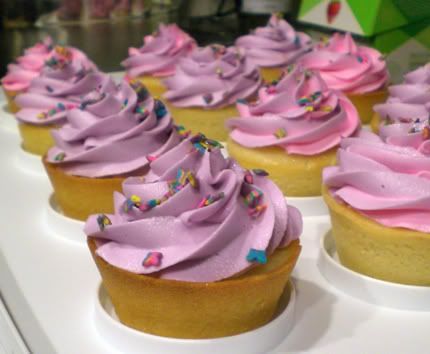
It only takes a tiny bit more time, and it makes them look much much cuter. Topped 'em with some pinky-purply butterfly sprinkles, and you've got the quintessential cupcake for a little girl's birthday party.

Since I had to have 25 cupcakes for the parties, and my recipe makes 15 each, I had a few extra. With one of them...well...you can never have too much frosting, right?


Haha, WRONG. No one ate that one. Daniel claims, "I don't know how to eat it." But you can really see the side-by-side colors in that one.

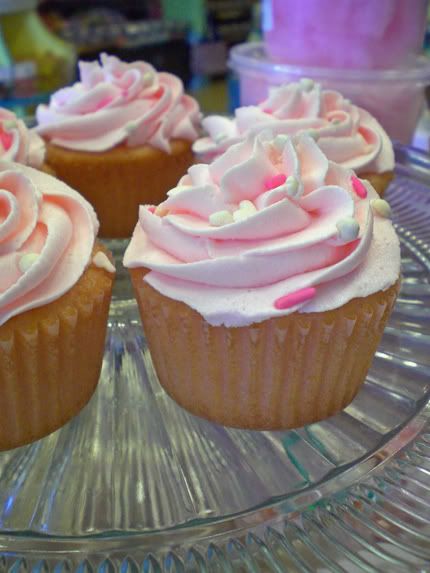
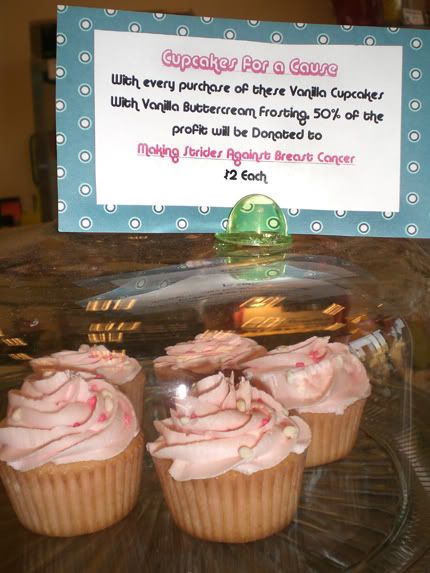
The other baking thing I did this week was the "Cupcake of the Week!" This week's flavor? Vanilla with Vanilla Buttercream! Nope, no fancy flavors this week! Because this week at the mall is Making Strides Against Breast Cancer. So, I made Pink themed cupcakes to go along with this event, and with each cupcake sold, 50% of the money goes to Breast Cancer.


After the walk, the participants will probably be hungry and want a perfectly pink cupcake, right? Hopefully, they'll all be purchased up, and I can make a donation to making strides.

While I was making and baking those bad boys up, I figured I'd take some pictures to give a few simple little cupcakes tips to all you cupcake bakers out there. These are some no-brainer tips that you may or may not know already, but once I figured out these little methods, it made cupcake baking a little bit easier.

Tip #1: How to get evenly sized cupcakes
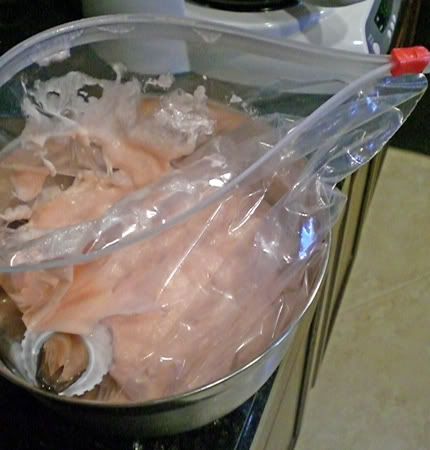
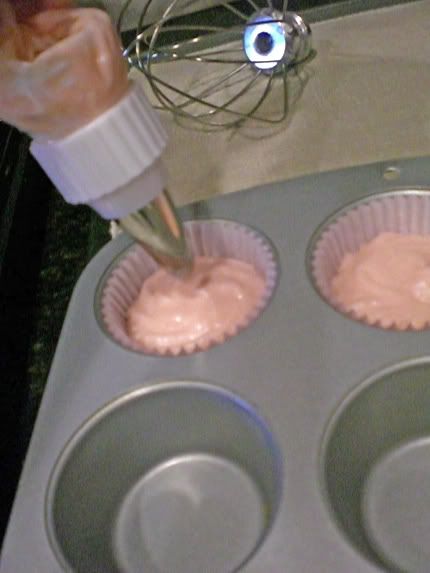
I like to put all my batter into a big zippy bag fitted with a piping tip. This way, I can squeeze the batter into the liners in the pan, and it won't be all lumpy. When piped in rather than scooped in to the pan, you can easily see if they are all equally filled up or not. It also makes for MUCH LESS MESSY cupcake batter distribution. No dripping from the measuring cup or spoon, you just squeeze out the batter, stop squeezing when you're done, and then move to the next liner... No drips on the pan between the wells.
BUTTT, if you're alone and baking cupcakes, How do you get that batter in a bag? YOU ONLY HAVE TWO HANDS, RIGHT?
What I like to do is fit my ziplock bag with the tip, take the tip and fold it upwards (positioned so that no batter will drip out of the tip due to gravity...stupid gravity), and lay the bag in a bowl:
really terrible picture warning:

You can either spread the opening of the bag over the rim of the bowl, or just hold the bag open with one hand. Then, pour your batter in easily! :)

really really bad picture warning

Then you just pipe your batter into your liners. See how much easier it is to tell if they're equally filled? It's nicely even and not lumpy.

Tip #2: How to get the cupcakes out of the pan easily
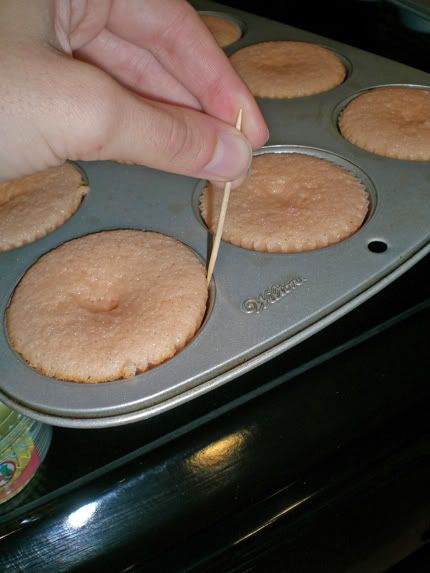
I usually let my cupcakes cool in the pan for just 1 - 5 minutes. This way, I don't scorch my fingerprints off, but I also don't allow the cupcakes to continue baking in the pan for that long. As soon as they get out of the oven, however, I take a toothpick and run it around the edges of the cupcake: releasing that top little blub of cupcake that may be stuck to the pan.

Then I let it cool for a tiny bit longer, and pop 'em out. Its much easier to get this cupcake rim un-stuck when they are still fresh out of the oven... no ripping or breaking. And then they literally just fall out of the pan. VOILA!

So those are my cuppity-cake tips. They're common sense, but it took me quite a few batches to figure them out. Maybe they can save you a little bit of time and aggravation in the kitchen. Happy Baking!!

Saturday, September 27, 2008

Banana Fluffernutter Cupcakes and Mini-Cupcakes with Nutella Frosting


I'm back from my trip, and back in the blogosphere! The trip was beautiful. Venice, Bari, Olympia, Mykonos, Santorini, Athens, Croatia, and home. We had wonderful weather, tremendously enjoyable excursions, and outrageously good food. And now, we're back in the land of dollars instead of Euros, homework instead of guided tours, and peanut butter sandwiches instead of 6 course european meals. Ehh... its...good.. to be home? I'm joking. It was a great trip, but it is nice to be back in our house with our beloved puppy. Unfortunately, life is still chaotic and busy. Thesis deadlines are rapidly approaching and I need to continue doing some serious intensive work on it for the next few weeks. But, I still found time to make cupcakes.

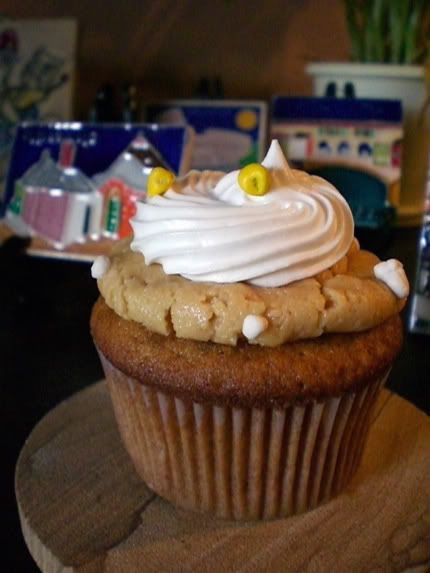
This week's cupcake of the week, the Banana Fluffernutter Cupcake, is... really ugly. In my head, they looked quite adorable. Once executed, however, the cupcakes appearance proved to be less than cute. But oh well, they still taste good. I just don't know how well they will sell. This week's flavor combo was inspired by that amazing Fluffernutter sandwich from childhood, (or adulthood if you're a child at heart like me and still eat them) made from Peanut Butter and Marshmallow Fluff spread on bread. With the addition of banana, the flavor combo is a total winner. Banana cupcakes, topped with peanut butter frosting, and then some homemade marshmallow cream and crunchies for a garnish (an attempt to make them look a little less ugly... didn't help.)

Banana Fluffernutter Cupcakes
The Banana Cupcake recipe was the same one I used as my Hound-dog Heaven cupcakes, and the Peanut Butter Frosting is the same one I used here in the Chocolate Peanut Butter Cup Cupcakes (except this time I made the mistake of skipping the step of food processing the Peanut Butter... so it is much clumpier and MUCH drier...NOT cute). For the Marshmallow Cream frosting, I used this Epicurious Recipe scaled down.

Marshmallow Cream Frosting
Ingredients
:
1/3 cup + 2 teaspoons white granulated sugar
1 Lg egg white
1/8 teaspoon Cream of tartar
2 tablespoons Water
1/2 teaspoon clear Vanilla extract
Tiny dash of salt

In large metal bowl, whisk together water, sugar, egg white, cream of tartar, and salt. Set bowl over pan of barely simmering water and mix with handheld electric mixer at low speed. Gradually increase speed to high, beating until mixture holds stiff peaks, about 5 minutes.

Transfer bowl from pan to folded kitchen towel on counter and continue beating until mixture is cool and billowy, about 2 minutes more. Beat in vanilla. Cool piped frosting on to cupcakes.


Ehh, I told you they were ugly. The marshmallow frosting was pretty easy to do, and had a great consistency for piping. Very much like marshmallow fluff. I will definitely use this recipe for frosting again.


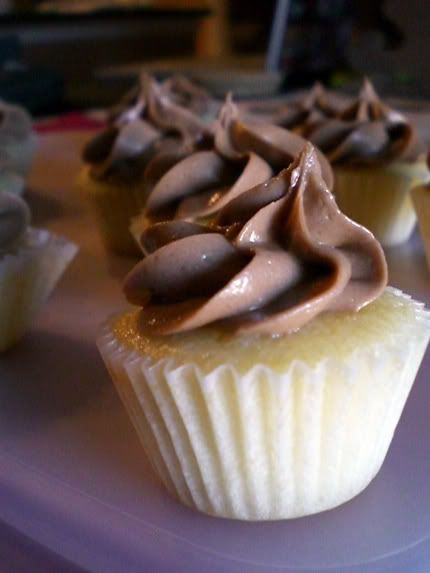
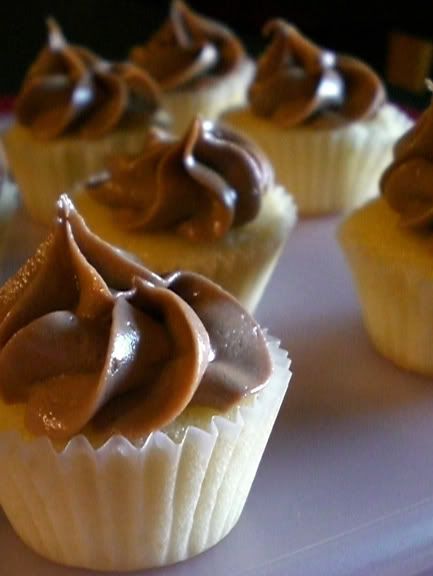
BUT THATS NOT ALL. That's right! There's a bonus recipe this week! Tonight, I have a little get-together with the girls from my Italy abroad trip. For the occasion, I whipped up some mini-vanilla cupcakes topped with nutella frosting, in honor of the delicious hazelnut spread we ate daily during our time abroad there. The cupcake recipe is my usual one, scaled down to 1/4 of the original, so that it only makes 24 mini-cupcakes (approximately 7 or 8 regular sized cupcakes). But its the frosting thats the star of these cupcakes.

Nutella Frosting
Ingredients
:
2 tablespoons butter, softened
1/2 teaspoon vanilla
2 tablespoons nutella
1 1/2 cups of sifted confectioner's sugar
1 teaspoon cocoa powder
Little sprinkling of salt
4 teaspoons milk

In a small bowl, In a medium bowl, using an electric hand mixer, beat softened butter, nutella and vanilla until well mixed. In a small bowl, mix sugar, salt and cocoa powder until its thoroughly mixed. Gradually, add this dry mixture to the butter mixture, adding milk as needed to get a creamy frosting-like consistency.
I got JUSTTTT enough out of this to pipe frosting on to 24 mini-cupcakes. It is very, very good if you like nutella.

Saturday, September 6, 2008

Chocolate Snickerdoodle Cupcakes

Photobucket

It is absolutely amazing how fast the week flies by when you are trying to accomplish 9,000,000 things every day. Another week has gone by, and I feel like I have accomplished none of the work I planned on getting started on. ::sigh:: I can only hope that I'll actually be able to get it all done by the due dates. I'm getting quite nervous. And next Friday I leave for Europe for a week... oy vey. I thought your senior year, last semester was supposed to be easy??

Anyway, in between making my Italian presentation on Restaurazione D'Arte in Italia for Tuesday and NOT getting any more work done on my thesis, I was able to whip up this batch of Cupcakes of the Week. I must say, I'm more than happy with the results. A few days ago... well maybe it was more like weeks ago... I'm not sure... but I saw a little blog snippet of Chocolate Snickerdoodle Cookies. How amazing does THAT sound? Combining the amazing-ness of Cinnamon Sugar with Chocolate?! Count me IN. I decided to try to make the Cupcake version of that.

For the Chocolate Cake, I went with this recipe for Double Chocolate Layer Cake from Epicurious. It had a good number of good reviews, and I really wanted a rich, deep, chocolatey, moist cake to be my base. I scaled it down and played with it as such:

Photobucket
don't they look soo dark and chocolatey?

Chocolate Cinnamon Cupcakes adapted from Epicurious
Makes 17 cupcakes

Ingredients
1 1/2 ounces Semi-Sweet Chocolate Chips
3/4 C Hot brewed Coffee
**EDIT: 1 1/2 C Granulated Sugar
1 1/4 C Flour
3/4 C Unsweetened Cocoa Powder (not Dutch Process)
1 Teaspoon baking soda
1/4 + 1/8 teaspoons baking powder
1/2 + 1/8 teaspoons salt
1 1/2 Eggs (I know, I'm so annoying!)
1/4 + 1/8 C Oil (I used olive oil, its fiiiinneee)
3/4 C Buttermilk
1/4 + 1/8 Teaspoon Vanilla
1 teaspoon of Cinnamon

Preheat to 300, and line your cupcake pans with 17 liners.
Put the semi-sweet chocolate chips in a glass measuring cup, and the hot brewed coffee in another glass, microwave safe measuring cup. If your coffee is not super hot, I recommend making it so with the help of your trusty microwave. Pour the hot coffee over the chocolate and let it melt. Give it a stir every couple of minutes.
In a medium bowl, combine sugar, flour, cocoa powder, baking soda, baking powder and salt.
In the bowl of an electric mixer, beat the eggs until they are slightly thickened and a light, opaque yellow color.
Slowly add the oil, buttermilk and vanilla to the eggs. Then add the melted chocolate mixture, beating until combined well.
Next, add the sugar mixture and beat on medium until combined well.
Pour batter into cupcake liners until they are about 3/4 full. Bake for about 35 minutes, or until a tester comes out clean.
Place cupcake pans on cooling rack and let sit for 5 minutes. Then, take a knife and gently separate any cupcake-tops that may have grown and stuck to the pan. Remove cupcakes from pan and let cool completely on wire rack.

Photobucket

Cinnamon Buttercream Frosting
Ingredients

2 sticks of butter, room temperature
1 teaspoon vanilla extract
2 teaspoons ground cinnamon
2 cups confectioners sugar

In the bowl of an electric mixer, beat the butter until light, fluffy and creamy. Then, add the vanilla. In a small bowl, combine the sugar and ground cinnamon. Then, add slowly to the butter mixture. Beat on high for about 5 minutes, until it reaches desired consistency.

Photobucket

I would definitely use this chocolate cake recipe again, it was easy, and came out very moist and chocolatey. And the cinnamon buttercream... great. In both the cake and the frosting, the cinnamon was noticeable but not overpowering. It had a good balance of rich, intense chocolatey-ness, and spice from the cinnamon.

Photobucket

And before I go, I would like to share two things with you. One is silly and one is exciting. Ok, the exciting one first:

LOOK, I got on Cupcakes Take the Cake! I was so excited! Theirs is one of my favorite blogs, so getting on there was a very cool thing for me :)

Ok, here's the silly thing:


How cute is Ernie taking pictures of his chocolate cuppycakes? He'd be a good foodie blogger.

Sunday, August 31, 2008

Chocolate Mint Cupcakes and Contest Winner Announced!

Photobucket

With school back in, I am going to be a very busy woman. Actually, I am going to be a much busier woman than I had previously thought. I am enrolled in only one class: Advanced Italian Oral Communication, which is going to be quite a bit of work, but I am also doing an Internship at an art museum near my university: 8 hours a week in the exhibitions department with a written log of what I do and a short research paper on an issue in museum studies, I might be training to become a docent at the museum to give tours to school kids, and I am completing my thesis this semester. Previous to Friday, I was working on a regular ol' thesis: minimum of 25 pages to be completed by the end of the semester. Now, however, I am doing an honors thesis, which is considerably more intimidating, which much more demanding deadlines and due dates, and much more strict requirements, as it will be bound and published. I will have a committee of three professors to work with, and at the end, I will have to present my paper and do a defense in front of said committee. Double Eep! The first draft is due November 7. !! November 7th! That might seem like that gives me a lot of time, but no. Its right around the corner. Luckily, I'm one of those people that generally need pressure to perform well. If I am given an entire semester to complete a paper, I might be a tad laxadaisical about getting it done, but knowing there are deadlines approaching and committees awaiting rough drafts, I will hopefully be more disciplined about getting it done. So if anyone out there knows about how portraits of women in Augustan Rome communicate his ideas on social reform, please leave me a comment and we'll chat. On top of all of this work, I will still be putting in a few hours per week at the store, making the cupcakes of the week, and attempting to become a substitute teacher in this county, going to Europe for a week and a half, and a cruise for Dan's sister. I have no idea what I've gotten myself into. If you start seeing pictures of cookies shaped like Augustan coins, you'll know I've completely lost my mind and succumbed to the pressure of school.

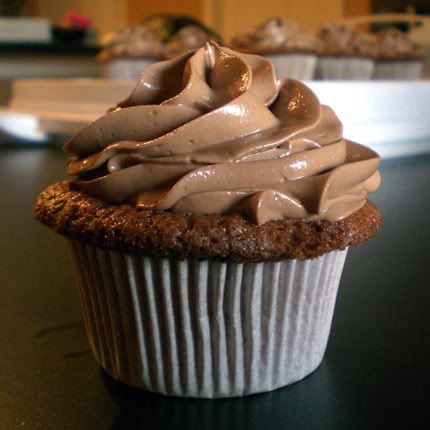
Ok, enough stressing out. Its time for this week's Cupcake of the Week! I don't particularly like the Chocolate - Mint combination, but many many people do, and these cupcakes aren't for me. We had a bunch of packets of Chocolate-Mint hot cocoa lying around, so I decided to make use of them. Here is the recipe:
Photobucket

Chocolate Mint Cupcakes makes ~16 cupcakes
Ingredients:
3.5 eggs, separated
1/2 C sugar
1/6 C oil
2 tablespoon vanilla extract
1/2 c flour
3/4 teaspoon baking powder
1/4 teaspoon salt
3/4 C + 2 tablespoons mint hot cocoa mix
1/4 C warm water
1/8 C sugar
4 egg whites

Preheat to 350.
In a small bowl, combine the flour and and next three ingredients and stir to combine, and set aside.
Beat 3.5 egg yolks together with 1/2 cup of sugar until light and fluffy. When it starts to thicken, add 1/2 tablespoon of warm water and beat until fluffy again.
While still whisking, pour in oil slowly, beating until combined.
Add the flour mixture to the yolk/oil mixture and beat until just combined - don't over beat.
Add the rest of the water along with the vanilla.
In a separate bowl, whip the egg whites until stiff peaks form. Add 1/8 C sugar and mix until combined.
Pour the fluffy egg whites into the batter and fold in gently.
Pour batter in to *paper-lined cupcake tin* (or else they will not come out until they are about 3/4 full. Bake 15 - 18 minutes. Remove from a toothpick inserted comes out with just moist streaks.
Note: We filled these with batter a bit higher than we normally fill our cupcakes because we wanted a little lip at the top. These cuppies have a tendency to shrink a lot when coming out of the oven, and the lip that sticks to the top of the cupcake tin prevents that a bit.

Chocolate Buttercream from Magnolia Bakery Cookbook
Makes enough to frost 12 really nice and fluffily, with a tad left over
Ingredients:
2 sticks unsalted butter, soft
1 tablespoon + 1 teaspoon milk (use this as you need it, you probably will not need it all if you don't want it to be too wet)
6 ounces semisweet chocolate [though I used 7 oz], melted and cooled until lukewarm (cooled about 15-20 minutes after melting on low in top of a double boiler for 10 minutes)
1 teaspoon vanilla extract
1 1/4 cup confectioner's sugar

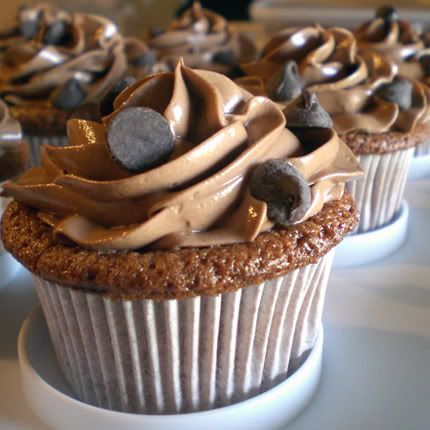
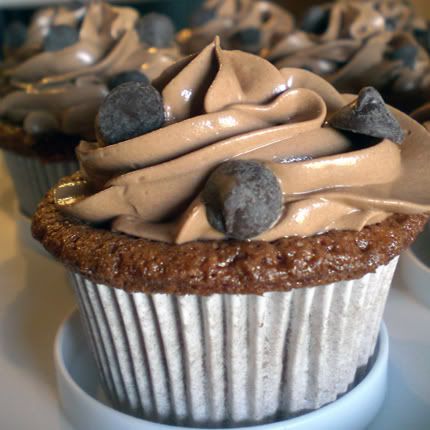
In the bowl of an electric mixer, beat the butter until soft and creamy - about 3 minutes. Add the milk as you need it, and beat until smooth. Add the melted chocolate and beat well. Add vanilla, and beat for 3 minutes. Slowly add the sugar and beat until you reach your desired consistency. Garnish with chocolate chips.
Photobucket

Ohhh, the CONTEST WINNER, right. It was a tough, tough choice. I liked a lot of the ideas, and I weighed the pro's and con's of all of them before making a final decision. After taking appearance/impression on customer, price per piece (including shipping costs to get the packaging to me), ease of use for both me putting the cupcake in and the customer getting the cupcake out, no large quantity needed for purchase of containers, be able to be closed and not totally destroy the frosting, I decided to go with...
Pam! Her entry was... "Sam's Club - Hefty® Hinged Lid Containers 6 x 6 x 3 in.- 250 @ $13.08 or $.05232 each
cthttp://www.samsclub.com/shopping/navigate.do?dest=5&item=189806&pCatg=1724" Thank you Pam! I went to my local Sam's club yesterday and purchased them! I brought them to the store, tried them out, and they worked like a CHARM!!!!
Unfortunately, Pam... you're Blogger profile says "Profile Not Available The Blogger Profile you requested cannot be displayed. Many Blogger users have not yet elected to publicly share their Profile."
So, PAM, if you are OUT THERE! - Comment on this post to get me your contact info so I can get your prize package sent to you!! And I have this user's IP address logged, so please don't try to pull any fast ones and claim you are Pam.. I'll know if you are or aren't. :)

Friday, August 8, 2008

Twinkies Gone WILD!

Have you tried the cupcake of the week? No? Not yet? Oh, you don't know the flavor? Well... brace yourself. Are you ready? This week's flavor is...

Photobucket
GOURMET TWINKIE-CLONE CUPCAKES!
Golden yellow cake filled with a generous amount of pastry cream, topped with swirls of vanilla buttercream and garnished with a slice of chocolate covered twinkie.

Yes thats right! I've improved on the American classic by taking the tasty treat out of its plastic wrapper and 903823 month shelf-life into a Gourmet Homemade Cupcake Creation. An enormously delicious guilty pleasure. Come on...everyone likes twinkies, whether they like to admit it or not.

I searched for twinkie-clone recipes and decided to go with my own take on a recipe from the talented Joy the Baker, which she adapted from "Gourmet Cookbook". Below is my scaled version:

Twinkie Clone Cupcakes
Ingredients:
1 Cup Flour
1 1/2 Teaspoons baking powder
1/8 Teaspoon salt
5 Tablespoons butter, soft
1/2 C Sugar
1 Large egg
1/2 teaspoon vanilla extract
1/16 tsp almond extract
1/2 C Milk

Preheat to 350.
Mix flour, baking powder and salt together in a small bowl and set aside.
Beat butter and sugar together in an electric mixer until light and fluffy. Add egg and beat well.
Add the extracts and beat. On low, alternately add the flour and milk to the butter mixture, beginning and ending with flour. Don't overmix!
Spray cupcake tin with non-stick spray and fill up 8 of the wells evenly with the batter.
Bake for about 13-15 minutes, or until a toothpick inserted comes out with only a few moist crumbs.
Remove from oven, let cool in the pans for about 2-3 minutes then remove to a wire rack to cool completely while you prepare the Pastry Cream.

Twinkie Pastry Cream scaled from MiamiHerald.com
Ingredients:
2 Tablespoons all purpose flour
1/4 C Milk
1/4 Stick butter, soft
2 Tablespoons shortening
1 Teaspoon Vanilla
1/8 Tsp salt
2 C Confectioner's sugar

Combine flour and milk in a small saucepan. Cook over low heat, stirring constantly with a wire whisk, until mixture thickens to about the consistency of condensed milk. Remove from heat and put in the frig while you prepare the 2nd part.
Beat the softened butter and the shortening together with an electric mixer. Add in vanilla and salt, and combine.
Add the chilled flour/milk mixture. Gradually beat in the confectioner's sugar. Continue beating until it reaches desired consistency.

I tried a different method of adding a filling to cupcakes since the cream was the right consistency to do so. This time, I filled a pastry bag fitted with a star tip with the cream, and inserted the tip into the center of the cooled cupcakes. Gently squeeze the pastry bag while pulling out the tip. Stop squeezing before removing the tip.
Photobucket

The frosting covers up the little dot of pastry cream nicely. As usual, I went with my tried and trusted Buttercream frosting recipe.
Photobucket

Then, to finish it off... take a twinkie, stick a popsicle stick in it and stick the whole thing in the freezer. When its firm enough, dip it in melted milk chocolate and put it back in the freezer until the chocolate sets. When the chocolate has hardened, use a sharp knife and cut slices to garnish the top of the cupcakes. VOILA! You got yourself one handsome twinkie cupcake! :)

Photobucket

Saturday, August 2, 2008

Turtle Brownie Cupcakes

Photobucket

This week's cupcake flavor? Turtle Brownie Cupcakes! They combine the magic that is Brownies, Cupcakes, and Turtle Candies (chocolate, caramel and nuts, if you are not familiar). For the cupcake recipe, I saw good reviews on this one from Epicurious so I decided to go with it. Since they really are supposed to be cupcakes, and since I intended on smothering them in buttercream frosting, caramel, chocolate shavings and almonds, I didn't want them to be SO rich. I altered the recipe as such:

Brownie Cupcakes
3/4 stick of butter
1/2 C Semisweet Chocolate Chips (reduced from 1 1/4 c!)
3 oz unsweetened chocolate
1/2 C Packed light brown sugar
1/3 C Granulated sugar
2 eggs, room temperature
1 teaspoon vanilla
1/2 C A.P. flour
1/4 Tsp Salt

Preheat oven to 350. In the top of a double boiler, melt the butter, and two types of chocolate together. Stir until smooth and lumpless. Remove the top of the double boiler from heat, and whisk in both types of sugar, then whisk in the eggs one at a time. Whisk in vanilla, flour & salt. Divide into 10 wells in a non-stick sprayed cupcake pan (or paper-lined cupcake pan). Bake 20-25 minutes or until a toothpick comes out clean with only moist crumbs. Mine took about 22 1/2 minutes. Remove to wire rack to cool.

Photobucket

For the frosting, I went with my usual (simply because I had some made already... or else I may have attempted a caramel frosting). But the vanilla buttercream complimented the rich chocolate brownie nicely.

Photobucket

Photobucket

Then, I swizzled some melted caramel from some caramel bits I picked up. It was easy to melt in the microwave (which I usually do not do), and easy to use.

Photobucket

Photobucket.

Then, to top it all off, some chocolate shavings & almond slivers. VOILA - amazing. They taste way better than they look.

Photobucket

Thursday, July 31, 2008

Chocolate Cupcake? Vanilla Cupcake? Can't decide!? Do BOTH!

Photobucket

Black and White Cupcakes with Banana Filling aka Banana Split Cupcakes

Yup, thats what last week’s Whacky cupcake flavor, but I couldn’t post it until now because I was waiting for a box to get to NY. You see, its my sister Jenn's birthday soon (you can go to her blog and wish her a happy b-day on August 2nd if you wish), and it was the perfect opportunity to make another attempt at Cupcake Shipping. I was sending her a box of presents anyway, so I thought I’d do Cupcake Shipping Experiment Pt 2. More on THAT later when she sends me some photos. For now, here is the deal on these cupcakes:

Photobucket

I saw this recipe on Martha Stewart’s website for Cupcakes that are split right down the middle: chocolate cake on one side and vanilla on the other (thus the SPLIT part of banana SPLIT cupcakes...split between chocolate and vanilla...get it?). I scaled down the recipe very weirdly, down to 1/3 of the original. It was actually quite complicated doing so because of the recipe being divided in half anyway into a chocolate batter & a vanilla batter. Yes, some of the measurements are very odd and go to the 100th or even the 1000th decimal place, but just round it and do your best. Here is what I came up with...

Photobucket

Black and White Cupcakes makes about 8
Ingredients for Vanilla batter:
2 2/3 Tablespoons Butter
.58 C Flour
2/3 tsp Baking powder
.167 Tsp salt
.25 C sugar
2/3 Egg (yes, 2/3 of an egg)
1/3 Tsp vanilla
.167 C milk

Ingredients for Chocolate batter:
2 2/3 Tbl butter
.416 flour
.16 C Cocoa powder (this is 1/2 of 1/3 C)
2/3 Tsp Baking Powder
.167 tsp salt
.25 C Sugar
2/3 Egg
1/3 Tsp vanilla
.167 c Milk (this is half of 1/3 C)

*Note* -- If it makes it easier, these are the measurements for the ingredients TOTAL (vanilla + chocolate batter). So just use half of these measurements for each batter (besides the flour and cocoa, where the measurements are different for each):
5 1/3 Tablespoons butter
1 C Flour
1/3 of 1/2 C Cocoa Powder (I use a 1/2 C measuring cup and just eye about 1/3 of it)
1 1/3 Tsp baking powder
1/3 Tsp salt
1/2 C sugar
1 1/3 egg
2/3 tsp vanilla
1/3 C Milk

Directions:
*Make one batter at a time to avoid confusion.
Preheat the oven to 350. Butter and flour (or use a non-stick spray with flour) a muffin pan, or use paper cupcake liners.
In a medium bowl, whisk the flour, baking powder & salt together to combine.
With an electric mixer, beat butter and sugar together until light and fluffy. Add 2/3 egg and beat well.
Add vanilla and mix until incorporated. On low, beat in 1/2 of the flour mixture, followed by milk, and then end with the remaining flour. Don’t overmix – just mix until it is combined. Set aside. Make the chocolate batter – prepare the same way, except in the beginning, whisk together not only the flour, baking powder and salt, but the cocoa as well.
Using a tablespoon, measure out 3 tablespoons of each batter to put into the wells in the cupcake tin. Do your best to keep each batter to one side.
Bake 22-24 minutes or until a toothpick comes out clean after inserted. Cool in the pan for 5 minutes, and then transfer to wire rack to cool completely.

Photobucket

What is so BANANA about these Banana Split Cupcakes you ask? Well, I had the idea to put a Banana Custard filling in the center of them. I won’t post the custard recipe for two reasons: One- I lost it. Two- It was unsuccessful. It was way too watery, so it kinda absorbed into the cupcake a little bit, and it was overly sweet. Luckily, I only put about a teaspoon of it into the cupcakes, so they were still quite tasty.

With their hats cut off:
Photobucket

Filling in place:
Photobucket

The tops trimmed and replaced:
Photobucket

For the frosting, I used my favorite frosting recipe, and garnished with a sour cherry candy and sprinkles to make it look like a real ice cream sundae.

Photobucket

Photobucket

Friday, July 18, 2008

Chocolate Peanut Butter Cup Cupcakes

Photobucket

To shake things up a bit, Dan recommended this week's cupcake be chocolate cake. I rarely dabble in chocolate cake because Daniel isn't a huge fan of chocolate, but as these are not for him, I took his suggestion and decided to go with it. My Vanilla Cupcake recipe came from Billy Reece, so I stuck with him to see how his Chocolate Cupcakes are.
Now, what to pair with chocolate cupcakes... chocolate frosting? Too much chocolate. Vanilla? Boring. Strawberry? No, we know how strawberry jam frosting came out last time, and I don't have any fresh strawberries. So I went with the classic Chocolate Peanut Butter combination. To make the cupcakes more exciting, I baked a mini reese's cup right into the cupcake. Other than that, I kept the same basic recipe, just played around a bit with the measurements a little so I wouldn't wind up with 24 cupcakes. I scaled it down as such to make 9:

Chocolate Buttermilk Cupcakes with Reese's Peanut Butter Cup Center based on Billy's Reece's Chocolate Cupcakes
2/3 C Cake Flour
1/3 Tsp Baking Soda
6.5 Tablespoons of butter
1/3 C Sugar
1/3 C Packed light brown sugar
1 egg
2 oz unsweetened chocolate, melted & let cool for 15 minutes
1/3 C Buttermilk
1/3 Tsp Vanilla
9 Mini Reese's Peanut Butter Cups, chilled in freezer for about 30 minutes.

Preheat to 350. Cream the butter & both types of sugars together. Add the egg and scrape down the sides of the bowl (if you don't have a super cool SideSweep like me:) ). Add the melted/cooled chocolate and mix until incorporated. Scrape down sides of bowl. In a small bowl, combine the cake flour & baking soda, and in a measuring cup, combine the buttermilk and vanilla extract. Alternately, add the flour mixture and the buttermilk mixture to the chocolate mixture, beginning and ending with the flour mixture.
Spray cupcake tins with non-stick spray, and fill cupcake wells 2/3 full. Remove peanut butter cups from the freezer, unwrap, and press into the batter in the cupcake tins so that the top of the peanut butter cup just peeks out of the batter.
Photobucket
Bake 20 minutes, or when it springs back lightly when touched and a tooth pick comes out clean. Turn out from cupcake tin onto cooling rack.
Photobucket
No, those aren't chocolate belly buttons on my cupcakes!

For the frosting, I found a Fluffy Peanut Butter Frosting Recipe at Allrecipes.com. The reviews were good, and looked promising for a sturdy, pipe-able peanuty frosting. I halved it, and added a few steps since I only had crunchy peanut butter on hand:

Peanut Butter Frosting
1/2 Stick of butter, soft
1/2 C Crunchy Peanut Butter
1 1/2 Tbl milk
1 C confectioner's sugar

Put peanut butter in a food processor and pulse until most of the big peanut chunks are broken up. Add the butter, and pulse until full incorporated and peanut chunks are further broken up. Scoop into bowl of an electric mixer. Gradually mix in the sugar. As it gets thicker and thicker, add milk as needed to get the correct consistency.

Photobucket

Photobucket

The chocolate cake gets moister the second day, and are quite dry the first day they are baked, just as I've found is true for Billy's Vanilla Cupcake recipe. The frosting piped rather well, and was very very peanut buttery. You couldn't really taste the reese's cup amidst all the other chocolate and peanut butter flavor, but I suppose its cool to just know that they're in there. Think they'll be a hit?

Photobucket


LinkWithin

Related Posts with Thumbnails