Recent Posts

Monday, August 24, 2009

Cool N' Easy Jello Pie


Oops! As several of you pointed out - I totally forgot to post about the pie! What a goober!!! This weekend for Dan's sister's birthday celebration, I got a request for this Cool N' Easy Jello Pie, which I kind of think of as like a jello cream pie. It is a super simple dessert to prepare, produces a very tasty finished product, and is totally diet-friendly! I loved making this as it's so different from the things I normally make. I would definitely recommend this recipe, the entire pie was gone within minutes! And what is so great about it is that there is a lot of room for creativity - experiment with different flavors, add different fruits, mix the fruit in, lay it on top, etc etc.

You can find the recipe here. Below is what I did to make a nice cutely decorated pie :) If you're going to be bringing this somewhere, I would suggest decorating the top with fruit, or else it's kind of boring and weird looking.

Cool N' Easy Jello Pie

Ingredients
:
2/3 cup boiling water
1 pkg. (4 serving size) box of JELL-O (the original recipe says strawberry, that's what we did, but you can experiment with others like lemon, key lime, banana, etc... yum!)
Ice cubes
1/2 cup cold water
1 tub (8 oz.) Cool Whip, thawed
1 HONEY MAID Graham Pie Crust (6 oz.)
About 5 - 7 Fresh Strawberries
Additional Cool Whip for decorating

Bring 2/3 C of water to a boil. Stir the boiling water into the dry jello mix in a large bowl at least 2 min. until completely dissolved.
Add enough ice to the 1/2 C cold water to bring it up to 1 cup. Add to gelatin; stir until slightly thickened. Remove any unmelted ice.
Add whipped topping; stir with wire whisk until well blended. Refrigerate 15 to 20 min. or until mixture is thick enough to mound.
Spoon into crust, and smooth over with a rubber spatula.
REFRIGERATE at least 4 hours or until firm.
Wash and dry approximately 5 - 7 strawberries. Cut them into slice (with the help of a handy dandy egg slicer!)
Starting in the center of the pie, cover the surface of the pie with the strawberry slices.
Place some additional cool whip into a piping bag and decorate the top of the pie.

Before Decorating:


After: (much nicer)

Sunday, August 23, 2009

Sweet Melissa Sundays: Banana Bread


Before I begin blogging this week's tasty SMS recipe, I want to shout from the rooftops for a minute.... guess what?... I'M ENGAGED!!!!!!!! It happened Friday night, my Daniel proposed. I am the happiest girl on the planet right now. :) I'm sure I'll continue to be blabbing a lot about it in the future.

Whew! Sorry, I just had to brag for a minute. Ok, now to this week's recipe, chosen by sweet Joy Hot Oven, Warm Heart. She chose well, because this was delicious. I omitted the apples because I'm a bit of a banana bread purist. Unless it's peanut butter of cinnnamon, I don't like a ton of stuff going on in my banana bread. The only other change I made was to add a little sugary crunch topping:


Banana Bread Sugary Crunch Topping:
2 T Granulated Sugar
2 1/2 T Brown Sugar
1 tsp cinnamon
~ 1 heaping T chopped walnuts

After preparing the banana bread according to the recipe, I sprinkled enough of the above topping to coat the top of the banana bread (I had some topping left over). The topping added a nice slightly crunchy topping to the otherwise soft banana bread.

I really enjoyed this week's recipe! I've never put nutmeg in a banana bread batter before, but in this recipe it was great. It was JUST the right amount. Enough to be noticeable, not enough to be overpowering. The only thing I have to say about this banana bread is that my regular recipe is much more moist. Not that this recipe is dry, it is not! But my go-to recipe produced a much moister product. But it was still Delicious, Thanks for this week's pick, Joy! Be sure to check out the other SMS'ers take on Sweet Melissa's Yummy Bread!!!!!

Sunday, August 16, 2009

Sweet Melissa Sundays: Hazelnut Truffles!


Ohhh boy. Hazelnut coffee every morning. Hazelnut Creamer. In Italy, the gelato of choice: nocciola. Favorite thing to go with peanut butter: Nutella. Needless to say, I was totally excited about this week's choice: Hazelnut Truffles. Yummm!!

But! Some things got in the way of making them strictly according to the recipe in the Sweet Melissa Baking Book. I went to virtually every store in Central Florida and found no hazelnuts! Ug! I know for a fact that I've purchased hazelnuts this time of year in New York... when I first came back from Italy last July armed with an authentic and delicious hazelnut biscotti recipe, I went to the closest Stop and Shop and picked up a big bag of them to immediately bake into the crunchy italian cookies. However! Just like I have trouble finding almond paste here in Fla year round (no such problem in NY) I could not get my hands on any hazelnuts. Arghh!! So I bought some macadamia nuts (which turned out to be half price, gotta love those at-the-register surprises!). And Dan's mom surprised me by picking out all the hazelnuts from a big container of mixed nuts! Is she not the nicest ever??? So, I learned how to blanch nuts, too... which turned out to actually be rather simple, really. And I wound up with a delicious mixture of toasted macadamia nuts and hazelnuts. The smell as they were toasting was... increddddddible.


After they were toasted, and cooled, I pulse chopped them in the food processor:


For the chocolate, I didn't use anything super fancy-shmancy. I chose the Ghirardelli Semi-Sweet chocolate chips.


Oooh and the smell of the toasted nuts, the melted chocolate mixed with the Frangelico... mmmmm


For my topping, I experimented! After reading Nina's post on the Truffles P&Q page of the Sweet Melissa Sundays group site, I totally copied her idea for coating in Rice Krispy treats. Thanks, Nina! And it turns out great minds think alike, because when I read her post on truffles, I saw she decided to coat with Graham Cracker Crumbs, too. I had four toppings: Graham Cracker Crumbs, Nilla Wafer Crumbs, Rice Krispies, and the toasted nut mixture:


The end result? Ohhh so good. Even Daniel who "doesn't like chocolate" could be spotted poppin' a few in his mouth.


Be sure to read the other SMS Bloggers' posts on Truffles! And see Annie of Living Life Foodcariously for the recipe. Nice pick, Annie! It was a winner in this house.

Saturday, August 8, 2009

Sweet Melissa Sundays: Snickerdoodles!


Cookies two weeks in a row from Sweet Melissa Sundays! And you won't hear me complaining about it! Last week, I had the pleasure of hosting and chose Chewy Peanut Butter Cookies, and they were Goo-oo-ood. This Sunday, Spike the Baker chose Snickerdoodles. During this batch of cookies, I made sure everything went right. I got all my ingredients in place and ready to be added at the proper time... and I even made sure my eggs went IN TO the batter.

Don't cookies just make you feel good? You can walk by and just pop one in your mouth. It doesn't necessary feel like you pigged out too bad, because it's just one cookie, right? Just one. Or two. Or seven. Hey, it's just a few cookies, right?


These cookies are no exception. These Definitely the BEST Snickerdoodles I've ever made from scratch. Ever. They're light, not dense, coated in a nice, slightly crunchy sugary not-too-cinnamony coating. Ridiculously delicious. Just as good served warm out of the oven as it is days later. In fact, I think I may put one on display in my home. But I'm not going to promise there won't be nibbles taken out of it as the days go on.


I prepared this recipe exactly as it was written in the book. I'm glad I didn't experiment this time!

Thanks for this week's pick, Spike! It was thoroughly enjoyed by all those who tasted it over here. Be sure to check out the all the rest of the SMS Baker's Snickerdoodles!


PS - My apron got on Outblush!!! Which just happens to be one of the sites I loyally read daily. YEY!!!! Check it out here!

Tuesday, August 4, 2009

Our Measurements Apron!


Look! We are featured on "Stuff We Like" on Lifehacker!!!

Check it out HERE!

If it ever says "Sold Out" it's because we have to re-list, not because we are sold out! Here is the link to our shop which will always have the most current link: HERE

Sunday, August 2, 2009

Sweet Melissa Sundays: Chewy Peanut Butter Cookies


It's finally my turn to host Sweet Melissa Sundays! Yey! Since it was my turn to choose a recipe, I went for something simple, and something that I think mostttt people would like. It was a tough choice.. there are so many delicious recipes in the 
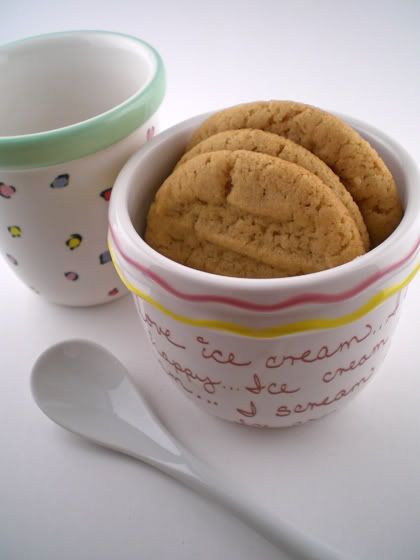
Sweet Melissa Baking Book! Finally I decided on Chewy Peanut Butter Cookies. Me and pretty much everyone I know LOVES Peanut Butter but for some reason, I don't make Peanut Butter cookies that often. Maybe because the boy likes chewy cookies, and the few times I have made them, I don't ever remembering them coming out that chewy. Fortunately, this recipe whipped up some seriously good, seriously simple to make, seriously soft and chewy cookies. Mmmm, Sunday breakfast perfection.

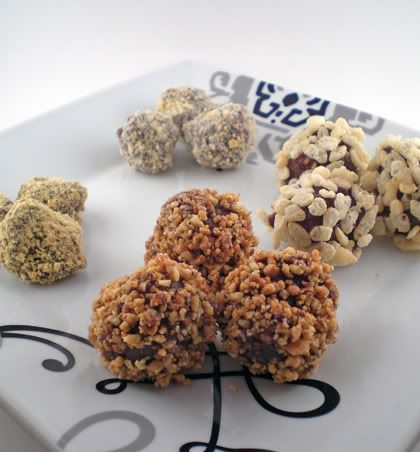
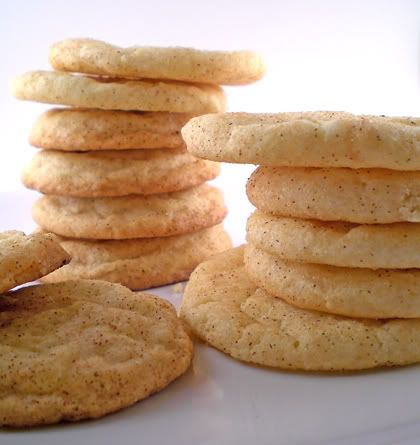
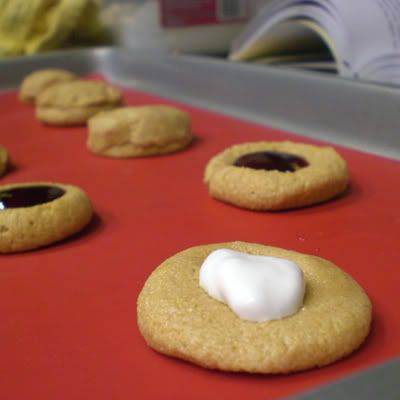
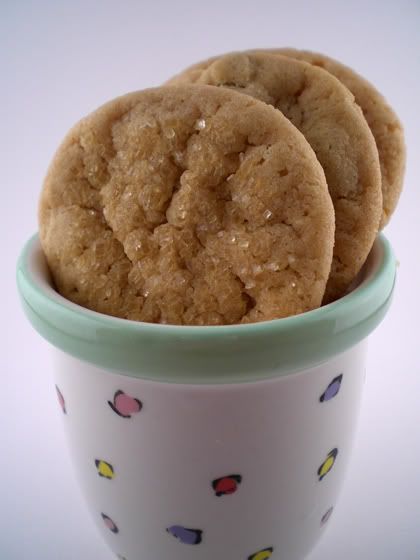
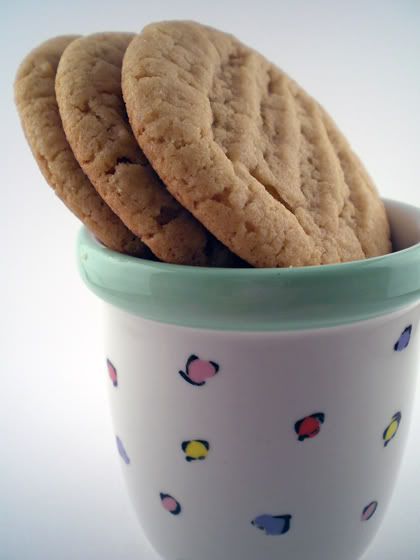
I decided to make them a bunch of different ways. For my first batch, I made some the straight up Peanut Butter Cookie way, with the fork indentations and everything (though I didn't cross them, what can I say I'm a minimalist). With others, I rolled them in some turbinado sugar for a little extra crunch. And with others, I made little pockets - some were filled with grape jelly and others were filled with fluff:


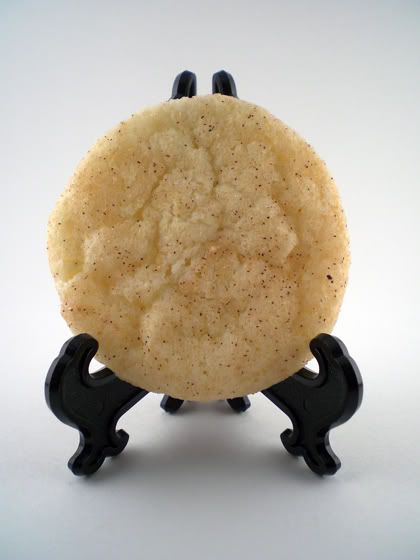
With this first batch of cookies, I decided to leave out the egg to make Peanut Butter Shortbread Cookies... Ok, FINE you caught me. I did that by accident. After my precious little goodies were cooking in the oven and I began cleaning up, I noticed that sneaky little egg on the counter. Bit of advice: when you're baking mise en place , make sure your placing all of your pre-measured ingredients ON THE SAME COUNTER. Or else you might forget the SNEAKY LITTLE EGG!!!!

But, as my good friend Cicero said, "We must not say every mistake is a foolish one." I think maybe he made peanut butter cookies and left out the egg one time, because this mistake was pretty delicious. They turned out like shortbread!! If you like shortbread and peanut butter, try the recipe this way some time!! :) Maybe I should re-design my measurements APRON to also include, in a nice large font, "DON'T FORGET TO PUT THE SNEAKY EGG IN!" :)

The only thing that didn't come out so well was....

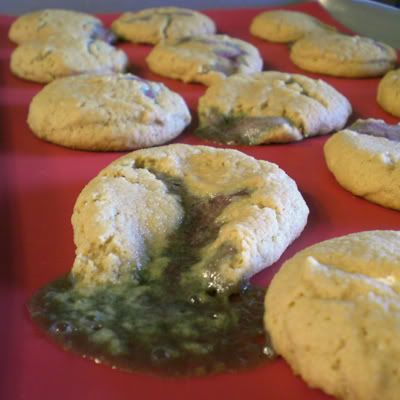
6 out of 9 of the Jelly filled ones came out looking like they puked on my baking sheet. Oh wells!! Maybe I'll try this idea again in the future when I put the egg in... I think they cracked open because the cookie was dry and crumbly. It would probably work if they were chewy like they were supposed to be.

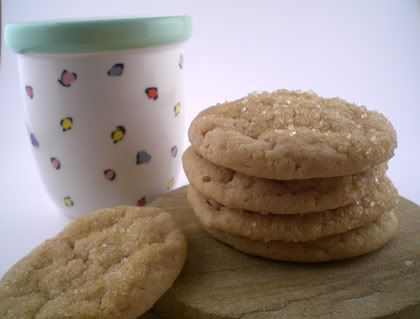
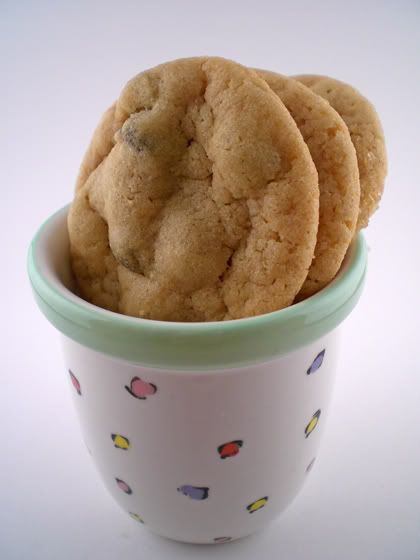
Since it was my turn to host this week, I couldn't post a MISTAKE! So I whipped up another batch and this time I REMEMBERED TO PUT THE EGG IN. With these ones, I made some the traditional way, others I rolled in turbinado sugar, and others I threw a few chocolate chips in.

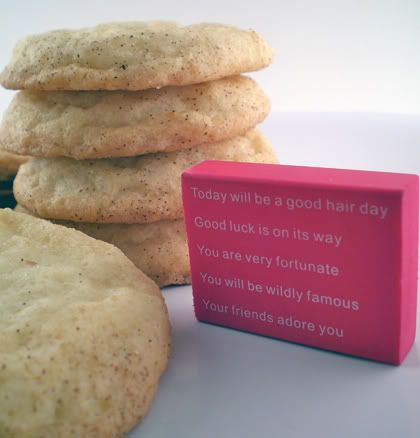
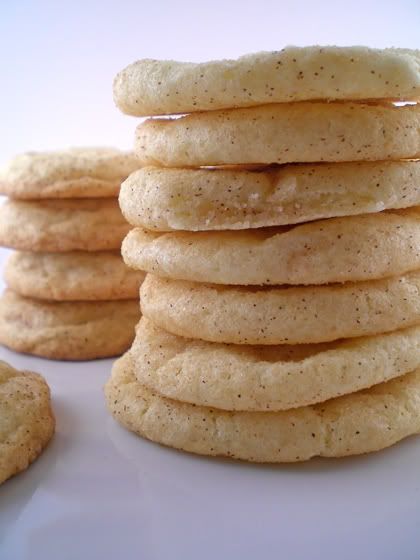
Result?? DELICIOUS. I know I will certainly be making Peanut Butter cookies more often from now on. They came out nice and soft and perfectly chewy, just like the recipe said! And they are Peanut Buttery, but not so overwhelmingly peanut buttery. I thought they were rather perfect. One reviewer said it tasted like a sugar cookie with a kick of peanut butter. Hope everyone enjoyed baking with me this week! I can't wait to visit your blogs and see what you came up with!!


Recipe, pg. 66 of the Sweet Melissa Baking Book!
"The cookies are best when they are chewy, so don't over-bake them!"
Makes 2 dozen cookies.

Ingredients:
1/2 cup Smooth Peanut Butter
8 tablespoons (1 stick) unsalted butter
1/2 cup granulated sugar
1/2 cup firmly packed light brown sugar
1 large egg which may or may not be optional :)
1 1/4 cups all-purpose flour
1/2 teaspoon baking powder
3/4 teaspoon baking soda
1/4 teaspoon salt

Before you start: Position a rack in the top and bottom thirds of your oven. Preheat the oven to 325 F. Line two cookie sheets with parchment paper or aluminum foil.

1. In the bowl of an electric mixer fitted with the paddle attachment, cream peanut butter, butter and sugars until light and fluffy, about 3 - 4 minutes. Beat in the egg.

2. In a separate bowl, whisk together the flour, baking powder, baking soda and salt.

3. Add the flour mixture to the peanut butter mixture and mix until combined. Be sure to scrape down the sides of the bowl so that everything is combined evenly.

4. Scoop dough by rounded tablespoons and roll into balls. Place the balls about 2 inches apart on the prepared cookie sheets, and press down slightly. Using a fork dipped in flour, press down on the cookies first one way and then the other to form an "X" pattern, creating the crosshatch effect. (The cookies should now measure approx. 2 inches in diameter.) Bake for 10 minutes or until the edges are lightly golden. Overbaking will cause these chewy cookies to become crunchy so try to avoid it.

The cookies will keep in an airtight container at room temperature for up to 3 days. For longer storage, they can be frozen wrapped in plastic wrap and aluminum foil for up to 1 month. Do not unwrap before defrosting.


Please be sure to check out all the other fabulous SMS Bakers' posts!!

LinkWithin

Related Posts with Thumbnails