Recent Posts

Sunday, September 20, 2009

SMS - Eep! And Strawberry Shortcake Crumb Muffin Recipe


I'm glad that SMS is not very demanding and only requires you to, at a minimum, participate once a month. Unfortunately, this will be my first time not participating for two weeks straight! I know, I'm terrible! I'll be up and running again soon, I promise. I haven't forgotten about you SMS, life is just getting in the way right now! For now, I leave you with a recipe I promised you a long time ago, that a reader just reminded me I never posted (Thanks, Linda!)

Way back when I was entering my muffin recipe into the Mimi's Cafe contest, I promised that I'd post the recipe I came up with in the future. Well, here it is - sorry it took so long, it completely escaped my mind!

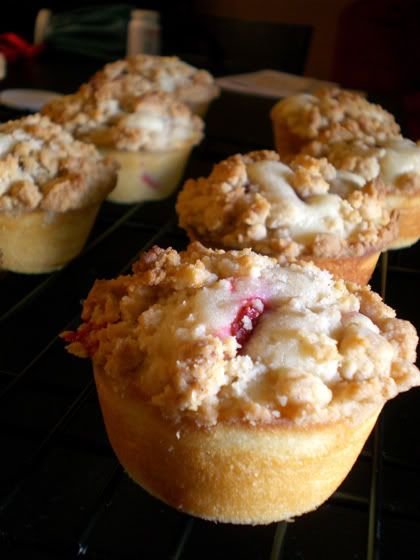
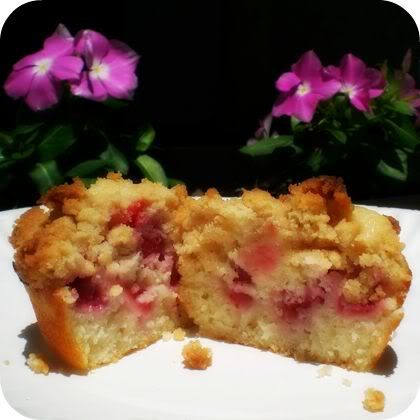
Strawberry Shortcake Crumb Muffins

Ingredients:
1 3/4 C all purpose flour
1/4 C cornstarch
1/2 C sugar
2 tsp baking powder
1/2 tsp salt
1 C buttermilk
1 egg
1/2 tsp vanilla
1/4 C butter, melted
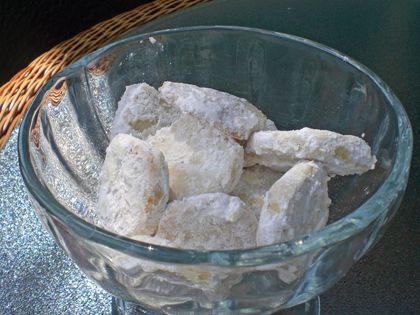
10 strawberries, washed, dried & sliced

3/4 stick unsalted butter, melted
1/4 C packed light brown sugar
1/4 C granulated white sugar
1/4 tsp cinnamon
1 C + 1 tblspn flour (+extra if needed)

Muffins:
1. Grease & flour a standard muffin/cupcake pan. Preheat the oven to 425F.
2. Whisk together flour, cornstarch, sugar, baking powder & salt, & set aside. In another small bowl combine the melted butter, buttermilk, vanilla & beaten egg. Stir in to the flour mixture. Stir just to incorporate, do not overmix - it will be lumpy.
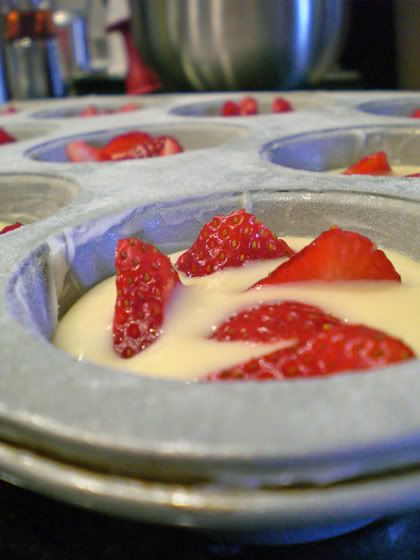
3. Pour into the muffin pan, filling each cup about 2/3 full. Gently insert the strawberry slices into the batter so that they are vertical (they will stand up and down in the batter).
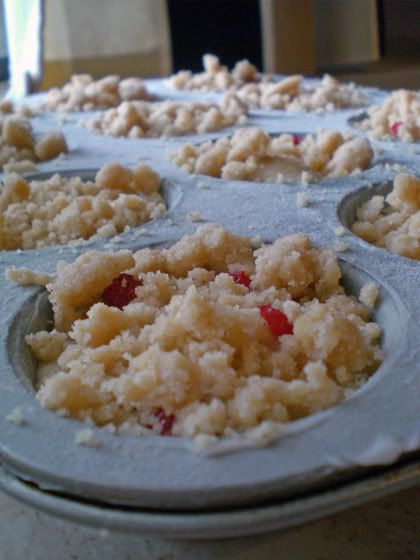
Sprinkle with crumb topping.
4. Bake 15 - 18 minutes, or until the crumb topping is browned, and a toothpick inserted into the muffin comes out clean with only moist crumbs.

Crumb:
1. Whisk together the butter, sugars, cinnamon and salt until smooth.
2. Stir in the flour with a whisk, then stir with a butter knife to create the crumbly texture. Add more flour as needed to create the correct crumb size.
3. Sprinkle on to muffin tops - crumb topping with dry up and crisp in the oven.


Monday, September 14, 2009

Oops!

I'm sorry I missed a week of SMS!! This weekend was BUSY - an anniversary dinner, a baby shower and a bridal shower, WHEW! But I will be back on track soon. :)

Sunday, September 6, 2009

Sweet Melissa Sundays: Fallen Chocolate-Peanut Butter Souffle Cake


This week, the sweet Sarah of Blue Ridge Baker chose our recipe: Fallen Chocolate Souffle Cake from the Sweet Melissa Baking Book. I was pretty excited to make this one, as I'd never done any sort of souffle anything before. Half way through making it, I realized how crazy it is that this cake doesn't need any flour at all! Ahh, the power of egg whites.

Overall, this was very easy to put together. It went very quickly and was rather painless. I halved the recipe and baked up the batter in 2 mini-bundts + 2 mini springform pans. I made only slight variations to change this Chocolate Fallen Souffle Cake into a Chocolate-PEANUT BUTTER Fallen Souffle Cake:

Adaptations:
I Halved the recipe and made some changes:
5 ounces ghirardelli semi-sweet chocolate
+ Approx 1 - 1.5 ounces Reese's Peanut Butter Chips
*Omitted Orange Zest
*Reduce the amount of Grand Marnier by a smidge. (Used about 1 teaspoon)


The result was quite nice. The peanut butter flavor was a nice addition. The cake came out almost like a rich, chocolate sponge brownie... if that makes any sense. It has the rich chocolately moist-ness of a brownie, but was light like sponge cake. Yum! Can't wait to try this with ice cream later. :) Be sure to see how the other SMS bakers' Souffle Cakes baked up!!! And see Sarah's wonderful blog for the recipe. Cheers! And happy Labor Day!!

Saturday, September 5, 2009

Key Lime Meltaways


Sorry I missed last week's Sweet Melissa Sundays! I am quite the busy girl right now. First, I wanted to show you all the new website we have for the aprons, Woo! Check it out here! Right now, the site up is just a temporary one until we really figure out what we want to do there, but I just thought I would share it with you. What do you think??

Last week, I had a few moments to kill. The week's homework was done already, so I thought I would whip up a batch of cookie's I've had bookmarked for about 989 years. We had some key limes sitting around on the counter, so I figured I'd put em to good use in this Martha Stewart recipe (which ALL user comments raved about, by the way...always a good indicator for me). I made some slight adaptations because I wanted to use Key Limes instead of regular ol' lime, and I really them wanted to pack a limey punch.

These came out really really good. We tried one about a half hour after they came out of the oven, and they were totally disgusting. Totally. I think the combo of sweet, lime, and WARM but a Baddd, Badd combo. It was too tart, and honestly was just really weird. I feared I'd have to toss the whole batch. But a second taste test the next day fixed all that - it seems they just needed some time to relax before they'd become yummy. These are perfectly sweet, limey, and crumbly. I can't imagine any lime lover not enjoying these. here is the original, and below is my adapted version.

Key Lime Meltaways, adapted from Martha Stewart's Lime Meltaways

Ingredients:
1 1/2 sticks) unsalted butter, room temperature
1/3 cup confectioners' sugar + Extra for rolling cookies in
Grated zest of 4 Key Limes
3 - 4 tablespoons freshly squeezed key lime juice
1 tablespoon pure vanilla extract
1 3/4 cups plus 2 tablespoons all-purpose flour
2 tablespoons cornstarch
1/4 teaspoon Sea salt


Yummm, flecks of key lime zest

Directions:
In the bowl of an electric mixer, cream butter and 1/3 cup of the powdered sugar until fluffy. Add the key lime zest, juice, and vanilla; beat until fluffy. In a separate bowl, whisk together flour, cornstarch, and salt. Add this to the butter mixture, and beat on low until combined. Between two pieces of parchment paper, roll dough into two 1 to 1 1/4-inch-diameter logs. Chill at least 1 hour. (I chilled mine for a few days...I told you I've been busy! The dough was just fine)
Preheat oven to 350 degrees. Line two baking sheets with parchment or silicone baking mat. Fill a small to medium sized zippy bag about half way with powdered sugar. Remove parchment from logs; slice dough into 1/8-inch-thick rounds (I find it easy to slice the dough with thread - just wrap it around the log, tie a knot, and pull tight to cut a slice). Place the cut rounds on baking sheets, spaced 1 inch apart (AND DON'T MAKE THE MISTAKE I DID WITH THE FIRST TWO COOKIES... for some reason, my sleepy brain tossed them in sugar BEFORE baking... they actually came out pretty normal. But it's much easier to toss them after they're baked, hehe :)
Bake about 15 minutes, or until barely golden at the edges and sides. Transfer cookies to a wire rack to cool slightly, 8 to 10 minutes. While still warm, place cookies in the sugar bag; shake the bag to coat. Store baked cookies in an airtight container for up to 2 weeks.

LinkWithin

Related Posts with Thumbnails