
Recent Posts

Showing posts with label candy. Show all posts

Monday, June 3, 2013

Highly Addictive Salted Caramel Pretzel Bark

I often make cakes, pies and tarts which require slicing before serving.  If someone wants a piece they need to very deliberately pick up a knife, grab a plate, slice and serve.  However, I really enjoy making things people can  casually snack on, too.  These things don't require knives for slicing, spoons for scooping, or even plates for serving.  These things can just be picked up and popped in one's mouth.  I think these types of things are usually the biggest hit (or at least the type with the least left over).  

This is one of my top favorite "snacking" recipes.  It is pretty easy to prepare, and results in a bite-sized, sweet-n-salty, highly addictive snack.  I found this this recipe on Mama Say What!?  and I'm very glad I did, because this was thoroughly enjoyed by all who snacked on it.  My favorite way to enjoy it is straight out of the freezer!
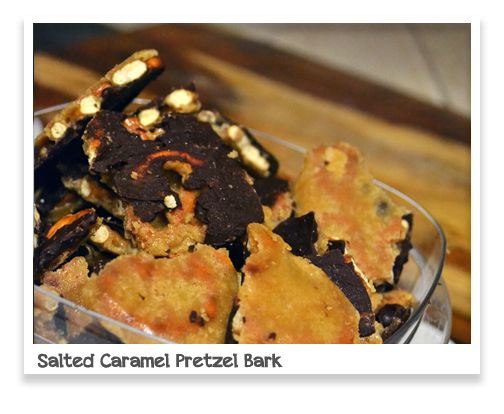
Salted Caramel Pretzel Bark
Ingredients:
1/2 of a 1 lb bag of mini pretzels
2 sticks unsalted butter, room temperature
1 cup lightly packed light brown sugar
2 cups chocolate chips of your choice (I used semisweet)
Fine sea salt (I always use Diamond Crystal)

Preheat your oven to 350 F.

Line a large jelly roll pan (or two 9x13 pans) with precut parchment paper.  Carefully, line the trays with the mini pretzels making neat rows, placing the pretzels right up against each other.  

In a medium saucepan on medium heat, melt the butter.  Add the brown sugar and stir.  Allow the sugar to dissolve and let it bowl gently just until it starts to stick to the bottom and it forms a nice smooth caramel.  Let it bubble and little and get nice and thick.

Remove from heat, and pour evenly over the rows of pretzels.  Put in the preheated over for 5 minutes (this will help the caramel spread out even more evenly).  Remove from the oven and sprinkle the chocolate chips over the top.  Place back in the oven for just 1 minute, and then spread the chocolate chips around with a offset spatula until mostly melted.  

Sprinkle generously with sea salt, and allow to cool at room temperature for a few minutes.  Then place in the freezer for 2 to 3 hours, until completely frozen.  When frozen, break it up into pieces and serve.  (I like to keep it in the freezer until I serve it).  

Sunday, February 19, 2012

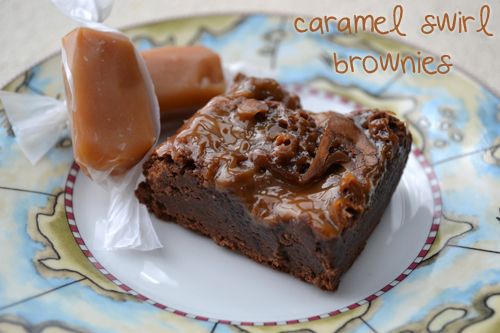
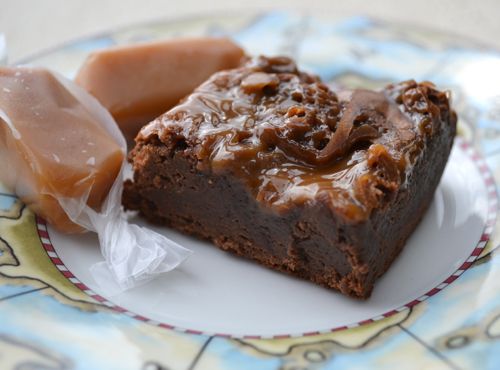
Caramel Swirl Brownies


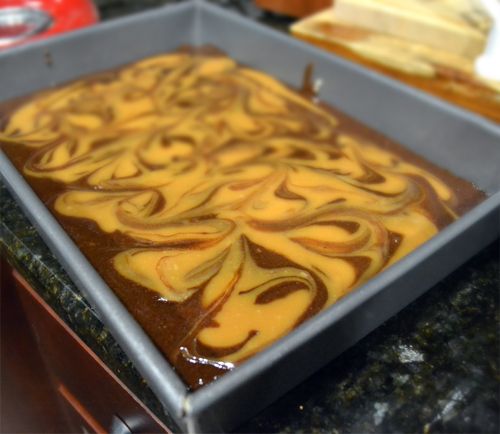
The other night I made homemade soft caramel candies for the first time.  It was a first for me in that I've never made the candy form of caramel - I've done caramel sauce, frosting, and icings before but never candies - and they were very much a success!  But I was far too lazy to wrap all of those little candies up in wax paper squares.  So what to do with the rest of this delicious stuff?  I cut half of the caramel block, wrapped it in wax paper and vacuum sealed it for storage in the freezer until I think of something genius to do with it.  But with about 1/8 of the recipe, I decided to melt it back down with about 2 Tablespoons of heavy cream, and then swirl it on top of brownie batter before baking.  Good decision.  I'm already dreaming of what this would be like on top of blondies...

Caramel Swirl Brownies
Ingredients:

4 (1) oz squares of unsweetened chocolate

3 oz of semi-sweet chocolate chips

3 tablespoons natural unsweetened cocoa powder

1 cup unsalted butter

5 eggs

2 3/4 cups sugar

1 tbsp vanilla

1 1/2 cups all purpose flour

1 tsp sea salt

Grease one 9 x 13 pan. Line the bottom with parchment and lightly grease the parchment.
In a small saucepan over low heat, melt chocolate squares, chips, cocoa powder, and butter. Set aside after it has melted and combined.
Beat eggs, sugar and vanilla at high speed for 10 minutes. Put the guard on your stand mixer bowl - this gets splashy! Add the melted chocolate mixture, salt and flour and mix until just blended. Let the batter sit on the counter for 20 minutes before pouring into the greased pan (half way through this would be a good time to preheat the oven to 375). Let air bubbles escape by dropping the pan on to a counter a few times.

For Caramel Swirl:
Combine approximately 1/8th recipe of Soft Candy Caramels (from Baked Explorations, found here) or around 25 store-bought caramel candies unwrapped with 2 tablespoons heavy cream.  Stir to combine over medium heavy until pourable consistency.  Pour over pan of brownie batter and swirl with a knife.  

Bake for 30 minutes and test with a toothpick. If it comes out clean with only a few crumbs, remove to a cooling rack. Let cool completely before cutting.


Thursday, February 16, 2012

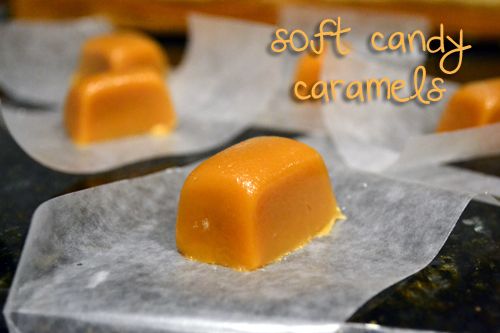
Club: BAKED - Soft Candy Caramels


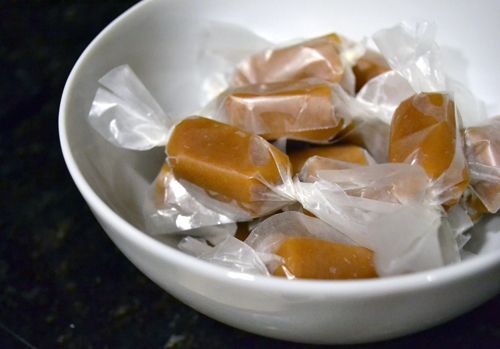
I've made caramel sauces, caramel frostings, salted caramel icings, and more, but never made an actual soft candy caramel.  Now that it was the recipe this week in Club Baked I finally got a chance to make them.  The process was actually quite easy.  Most of the length of time it took to make them was waiting for it to reach the correct temperature.  


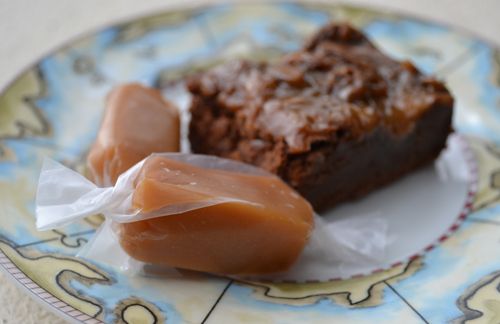
The most tedious part was probably cutting and individually wrapping the little caramels.  And to be honest, I gave up half way through and just wrapped the remaining hunk of caramel in one piece of parchment, vacuum sealed it and froze it for use later.  Also... I could help myself and with about 1/8 or 1/10th of the recipe, I decided to make caramel brownies.  Here's a sneak preview...

These caramels were delicious.  I loved the little taste of salt you get at the end from the sea salt.  They really are quite soft, too - much softer than any store-bought caramel candy.  And surprisingly they don't get stuck in your teeth.


Thanks for hosting, Teri!  Head on over to The Freshman Cook for the recipe, and be sure to visit the list of this week's participating bakers!  and Stay tuned for my Caramel Swirl Brownie recipe soon...

Monday, July 4, 2011

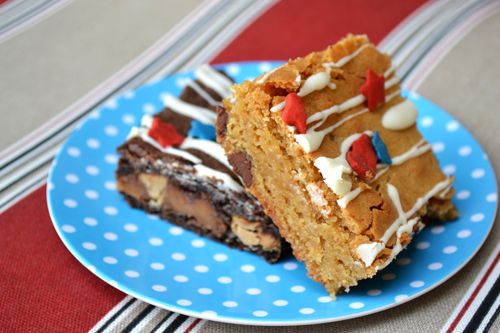
Rolo Brownies and Quick 4th of July Dessert Idea

Happy Fourth of July everyone!  I hope you are all enjoying your day with family and friends, eating lots of food and watching fireworks.  If you are going to a barbecue and you need something to bring, this is a great idea that can be made at the last minute.  


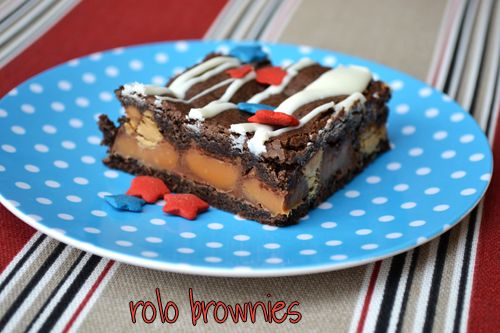
The second I saw these Rolo Brownies on My Baking Addiction, I knew I'd be making them at some point.  When it came time to pick what to make for a Fourth of July party, I thought these would be the perfect thing to bring.  They're pretty quick to throw together - it involves a short cut - a boxed mix, something I very rarely do! But it tastes like homemade.  If you're not a fan of boxed mix flavor, don't worry - neither am I, and these taste nothing like something you get from a box.  Plus, they're quite unique!  I doubt anyone else will be bringing Rolo-stuffed brownies to your barbecue.  


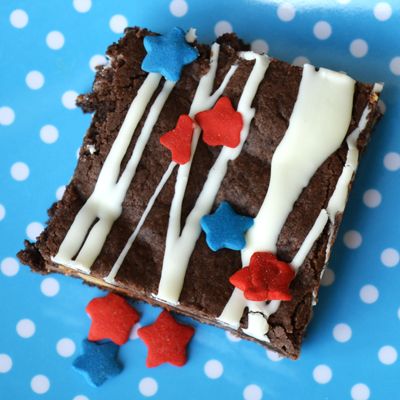
I've added the simplest, quickest Fourth of July decorating idea that will turn these brownies, or any brownie recipe for that matter, into a festive, Star-Spangled dessert.  :)  


Star Spangled Rolo Brownies from My Baking Addiction
Ingredients:
1 box chocolate fudge cake mix
1/3 cup evaporated milk
1 stick unsalted butter, melted
5 packages Rolo (or 40 rolos) unwrapped
Peanut Butter Chips


Preheat to 350 F.  Lightly spray an 8 inch square baking pan with non-stick spray.  Line with 8 in Cake Pan Pre-Cut Parchment Square.  
In a large bowl, combine cake mix, evaporated milk, and melted butter until combined.  Divide the batter in half, set half aside.  With half of the batter, press into the bottom of the prepared pan in an even layer.  Bake for 8 minutes, then remove the pan from the oven and set aside to cool for 10 minutes.
Arrange rolos over the surface of the brownies, close together.  Sprinkle peanut butter chips in all the spaces in between the rolos.  On another 8 in Cake Pan Parchment Square, pat the remaining brownie dough into an 8 inch square.  Turn the parchment over on top of the rolo layer, dough side down, and then peel the paper away.  Bake for another 20-25 minutes.
Let brownies cool completely before removing from the pan or cutting.  


Want the quickest, simplest way to decorate your dessert for 4th of July?  Take any white frosting, microwave for 10-15 seconds are stir until frosting is pourable.  Drizzle over the top of your dessert, and sprinkle with Red and Blue Star Shaped Sprinkles.  Voila!  I used this technique on the Rolo Brownies and on some Blondies I made.  


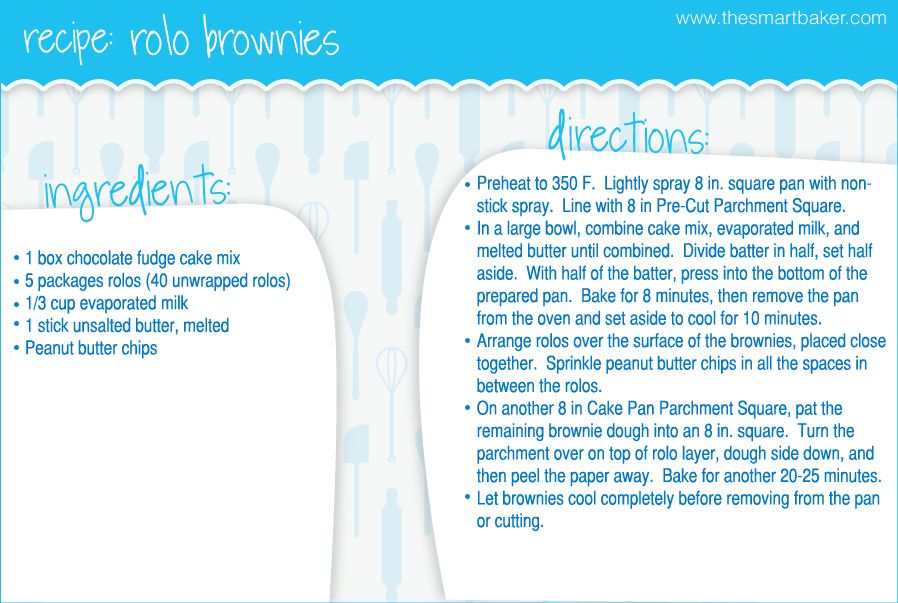
Recipe Card! Click to enlarge:


Thursday, November 25, 2010

Happy Thanksgiving!

Photobucket

I hope you all have a Happy and Healthy Thanksgiving!  

Photobucket

Photobucket

Here are some Turkey Cake Pops (from Bakerella's Cake Pops book) I made for our Thanksgiving dinner.  What are you making this year?

Thursday, November 18, 2010

My Wedding Cake!

Photobucket


I wanted to share photos of my wedding "cake" with you all!  If you are reading this blog, you're likely as obsessed with desserts as I am, so I know you'll appreciate these. :)  And no, I did not wind up making my own cupcakes - as many people warned me not too!  I think it was a very wise decision.  The cupcake tower structure that the cupcakes are sitting on are our latest product on www.TheSmartBaker.com.  It worked wonderfully at the wedding!  We used it in our candy buffet, too for our hand-dipped chocolate covered items.  Yum!  Take a peek!!


Photobucket

Photobucket
My cake topper!  Yep, thats my pup on it, too :)

Photobucket

Photobucket
Here is the tower for the candy buffet.  We had around 40 pounds of other candy, too - like sour watermelons, chocolate covered pretzels, yogurt pretzels, chocolate covered gummy bears, neon sour worms, mini gummy bears, jelly rings, sour belts, and peachy penguins.  Guests got to take home a box full of candy!  We got all of our candy from www.AJsCandyCastle.com


Sunday, October 10, 2010

SMS: Roasted Cashew Brittle

Photobucket

This week, it's my turn to host Sweet Melissa Sundays!  Last time I hosted it was August 2, 2009 so I was so excited to finally host again.  We have been baking along to the Sweet Melissa Baking Book since April of 2009, so a good deal of the recipes from the book have already been selected and baked.  We've made so many delicious things over the past year and a half!   Can you believe we've been doing this that long already?

For the recipe this week, I selected the Roasted Cashew Brittle.  I've never made brittle before and I love cashews so I thought this would be a fun recipe.  I prepared the recipe word for word from the Sweet Melissa Baking Book, no substitutions or changes.  I'm hosting, so I didn't want to mess anything up!  It was actually a rather quick and easy process.

LinkWithin

Related Posts with Thumbnails