Sometimes, you just need a cheesecake. Wouldn't you agree? It's great when said cheesecake is made with Greek Yogurt, so even when you're indulging you can feel just a little bit better about it.
I'm kind of picky about my cheesecake. I'd rather not eat it if it's not amazing. Mediocre cheesecake isn't really worth it for me. Next time I'm feeling cheesecake, I think I'll go the Greek Yogurt route again because it lent the cake such a wonderful texture. It was nice and light, unlike some heavy dense cheesecakes I've eaten. The flavor from the flavored greek yogurts (raspberry and key lime) was noticeable but not over the top strong. Overall this was a great (and SUPER SUPER easy!!) dessert. We had no problem getting rid of the left overs.
Berry Key Lime Cheesecake, from Oikos
Ingredients:
Crust -
9 Graham Crackers
2 Tbsp Granulated Sugar
4 Tbspn butter, melted
Filling -
2 (5.3 oz) single serve containers of Dannon Oikos Key Lime Greek Yogurt
2 (5.3 oz) single serve containers of Dannon Oikos Raspberry Greek Yogurt
4 eggs, rom temperature
1 can sweetened condensed milk
4 Tbsp All Purpose Flour
In the bowl of a food processor, pulse graham crackers, sugar and butter. Pat the mixture into the bottom of a 9 inch spring form pan. Set aside.
In a bowl, combine key lime yogurts with 2 eggs, 2 Tbspn flour and half of the sweetened condensed milk. If desired, add food coloring.
In a separate bowl combine raspberry greek yogurts with 2 eggs, 2 Tbspn flour and half of the sweetened condensed milk. If desired, add food coloring.
Pour Berry mixture on top of the crust. Then slowly pour the key lime mixture on top of that. Swirl with a knife if desired.
Bake a 250 F for 30 - 40 minutes, until the center of set and edges are fully cooked. Refrigerate for at least 3 hours or over-night before serving.
Recent Posts
Thursday, January 31, 2013
Berry Key Lime Cheesecake with Greek Yogurt
Posted by
Stephanie
at
6:16 PM

Berry Key Lime Cheesecake with Greek Yogurt
2013-01-31T18:16:00-05:00
Stephanie
cheesecake|greek yogurt|key lime|raspberry|
Comments
Labels:
cheesecake,
greek yogurt,
key lime,
raspberry
Sunday, January 6, 2013
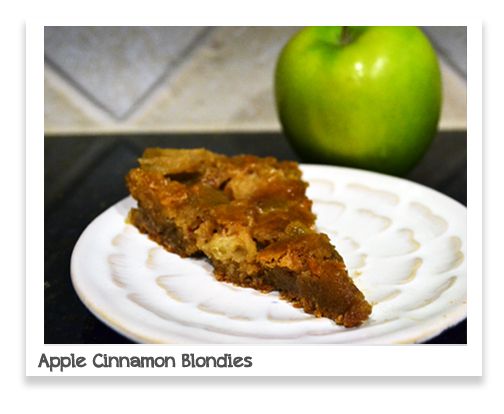
Apple Cinnamon Blondies
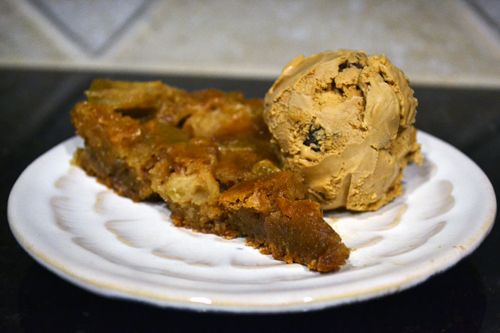
Hard to believe all the Holiday hub-bub is over. Yesterday, we took down our Christmas tree and put away the last of the decorations. I always feel a tiny bit sad when we do that, though it is nice to get that corner of the living room back. Is everyone still in sugar shock from Holiday parties and dinners? That's just not possible for us over here. So if you're like me and you're not in a giving-up-sugar stage, then you may want to make these Apple Cinnamon Blondies. It has all the comforting homeyness of apple pie, but is much much easier. The end result is a moist, sweet, flavorful blondie that is just begging to be enjoyed with a scoop of ice cream on top :) We put Sea Salt Caramel Gelato on top and that may just be one of the best decisions we made all week.
Apple Cinnamon Blondies adapted from Baked by Rachel
Ingredients:
1 1/2 cups lightly packed light brown sugar
1 stick unsalted butter
1 1/4 cups all-purpose flour
1 teaspoon fine sea salt
1/2 teaspoon cinnamon
1/2 teaspoon baking powder
2 large eggs, room temperature
1 teaspoon vanilla extract
1 1/2 cups chopped granny smith apple, skin on (approx. 1 medium apple)
1/2 cup cinnamon mini baking chips (I used King Arthur Flour)
Directions:
Pre-heat oven to 350; spray a 9.5-inch tart pan with non-stick cooking spray, and line 1 small baking dish (1 cupcake, 1 mini springform, etc.) with parchment and set on a large cookie sheet (this way if anything drips, it will fall on your cookie sheet and not the bottom of your oven). Set aside.
Pre-heat oven to 350; spray a 9.5-inch tart pan with non-stick cooking spray, and line 1 small baking dish (1 cupcake, 1 mini springform, etc.) with parchment and set on a large cookie sheet (this way if anything drips, it will fall on your cookie sheet and not the bottom of your oven). Set aside.
Melt butter and brown sugar in a heavy duty saucepan over medium heat stirring constantly; remove from heat and set aside.
In a medium bowl, whisk flour, salt, cinnamon and baking powder. In a separate large bowl, whisk eggs and vanilla. Add melted butter and sugar mixture and whisk until combined. Slowly whisk in dry ingredients just until combined. Fold in chopped apples and cinnamon chips.
Pour batter into prepared baking pans and place cookie sheet in pre-heated oven for 25-35 minutes or until a knife comes out clean from center. The small baking dish will most likely be finished a few minutes ahead of the 9.5 inch tart pan, so keep an eye on it.
Allow to cool almost entirely in the pan. When ready to cut, separate pan by carefully running a knife around the edges and then pushing up from the center of the bottom of the pan.
Subscribe to:
Posts (Atom)


