Recent Posts

Monday, December 3, 2007

Tadaaaa


Originally uploaded by icecreamb4dinner

Here is the cute little certificate I spoke of in the last post. Forget my bachelor's degree, I have a certificate of achievement with my name on it. I think its really nice that a big company would take time out to make something like this for people who send in pictures of their products. So, send your pictures in to Betty Crocker, people! :)

Key Lime Cupcakes


Originally uploaded by icecreamb4dinner

Ok, I made these a very long time ago. A million years ago to be exact. But I've been super busy. I figure, better late than never, right? Especially with these cakies, it'd be doing them a horrible injustice to not post them. They were absolutely delicious, and stayed moist. One of Daniel's coworkers said, "This is the best thing I ever put in my mouth". They were that good.

We had still never used any of that beautiful key lime juice from my trip to Key West in the beginning of September, so when searching King Arthur Flour's website (our new bible for baking) for a recipe to make, we kept key lime juice in mind. We stumbled upon these "Fairy Cakes" as they called them. The only thing we did different from
the original recipe
was to make it key lime instead of regular lime, and make the frosting key lime flavored as well.

"Fairy Cakes" or Key Lime Cupcakes:
3/4 c butter, soft
3/4 c sugar
1 Tablespoons lime zest
1 1/2 c King Arthur unbleached ap flour
1/2 tsp salt
2 tsp baking powder
2 Tablespoons key lime juice
1/4 c milk
3 lg eggs

Preheat to 375
Lightly grease cupcake pan, no paper liners.
Cream the butter, sugar, and zest until fluffy.
Sift flour, salt, and baking powder together, and beat into butter mixture until a paste forms.
Stir in key lime juice and milk.
Add eggs one at a time, scraping the bowl between each one.
Final batter should be nice and light and fluffily.

Bake ~18 minutes, or until slightly golden brown, tops spring back when touched lightly or until toothpick test comes back clean. Cool on a rack for 5 minutes, then remove from pan to cool completely.

Here is our version of the
Vanilla Key Lime Frosting:
2/3 c butter, soft
1/8 tsp tsp salt
4-5 c confectioner's sugar
~1 1/2 tsp vanilla extract
1 tsp key lime juice
1/4 - 1/3 c milk
green food coloring

Beat butter and salt until fluffy.
Add 2 c of the sugar and beat slowly until well blended.
Add the vanilla, half the milk, and the key lime juice. Beat.
Continue mixing in sugar and milk alternately until completely mixed in.
Add green food coloring and beat until light and airy.

One of the funniest things happened as a result of baking these cakelets. My father is a food broker and has Betty Crocker as one of his clients. The green food coloring I used was a new item of theirs, neon food coloring, and the sprinkles were from a Barbie line of cake/cupcake decorations they had put out a while ago. I sent my Dad a picture of the cupcakes for fun, showing the products of theirs that I used. The picture got sent around to various peoples at Betty Crocker, and within a week I got a nice little certificate of achievement for creativity and skill in decorating with a little picture of my cakeys on it.

Saturday, November 3, 2007

Lots of Baking, not so much time...

We've found enough time to bake, but not enough time to record it all on here. Finnnaaallly getting to that now.
We made these chocolate chip cookies about 2 weeks ago (I know, I'm really late). Well, our latest baking kick, King Arthur Flour failed to provide us with a chocolate chip cookie recipe that we deemed good enough. We wanted soft and chewy, not crispy, and we couldn't find it there. After endless searching, we finally found this recipe on epicurious, and it has now replaced my old go-to recipe for chocolate chip cookies (was pretty darn good to begin with, mind you).

We followed this recipe religiously and it produced glorrrrious results. They stayed super fresh in tupperware for over a week. Dan even wound up having to cut these cookies up at work, so everyone could get a piece (luckily, they were bigger than ginormous, so this was possible).

Photo Sharing and Video Hosting at Photobucket

The following week, it was Daniel's sister's birthday, and we were chosen to provide the desserts. We made two dishes, and both were equally spectacular. As the dessert for everyone, we made something my mom told me about a while ago: brownie/chocolate chip cookies. Brownie batter on the bottom, with chocolate chip cookie dough delicately spread on top, and then baked:

Photo Sharing and Video Hosting at Photobucket
They were very, very good. Very.

For the guest of honor, we made the famed Rainbow Cookies of NY.
I have no idea where I got the recipe from, I've had it for years. They take a lot of work and time, but in the end, they're worth it.

Photo Sharing and Video Hosting at Photobucket

Thursday, October 11, 2007

DoughnutMuffin


DoughnutMuffin
Originally uploaded by icecreamb4dinner

Finally back in baking mode. These were baked on Sunday, but I haven't had time to post since then. Since then, we've also made some chocolate chip cookies, so I'll try to post that on here, too. There was a while there were I was far too busy to do anything baking related, but I have managed to find a wee bit of baking time in between studying for exams and doing papers. This time, we decided to go with yet another King Arthur Flour recipe, since we are a little in love with them at the moment. This recipe... ehhhh. Some people said they tasted doughnut, others didn't get it at all. Also, ours came out a wee bit on the dry side, but when they are warmed up a second before eating them, they taste much better. The topping K.A. says to go with is a sprinkling of cinnamon sugar on top of melted butter. But this didn't really do it for me. I think these would be WAY better with a simple glaze or icing on top, like a...doughnut. Plus, it would help with the dry factor. Perhaps we'll try that next time.
Overall these are a nice little not-so-sweet breakfast muffin.
What I do recommend is listening to them when they say to spray your muffin liners. I had never heard of doing that before, and didn't, but after we peeled the first muffin from its paper I could see why you need to. They get a bit stuck to the paper if you don't.


Doughnut Muffins
from King Arthur Flour
the World Wide Web.


Batter
1/4 cup (1/2 stick) butter
3/4 cup sugar
2 large eggs
2 1/2 cups King Arthur Unbleached All-Purpose Flour or King Arthur White Whole Wheat Flour
2 teaspoons baking powder
1 teaspoon nutmeg
1/2 teaspoon salt
1 teaspoon vanilla
1 1/4 cups milk

Topping
3 tablespoons butter, melted*
4 teaspoons cinnamon-sugar*

*These amounts are the "greater amounts" K.A. called for if you want an "extra sugary top" but I couldn't find enough surface area on these muffins top to fit all that on there!

Preheat the oven to 425°F. Line a muffin tin with 12 paper or silicone muffin cups (we did Cupcake sized muffins and made about 18 or so), and grease the cups with non-stick vegetable oil spray; this will ensure that they peel off the muffins nicely.

In a medium-sized mixing bowl, cream together the butter and sugar till smooth. Add the eggs, beating for several minutes and scraping the bowl, till the mixture is smooth and light colored. Beat in the baking powder, nutmeg, salt, and vanilla.

Stir the flour into the butter mixture alternately with the milk, beginning and ending with the flour and making sure everything is thoroughly combined. Spoon the batter evenly into 12 lightly greased muffin cups.

Bake the muffins for 20 minutes, or until they're a pale golden brown. Remove them from the oven, and let them cool for a couple of minutes, or until you can handle them. While they're cooling, melt the butter (this is easily done in the microwave).

Use a pastry brush to paint the top of each muffin with the butter, then sprinkle with the cinnamon-sugar. Repeat the process, if desired. Allow the muffins to cool on a rack.

Sunday, October 7, 2007

Blondies

Since our cinnamon bun recipe from King Arthur Flour's was such a hit, I thought I'd use one of their recipes for some blondies. Now I'm pretty confident that I'll keep continue using recipes from their site, because these were amazing. Besides..um... one trademark Stephanie screw-up, these were really simple and tasty.

What was that screw-up you ask?
Photo Sharing and Video Hosting at Photobucket
Sadie eyeing up the waste.

This recipe calls for one pound of brown sugar, & 1/4 c granulated sugar but once we had got to the last step, ready to throw these babies in the oven, Dan saw the unopened box of brown sugar sitting on the table. OOPS! We tried to mix it in last minute, but started another batch at that moment just in case it didn't work (yes, we have two pounds of brown sugar in the pantry at all times). It was a good thing we made that bake-up batch because the 1st faulty batch never cooked. It stayed in the oven for over and hour and was still liquid when we finally decided to throw it away. At least we got a real good laugh out of it.

But as you can see, the second batch went just swimmingly:
Photo Sharing and Video Hosting at Photobucket
They were moist, sweet, and perfect. Dan brought them into work, and they were a hugeee hit. I definitely recommend this recipe if you are craving blondies.


Blondie Bars
from King Arthur Flour's Website.


1 1/3 sticks unsalted butter, melted
1 pound brown sugar, light or dark (we used light)
1/4 cup granulated sugar
1/2 teaspoon salt
1 tablespoon vinegar, white or cider
3 large eggs
1 teaspoon espresso powder
2 teaspoons vanilla
2 1/2 teaspoons baking powder
2 3/4 cups King Arthur Unbleached All-Purpose Flour
8 ounces chocolate chunks
2 cups coarsely chopped nuts (But we used 3/4 c mini reeses pieces)

Preheat the oven to 350°F. Lightly grease a 9" x 13" pan.

Combine the butter, sugars, salt, and vinegar, stirring to combine. If the mixture is super-hot from the melted butter, let it cool to lukewarm. Add the eggs, espresso powder, vanilla, and baking powder, beating well. Stir in the flour, mixing thoroughly, then the chocolate chunks and nuts.

Scoop the batter into the prepared pan, using your wet fingers to smooth the top. Bake the bars for about 38 minutes, until the top is golden and shiny, and the center is just barely baked through. Use the sharp tip of a knife to peek into the center; it should be very damp, but not unbaked. Yes, this puts a hole right in the center of the pan of bars; but you're going to cut them into squares anyway, and just assume the one with the hole will be yours—baker's privilege!

Remove the bars from the oven, and cool to lukewarm before cutting. A plastic knife will glide right through these sticky bars without tearing them. Serve with ice cream, if desired. To serve bars warm after they've cooled, reheat briefly in the microwave, or slip them into a toaster bag and pop into the toaster.

Yeahhh.... as usual...
Photo Sharing and Video Hosting at Photobucket
How could we resist?

Thursday, September 27, 2007

Cinnabunssss

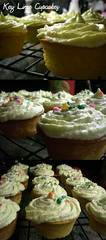
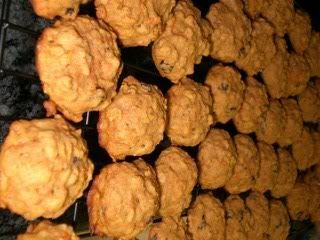
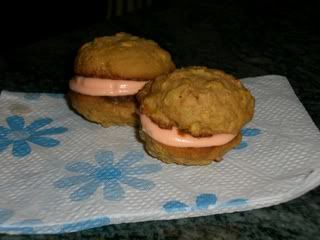
It has been quite a long time since the last post! July was the last time I posted anything, thats pretty depressing. In fact, I don't think we have baked much since then, besides a batch of failed key lime cookies. It is a tried and true recipe but... it doens't come out right when you forget to add the key lime zest. You'd think the cramped fingers and bloody knuckles from 45 minutes of zesting those little suckers would have been enough of a reminder to add that part in, butttt I didn't. When I realized it had been left out, I took the cookie sheets out of the oven, dumped the dough into a bowl & mixed the zest in. We threw them back in the oven, thinking that the one minute of bake time prior to us massacre-ing the dough wouldn't affect the outcome THATmuch. The result was a hideously deformed cookie...that tasted quite good, at least! But I was too embarassed to put those pictures on here. Come to think of it, I talk a lot on here about me forgetting to add in vital ingredients. Oh well.
Half of the reason for not being able to bake is all the school work. Over the summer, my drawing class kept me pretty busy, and now, the regular semester has started back up, and is proving to be the MOST work I've ever had in my college career. Kinda makes me wish I hadn't switched schools and changed majors a hundred times, but c'est la vie. The other reason I haven't had time to bake is because I haven't stopped travelling since June. After our spectacular European cruise, for the rest of the summer, I flew to and from NY every other 2 - 2.5 weeks. It wasn't planned, it just happened like that. A lot of last minute trips to go see friends, the family, & a wedding. Then I went on a second cruise in early September with my family. So, needless to say, I've been busy. But I did notice something recently:
Photo Sharing and Video Hosting at Photobucket
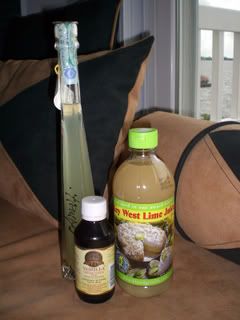
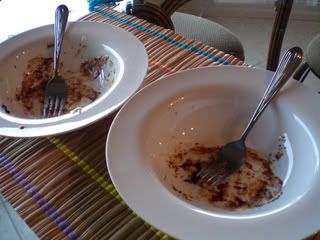
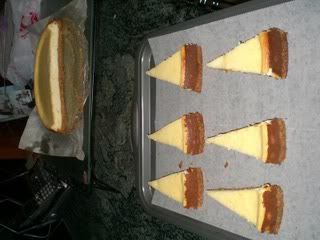
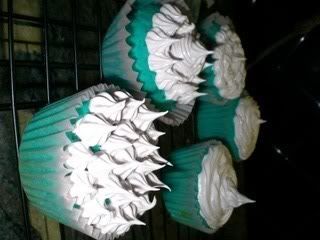
It seems when I travel, what I bring back for myself is baking related.
When we were in Italy, I bought some Limoncello in Amalfi. Since I don't drink, I thought it would make a nice addition to a dessert. Then, on the second cruise, I have specific items in mind from the different destinations I went to. Our first stop was in Key West, where I was hell-bent on bringing back some key limes, which I planned on using in a successful version of the above monstorcities. I was really excited to be able to pick some up, so you can imagine how sad I was when I learned you are not allowed to bring any fruits or vegetables back on the boat. Luckily though, while enjoying a slice of HEAVENLY key lime pie at the Blond Giraffe, I picked up some of their key lime juice. Mexico was our next stop, and I was NOT leaving until I had some pure vanilla extract. Me and Charlie haggled a lady down to $2 and I was set.
The extract was the first of the items to be used. I'd still like to use it in a recipe with less spices so I can taste the vanilla, but this proved successful in this recipe from King Arthur Flour's Website:

Cinnabun Clones:

Dough:
1 cup lukewarm milk
2 large eggs, room temp
1/3 cup unsalted butter, cut up
4 1/2 cups King Arthur Unbleached All-Purpose Flour
1 3/4 teaspoons salt
1/2 cup sugar
2 1/2 teaspoons instant yeast

Filling
1/3 cup unsalted butter, softened
1 cup brown sugar, packed
3 tablespoons ground cinnamon

Icing
one 3-ounces cream cheese, softened
1/4 cup unsalted butter, softened
1 1/2 cups confectioners' sugar
1/2 teaspoon vanilla extract

Combine all of the dough ingredients in a large
mixing bowl, stirring till the mixture becomes cohesive.
Lightly grease the bowl of your electric mixer.
Knead it in the electric mixer using the dough hook for
4 to 7 minutes at medium speed. Place the dough in a
lightly oiled bowl, turn to grease all sides, cover the bowl with a
proof cover or plastic wrap, and let it rise for 60 minutes, till it's
nearly doubled in bulk. (when we made it, it didn't rise at all in 60 min...
but that may be because after we already added it, we realized the
package said "best used before January 2007")

Assembly: Transfer the dough to a lightly greased work surface, and
roll it into a 16 x 21-inch rectangle. Spread the dough with the 1/3
cup butter. Mix the brown sugar and cinnamon, and sift it over the
dough covering it evenly.

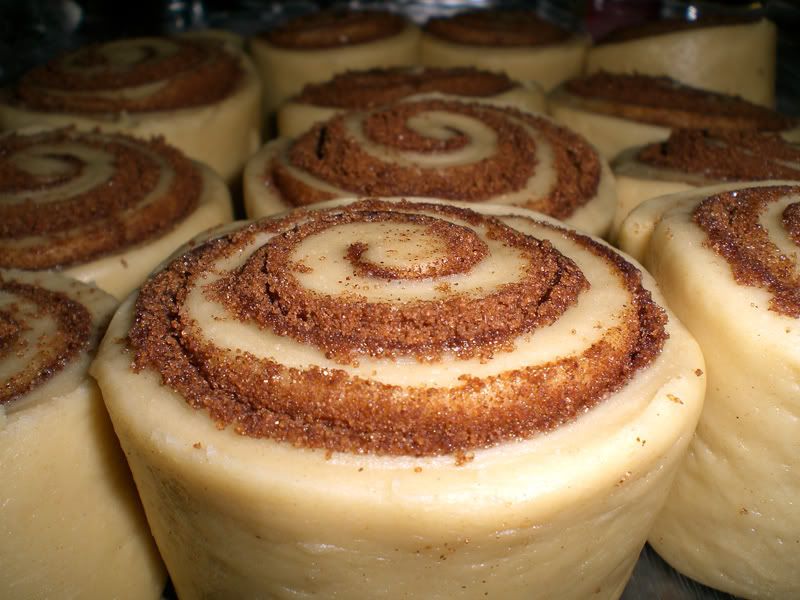
Starting with a long end, roll the dough into a log, and cut it into
12 slices using thread. Place the buns in a lightly greased 9 x 13-inch pan. Cover
the pan with a proof cover or plastic wrap, and let the buns rise
until they're nearly doubled, about 30 minutes. (we skipped this 30 min wait)

Photo Sharing and Video Hosting at Photobucket
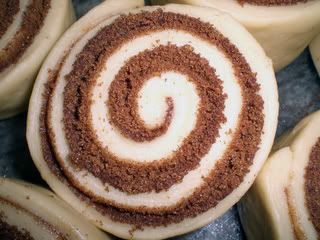
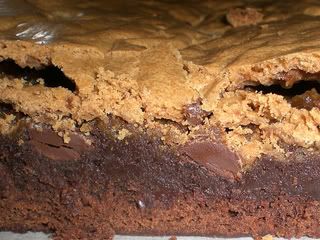
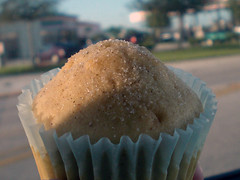
Extreme Sugary Close-up!

Photo Sharing and Video Hosting at Photobucket
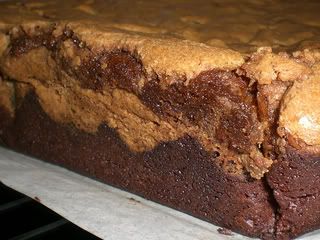
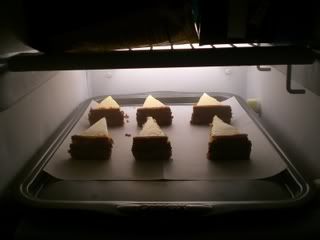
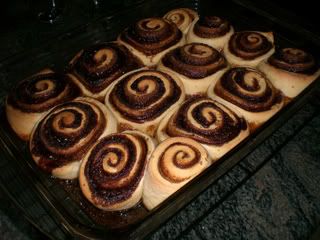
Ready to go in the oven

Bake the buns in a preheated 400°F oven until they're golden brown,
about 20 minutes. While the buns are baking, make the icing.

Photo Sharing and Video Hosting at Photobucket

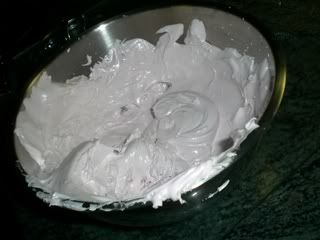
Icing: In a small bowl, beat together the cream cheese, butter, sugar,
and vanilla. Spread the icing on the buns while they're warm.

Photo Sharing and Video Hosting at PhotobucketPhoto Sharing and Video Hosting at Photobucket

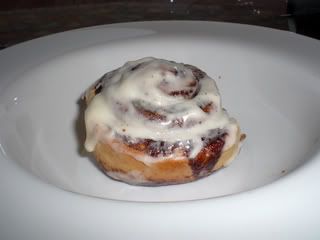
Yield:12 big beautiful buns.

Photo Sharing and Video Hosting at Photobucket

Monday, July 16, 2007

Cheesecake Experiment

We had had the idea to make this for a while, and last night we finally got around to executing it since Daniel's family was coming over for dinner and we had an excuse to make it. Are you curious what it is? Ok, I'll give you a hint, it is quite possibly the most indulgent dessert in history (and maybe one of the tastiest). Still can't figure it out? Another hint? Fine. Ok, what is better than cheesecake? Chocolate covered cheesecake, you say? Yes, you'd be right. And how can you make THAT even BETTER? Put it on a stick, of course!! Yes, we made chocolate covered cheesecake on a stick, with the help of Dan's sister.
Photo Sharing and Video Hosting at Photobucket

First, we had to start with the cheesecake. We made a very very simple cheesecake recipe with a yummy sugary nilla wafer crust.

Crust Ingredients:
3/4 of a box of nilla wafers
1/4 c sugar
a little more than half a stick of butter.

1. Preheat to 350.
2. Lay parchment paper in the bottom of a springform pan, and butter the top of the paper and the sides of the pan.
3. Combine all ingredients together until fully incorporated, and has a crumbly texture.
4. Press firmly into the bottom of the springform pan, and bake for 10 minutes, until slightly golden around the edge.

Simple Cheesecake Ingredients:
2 eight oz packages of cream cheese, softened
2 eggs
1/2 c sugar
1/2 t vanilla extract

1. Beat all ingredients together (yes, its that easy).

2. Add to crust, and bake about 35 minutes.

3. Leave it in the springform pan until it has cooled, then pop open the springform, and drag the parchment paper onto a cutting board.

4. Cut small slices, and then either lay them on a parchment lined cookie sheet,
Photo Sharing and Video Hosting at Photobucket

or take the slices and roll it into a ball, and lay on a parchment lined cookie sheet.
Photo Sharing and Video Hosting at PhotobucketPhoto Sharing and Video Hosting at PhotobucketPhoto Sharing and Video Hosting at Photobucket

5. Stick sticks into them (as far as you can go so it won't slide off your stick when you're chocolate dippin' em)
Photo Sharing and Video Hosting at Photobucket

6. Let them set in the freezer for at least an hour
Photo Sharing and Video Hosting at Photobucket

7. If you're not as lucky as us to get to have a candy store at your disposal, melt chocolate in the top of a double boiler.

8. When your slices/ballies have frozen, hold the slices by the stick, and dip into the melted chocolate. After dipping, return to the parchment paper to go back in the freezer to set the chocolate.
Photo Sharing and Video Hosting at PhotobucketPhoto Sharing and Video Hosting at Photobucket

9. Swizzle & garnish as desired, and Enjoy!!
Photo Sharing and Video Hosting at Photobucket

It makes quite a pretty presentation, too
Photo Sharing and Video Hosting at Photobucket

So, in conclusion, cheesecake is good, but chocolate covered cheesecake is better.

Sunday, July 1, 2007

OOPS! Brownies

Sorry it has been so long since the last post, but I have been busy cruising around the Mediterranean, & training our new beautiful puppy. Ok that sounded boasty… and it was. I had an amazing time cruising from Spain to France, to various places around Italy, and back to Spain with my dad, sister and Daniel.
Photo Sharing and Video Hosting at Photobucket
After the cruise, we flew back to NY to spend a few days there getting over jetlag and hanging out with the family before coming home to Florida. And we spent that time wisely… by eating great NY food (you cannot find a canola in Florida, nor an Eggplant parmigiana like Domenico’s has…not that we hadn’t eaten more than enough on our trip) and also buying a little shih tzu puppy named Sadie.
Photo Sharing and Video Hosting at Photobucket
I’m pretty sure everyone is sick of me talking about her since that is all I do, so I’ll get on with it.

This is the first baking we’ve done since returning home because with puppy-face around, we’ve been too tired to stay up past 10 oclock. It took us 3 days to watch the first Godfather movie, that’s how quickly we fall asleep. But a few days ago me and Daniel were acting like our old selves and decided that we were going to have a ridiculously extravagant dessert later on. Generally that results in freshly made brownies, served warm, and smothered in icecream, whipped cream, chocolate syrup, sprinkles, etc.. (you name it, we’ve had it on a sundae!) I’ve been calling these our OOPS! Brownies since we had to stray from the recipe a few times because… well…oops. I blame it on the fact that we were both so exhausted. This time, we used a different recipe than usual. Jenn had sent this to me months ago, and I finally got around to making it: you can find it here. So we set out to make our brownies, and we were getting all of the ingredients out and measured when we realized, OOPS, we’re out of the chocolate we normally use in brownies. Ok, no biggie. We had a few Dove 71% dark chocolate bars from Dad that we could melt down, these would have to be dark chocolate brownies instead of the usual. Then, OOPS, we only have light brown, no dark brown sugar. Oh well, fine. Then, we had everything all mixed and prepared, and in the buttered pan when OOPS! I realized I never put the vanilla extract in. I quickly went to get it when I realized OOPS AGAIN! We used the last of it right before vacation. So, we used almond extract instead. So, our brownies turned out to be dark chocolate almond brownies. But HEY, upon trying them we realized they were pretty darn good. You could taste the almond, and the dark chocolate definitely gave them a much deeper richer chocolate flavor. Daniel doesn’t usually like almond, and he really doesn’t like dark chocolate, and even he ate almost the whole thing (plus tons the days after we made them, since they really do taste best the day after) So, anyway, here is the recipe, with the OOPS ingredients, not the real ones.

2 sticks unsalted butter
8 ounces dark chocolate
4 large eggs
1/2 teaspoon salt
1 cup granulated sugar
1 cup light brown sugar
2 teaspoons almond extract
1 cup all-purpose flour

Photo Sharing and Video Hosting at Photobucket
Don't you just love that brownie in paradise picture?

1. Preheat the oven to 350.
2. Melt the butter and the chocolate together on low power in a microwave, stirring after every thirty seconds to make sure it doesn’t burn.
3. Whisk eggs together in a large bowl. Then whisk in the salt, followed by the sugars and finally the almond extract (ya, don’t forget that part like I did). Once the chocolate-butter-ganachey type mixture is smooth, stir that into the egg mixture.
4. Fold in the flour.
5. When there are no more clumps in the batter and the flour is fully incorporated, spread evenly in the prepared pan.
6. Bake 35-40 minutes, or until a toothpick comes out clean. Cool in the pan on a cooling rack. For yummiest results, try your hardest to wait til tomorrow until eating!

Tuesday, June 5, 2007

And The Quest Goes On...

During my quest for the perfect cupcake, one of the bloggies that I go to most often featured the most beautifullll little chocolate cupcakes. I bookmarked it thinking I'd probably never get the chance to make them since Daniel doesn't really like chocolate. Fortunately, he got a request for chocolate cupcakes about 3 days later for someone's birthday, and we went straight to this recipe. (I'm not going to post the recipe since I made very few changes, it can be found here - thanks so much for posting it for us!!) We halved the recipe for both the cupcake and frosting, and used little baby muffin sized tins instead, and got 15 of the little cuties.

Photo Sharing and Video Hosting at Photobucket
In the oven, they plumped nice and fluffily.

Photo Sharing and Video Hosting at Photobucket
When they got out of the oven, though, they shrunk down a lot, and very quickly.

Photo Sharing and Video Hosting at Photobucket
But when the frosting was piped on, and some Nestle crunch ice cream topping (a new sample product my dad gave me) was sprinkled on top, they looked quite adorable.

Photo Sharing and Video Hosting at Photobucket
Hehe, cute candle, I couldn't resist the polka dot candle picture, sorry!

We were able to wait until after refrigeration to share a sample, and they tasted amazing! They got quite good reviews - even from 2 people who "don't like chocolate"!!. They were really moist, yet not dense & heavy, & the frosting reminded me and Daniel of a light cheesecakey/mousse flavor and consistency.

One of my go to recipes for chocolate cupcakes now!! Thanks for giving up this recipe to us! The quest for the perfect vanilla cupcake will have to continue, since those are the bf's favorite (and the ones he can eat 5 of for breakfast).

Wednesday, May 30, 2007

Carrot Cake Cookie Sandwiches

We have temporarily put aside the quest for the perfect cupcake to make these cookies. Here is a recipe for carrot cake cookie samiches with cream cheese filling, and since we both can't resist an opportunity to add food coloring to anything-and-everything, we appropriately tinted our filling a lovely carroty shade of orange. I searched for different recipes for carrot cake cookies and kinda combined them all into this one:

Carrot Cake Cookie Sandwiches
1 C packed brown sugar
2 sticks unsalted butter, softened
2 large eggs room temp
1.5 C all purpose flour
1 tsp baking soda
1 tsp baking powder
1/4 tsp salt
1 1/8 tsp cinnamon
1/2 tsp ground ginger
1/2 tsp groung nutmeg
1 2/3 C rolled oats
1 1/2 C finely grated carrots
2/3 C raisins
1 tsp vanilla extract

Preheat to 350 (but not yet, since dough needs to chill for 30 minutes!)
Beat brown sugar and butter until light and fluffy. Add eggs and vanilla, beat until well combined.
In a separate bowl, sift flour, baking powder & soda, the salt, cinnamon, nutmeg and ginger together. Slowly add this to the wet mixture. Once it is combined, add the oats, carrots and raisins in alternately.
Chill 30 minutes in refrigerator. Line baking sheets with parchment paper. Scoop out balls of dough about the size of a ping pong ball. We used a cookie scoop to make nice little bally shaped ones, since these cookies retain their shape after baking for the most part. Bake about 12 minutes, and then pull parchment paper off onto a wire rack to cool.

Photo Sharing and Video Hosting at Photobucket


Cream Cheese Filling
4 oz cream cheese softened
1/2 stick butter softened
1/2 c confectioners sugar
1/2 tsp vanilla
*Note, this does not make enough filling for the entire batch of cookies, since we wanted to have some without. If you want to use a good amount of filling in all of the cookie sandwiches, you should probably double all of these measurements.

Beat butter and cream cheese until smooth and creamy. Slowly add in the sugar, and once combined, add the vanilla (and then the food coloring if you are pigmentally inclined like we are).
When cookies are entirely cooled, pipe a good amount onto the flat side of a cookie, and top with the flat side of another cookie.

Photo Sharing and Video Hosting at Photobucket


Keep refrigerated once frosting is put on. Even when served cold, right out of the frig, these cookies were received very very well, and were veryyyyy moist. Enjoy!

Monday, May 28, 2007

The Quest For THE PERFECT Cupcake

Now that Daniel & I are armed with piping tips and the proper equipment to make pretty cupcakes, I am determined to find THE perfect cupcake recipe, and I will definitely know that I have found it when Dan can eat 3 of them in one sitting (and most likely, in 3 bites or less).

THIS recipe, however... is not the one.

They did look very very cute, but they were a bit disappointing. The cupcake was far too dry, and the frosting turned out initially more like strawberry marshmallow frosting, and then transformed over night into some type of strange meringuey, light, hard topping on our bright blue beauties. Here is the recipe for the cupcake as I used it, almost exactly as it is shown in my little pink book: "500 Cupcakes - the only cupcake compendium you'll ever need".

Vanilla Cupcakes
1 C sweet butter, softened
1 C superfine sugar
2 C self rising flour
1 tsp baking powder
4 eggs
1 tsp vanilla extract
And we um.. added a ridiculous amount of blue food coloring, and a few sprinkles too.

Preheat the oven to 350. Place all ingredients in a medium bowl and beat with an electric mixer until smooth and pale, about 2-3 minutes.
Photo Sharing and Video Hosting at Photobucket

Spoon the mixture into the cups.

Photo Sharing and Video Hosting at Photobucket

Bake about 20 minutes. Remove from oven, cool for 5 minutes, then remove from tins and let cool on wire rack.

Photo Sharing and Video Hosting at Photobucket

Hm.. now that I'm looking at it, I used regular granulated sugar, I probably should have used confectioner's. Maybe thats one reason they're too dry. And yes, I thought the directions asking me to put all ingredients in a bowl and beat were strange, but I followed them anyway.

Strawberry (Marshmallow?) Frosting from Cooks.com
1 C sugar
1/2 C sliced fresh strawberries
1/8 tsp salt
1 egg white, room temp.

In top section of double boiler, combine all ingredients. Beat with electric beater to blend well and dissolve sugar. Place over boiling water and continue beating until frosting stiffens and holds its shape, about 4 minutes beating time. Remove from heat and continue beating until cool, about 2 minutes. Generous topping for large angel food or sponge cake.


Photo Sharing and Video Hosting at Photobucket

Photo Sharing and Video Hosting at Photobucket

Photo Sharing and Video Hosting at Photobucket

Anyway, these were fun, but not eat-8-for-breakfast good, so the quest shall continue.

LinkWithin

Related Posts with Thumbnails