Recent Posts

Showing posts with label espresso. Show all posts

Friday, June 1, 2012

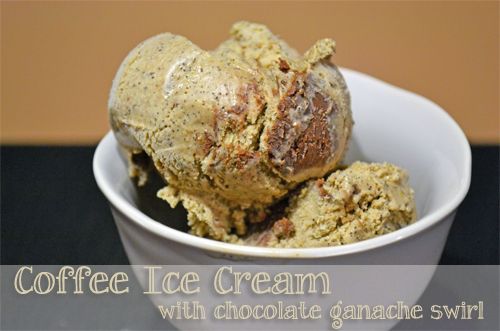
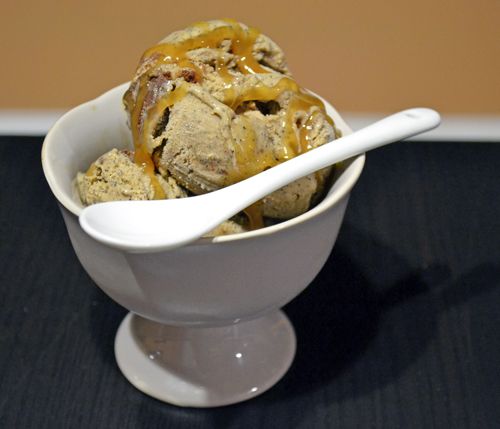
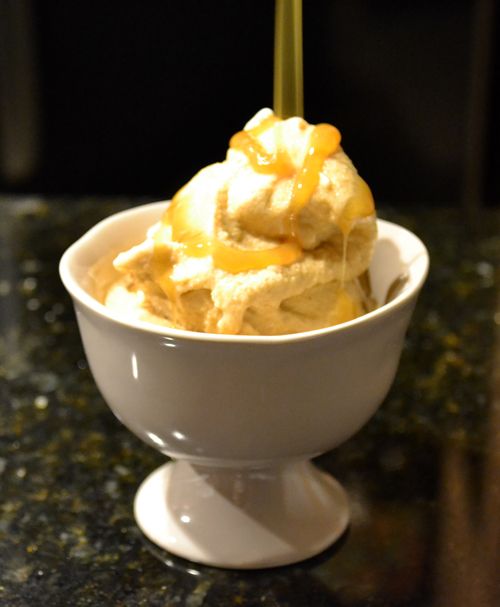
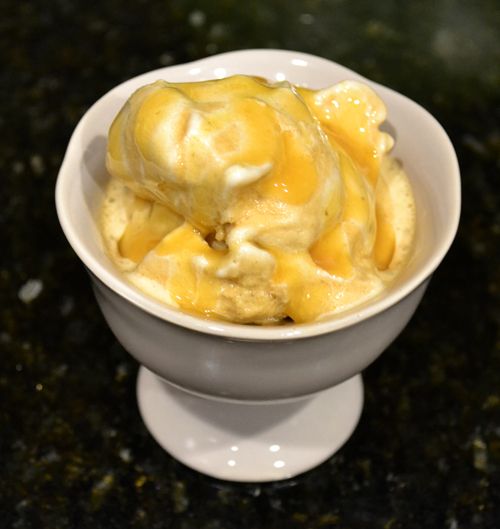
Coffee Ice Cream with Chocolate Ganache Swirl

When I started making Baked Explorations' recipe for Coffee Ice Cream, I realized I've been making a baking mistake for years.  Years!  Throughout all of the espresso flavored things I've made, I've been using Ground Espresso and not Instant Espresso powder.  So instead of dissolving away into a rich coffee flavor and leaving a smooth texture behind, mine has has grinds and flecks of espresso in my baked goods.  Oops!  Well, I had started this recipe when I figured that out, so perhaps this is the last coffee flavored thing I will make the wrong way.  But to tell you the truth, it didn't negatively affect the outcome because this ice cream was absolutely delicious.  So rich and creamy, full of coffee flavor.  It might not be a good idea to have a large serving of this shortly before bed though, because you might be up for a while.


I kept the recipe the same as it was written in the Baked Explorations book with two substitutions.  One being the espresso powder (oops) and the other being 1 tablespoon of Bailey's with Caramel instead of Kahlua - Delicious change by the way!  To see the complete recipe, visit Karen's Cookies, Cakes and More.


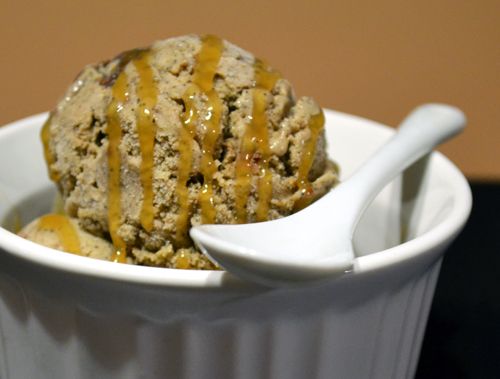
I also made a few additions to make things a little more interesting.  I prepared a small batch of chocolate ganache and swirled it into the ice cream at the last minute to create a chocolate fudgey swirl throughout the ice cream.  My husband wanted to add caramel sauce (he absolutely loves with Caramel Frappucino's and Caramel Macchiato's) but since I was getting a little lazy at this point, we just swirled in store bought caramel sauce.  These two additions made the ice cream out of this world!


Chocolate Ganache from Martha Stewart
Ingredients:
4 ounces semisweet or bittersweet chocolate, chopped
1/4 cup + 2 tablespoons heavy cream
1 tablespoon unsalted butter, room temperature


In a medium sauce pan, heat the heavy cream until just simmering.  Pour over the chocolate and let stand for 30 seconds. Stir until smooth.  Whisk in butter until completely incorporated.  Let cool until desired consistency.  If adding this to ice cream, cool until room temperature before adding to the ice cream.  


Visit Club Baked's website to see how the other bakers did with this recipe!

Sunday, March 11, 2012

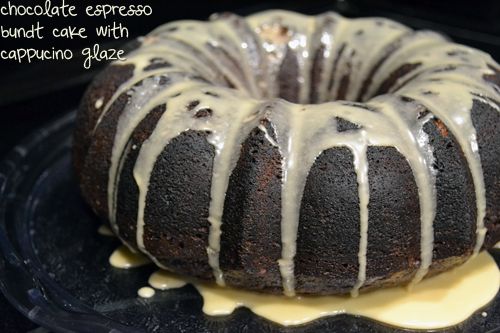
Rich Chocolate Espresso Bundt cake with Cappuccino Glaze

I think Bundt cakes are an under appreciated member of the dessert world.  Just listen to this: Rich, moist Chocolate Espresso Bundt cake with Cappuccino glaze.  Don't appreciate the bundt yet?  Bake this recipe up and you just might change your mind.

Chocolate Espresso Bundt Cake, adapted from A Delightful Dish
Ingredients:
8 oz butter (2 sticks/1 cup)
1/2 cup high quality Dutch process cocoa
1 heaping tablespoon instant espresso powder dissolved into 3/4 cup water
2 cups granulated sugar
1 cup sour cream
1 tablespoon vanilla extract
2 large eggs, room temperature
2 cups all-purpose flour
1 teaspoon baking soda
1/2 teaspoon fine sea salt


Preheat oven to 350° F. Butter and flour a 10-12 cup bundt pan (be care to get into all those little creases in the pan!)
Melt butter in the top of a double boiler set over medium-low heat.  Add cocoa and stir until smooth. Whisk in the espresso mixture and remove from heat. Add the sugar, sour cream, vanilla, and eggs to the warmed cocoa mixture and whisk until smooth. In a medium bowl combine flour, baking soda, and sea salt. Add all at once to the first mixture, whisking just until combined.
Pour batter into prepared pan. Bake for 40-45 minutes, or until it feels firm to the touch and has slightly pulled away from the sides of the pan. Cool in pan on a rack for 20 minutes. Carefully loosen the cake with a knife and invert onto a large plate.

Glaze:
2 Tablespoons of Espresso or very strong brewed coffee
1/2 teaspoon pure vanilla extract
2 - 3 Tablespoons heavy cream
1 cup Powdered sugar

Gradually add the espresso and vanilla to the powdered sugar while whisking constantly, making sure to get any lumps out. Add the cream a bit at a time until you have the consistency you like (you may not use all of the cream). It should be thin enough to drizzle, but thick enough so that it does not all drip off the cake.
Once the cake has fully cooled, use a large spoon to drizzle on the glaze.  Allow the glaze to set before digging in.  I poured some glaze on, allowed it to set, and then poured more on top to make the glaze more visible.  


Thursday, July 14, 2011

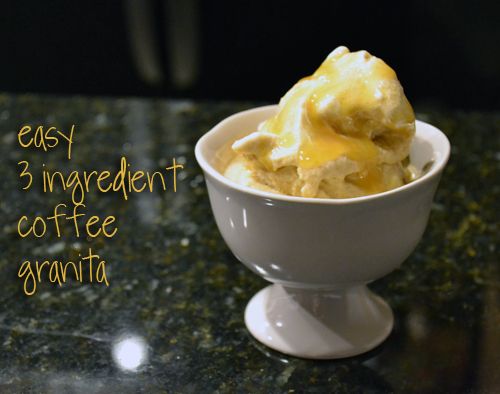
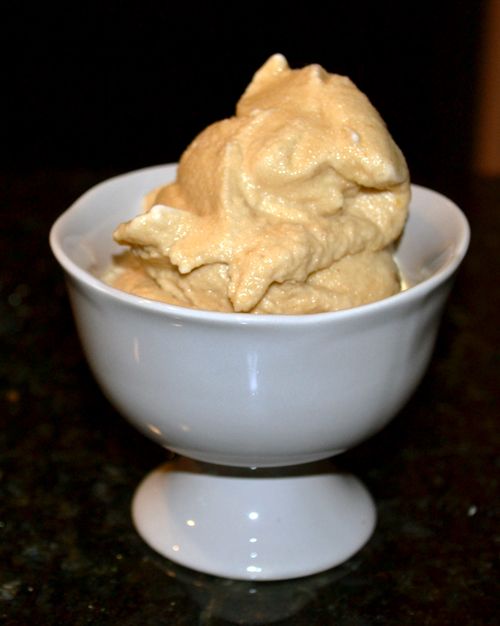
3 Ingredient Coffee Granita


It's hot.  It is crazy hot.  They say, "A dome of heat will bubble over the nation's midsection through the upcoming weekend and is set to expand east next week. Extreme heat is forecast to build across the central United States through the weekend and then spread to the Atlantic Seaboard."  They add we'll probably get into the 100's in many cities.  Awesome.  Here in Florida, the short walk from the air-conditioned house to the car already has you dripping with sweat.  Yick.  What are you doing to beat the heat?  I made this super simple only 3 Ingredient Coffee Granita and it is a terrific way to cool down... only try not to eat it shortly before going to bed. :)


3 Ingredient Coffee Granita
Ingredients:
2 cups very strong coffee (or espresso)
1/2 cup granulated sugar
2 teaspoons pure vanilla

Stir hot coffee with the sugar until sugar dissolves.  Then stir in vanilla.  Place in the fridge to cool the mixture.
Transfer coffee to the bowl of your ice cream maker and freeze according to your ice cream maker's directions (mine churned 25 minutes).  
Serve with whipped cream and caramel syrup for an extra treat!


Sunday, January 30, 2011

Brown Butter Espresso Chocolate Chip Cookies

Photobucket

In my opinion, a chewy, soft chocolate chip cookie beats a crunchy chocolate chip cookie any day.  I love dry, crumbly cookies like shortbread, but when it comes to Chocolate Chip Cookies, they just need to be tender.  
When I first made these cookies, I baked up about half of the batter, and froze the rest.  The first batch came out over-baked them so they were too crunchy for my liking.  But the delicious toffee-like smell of the browned butter and the coffee aroma from the espresso powder was too tempting, and I had to try again for a soft, chewy cookie.  The second batch I baked up were made straight from frozen.  I adjusted the baking time and this time they came out perfect.  They had a slight crunch to the exterior, but gave way to a perfect, soft and chewy chocolate chip cookie center.  The browned butter adds a nice complex flavor to these cookies, but the espresso flavor is too subtle to really notice in the final product... but that didn't stop us from quickly eating up the whole batch.  


Photobucket


Brown Butter Espresso Chocolate Chip Cookies adapted from Healthy. Delicious.
Ingredients:
1 stick unsalted butter
1 Tbsp espresso powder
1 tablespoon water
2 cups all purpose flour
1/2 tsp baking soda
1 pinch fine sea salt
1 cup light brown sugar
1/2 cup granulated sugar
1/2 tsp pure vanilla extract
1 large egg, room temp
3/4 cup chocolate chips/chunks: (I used half Milk Chocolate Chips, and half chunks I created by chopping up a block of Callebaut dark chocolate)


Directions:
In a large bowl, combine flour, baking soda and salt.  Set aside.
Place butter in a small saucepan on medium heat.  Stir occasionally until melted.  Continue cooking until the butter foams up a bit at the top and then turns a golden brown color - at this point it will have a slightly nutty aroma (around 5 minutes).  Remove from heat and allow to cool slightly.
In a small bowl, combine the butter, sugars, and vanilla.  Beat in the egg.
In a small glass measuring cup, microwave the 1 Tbsp water until it boils (only takes a very short time!).  Then, add the espresso powder and stir.  Add to the butter mixture.
Gently mix the wet ingredients into the dry ingredients.  Add the chocolate chips.  [(My dough was very dry.  I pressed it together into a log (about 2 - 2.5 inches in diamter), rolled it in plastic wrap and put it in the fridge for about 30 min to an hour.  After chilling, it was stiff enough to be sliced and hand-shaped into half inch thick cookies.  At this point, you could bake right away (but you'd have to decrease the baking time or you will over bake them!!)  however, I suggest you freeze the dough mounds until firm before baking.)]
Preheat to 365.  Place cookies on a Silpat or parchment lined cookie sheet.  If baking from frozen, bake 11-13 minutes or until edges look set and centers still look slightly moist.  Allow to cool for 5 minutes on the pan, and then remove to cool the rest of the way on a cooling rack.  
Yields about 20-25 cookies.


Photobucket

Photobucket

Sunday, July 26, 2009

King Arthur Fudge Brownies & Coffee Slushy

I've noticed something interesting. At work the other day, a customer came to my window (I'm a drive-up teller). He showed me a pre-printed deposit slip that said, "For ID Only" on it. Having never seen this done before, I was a bit confused. He just handed this deposit slip and a check for me to cash, and repeated, "This is for ID only." Not really understanding his point, I innocently asked him if he had his ID on him. To which he replied, "No, I don't, that's why I've put this deposit slip in here." Now, I don't know if you've ever been a bank teller, but this is not generally an accepted form of identification. I took in his check and deposit slip, and asked the people around me, "Does anyone know Mr. So & So?" To which, a co-worker replied, Oh yes! He's a very good customer, he has a lot of accounts with us. He walked over and said hello to the customer, with a little bit of butt-kissing. The customer told my co-worker THREE TIMES in the following conversation, "Do me a favor, tell that bank teller who I am." Apparently, because he has money, I was supposed to know his identity and break the rules for him. It just kind of made me think, I don't really care if you have a gajillion dollars, or negative gajillion dollars... please don't treat me like that. I was standing righttttt thereeeee.

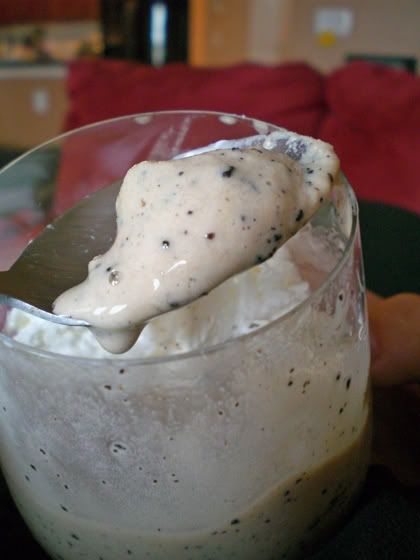
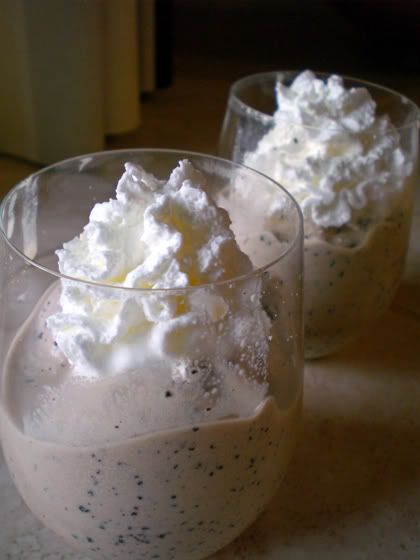
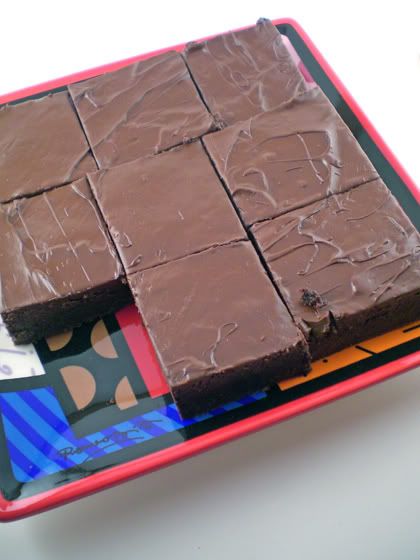
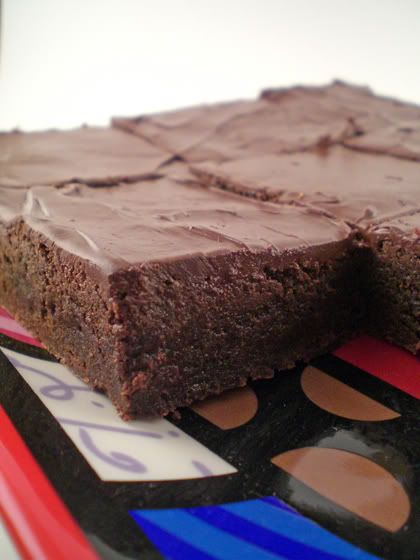
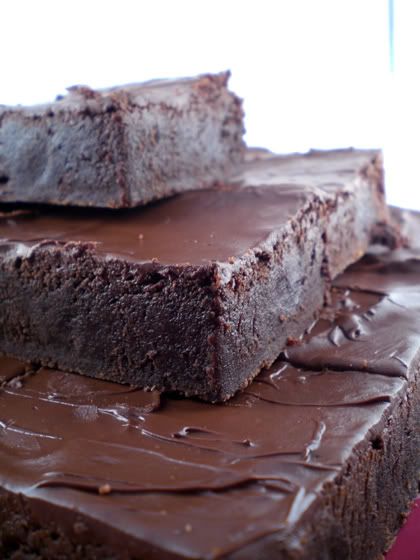
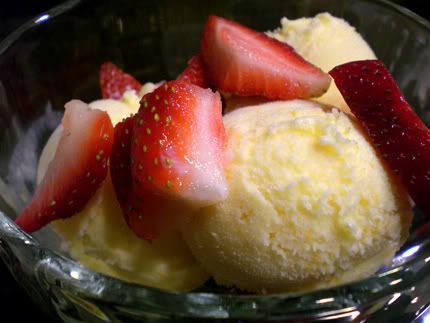
For some reason, this event reminded me of my two most recent dessert-making experiences. Take these photos for example:


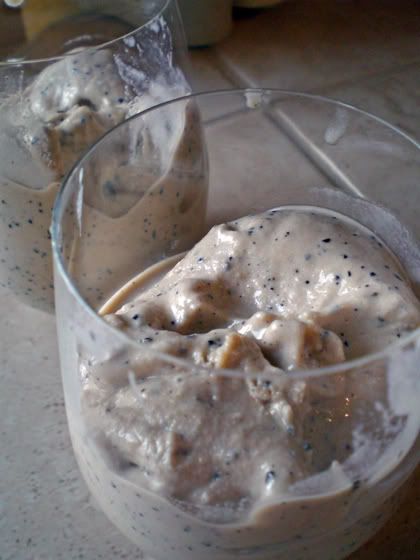
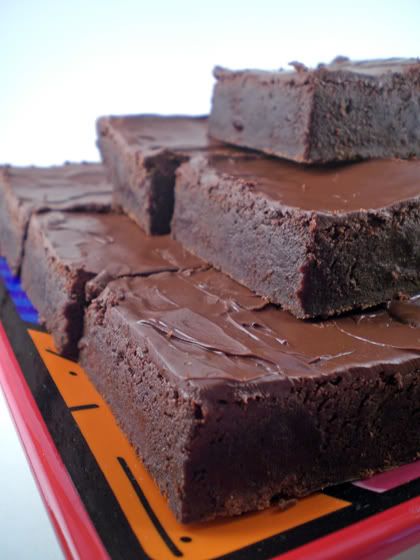
You'd probably think the brownies were much much better, right? Well, it wasn't the case! The brownies were so-so, and the edges were down-right trash-worthy. But the Coffee Slushy... the gloppy, melty, ugly, spotty Coffee Slushy... was Too Die Forrr. I don't care how pretty ya look, as long as you taste good. In a weird way, it reminded me of my encounter with Mr. So & So. I don't care how much money you have or don't have, as long as you're not a doodie-head to me. Sound like a stretch? Maybe. Maybe it's all the frozen coffee deliciousnesssss talking.
*** V.I.P.U. (Very Important Post Update :) -- We retasted the interior slices (not-edge pieces) of brownie later on that night and even the next day... Okay, they tasted much better. Very good and very fudgy! They improved greatly with time! ***

Anyway, on to the recipes. Unfortunately, there will be no SMS this Sunday. But I have two other things to share with you!
First, the delectable Coffee Slush.


I found these instructions for making a nice frozen coffee treat. And since Daniel had just picked up some freshly roasted Snickerdoodle flavored coffee (gasp!) I thought... I'm soooooo there. I only made a few alterations. Here is what I did....

Ingredients:
Slightly less than 2 tablespoons coffee grinds in your favorite flavor
1/2 C sugar
1 1/2 C Low Fat Milk
1 Tablespoon cornstarch

Directions:
Whisk the cornstarch into a half cup of cold low fat milk, beating until lumps are gone. Set aside for a couple of minutes.
Add to the rest of the milk (1 cup). Add sugar and simmer on low heat until the sugar dissolves.
Take 2 - 3 tablespoons of the warm sweetened milk and add to the coffee powder in a cup and beat vigorously with a handmixer until it becomes creamy.
Add this to the heating milk and stir till the custard thickens and is able to coat the back of a spoon without dripping off.
Take it off the heat and cool in an ice-bath for 10-15 minutes.
Put in the frig for about an hour. When thoroughly chilled, put in your ice cream maker for the amount of time your ice cream maker recommends.
Serve in a tall glass topped with whipped cream. DELICIOUS


ON TO THE BROWNIES!

I saw amazing reviews of the King Arthur Flour Fudge Brownies. So, I decided to give this recipe a go for our Sunday family night dinner. When they came out of the oven, I threw a few chocolate chips on top and the warmth of the fresh baked brownies was enough to melt them enough to be spread into a smooth topping with an offset spatula. So, they looked pretty darn pretty! But to be honest, I was a little disappointed. The edges were SO CHEWY that we had to throw them away. But the inside slices were pretty good... Nice and fudgy. I might have preferred the brownies to be a little bit MORE cakey. It was SO fudgy and creamy that it was almost like biting into a slice of fudge.
But judging from the 120+ Positive reviews on King Arthur's website, perhaps something went wrong for me. I might give it a try again and see if it comes out any better. Don't get me wrong, they weren't bad! In fact, I'm sure the family will have no problem gobbling them all up! But I'm just sayin'... I've had better. I followed along with the pictures and instructions from the KA Baker's Banter Blog. The only thing I did differently was to do the butter-sugar heating in the top of a double boiler, rather than the microwave. I DID notice that my chocolate-egg mixture was considerably thicker than theirs looked. Perhaps I'll try again next time with the microwave method.
*** Post Update!! After a re-taste later, these brownies turned out to be quite yummy. Sorry I was so quick to judge you, little chocolately fudgy brownies! ***


Please see King Arthur Flour's website for the Fudge Brownie Recipe, since I didn't really make any changes to it.

PS - Please make sure to check out my super-cool apron if you haven't yet. :) [shameless promotionnnnnn]
PPS - Just wanted to make a shout-out to Karen who purchased one. Hope you're enjoying it, Karen!!

Sunday, March 22, 2009

More Blog Catching up! Awards, Wilton Classes & A Cake

I'm catching up on overdue posts! Back in FEBRUARY (o dio mio, I am behind) the glorious Donna of My Tasty Treasures bestowed upon me the Kreativ Blogger award. Yeyy, Thank you Donna! So sweet! If you haven't yet, you should really go visit her blog. She's hilarious and always whippin up something new and delicious in the kitchen.

I am going to pass this award on to 5 bloggers whose sites I thoroughly enjoy visiting:
*Elyse's Confectionery Creations
*honey & jam.
*Tami's Kitchen Table Talk
*The Cupcake Activist
*Three B's .... Baseball, Baking, & Books

Now, on to the cake. I am taking the Wilton Cake Decorating Classes at Michaels. So far, I have completed Course 1 which "Focuses on basic skills and techniques, from icing prep and simple borders to roses". It is time consuming - there is quite a bit of prep work prior to going to class... course 1 required a cake baked and frosted prior to coming to each class, and also required you to bring several different containers of frosting in different colors & consistencies.... as well as the clean up time once you get home from class. But nevertheless, it was definitely worth it. I really feel like I learned a lot, and more than anything else, it gets you over than FEAR of cake decorating. It was challenging and fun and very useful. Here are some pictures from course 1:

DING DING DING, ROUND 1, FIRST CAKE:

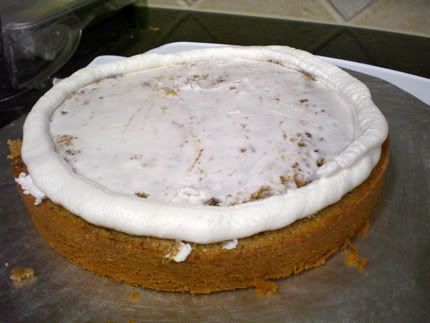
A neat little trick I learned during lesson 1 - How to properly add a filling in a 2 layer cake:

You take your "Thin Consistency Course Buttercream Frosting" (see my post on Sugar Cookie Bars for the recipe and make a very thin layer on the top of your bottom layer. This makes it kinda waterproof, or pudding-proof or filling-proof if you will. It protects the porous cake from absorbing all of your delicious filling. Then pipe a thicker layer of Buttercream Frosting around the outside of the cake like this:
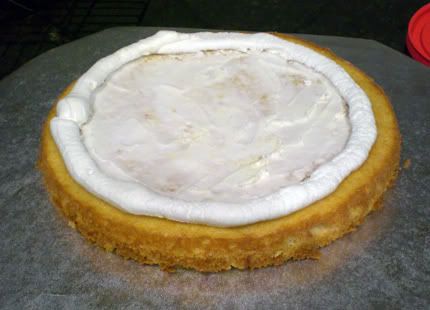

Now, you fill up your circle with your choice of filling (I chose the easy route and used a pudding cup :)
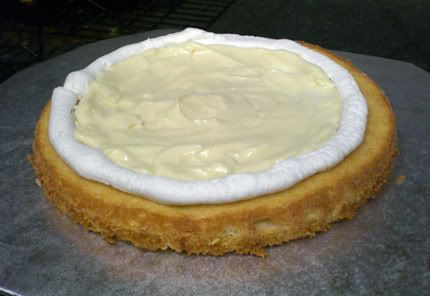
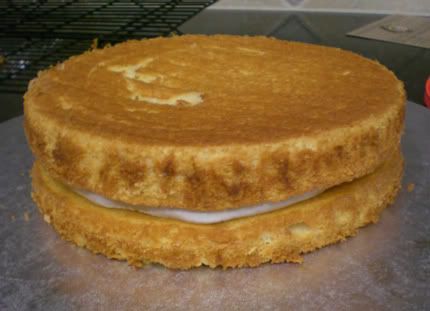
The little frosting dam you created earlier prevents filling leakage once you squish on your top layer...

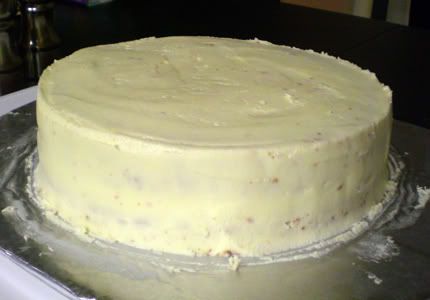
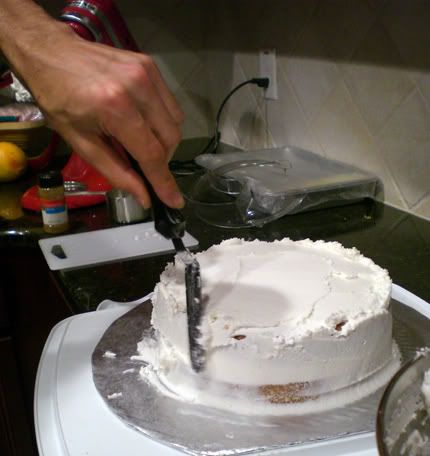
Next, attempt to ice your first 2 layer cake ever.. get fed up because you neglected to do a Crumb Coat (very. important.). Realize you earned your reputation as "The Angry Baker" for a very real reason. Shout expletives and wave your offset spatula threateningly until your more-patient and thoroughly-talented boyfriend offers to help/do the rest of it for you. Thank him and secretly be envious of his cake icing skills...

Finally, bring this cake to class and learned to transfer patterns and pipe decorations using the star tip:
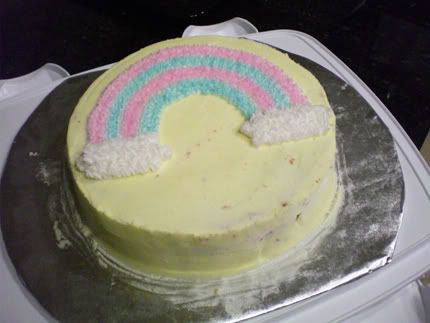
Not bad for a first timer, eh??

DING DING DING, ROUND 2, NEXT CAKE:
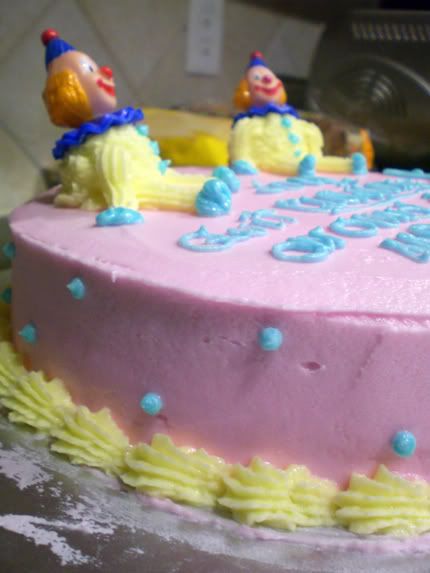
Check out the scallop shell border, and dot piping skills. Ohh yah baby.
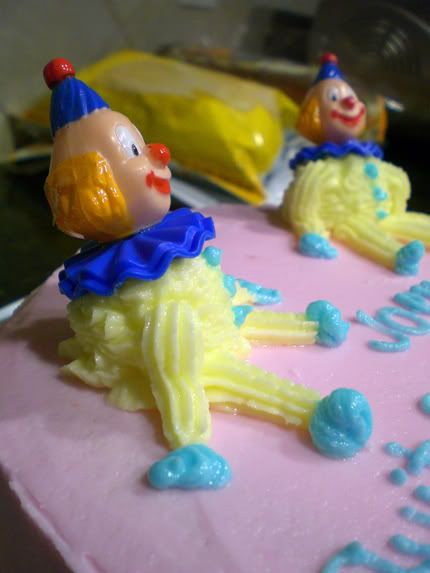

Ok, maybe the clowns could use some improvement.
and yes, Daniel did frost this one for me, too. he's really good, isn't he??

DING DING DING, ROUND 3, LAST CAKE FOR COURSE 2:
And there's a RECIPE with this one! :)

The cakes baked for the previous lessons were a plain ol' white cake. Though they were gobbled up radidly, I thought I'd go with a fancier one for my final cake. Inspired by Vanilla Sugar's Cinnamon Espresso Cake, I decided to alter the recipe to fit my Wilton Course Requirements.

Cinnamon Espresso Cake with Cinnamon Espresso Pudding Filling adapted from Vanilla Sugar, makes enough for (1) 2-layer cake.

Ingredients:
1 3/4 C minus 1 Tblspn sugar
2 1/2 Tblspn cinnamon
2 1/4 tsp espresso powder
2 1/2 C + 2 Tblspn flour
3 tsp baking powder
a dash of sea salt
1.125 C half and half (just estimate its 1 1/8 C)
3 eggs room temp
1 1/2 tsp vanilla
1 & 3/4 sticks butter, melted and cooled
1/2 C miniature chocolate chips
1 pudding cup

1. Preheat oven to 350F and prepare two 8 inch cake pans - use shortening to grease, and dust with flour, shaking out the excess
2. In a small mixing bowl, combine 3 tablespoons of the sugar, with 1 tablespoon of cinnamon, and the espresso powder. Set aside.
3. In a large mixing bowl, whisk the flour, remaining sugar, baking powder, remaining cinnamon and salt together until combined.
4. In a medium mixing bowl, whisk the half & half, eggs, and vanilla until blended together.
5. Pour the egg/cream/vanilla mixture over the flour mixture and gently whisk until almost combined but do NOT overmix!
6. Using a rubber spatula, fold in the melted butter just until the butter is incorporated.
7. Divide evenly between two mixing bowls (this will make the second portion much easier). Take one bowl and pour a little more than half of it into one of your prepared cake pans. Repeat with the other bowl of batter and the other cake pan. Spread evenly.
8. Sprinkle the mini chocolate chips over each of the cake pans and then top with the cinnamon-sugar espresso sugar mixture** (**Be sure to Reserve about 2 tablespoons of this mixture for use later). Top with the remaining batter but dolloping the batter on top of the cinnamon/expresso mixture.
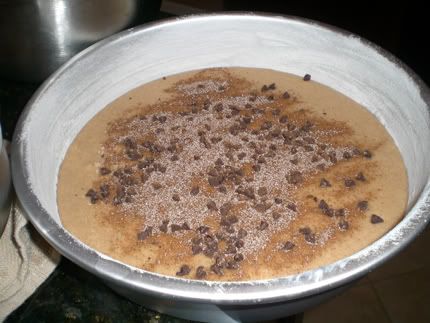

9. Go slowly and lightly, and use your wet fingers to spread it out as much as you can. You want As little of the cinnamon/expresso stuff showing as possible.
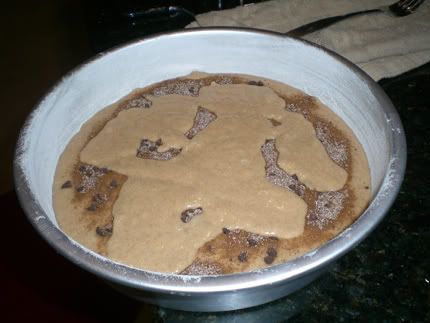

10. Bake for about 25 - 30 minutes at 350F, but start checking for doneness at like 22 minutes. Bake just until a toothpick comes out clean. Let the cake cool in the pan for 15 minutes, then turn out onto a wire rack. Turn it out again onto another rack so it is right side up.
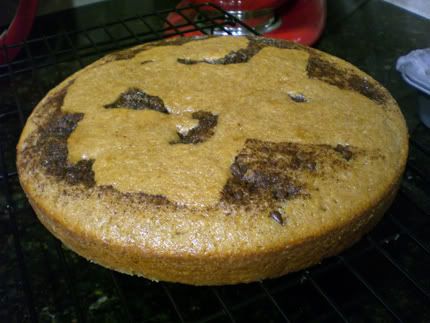

For the filling:
When the cake has completely cooled, create a frosting dam as seen in Cake 1.

Take the reserved cinnamon-sugar espresso mixture and stir into the pudding cup.
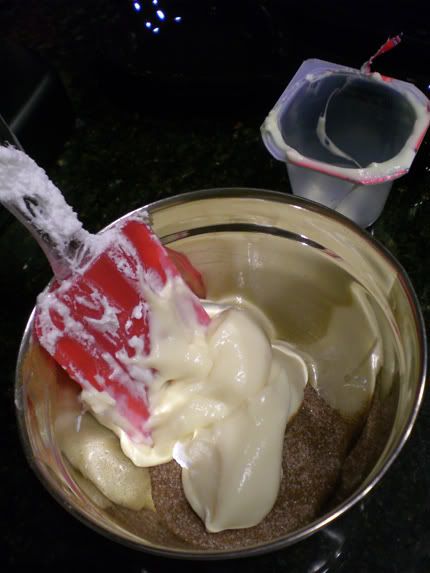

Fill your frosting dam with the cinnamon-sugar espresso pudding.
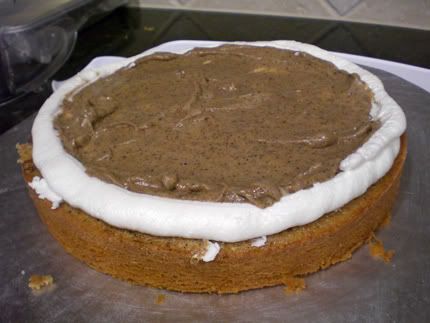

Top with your top cake layer and frost with frosting of your choice!*** (Warning - you may need to level your cakes off before layering them to avoid a cake hump. This may leave you with small scraps of cake filled with cinnamon-sugar espresso powder. Eat at your own risk, it's incredible addictive.)

***or make your boyfriend frost it for you as I did.. check out his skillllsss:

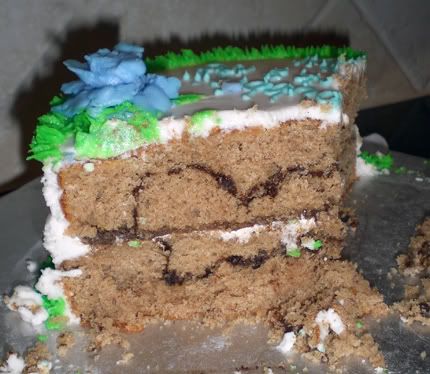
PICTURE BELOW OF FINISHED CAKE AFTER DECORATING DURING OUR FINAL CLASS OF COURSE 1:\
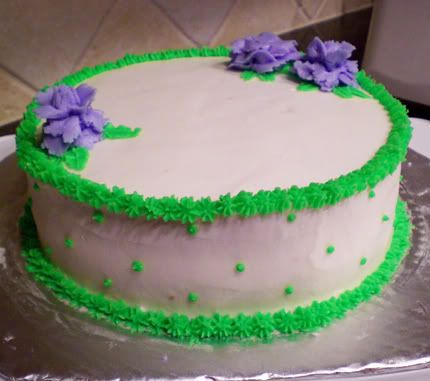

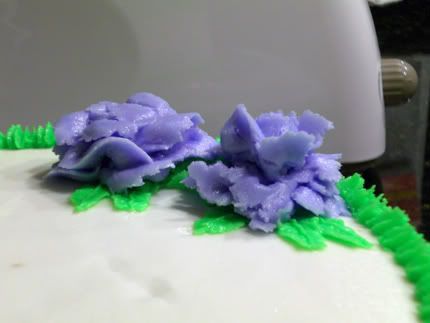
Ok...so my buttercream roses are PATHETIC. I blame it on being the only lefty in the class, quite a disadvantage. But my dots are cute, right?!

Aw, look how pathetic they are up close:
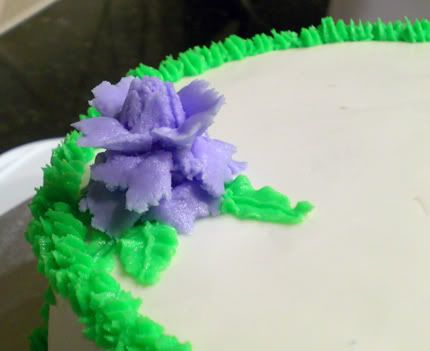


They're a bit wilty but oh well. We learn Royal Icing roses in Course 2, maybe that will be easier!

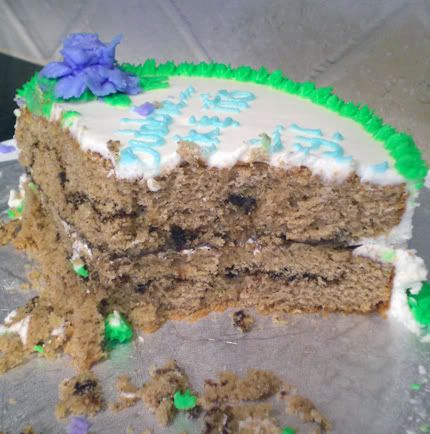
As for the Cinnamon Espresso Cake... delicious.


WHEW, Long post. Course 2 post to come soon!

Tuesday, February 24, 2009

More Ice Cream, Truvia Product Review, and Cappucino

Yet another successful recipe from my favorite Ice Cream recipe book. (I should really be getting paid by their publishers for all the good publicity I'm giving them, right??) This time, we made Orange Popsicle Ice Cream. Just.... take a look.


This might be my favorite one so far. Mmmm....

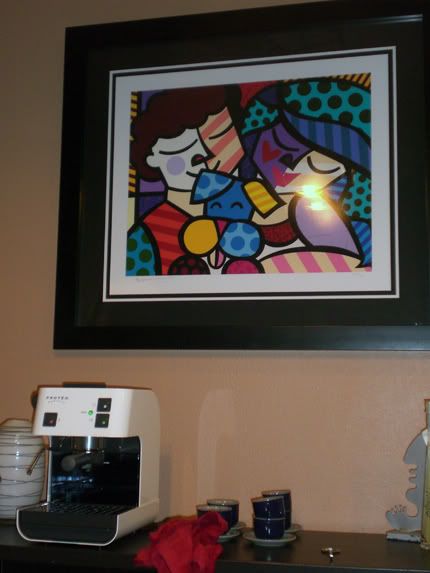
In other news, we've recently added a new piece of artwork to our home...


Oh, yeah the painting is pretty new, too. But I was referring to the espresso machine. After our vacations in Italy, it seemed only natural we'd need to get an espresso machine in our coffee-lovin' household.


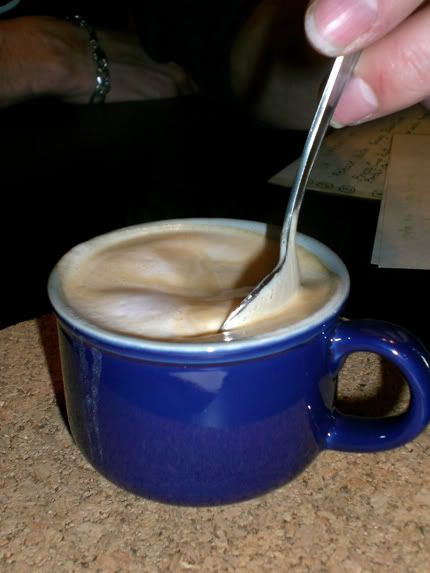
Our first attempt at home made cappuccino!


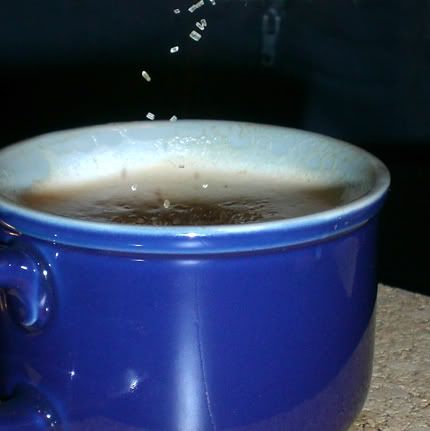
What are we sprinkling in our cappuccino, you ask?

With all the sugar we consume over here at Ice Cream Before Dinner... whether it's in ice cream, brownies, cupcakes, cookies, etc, we don't need any more white sugar in our diet. In our coffee and in a million other applications (I find more and more every day), we've turned to the new zero calorie natural sweetener Truvia.


The taste is not artificial like other no calorie sweeteners, and the fact that it is natural and not some weird mutant chemically altered science experiment is a benefit. Instead of being one molecule away from having the same chemical make up as plastic, this is made naturally from the leaves of the stevia plant. We've switched to using this 100% in our household instead of other sugar substitutes. And I don't know if it's all in my head or not, but you know those rumors/stories that artificial sweeteners jump-start your appetite, making you hungry? I've found that once I switched to Truvia, I can actually wait until lunch time to eat... without getting super hungry between breakfast and lunch. I would definitely recommend it!


Oops, I ate it.

LinkWithin

Related Posts with Thumbnails