Recent Posts

Sunday, December 23, 2012

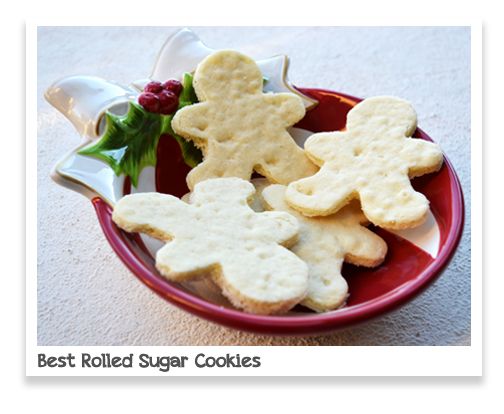
Best Rolled Sugar Cookies

Do you and your family decorate cookies for the holidays?  I'm not sure if it is the extra humidity in the air here in Florida, or if it is my short temper with all things that involve a rolling pin, but the process of rolling out cookies is not one that usually occurs without some kicking and screaming.  No matter how much flouring of the rolling pin and the counter that goes on, and no matter how thorough and frequent the dough chilling is, everything always sticks to what it is not supposed to and the cookie cutters never work like they're supposed to.  So, Daniel and I have developed the slightly wasteful yet much less frustrating and MUCH quicker method of using cookie cutters.  I wish I had taken pictures along the way, but I'll just have to explain as best as I can...

  1. Chill your cookie dough in the refrigerator
  2. Roll out cookie dough in between two sheets of Pre-Cut parchment that fit the size cookie sheet you are using. (By rolling the dough between two sheets of parchment, you won't have to worry about the dough sticking to your rolling pin!). 
  3. Put the cookie sheet back in the fridge to re-chill a little bit. (This step helps the top layer of parchment peel off easily and cleanly so it can be re-used).
  4. Place cookie sheet in the preheated oven to bake one large cookie the size of your cookie sheet.
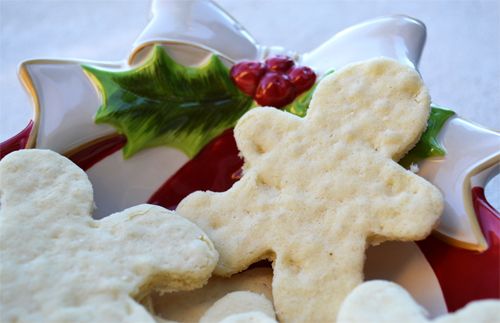
  5. Immediately when your cookie dough is done baking, remove from the oven and slide the parchment to a heat-proof surface (I slide it on to our granite countertops).  While the cookie is still soft, use the cookie cutters to cut cookie shapes out of the baked cookie dough.
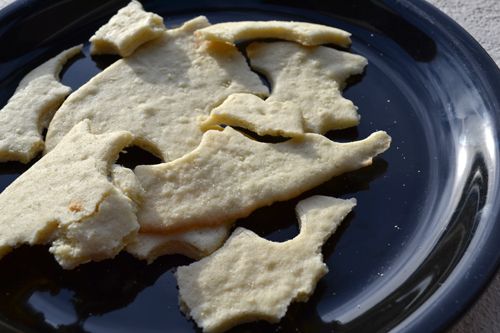
Not only is this method quicker and easier, but you end up with tons of cookie scraps to eat! Ok, so it does "waste" some cookie dough, but I use the term "waste" lightly because Daniel and I ate the cookie scraps for days after.  Another nice thing about this method is that you don't have to worry about the cookie dough puffing during baking and ruining the cute cookie-cutter shape you worked so hard to cut.  

What do you think?  Is this method too wasteful for you or do you think it would keep the peace during all of your holiday baking?  For me, I find it saves my sanity so it is worth losing a few cookies worth of dough due to the cookie scraps byproduct.  

Cookie scraps!

Anyway, this is a new-to-me cookie recipe that I'm quite happy with.  The cookies are nice and soft (a quality many people commented on, "how do you get them so soft??") and flavorful.  I'd say this is a very good basic sugar cookie recipe.


The Best Rolled Sugar Cookies adapted from Allrecipes.com
Ingredients:
1 1/2 cups unsalted butter, softened
2 cups white sugar
4 eggs, room temperature
1 1/4 teaspoon pure vanilla extract
5 cups all purpose flour
2 teaspoons baking powder
1 teaspoon fine sea salt

In the bowl of an electric mixer, cream together butter and sugar until smooth. Beat in eggs and vanilla. Stir in the flour, baking powder, and salt. Cover, and chill dough for at least one hour.
Place about 1/3 of the dough in between two 9x13 sheets of parchment paper.  Using a rolling pin, roll out the dough to about 1/4 inch thickness.  Place dough back on a cookie sheet and place in the fridge for a few moment to re-chill the dough and allow the top layer of parchment to peel off cleanly. 
Preheat oven to 350 degrees F.  Bake cookies about 8 to 12 minutes or until the dough just barely starts to brown at the edges.  Remove from oven, slide the parchment on to a heat proof surface such as granite countertops or a wooden cutting board and immediately cut the soft cookie into shapes with any cookie cutter. Place on a cooling rack to cool completely.  

Sunday, December 2, 2012

Little Girl Cupcake Towers

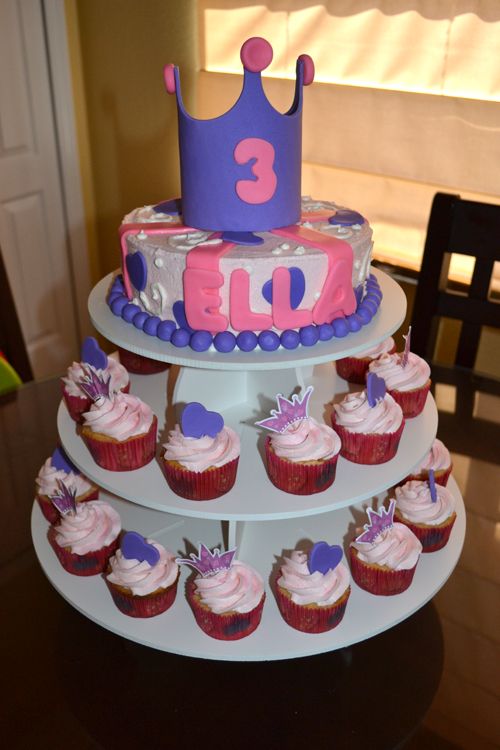
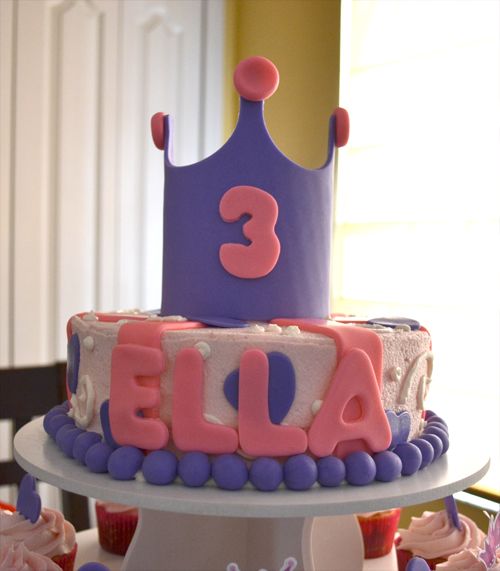
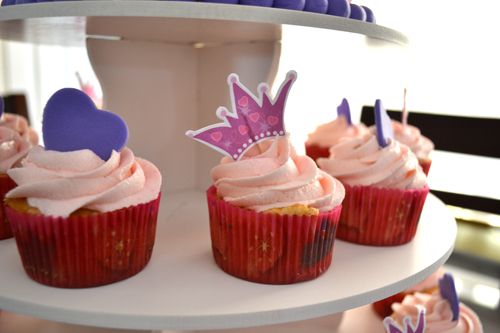
Not sure why I never posted these photos!  In April, both of our nieces have their birthdays.  This year, we celebrated a third birthday, and the girl of honor wanted a pink and purple Princess themed Cupcake Tower.  This is the Princess Cupcake Tower we made for her big day:

We used an 8 inch cake as the top tier...

And cupcakes with paper and fondant toppers as the next two tiers...

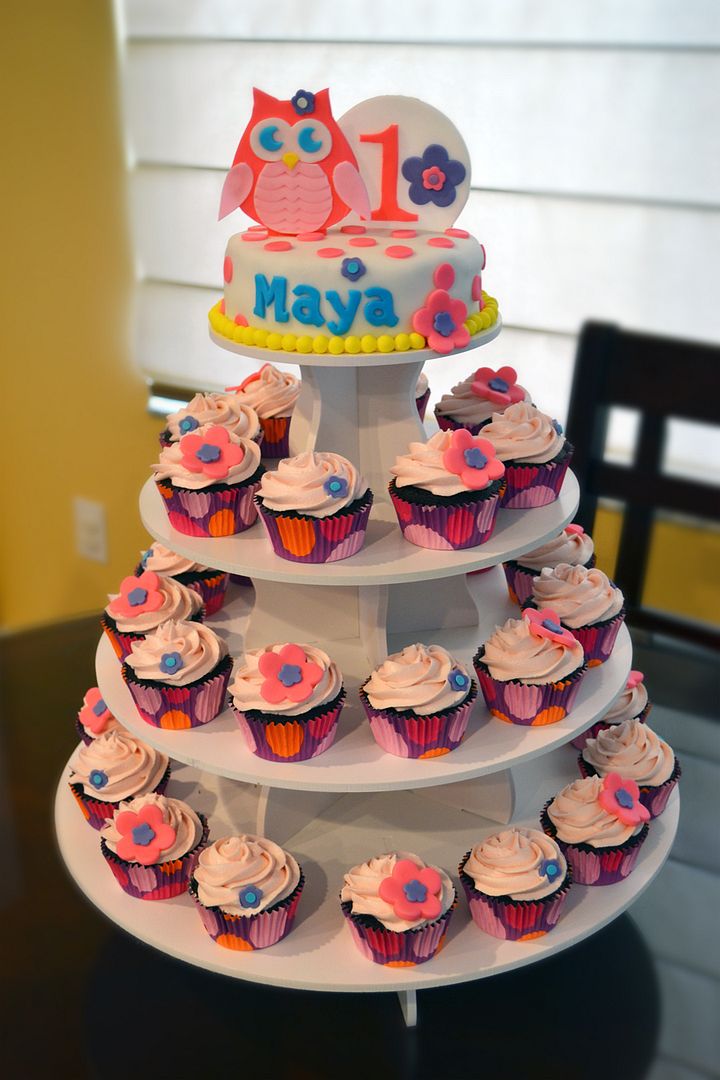
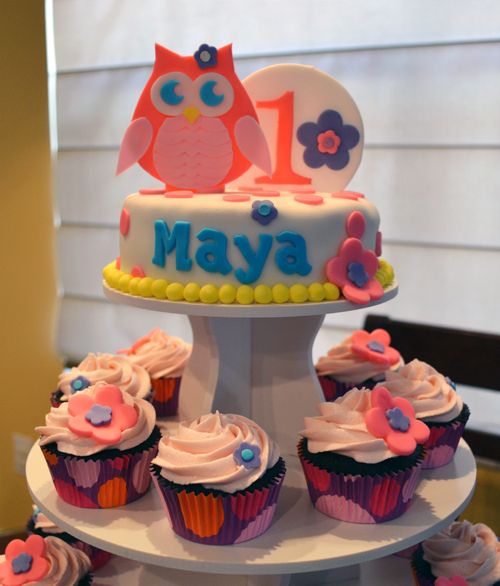
We also celebrated a first birthday!  For this, we made an Owl theme cupcake display with a similar color scheme. This is the Owl First Birthday Cupcake tower we created for this special little girl...

This one had a 6 inch cake as the top tier with a fondant Owl and a fondant One cupcake topper.  The cupcakes all have little fondant flower toppers, too. 

For both of these, I used The Smart Baker's Five Tier Round Cupcake Tower.  It was so much fun to work with such girly colors and themes!  I'm so excited to continue using their girly party themes as cake inspiration as the years go on!

Monday, November 19, 2012

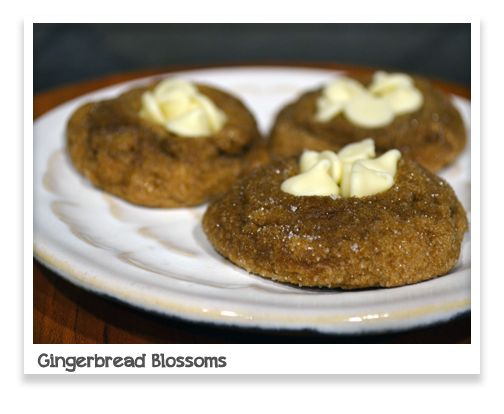
Soft Gingerbread Blossoms

I live practically across the street from a grocery store.  Two grocery stores in fact.  They're less than a 1/4 of a mile away.  Many, many times I have had to turn the kitchenaid mixer off while preparing a dough or batter to make a quick run to go get more eggs or milk that I forgot to buy.  Case in point - these cookies.  I didn't realize until the last minute, after 4 hours of dough chilling, that I needed white chocolate chips to stuff in the freshly baked cookies.  At this point, it was already getting "late" (well, late for me) and I needed to have these finished for work the next day.  Ug!  But luckily, I'm able to hop on over to the store and be back in the kitchen baking within 10 minutes.  Over the almost 5 years of living in this house, I would have ruined many a bowl of batter if I didn't live so close.  Anyone else do this?  I do it a few times a month!

These cookies are definitely worth a trip to the grocery store, even if it's more than 1/4 mile away.  They are soft and tender, and not overly gingery or molassesy.  They're more like a hybrid of gingerbread and a snickerdoodle.  Even non-gingerbread lovers enjoyed these cookies.  Perfect for the upcoming holidays!  Maybe these will find their way to your cookie platters this season.  

Gingerbread Blossoms adapted from Culinary Concoctions by Peabody
Ingredients:
3 cups flour
2 tsp. ground ginger 
1 tsp. ground cinnamon
1 tsp. baking soda
1/4 tsp. ground nutmeg
1/4 tsp fine sea salt
1 1/2 sticks unsalted butter, at room temperature
3/4 cup firmly packed light brown sugar
1/4 cup molasses

1/4 cup maple syrup
1 egg
1/4 cup granulated sugar
1 tsp. pure vanilla extract
approx. 1 cup white chocolate chips


In a large bowl, whisk to combine flour, ginger, cinnamon, baking soda, nutmeg and salt.
Beat butter and brown sugar in the bowl of an electric mixer on medium speed until light and fluffy.
Add molasses, maple syrup, egg and vanilla; beat well. Gradually beat in flour mixture on low speed. Wrap top of bowl in plastic wrap and refrigerate at least 4 hours.
Preheat oven to 350°F. Shape dough into 1-inch balls. Roll in granulated sugar. Place 2 inches apart on parchment-lined baking sheets.
Bake 8 to 10 minutes or until edges of cookies just barely begin to brown. Immediately press about 5-6 white chocolate chips into center of each cookie. Allow to cool completely.

Sunday, October 28, 2012

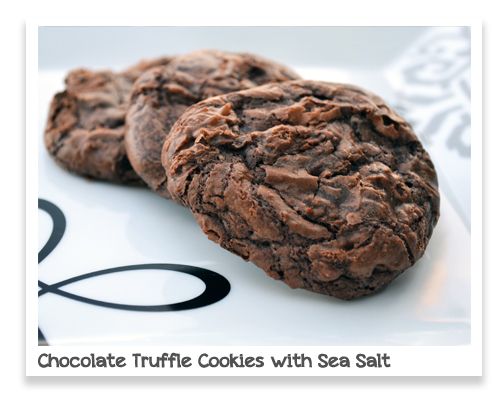
Chocolate Truffle Cookies with Sea Salt

Today is October 28th.  Halloween is just around the corner... and there are already Christmas decorations and advertisements all over the stores and TV.  It does feel like Fall gets a little bit rushed, especially after Halloween is over.  Oh well, might as well start planning those Christmas cookies now then, right? :)

These unique Chocolate Truffle Cookies would be a great addition to any Christmas cookie platter.  They have a nice shiny "crust" (similar to the top of a brownie) and the inside has a texture that combines a chocolate cookie, a rich fudgy brownie, and a chocolate truffle.  And BONUS - they're super easy to make.  

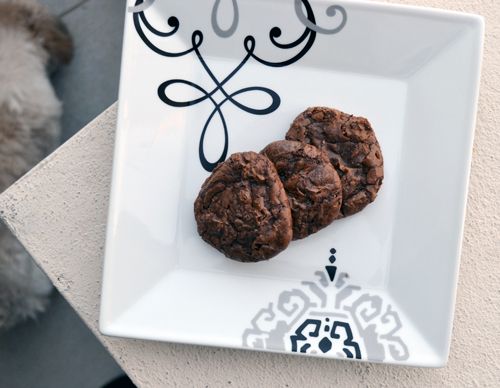
do you see the napping doggy in the picture above?

Chocolate Truffle Cookies with Sea Salt, adapted from Ghirardelli
Ingredients
  • ¼ cup all purpose flour
  • ¼ teaspoon baking powder
  • ¼ teaspoon salt
  • ½ cups dark chocolate chips
  • 2 tablespoon unsalted butter
  • 2 eggs, room temp
  • ½ cup granulated sugar
  • 1 teaspoon pure vanilla extract
  • fine Diamond Crystal sea salt for sprinkling
  • additional 1/3 cup dark chocolate chips (optional) for mixing into prepared dough

Prepare cookie sheets with Precut Parchment paper. Set aside.
In the top of a double boiler, melt chocolate and butter until smooth. Turn off the heat and let chocolate sit over warm water. 
In a small bowl, combine flour, baking powder and salt and mix to combine. 
In another bowl, whisk together sugar and eggs.  Slowly add the warm chocolate mixture. Stir to combine. 
Add vanilla and mix. Stir in flour mixture, mixing just until incorporated, do not over mix. 
If adding chocolate chips to the batter, allow to cool for a few minutes (if batter is too warm, the chocolate chips will melt). Stir in chocolate chips. Then chill for at least 10-15 minutes.
Preheat oven to 350°F. Scoop rounded tablespoons of batter and place on prepared cookie sheet. Sprinkle each cookie lightly with sea salt. Bake for approximately 7-8 minutes until the outside looks slightly cracked. Do not over bake because they will continue to bake a little as they cool once removed from the oven. Cookies should be soft and gooey in the center.


Friday, October 26, 2012

Friday Giveaway!


It's Facebook Friday Giveaway time! We are excited to announce our first super duper collaborative Giveaway from The Smart Baker AND Just Sugar Coat It. Just Sugar Coat It, the place for all things baking, carries baking cups, cookie cutters, tulip cups, and individual cupcake stands and much more! Check out some of the goodies they carry and enter for your chance to win a $40 credit to Just Sugar Coat It. All you have to do is go to www.justsugarcoatit.com and comment on our facebook post with what you would get from them if you won the gift certificate AND like them on Facebook (www.facebook.com/justsugarcoatit). While you’re there be sure to enter their giveaway for your chance to win a $40 credit from The Smart Baker. Winner will be announce on Friday Nov. 2nd, so get your entry in. (Winner will be chosen at random and must comment on this post and be a "liker" of Just Sugar Coat It)


Also, Facebook has recently changed how fan pages are able to reach out to their audience. Only about 10% of our fans are currently receiving posts. TO CONTINUE TO RECEIVE OUR POSTS, move the mouse near the "Like" button on the gear symbol ... Click on it and select "ADD TO THE INTEREST LISTS"...This will allow you to continue receiving our posts. Thanks everyone!

Monday, October 15, 2012

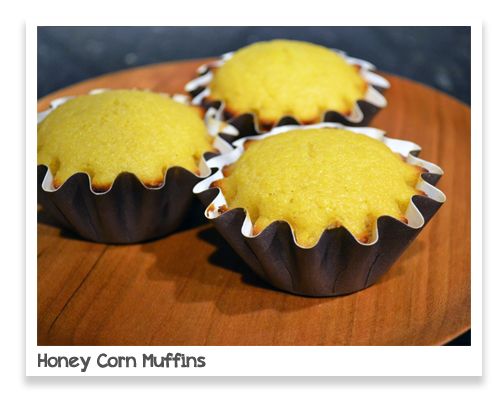
Honey Corn Muffins

When I was younger, I lived on Entenmann's Corn Muffins.  My mom would cut them in half, butter then, and put them in the broiler until they were perfection.  The little brown toasty bits at the edges were my favorite, I'd pick those off and eat those first.  Sometimes, instead of those corn muffins, I'd eat Thomas' Toast R Cakes Corn Muffins (or as little Stephanie referred to them, "flat corn muffins").  I guess you could have called my younger self a mass produced corn muffin connoisseur. 

Grown-up Stephanie still appreciates a good corn muffin.  I'm not going to pretend I didn't ask my mom to pick up a box of my beloved flat corn muffins when I went home to NY this past summer.  But for some reason, I've never made them from scratch before.  After baking this recipe from Baked Explorations, I have no idea why, seeing as they were so quick to throw together.  

This recipe baked up delicious little corn muffins.  I'm not sure I'll ever need to try another recipe since this one was just so good.  Buttery with a perfectly dense crumb.  I ate one (or two) plain without butter or honey, but I think if I were to toast and butter one up, I might just experience flashbacks to my afternoons after getting home from Kindergarten sitting on the couch in my den watching Match Game re-runs.  

Rather than baking them in standard cupcake liners, I used these adorable mini brioche style liners from Just Sugar Coat It.  Instead of 12, I was able to get 18 small muffins (perfect size!).  Let me tell you, I love these liners! They are stiff and hold up well, and make something as plain as a corn muffin look quite fancy.

For the recipe, look to Baked Explorations, or Karen's Cookies Cakes and More. Make sure you visit the blogroll and see how these muffins came out for the other Club Baked bakers. 

Saturday, October 6, 2012

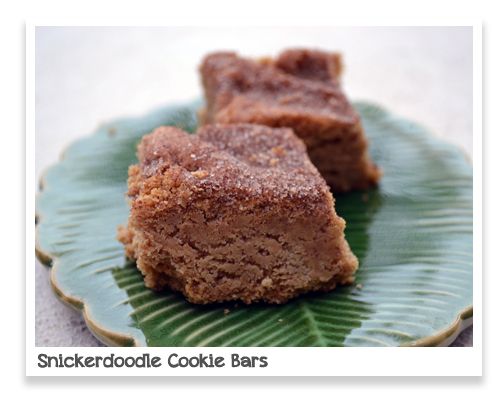
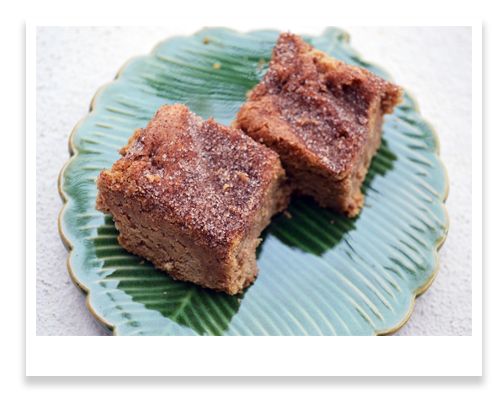
Brown Butter Snickerdoodle Cookie Bars

Are you a soft, chewy cookie person or a crunchy person?  I'm both (darn. I just love cookies) but Daniel is a soft cookie person true and true.  We both love cinnamon so soft cinnamon-sugary Snickerdoodles are a favorite around here.  But to be honest, a lot of the time I am just too lazy to individually roll each dough ball in cinnamon sugar.  It takes a while and I usually make quite the mess in the process (though, to be fair, I make a mess in the kitchen no matter what I'm doing).  So recently when I was in the mood for snickerdoodles but just couldn't get the motivation to go through the cinnamon sugar rolling process, I decided to just press the dough into a 8 inch cake pan.  What a beautiful decision that turned out to be because these Snickerdoodles came out nice and tall and soft.   Lesson learned - take the easy, lazy way out and sometimes, just sometimes, it works out.


Brown Butter Snickerdoodle Cookie Bars, adapted from BAKED Elements, Matt Lewis and Renato Poliafito
Ingredients:

2 sticks unsalted butter
2 3/4 cups all-purpose flour
2 ½ tsp cream of tartar
1 tsp baking soda
1 Tablespoon plus 2 tsp. cinnamon, divided
¾ tsp freshly ground nutmeg
½ tsp fine sea salt
2 large eggs, room temp
1 Tablespoon whole milk
1 cup plus 3 Tablespoon granulated sugar, divided
½ cup firmly packed light brown sugar
In a medium skillet, melt butter over medium heat swirling the pan occasionally until the foam subsides and the butter browns, about 8 to 10 minutes. Pour the browned butter through a strainer directly into the bowl of a standing mixer fitted with a paddle attachment. Beat the butter on low speed to release the heat and bring it to room temperature, approximately 5 to 7 minutes. 
In a large bowl, whisk together the flour, tartar, baking soda, 1 tsp cinnamon, nutmeg and salt.
In a small bowl, combine eggs and milk.  Whisk lightly.
Once butter has cooled, turn off mixer and add 1 cup of the granulated sugar and the brown sugar, and beat on medium for about 2 minutes. Scrape down the sides and bottom of the bowl and beat again for a few seconds. Turn the mixer to low and stream in the egg mixture, continue beating on medium until thoroughly combined.
Add the flour mixture in three parts, beating after each addition for 10 to 15 seconds, or until just barely incorporated. Scrape down the sides of the bowl and gather the dough into a mound in the middle. Cover the bowl and refrigerate for at least 1 hour.
Preheat the oven to 350 degrees F. Line an 8 inch cake pan with pre-cut parchment paper.
Gently press the cookie dough into the prepared cake pan.  In a small bowl, whisk the remaining 3 tablespoons of sugar and 1 tablespoon plus 1 teaspoon of cinnamon until the mixture is uniform in color.  Sprinkle over the cookie dough.  
Bake until a cake tester inserted into the dough comes out clean.  I think mine took about 20 minutes, but I would start checking at about 15 minutes if you want a soft, not dry cookie.
Set the pans on wire racks to cool for 10 minutes. Use the parchment tabs to lift the cookie out of the pan and transfer to a cooling rack to cool completely.

Monday, October 1, 2012

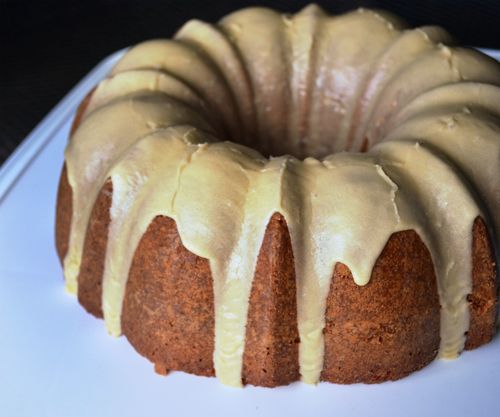
Burnt Sugar Bundt Cake with Caramel Rum Frosting

Burnt Sugar cake?  I've never tasted anything with "Burnt" intentionally in the name (though I've sampled my share of accidentally "burnt" recipes).  The title had me intrigued.  Browed butter (which is kind of "burnt" I guess) adds a delicious nutty flavor to recipes, so I thought Burnt Sugar must do something similarly magical, right?

In this recipe from Baked Explorations, the directions said to melt sugar (just sugar) slowly on medium heat on the stove top.  I was a little scared that I'd burn it, even though the recipe is called "Burnt Sugar Bundt Cake".   I think I've always had something else in with the sugar when I've melted it, like corn syrup or water so the idea of melting sugar and sugar alone had me concerned.  But my fears were all unwarranted because it really was simple.  The sugar melted slowly and without one single problem.  It turned into a delicious smelling caramel after the addition of coconut milk, heavy cream and lemon juice.

The rest of the cake went off without a hitch, too.  Half of the homemade caramel is added right into the cake batter, and the other half is turned into a frosting (though mine was much runnier, and more of an icing or a glaze than a frosting).  With a somewhat intimidating sounding title, the cake really was pretty easy to put together.

I let it rest for one day before serving it (willpower!).  We found it deliciously simple, and I mean that in a good way.  The cake itself it is like a moist, but not at all dense pound cake with a subtle taste of caramel/burnt sugar.  The frosting is very sweet and compliments the cake perfectly.  Everyone will enjoy the flavor of this cake, even the kiddies if you choose to make the caramel rum frosting into a caramel vanilla frosting like I did...simply use 1 tsp pure vanilla instead of 2 Tbsp rum.  


Burnt Sugar Bundt Cake Recipe
Ingredients
For the Burnt Sugar Liquid
½ cup granulated sugar
½ cup heavy cream
approx. 3/4 cup coconut milk
1 ½ tablespoons fresh lemon juice

For the Bundt Cake
3 cups all-purpose flour
1 teaspoon baking powder
½ teaspoon baking soda
1 teaspoon salt
1 ¼  cups unsalted butter (2 ½ sticks), room temperature
2 cups granulated sugar
4 large eggs, room temperature
1 teaspoon pure vanilla extract
Burnt Sugar Liquid (see above)

For the Caramel Rum Frosting
1/2 cup (1 stick) unsalted butter
2 tablespoons dark rum (OR 1 tsp pure vanilla extract for an alcohol free version)
2 1⁄3 cups confectioners’ sugar
Burnt Sugar Liquid (see above)

Make the Burnt Sugar Liquid
In a medium saucepan over medium heat, slowly melt the sugar. Use a wooden spoon to stir it continuously to ensure even melting. When the sugar turns a dark caramel color, remove the pan from the heat and slowly stream in the cream while continuing to stir (don’t worry if mixture starts to clump). Return the pan to medium heat and stir until completely combined; cook for 2 minutes longer, stirring. Transfer the burnt caramel mixture to at least a 2-cup heatproof liquid measuring cup (like Pyrex) and add enough coconut milk to make 1 1/4 cups liquid. Add the lemon juice. Whisk to combine, divide the mixture in half, and set both portions aside.

Make the Bundt Cake
Preheat the oven to 325 degrees F. Generously spray the inside of a 10-inch Bundt pan with nonstick cooking spray; alternatively, butter it thoroughly, dust it with flour, and knock out the excess flour. In a medium bowl, whisk together the flour, baking powder, baking soda, and salt.  Set aside. In the bowl of a standing mixer fitted with the paddle attachment, beat the butter and sugar until pale and fluffy. Scrape down the bowl and add the eggs, one at a time, beating until each is incorporated. Add the vanilla and beat for 5 more seconds. Retrieve one of the reserved portions of burnt sugar liquid. Add the flour mixture in three parts, alternating with the burnt sugar, beginning and ending with the flour mixture. Scrape down the sides and bottom of the bowl and beat again for 10 seconds. Pour the batter into the prepared pan and bake for 45 to 50 minutes, or until a small sharp knife inserted into the center of the cake comes out clean. Transfer the pan to a wire rack to cool completely. Gently loosen the sides of the cake from the pan and turn it out onto the rack.

Make the Caramel Rum Frosting
Put the butter, rum, confectioners’ sugar, and remaining portion of burnt sugar liquid in a food processor. Pulse in short bursts until the frosting is shiny and smooth. Use an offset spatula to spread the frosting over the crown of the Bundt in a thick layer. Let the frosting set before serving.

Be sure to check out the other Club Baked bakers' versions of this Baked Explorations twist on a traditional Bundt!  I hope they enjoyed it as much as I did. 

Monday, September 17, 2012

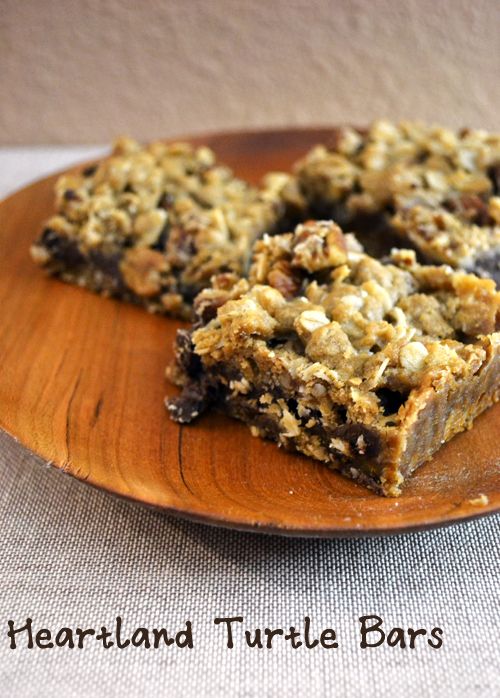
Heartland Turtle Bars

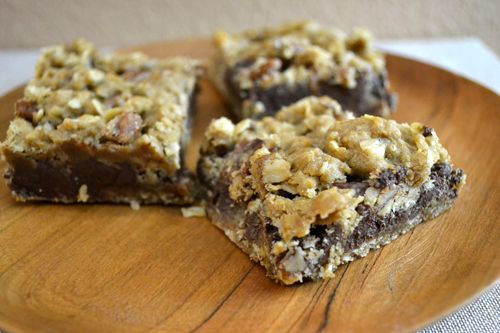
How do you feel about nuts in your baked goods?  A lot of people love mix-ins like walnuts in their brownies and peanut in their cookies.  But a lot of people absolutely hate that, too.  I don't really care either way.  While I don't hate nuts in desserts, I don't love it either.  So a dessert like Heartland Turtle Bars with toasted chopped pecans is not something I'd pick out to make, but I'm glad it came up in Club Baked.  These were simple to make and they were a total hit.  The oatmeal cookie part is nice and soft, and the pecan adds a little bit of a crunch.  The caramel recipe was very low maintenance and a cinch to throw together.  I definitely would not hesitate to make these again.... and I may have to because I want to eat them again :) 
Thanks to Julie for hosting and selecting this recipe!  It got me baking "outside of my box" and we absolutely loved it.  Be sure to visit Julie's site, Little Bit of Everything for the recipe and visit the Club Baked site to see how the other bakers' Turtle Bars came out.  


Sunday, September 2, 2012

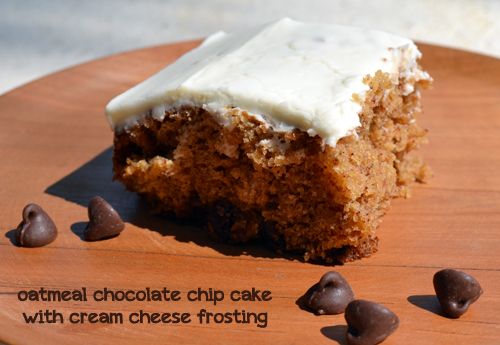
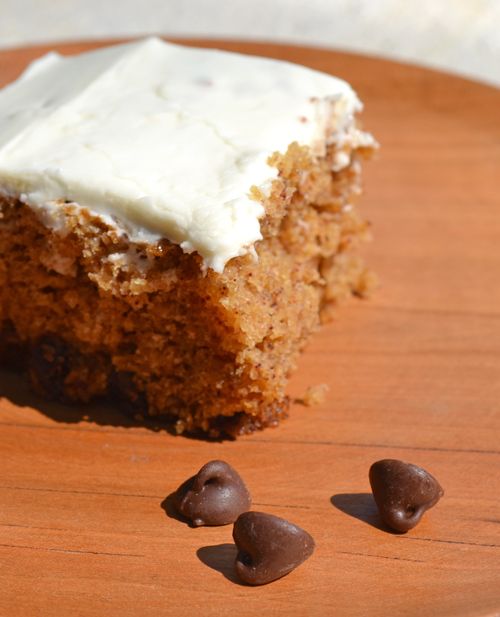
Oatmeal Chocolate Chip Cake with Cream Cheese Frosting

What is your favorite place in the house?  To many of us bakers, I'm sure the consensus is: Kitchen!  I always have all the tools I need right at my fingertips.  It is set up exactly the way that I find it works best for us.  I think thats why baking is a stress-reliever for me.  Despite whatever happens to be going on, my measuring spoons are always exactly where they belong and my mixing bowls can always be found neatly stacked in the cabinets... that is, unless I find out I left out an essential ingredient when the bake-saster is already in the oven, or something sticky boils over all over the stovetop (not that that EVER happens... ever).  

Speaking of stress-relieving, a slice of this cake would be the perfect answer to a stressful week.  It is quite easy to throw together and uses things most of us probably already have in the pantry.  It is large enough to feed a good amount of people at a gathering (9 x 13!), and it is definitely comfort-foody in a I-Taste-Like-A-Big-Oatmeal-Chocolate-Chip-Cookie way.  You could even sneak a piece in for breakfast during those particularly chaotic weeks, I won't judge you.  So, if you need something comforting and delicious thats easy to prepare, this is the cake for you.

Check out Jamie's blog Cookin' with Moxie and or the Baked Explorations cookbook for the recipe.  


Sunday, August 26, 2012

Cookie Dough Cream Pie and a New Product

When you bring a cake to an event, do you normally get asked to cut said cake at dessert time?  I sometimes do.  While I can bake up and decorate a cake nice and pretty, I can do no such thing when it comes to cutting slices.  They are generally all different sizes, even though I try to take into account people's specific requests like, "I only want a liiiitle piece," or "Oh, give me a normal sized piece."

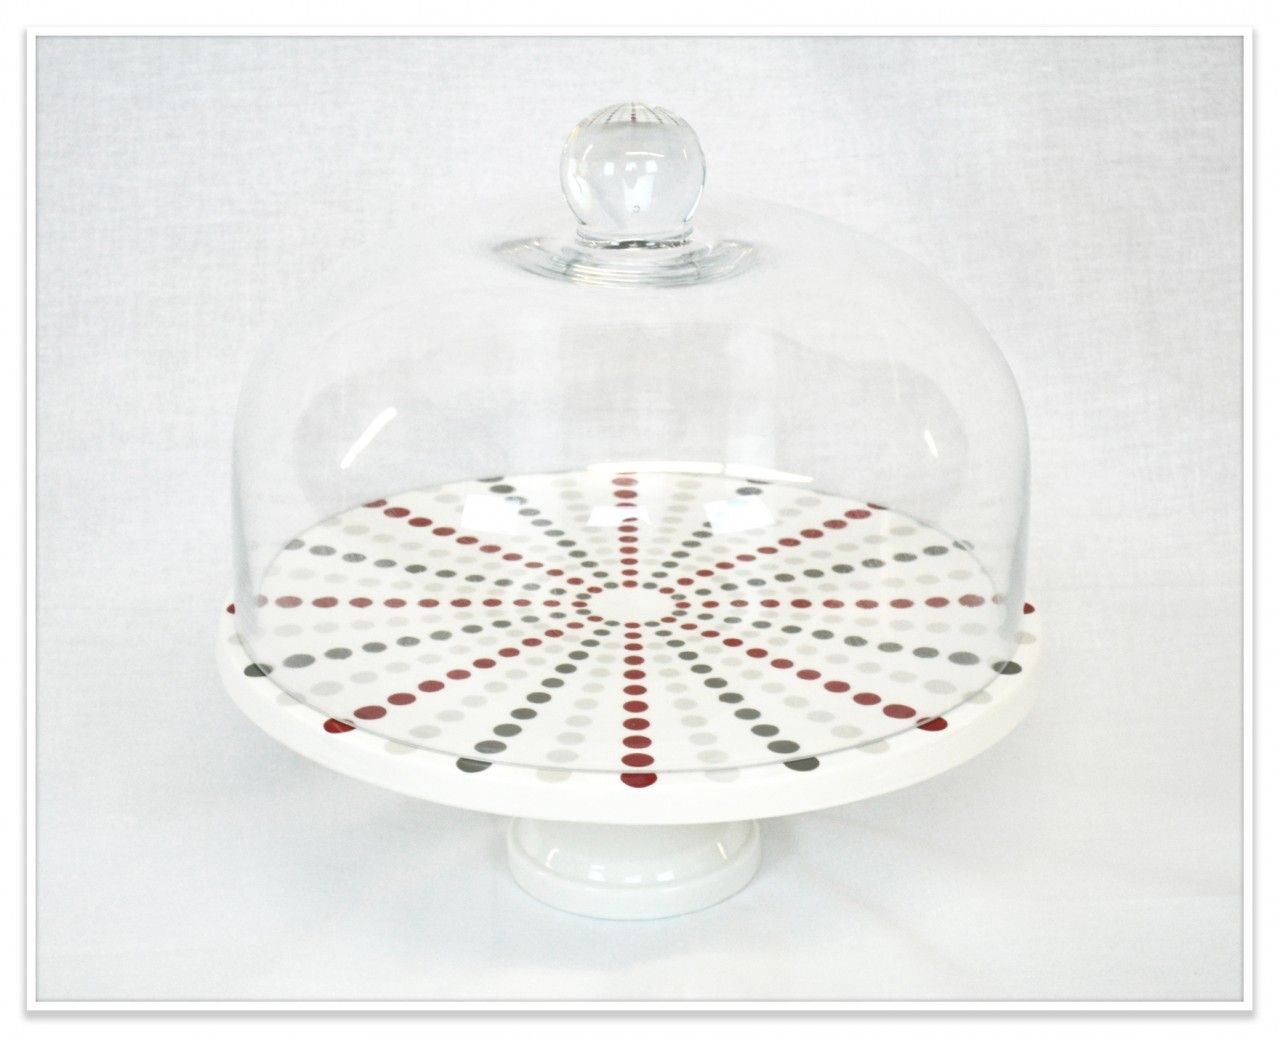
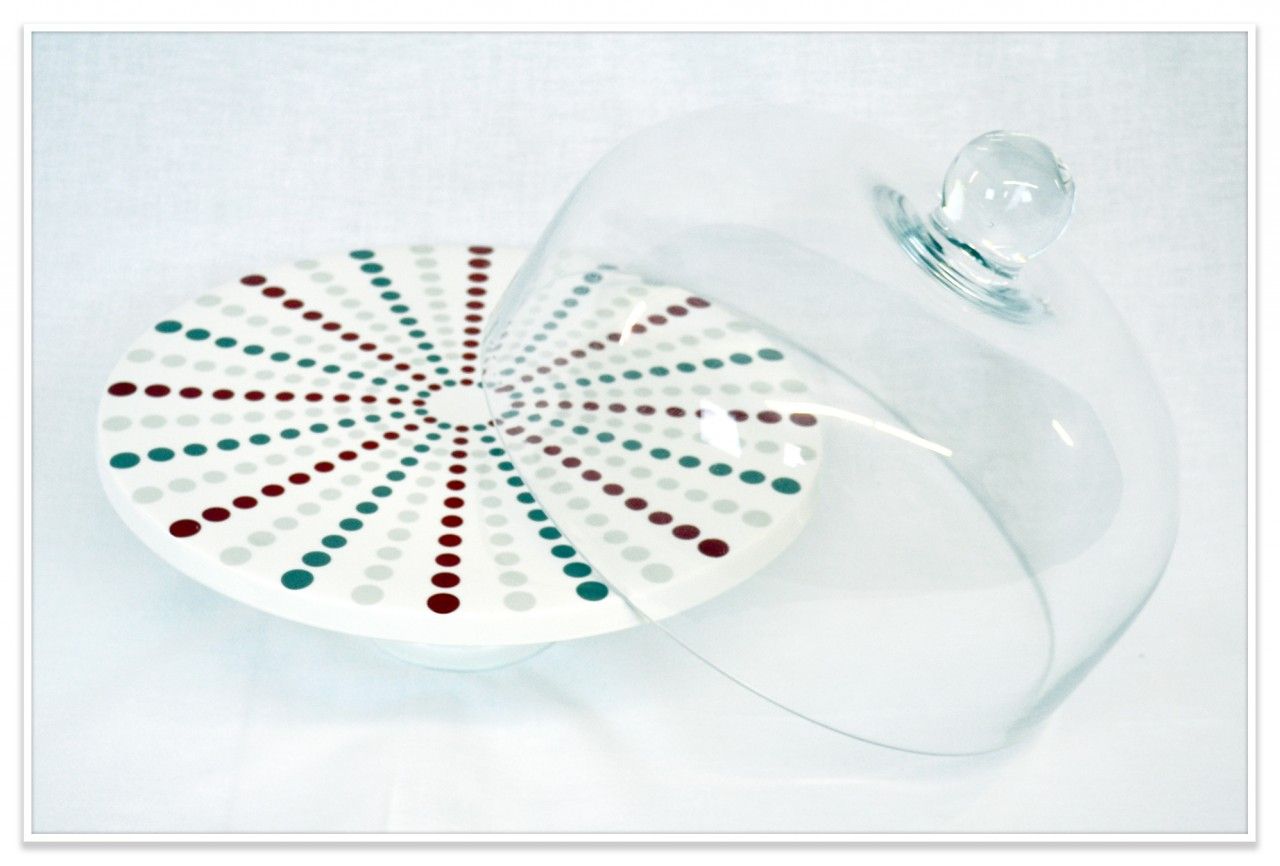
Since this is a common occurrence in our lives, we came up with a new product designed to make cake cutting simpler.  Introducing... the Perfect Slice Cake Stand.  This ceramic cake stand with glass dome lid is not only cute with its Polka Dot design, it helps you slice cake perfectly. Now, you can be sure you serve the perfect size slice to your guests. Simply choose which color dots to follow and slice along that row. Everyone will get the right size slice every time.  Need to get 8, 16 or 32 slices out of your cake?  The decorative and functional design helps you get the amount of slices you need, eliminating the guess work.  No one will know that the beautiful polka dot design is actually a tool to help you cut like a pro!

I am completely in love with this new product.  I've already used it on several occasions and it is garnering plenty of compliments wherever it goes.  Another great thing is that when it is not being used, the stand fits in the dome for more compact storage.

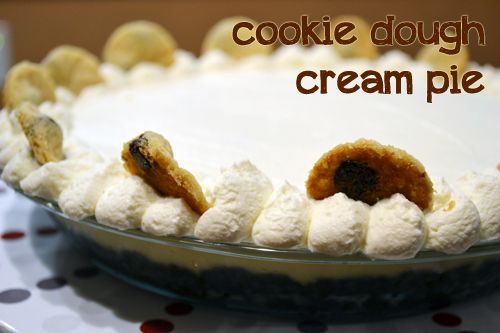
If you want to show off your new Perfect Slice Cake Stand, this Cookie Dough Cream Pie would be a good thing to serve.  While I have also served cakes that sit directly on the cake stand, I found it worked equally as well with this pie that sat in a glass pie plate.  It looked elegant, and the functional design still allowed me to cut perfect sized slices.

This rich pie consists of a chocolate cookie crust, chocolate chip cookie dough and Brown Sugar cream filling layers, topped off with whipped topping an adorable bite size cookie garnishes.  Holy guacamole, is this one good pie.  The recipe came from The Cookie Dough Lover's Cookbook, and after trying this pie, I'm eager to make more recipes from the book. I mean... Cookie Dough Mosaic Cheesecake?  Sugar cookies with Cookie Dough Frosting/  Cookie Dough S'mores!?  Yeah, you may need to purchase this book... you won't regret it.  They were even nice enough to make it Spiral Bound so it sits flat when you're reading from it (I LOVE when cookbooks are made like this!)

Tuesday, July 24, 2012

Almost Tortuga Rum Cake

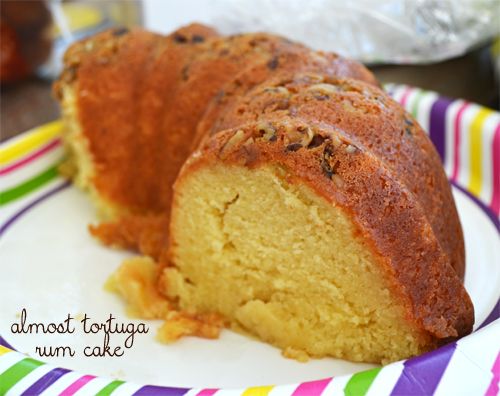
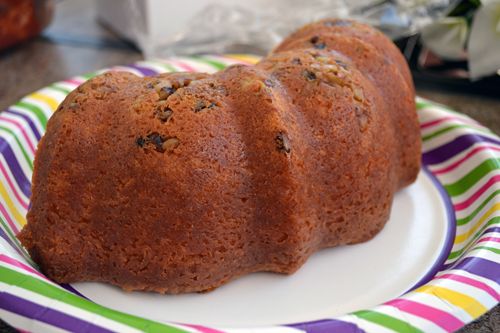
There is a famous story in my family about a little girl on vacation at Disney eating rum cake after dinner and getting a little bit funny afterwards.  Hilarious according to my family.  Said little girl had always been pretty small and skinny, so I suppose if a normal 7 year old has absolutely 0 tolerance for rum cake, then this 7 year old had even less.  Said little girl will never, ever live this down.  Sighhh.  Well, for some reason it just dawned on this all grown up little girl to make her own rum cake. Now that I'm tasting it as an adult, I can kind of see how a young bean sprout would get a little silly after eating some.


This recipe is called Almost Tortuga Rum Cake, inspired by those oh so common rum cakes in a can you find at every store in the Caribbean.  I've never had one of those so I can't verify if it is almost Tortuga-y or not, but I can say it was absolutely delicious.  The rum flavor is pretty strong, so if you're not a fan this may not be the cake for you.  However, you can always use less of the glaze the recipe calls for to avoid the strong rum flavor.  The only downside to this is that it uses a vanilla instant pudding in the mix.  Maybe one day I'll get around to trying a completely from scratch version.


Almost Tortuga Rum Cake, adapted from Food.com
Ingredients:
2 cups cake flour
1 1/2 cups granulated sugar
4 teaspoons baking powder
1 teaspoon fine sea salt
1/2 cup butter, room temp and cut into small cubes
1/2 cup + 3 tablespoons vegetable oil
1/2 cup finely chopped walnuts
1 (3 1/2) ounce package of vanilla instant pudding mix
1/2 cup milk
4 eggs, room temp
1/2 cup rum*
1 teaspoon pure vanilla extract


For the Rum Soaking Glaze:
1/2 cup butter
1/4 cup water
1 cup granulated sugar
1/2 cup rum *
(*the recipe called for whaler vanilla Hawaiian style rum but I used Pyrat Rum)


To make the cake:
Preheat the oven to 325.  Spray a 12 cup bundt an with nonstick cooking spray.  Sprinkle the chopped walnuts on the bottom of the pan.
In a large bowl, combine cake flour, sugar, baking powder, salt, butter and 3 tablespoons of the vegetable oil.  On low speed combine ingredients until the mix consistency resembles peas (or smaller) and all the pieces are the same size.  
Then, add pudding, milk, eggs, rum, the rest of the oil and vanilla and combine on medium speed for 2 to 3 minutes.  Scrape down the bowl halfway through.  Batter should be very smooth.
Pour batter into the prepared pan.  Bake for about 50 to 55 minutes or until fully golden, cake tester comes out clean and cake springs back when touched.  Remove from oven and place on cooling rack, still in the pan, while you prepare the rum glaze.


To make the glaze:
Combine butter, water and sugar in a small saucepan.  Bring to a boil carefully as mixture can boil over easily.  
Reduce to a simmer and cook until sugar is dissolve and syrup thickens a bit.  Remove from the heat and add the rum.  Stir to combine.
While the cake is still cooling, pour some of the hot glaze on the cake, allowing it time to soak in (make take a few minutes).  Continue to add syrup until most or all of the syrup is added*.  Allow cake to cool completely in pan before turning out onto serving platter.  


*Use the glaze to suit your tastes.  I wound up using about 3/4 of the glaze that I prepared.  It really made a lot and I didn't feel it really needed all of it.  I used about 1/2 of the glaze when the cake was still in the pan, and use more on top after it has been turned out onto a serving platter.  


Thursday, July 5, 2012

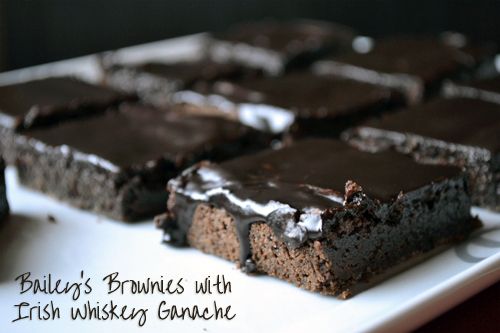
Bailey's Brownies with Irish Whiskey Ganache


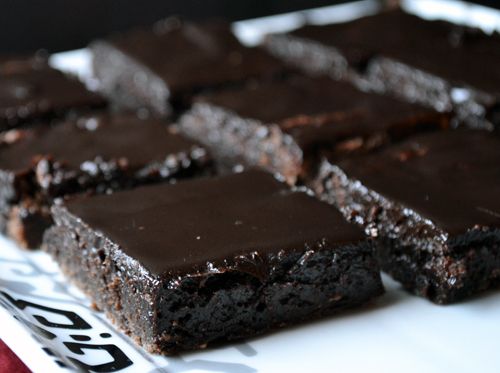
It is not very often I bake boozy treats.  But this past St. Patrick's Day (I know, it's July, I'm a little late in posting this!) I planned ahead and got the ingredients for these Bailey's Brownies with Irish Whiskey Ganache and I am glad I did.  These were super rich and chocolatey and were thoroughly enjoyed by all.  The brownies have a splash of Bailey's with Caramel mixed into the batter, and the whole thing is topped off with a layer of rich Jameson Irish Whiskey chocolate ganache.  The alcohol taste is not very strong at all, in fact, it kind of just bakes away and leaves a deep, rich flavor. 

Bailey's Brownies with Irish Whiskey Ganache adapted from How Sweet It Is
Ingredients for the Brownies:
1/2 cup unsalted butter
3 squares unsweetened baking chocolate
2 cups granulated sugar
2 large eggs, room temperature
1 cup flour
1 teaspoon pure vanilla extract
1/4 cup Bailey's with Caramel Liqueur

Preheat to 350 F. Line a 9 x 13 pan with parchment paper (this parchment paper!) and grease the sides.
In the top of a double boiler set over simmering water, combine butter and chocolate to melt.  When melted, transfer mixture to a mixing bowl and using an electric mixer, beat on medium.  Add in sugar and vanilla and beat until fluffy, about 2 - 3 minutes.  Add in eggs, beating after each addition.  Add flour and stir just until combined.  Stir in Bailey's.
Pour batter into the prepared baking dish and spread evenly.  Bake for 30 - 40 minutes, or until a toothpick comes out clean.

Ingredients for the Jameson Irish Whiskey Ganache: adapted from Brown Eyed Baked
8 oz bittersweet chocolate 
2/3 cup heavy cream
2 tablespoons unsalted butter, room temperature
2 - 3 teaspoons Jameson Irish Whiskey

Finely chop the chocolate and transfer to a heatproof bowl.  Heat the cream in a saucepan until it just begins to simmer and pour over the chocolate.  Allow to sit for 1 minute and then stir until smooth.  Add butter and whiskey and stir until combined.  Let ganache cool until it reaches the desired consistency (you want it to be soft enough to be spread with an offset spatula, but not super runny).  Spread evenly over cooled brownies with an offset spatula.

Sunday, July 1, 2012

Club Baked: Malted Waffles... a flop

If you were to go out to eat for breakfast, what are you are most likely to order?  For my husband Daniel, 99% of the time it'd be belgian waffles.  We've even made them at home quite a bit with lots of different recipes.  So I guess you could say he's a bit of a waffle connoisseur.  

These waffles... just didn't turn out so great.  But I know it is most likely a result of my own doing... I cheated!  Instead of being un-lazy and making the drive to the grocery store that is a little bit further away where they carry buttermilk, I was lazy and subbed milk + buttermilk powder.  I know the substitution usually works out when it is in a baked good, and I did have my concerns using it in this type of batter.  Alas, I used it anyway.  As a result, my waffles didn't get puffy and were actually quite thin and floppy.  But I don't blame the recipe!

The taste however was still very good.  And the floppiness didn't stop us from eating the whole thing.  I will have to try this again when I have real buttermilk on hand.  To see the recipe, visit Teri's blog, The Freshman Cook.  To see how these waffles turned out for other Club Baked Bakers, click here (they probably followed the recipe and didn't cheat like me!)

Saturday, June 30, 2012

Kitchenaid Double Oven Review and Mexican Hot Chocolate Cookies

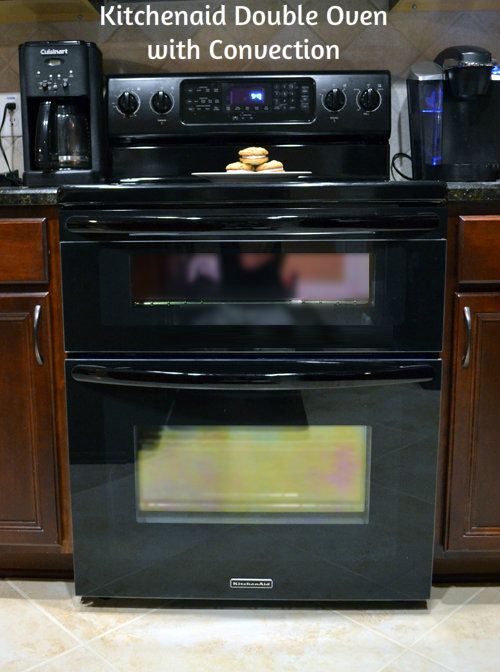
What could be more fun for an avid baker than shopping for a new oven?  About two months ago, we updated our oven with a Kitchenaid Double Oven with Convection.  Here is a review of what I've found out about it so far.

I'm kind of funny with certain things when it comes to baking.  After a lot of experimenting, I've come to the conclusion that when baking certain things, anything other than the middle rack has a different effect on the final product (even if you rotate halfway through).  When baking cupcakes, those that start out on the top rack always dome much more than those that start in the middle.  As a result I very rarely use any rack other than the middle, which means I used to have to heat up the whole oven just to use the middle rack.  The second and third pans of cookie dough or cupcake batter would have to wait until that middle rack was free to take their turn in the oven.  Being pretty energy conscious, I always felt pretty guilty about this.  

Another thing I ran into a lot when baking was competing for use of the oven.  Since I bake pretty often, something dinner and dessert baking time coincides.  In a standard oven, you have to choose.  Sometimes that means having to wait a couple of hours for dinner if I really needed to finish baking up that big birthday cake.

The solution to these problems?  A double oven.  This kind of double oven takes up the space of one standard oven (it's not like the two standard size wall ovens).  We got the Freestanding Electric 5 Elements Even-Heat™ True Convection System Architect® Series II by Kitchenaid (whew, that's a mouthful).  The single baking area is divided into 2 sections: 1 smaller section (around 1/3) and one larger section (around 2/3).  This means I can use my top smaller oven for baking things on just the "middle rack" (even though there is only one rack) and not feel guilty about wasting all that pre-heated oven space.  The bottom, larger, convection oven has two racks, and is large enough to bake tall things (like a big turkey if I were to even make one).  

So how does it work?  Terrific so far!  The top smaller oven, since it is smaller,  pre-heats far quicker than my old larger one did (perfect for those impatient I-forgot-to-preheat-and-now-my-batter-is-ready moments).  I've baked all sorts of desserts in there and many dinners and everything turns out wonderful.  I use this one 75% of the time.  The bottom convection oven also works beautifully.  When I'm baking a ton of cupcakes, I use both ovens and this greatly speeds up my production time.  The convection fan is very quiet, and the "Easy Convect" feature takes all the guesswork out of using convection - you put in your bake time and temperature, and it makes the proper adjustments for baking with convection.  

The Con's?  There are a few small quirks I've noticed about it in the past two months of using it.  First, probably the weirdest thing, is using the "Easy Convect" feature.  Once you put in the bake time and temperature information, it automatically starts preheating.  However, it also starts counting down!  For example, if I were baking a cookie recipe that calls for 350 degrees F for 8 minutes, it would tell you that it should bake at 325 in a convection oven for 8 minutes - the oven turns on and the counter begins to count down from 8:00.  The problem with that?  Well, it begins counting down and the oven is not preheated yet!  There is no way to stop the timer and allow the oven to preheat.  Kitchenaid's solution to this is add 15 minutes to your bake time to account for preheating time.  This is a little odd, no?  So instead, I typically do the calculations with "Easy Convect," then turn the oven off (to stop the counter) and then just start pre-heating the oven as normal with the information it told me to.  Plus, I'm not so sure that convection really shortens bake time all that much.  In the scheme of things though, this isn't such a big con and it can easily be worked around.  
Another con, and this one is more annoying that than Easy Convect quirk, is with the stove top.  Sometimes, I notice if the dial is not exactly on one of the dots, the power may not remain on.  If the dial is between dots, it may occasionally turn off.  I've had pots of water sit on the burner for about 20 minutes before I've realized it's not boiling - not even hot - because there is no electric!  I never experienced this issue with my old electric oven.

All in all, I absolutely love this new oven and would not go back to my old one.  The convenience of having two ovens that you can preheat to two separate temperatures, as well as the energy savings of having just one small oven greatly outweighs any cons the oven may have. 

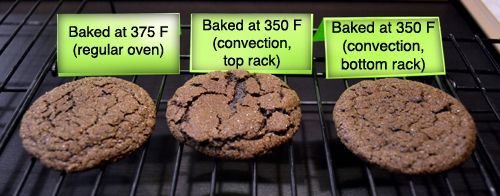
Would you like to see the results of my first baking experiment in the new oven?  After getting the new oven, I was curious to see what effect the convection had on the final product.  Would it come out drier or moister?  Would it bake up taller?  Spread out more?  So I made one batch of  same cookie batter and baked half of it in the top, regular oven, and the other half in the bottom, convection oven.  Take a look at the side by side pictures to see for yourself.
The cookie on the left was baked in the regular oven at 375.  Easy Convect told me to use 350 degrees in the Convection oven, so the middle cookie was baked at 350 in convection, on the top rack.  The cookie on the left was baked in convection at 350 on the bottom rack (kind of placed in the middle of the oven).

The top rack convection looks different, but all the cookies tasted pretty much the same.  No cookie was more or less moist than another.  It did seem like the cookies baked in the regular oven stayed a little taller and did not flatten out as much as the others.  For the most part though, there wasn't a huge difference between the different ovens.  

I'll have to do another similar experiment with a batter than baked up higher, like a cake or cupcake recipe.  So, more experiments to come!  But for now, on to the cookie recipe!  These were delicious.  They were slightly crispy on the outside thanks to the sugar coating and were nice and chewy on the inside.  With some, I spread a little biscoff on them and made delicious little chocolate spice cookie sandwiches.  Mmm.

Mexican Hot Chocolate Cookies, adapted from Martha Stewart
Ingredients:
  • 2 1/4 cups all-purpose flour
  • 1/2 cup unsweetened cocoa powder
  • 2 tsp cream of tartar
  • 1 tsp baking soda
  • 1/2 tsp fine sea salt
  • 1 cup unsalted butter, room temperature
  • 1 3/4 cups sugar
  • 2 large eggs, room temperature
  • 1 tsp pure vanilla extract 
  • 2 tsp cinnamon
Preheat oven to 375 degrees (or 350 for convection). In a medium bowl, whisk together flour, cocoa powder, cream of tartar, baking soda, and salt. In the bowl of an electric mixer, beat the butter and 1 1/2 cups sugar on medium speed until light and fluffy, about 2 minutes. Scrape down side of bowl. Add eggs and vanilla and mix just to combine. With mixer on low, gradually add flour mixture and beat until combined.

In a small bowl, combine remaining 1/4 cup sugar and cinnamon. Using heaping tablespoons, form balls of dough and roll in cinnamon-sugar mixture. Place, about 3 inches apart, on two parchment-lined baking sheets. Bake until cookies are set in center and begin to crack, about 10 minutes. Let cookies cool on sheets on wire racks 5 minutes, then transfer cookies to racks to cool completely.


LinkWithin

Related Posts with Thumbnails