Recent Posts
Thursday, July 31, 2008
Chocolate Cupcake? Vanilla Cupcake? Can't decide!? Do BOTH!
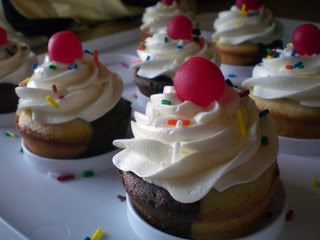
Black and White Cupcakes with Banana Filling aka Banana Split Cupcakes
Yup, thats what last week’s Whacky cupcake flavor, but I couldn’t post it until now because I was waiting for a box to get to NY. You see, its my sister Jenn's birthday soon (you can go to her blog and wish her a happy b-day on August 2nd if you wish), and it was the perfect opportunity to make another attempt at Cupcake Shipping. I was sending her a box of presents anyway, so I thought I’d do Cupcake Shipping Experiment Pt 2. More on THAT later when she sends me some photos. For now, here is the deal on these cupcakes:
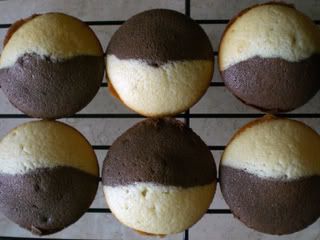
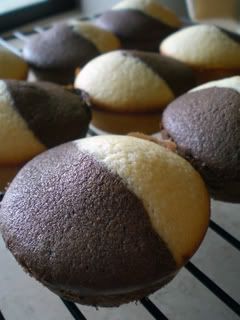
I saw this recipe on Martha Stewart’s website for Cupcakes that are split right down the middle: chocolate cake on one side and vanilla on the other (thus the SPLIT part of banana SPLIT cupcakes...split between chocolate and vanilla...get it?). I scaled down the recipe very weirdly, down to 1/3 of the original. It was actually quite complicated doing so because of the recipe being divided in half anyway into a chocolate batter & a vanilla batter. Yes, some of the measurements are very odd and go to the 100th or even the 1000th decimal place, but just round it and do your best. Here is what I came up with...
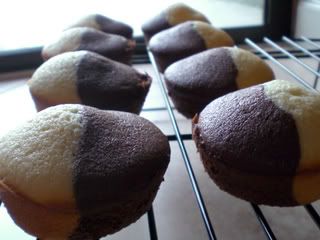
Black and White Cupcakes makes about 8
Ingredients for Vanilla batter:
2 2/3 Tablespoons Butter
.58 C Flour
2/3 tsp Baking powder
.167 Tsp salt
.25 C sugar
2/3 Egg (yes, 2/3 of an egg)
1/3 Tsp vanilla
.167 C milk
Ingredients for Chocolate batter:
2 2/3 Tbl butter
.416 flour
.16 C Cocoa powder (this is 1/2 of 1/3 C)
2/3 Tsp Baking Powder
.167 tsp salt
.25 C Sugar
2/3 Egg
1/3 Tsp vanilla
.167 c Milk (this is half of 1/3 C)
*Note* -- If it makes it easier, these are the measurements for the ingredients TOTAL (vanilla + chocolate batter). So just use half of these measurements for each batter (besides the flour and cocoa, where the measurements are different for each):
5 1/3 Tablespoons butter
1 C Flour
1/3 of 1/2 C Cocoa Powder (I use a 1/2 C measuring cup and just eye about 1/3 of it)
1 1/3 Tsp baking powder
1/3 Tsp salt
1/2 C sugar
1 1/3 egg
2/3 tsp vanilla
1/3 C Milk
Directions:
*Make one batter at a time to avoid confusion.
Preheat the oven to 350. Butter and flour (or use a non-stick spray with flour) a muffin pan, or use paper cupcake liners.
In a medium bowl, whisk the flour, baking powder & salt together to combine.
With an electric mixer, beat butter and sugar together until light and fluffy. Add 2/3 egg and beat well.
Add vanilla and mix until incorporated. On low, beat in 1/2 of the flour mixture, followed by milk, and then end with the remaining flour. Don’t overmix – just mix until it is combined. Set aside. Make the chocolate batter – prepare the same way, except in the beginning, whisk together not only the flour, baking powder and salt, but the cocoa as well.
Using a tablespoon, measure out 3 tablespoons of each batter to put into the wells in the cupcake tin. Do your best to keep each batter to one side.
Bake 22-24 minutes or until a toothpick comes out clean after inserted. Cool in the pan for 5 minutes, and then transfer to wire rack to cool completely.
What is so BANANA about these Banana Split Cupcakes you ask? Well, I had the idea to put a Banana Custard filling in the center of them. I won’t post the custard recipe for two reasons: One- I lost it. Two- It was unsuccessful. It was way too watery, so it kinda absorbed into the cupcake a little bit, and it was overly sweet. Luckily, I only put about a teaspoon of it into the cupcakes, so they were still quite tasty.
With their hats cut off:
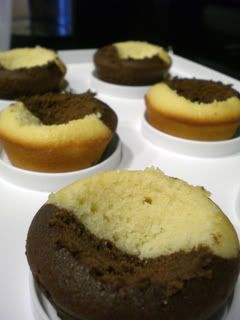
Filling in place:
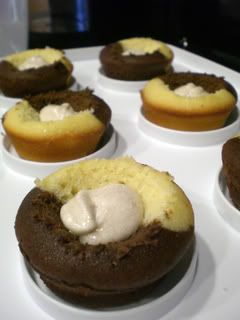
The tops trimmed and replaced:
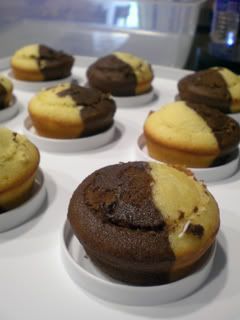
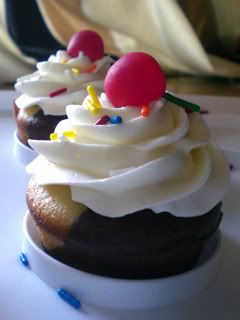
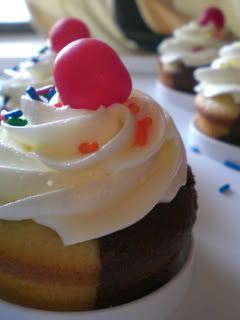
For the frosting, I used my favorite frosting recipe, and garnished with a sour cherry candy and sprinkles to make it look like a real ice cream sundae.
Labels:
cupcake of the week,
cupcakes,
fillings
Monday, July 28, 2008
Red Velvet Cupcake Minis
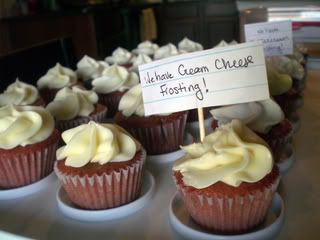
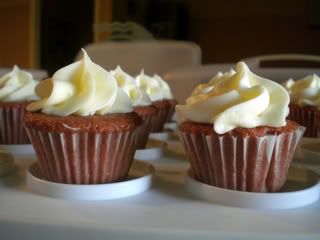
Saturday was our Italy Girls Reunion get together. Its amazing how much time went by since the trip. I can barely believe its been 2 and a half months since the trip began, and I've already been back for more than a month and a half. Incredible how time flies. I decided to bring cupcakes to our gathering because, well, I'm the cupcake girl. I talked about my cupcakes on the trip a lot, so I thought they would be curious to try them. One girl specifically requested I make her Red Velvet cupcakes once we got back, so thats what I went with. I used a recipe I've used in the past with great success, from Wilton Cupcake Fun. I halved it because I was making mini cupcakes:
Mini Red Velvet Cupcakes makes 24 mini cupcakes + 5 regular sized cupcakes
Ingredients:
1 1/4 C All Purpose Flour
1 Tablespoon Cocoa Powder
3/4 Tsp Baking Powder
1/2 Tsp Salt
1/2 Stick of butter, soft
3/4 C Granulated Sugar
1 egg
3/4 tsp red food coloring
1/2 Tsp Vanilla extract
1/2 C Buttermilk
1 Tbl Water
3/4 Tsp white vinegar (I used apple cider vinegar)
1/2 Tsp Baking Soda
Directions:
Preheat to 350. Line a mini muffin tin with 24 liners, and a regular sized muffin tin with 5 liners.
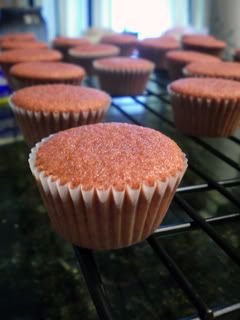
In a medium bowl, combine the flour, cocoa powder, baking powder & salt. In a different bowl, cream the butter and sugar with an electric mixer until it is light and fluffy. Add egg, red food coloring, and vanilla, and then mix until the red is evenly distributed. Alternately add the flour mix and the buttermilk to the butter mixture. Add the water and mix. In a small bowl, combine vinegar and baking soda, and fold into the cupcake batter. Pour batter into a large ziplock bag and snip a small (~1/4 inch) opening in the corner. Carefully, squeeze the batter into the liners so that they are about 2/3 - 3/4 full. Bake 15 minutes for the mini muffins and 20 for the standard sized cupcakes, or until a toothpick comes out clean. Remove from oven and let cool in the pan for 5 minutes, then remove to wire rack to cool completely.
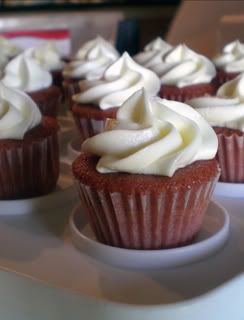
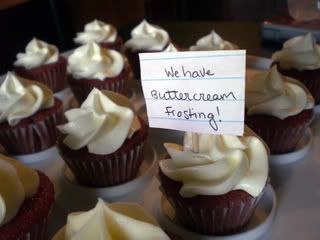
For the frosting, I wanted to use my vanilla buttercream because it is so yummy, and I wanted them to taste the real deal of my cupcakes. However, I also wanted to let them try the red velvet cupcakelets with their traditional frosting: Cream Cheese Frosting. The Vanilla Buttercream recipe can be found here.
The cream cheese frosting recipe is one of my own invention (through accidentally using the wrong amount of cream cheese when I was trying to make cinnabun icing here). Usually, I'm not a huge fan of cream cheese icing, its usually too tangy for my liking. But this one is juuusstt right. It tastes more like cheesecake or cheese danish filling than cream cheese. And its perfect for piping!
Best Cream Cheese Frosting Ever
8 oz cream cheese, soft
1/4 C unsalted butter, soft
1.5 cups confectioners sugar
1/2 tsp vanilla
Beat cream cheese, butter, sugar and vanilla. This recipe will make much more than you need for 24 mini cuppies and 5 regulars, but it freezes really well, so make it all and save the rest for when you need cream cheese frosting next!
Can you tell which frosting is which?
Labels:
bite sized,
frosting,
red velvet
Wednesday, July 23, 2008
Chocolate Chip Cookie Pie & More Gratuitous Cupcake Pics
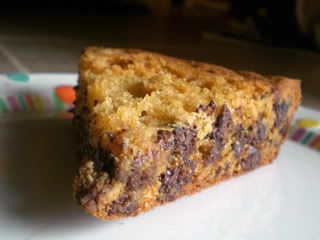
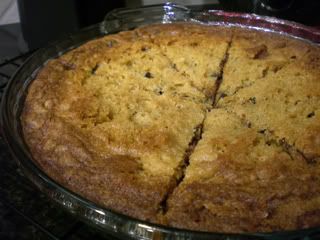
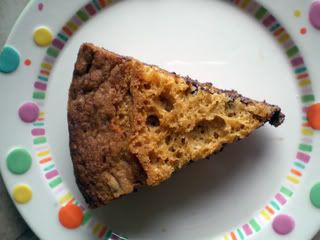
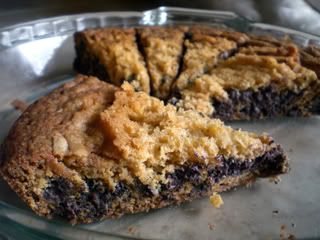
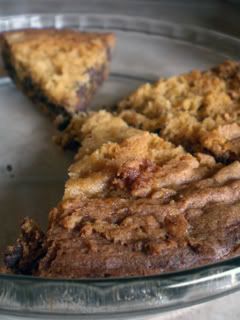
Rarely do I ever see something made on FoodNetwork and think to myself, "boy, I need to make that". But this recipe for chocolate chip cookie pie appeared on Paula Dean right about the same time all that Chocolate Chip Cookie frenzy was occuring due to the New York Times article. So I broke down. Daniel always appreciates a good chocolate chip cookie to eat for breakfast and put under his ice cream anyway. I made this recipe according to her directions, the only adjustment was halving the recipe (because I don't need 2 giant cookies the size of a pie), the omission of nuts and the whipped cream topping, and the added step of waiting 36 hours just to see how it would turn out.
Chocolate Chip Pie from Paula Dean
1.375 Flour (I know it seems complicated, but its 1 C flour + halfway between 1/4 & 1/2 C flour)
3/4 Tsp Salt
1/2 Tsp baking soda
.625 Tsp Baking powder (halfway between 1/2 Tsp and 3/4 Tsp)
1 stick unsalted butter, soft
3/4 C Packed light brown sugar
1/4 c granulated sugar
1.5 eggs (yes, one and a half eggs)
1 1/2 tsp vanilla
1 1/2 C Semisweet chocolate chips
Spray a 9 inch pie plate with non-stick spray, set aside.
In a large bowl, whisk flour, salt, baking soda & powder to combine. In an electric mixer, cream the butter and sugars together. Add the eggs one at a time and beat until it is incorporated in. Beat in the vanilla. Add the flour mixture little by little, and mix until fully combined, but don't overmix. Fold in the chocolate chips. Press into the pie plate and smooth the top to make it even. Cover with plastic wrap and chill for 36 hours.
Preheat to 350 and bake for 40 minutes until the pies are golden brown, and feel slightly firm when touched, but still soft. If they start to get too dark around the edges, put tin foil over the top and continue baking -- I had to do this..but be careful not to let it touch the top of your pie or your top will be less pretty than it could have been :( Let cool on wire rack.
And now, for your moment of zen:
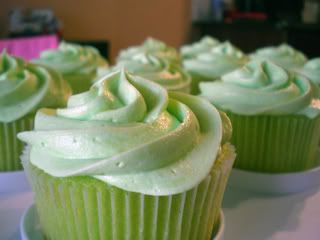
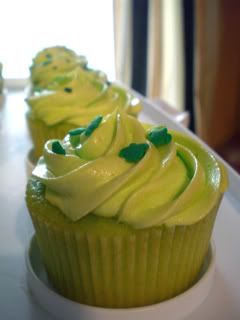
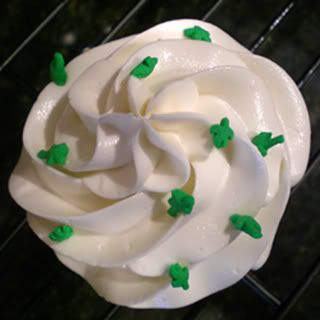
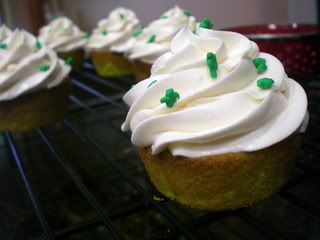
Green, with turtle sprinkles. Ahh, kids birthday parties.
Labels:
chocolate chip cookies,
cookies,
cupcakes
Monday, July 21, 2008
Smores Rice Krispy Treats
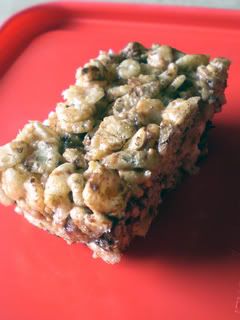
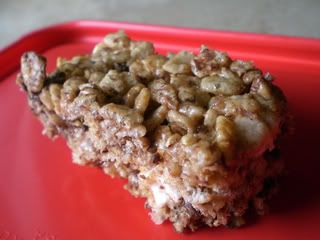
Ahh, Small Batches. I'm at it again. Who else has a 5 x 7 Pyrex baking dish? Anyone? It was a perfect size for these Smores (or is it S'mores? I'm never quite sure) Rice Krispy Treats. Pretty quick to assemble, and quite tasty.
Smores Rice Krispy Treats
1/6 stick of butter
1 1/3 C Marshmallows, plus a reserved 1/2 C of marshmallows
1/3 Tsp Cinnamon
2 Tablespoon Graham Cracker Crumbs
1/3 Tsp Vanilla
2 C Rice Krispies Cereal
1/4 C Semisweet Chocolate Chips
Melt better in a saucepan set on low heat. Add 1 1/3 C mallows and stir until totally melted. Remove from heat, and stir in cinnamon, graham crumbs and vanilla. Add cereal, and stir. Add chocolate chips and reserved half cup mallows and stir until everything is coated. Some of the chocolate chips with get a bit melty. Press into a greased 5x7 pan. Let cool and allow to set for an hour or so.
Labels:
rice krispy treat,
smores
Friday, July 18, 2008
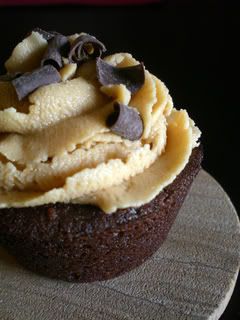
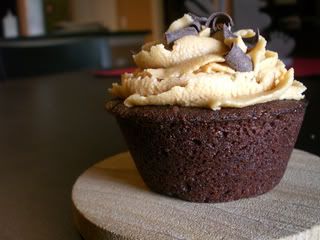
Chocolate Peanut Butter Cup Cupcakes
To shake things up a bit, Dan recommended this week's cupcake be chocolate cake. I rarely dabble in chocolate cake because Daniel isn't a huge fan of chocolate, but as these are not for him, I took his suggestion and decided to go with it. My Vanilla Cupcake recipe came from Billy Reece, so I stuck with him to see how his Chocolate Cupcakes are.
Now, what to pair with chocolate cupcakes... chocolate frosting? Too much chocolate. Vanilla? Boring. Strawberry? No, we know how strawberry jam frosting came out last time, and I don't have any fresh strawberries. So I went with the classic Chocolate Peanut Butter combination. To make the cupcakes more exciting, I baked a mini reese's cup right into the cupcake. Other than that, I kept the same basic recipe, just played around a bit with the measurements a little so I wouldn't wind up with 24 cupcakes. I scaled it down as such to make 9:
Chocolate Buttermilk Cupcakes with Reese's Peanut Butter Cup Center based on Billy's Reece's Chocolate Cupcakes
2/3 C Cake Flour
1/3 Tsp Baking Soda
6.5 Tablespoons of butter
1/3 C Sugar
1/3 C Packed light brown sugar
1 egg
2 oz unsweetened chocolate, melted & let cool for 15 minutes
1/3 C Buttermilk
1/3 Tsp Vanilla
9 Mini Reese's Peanut Butter Cups, chilled in freezer for about 30 minutes.
Preheat to 350. Cream the butter & both types of sugars together. Add the egg and scrape down the sides of the bowl (if you don't have a super cool SideSweep like me:) ). Add the melted/cooled chocolate and mix until incorporated. Scrape down sides of bowl. In a small bowl, combine the cake flour & baking soda, and in a measuring cup, combine the buttermilk and vanilla extract. Alternately, add the flour mixture and the buttermilk mixture to the chocolate mixture, beginning and ending with the flour mixture.
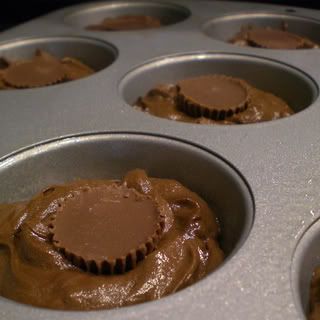
Spray cupcake tins with non-stick spray, and fill cupcake wells 2/3 full. Remove peanut butter cups from the freezer, unwrap, and press into the batter in the cupcake tins so that the top of the peanut butter cup just peeks out of the batter.
Bake 20 minutes, or when it springs back lightly when touched and a tooth pick comes out clean. Turn out from cupcake tin onto cooling rack.
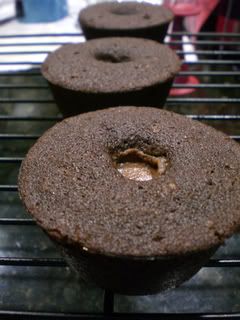
No, those aren't chocolate belly buttons on my cupcakes!
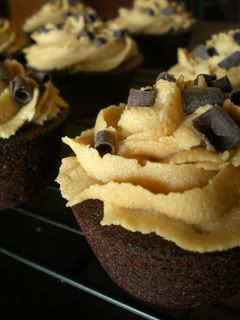
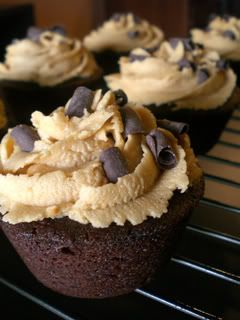
For the frosting, I found a Fluffy Peanut Butter Frosting Recipe at Allrecipes.com. The reviews were good, and looked promising for a sturdy, pipe-able peanuty frosting. I halved it, and added a few steps since I only had crunchy peanut butter on hand:
Peanut Butter Frosting
1/2 Stick of butter, soft
1/2 C Crunchy Peanut Butter
1 1/2 Tbl milk
1 C confectioner's sugar
Put peanut butter in a food processor and pulse until most of the big peanut chunks are broken up. Add the butter, and pulse until full incorporated and peanut chunks are further broken up. Scoop into bowl of an electric mixer. Gradually mix in the sugar. As it gets thicker and thicker, add milk as needed to get the correct consistency.
The chocolate cake gets moister the second day, and are quite dry the first day they are baked, just as I've found is true for Billy's Vanilla Cupcake recipe. The frosting piped rather well, and was very very peanut buttery. You couldn't really taste the reese's cup amidst all the other chocolate and peanut butter flavor, but I suppose its cool to just know that they're in there. Think they'll be a hit?
Labels:
cupcake of the week,
cupcakes,
frosting,
peanut butter
Monday, July 14, 2008
Jello Sherbert and Super Cool New Gadget
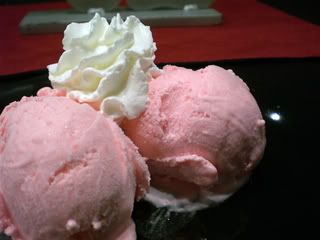
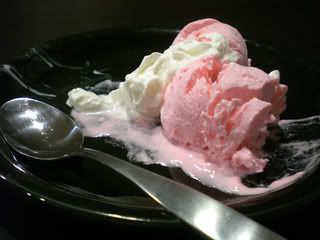
So, its hot here in Florida. Hot. No matter how air conditioned the house is, the minute I turn on the oven and start doing anything in the kitchen, I break a pretty serious sweat. This normally doesn't really slow me down much, because really, doing anything this time of year in this part of the country makes you break a sweat. Recently, however, I was in the mood to make something and too damn hot to turn the oven on. I reached into my long list of things to make in the near future and pulled out a recipe for making sherbert from jello. Didn't use the oven, just the stove top. Not too bad for you. Cool, icy result. Perfect! I had the recipe saved on my computer in a neat little program I have that stores recipes with pictures, where I put links to where I found them. Dan, unfortunately, deleted it accidentally when I asked him for a measurement while I was making it. I found it online at its original site here at Neverbashfulwithbutter's old blogspot. I used it that night to get my measurement that Daniel deleted, and then the next day, it seemed it had been pulled off the site. So, unfortunately, I am not able to post the recipe. I know it was from the Joys of Jello 1981 book, and that it involved 4 ounces of cool whip, a 3 oz box of jello, either 1/2 c of sugar or 3/4 c and water, but I don't remember the exact measurements. :( If anyone knows it, I'd appreciate it! Anyway, here are the results:
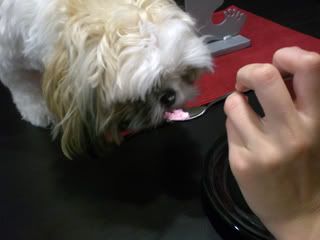
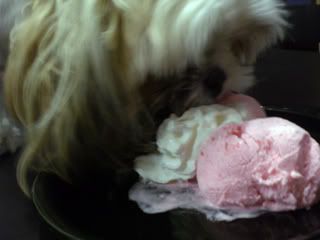
Sadie really enjoyed it, too.
Really enjoyed it.
It was pretty good, but not as flavorful as it should have been. When I was making room in the freezer for the 8x8 pan, the pot of water/jello/sugar mixture boiled over and I lost a lot of my concoction. If anyone finds the recipe, and wants to make it, I recommend keeping an eye on your pot! It takes a while to boil, but when it does, it boils over quick!
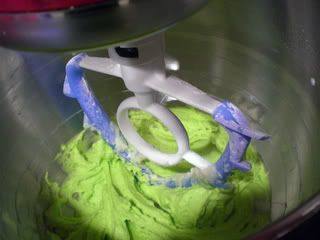
On another note, I wanted to introduce you to my cool new kitchen gadget friend. In the move into our house, we had tons of boxes from new stuff we had bought. In the confusion of all of these boxes, my kitchenaid mixer box was thrown away... with my dough hook and paddle attachment in it!! Dan bought THIS. Its a paddle attachment for kitchenaid mixers with rubber spatulas on the side, so it scrapes the side of the bowl and pushes down the dough as it turns. Its great! I made a familiar recipe with it so I could see how good it really works.
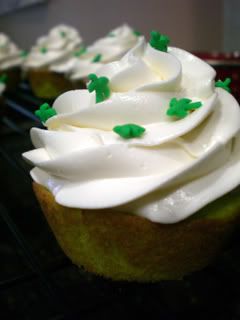
And it really does work. The website says to reduce speed and length of mixing time, so we adjusted accordingly. Worked like a charm. The result? These gorgeous Key Lime Cupcakes with Palm Tree Sprinkles, oh so Florida.
Labels:
frozen treats,
kitchen gadget
Sunday, July 13, 2008
Lemon Ricotta Tart
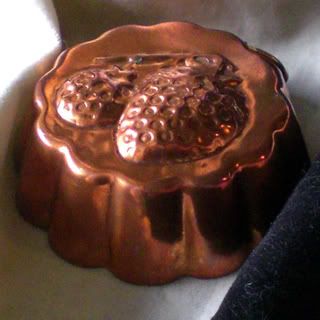
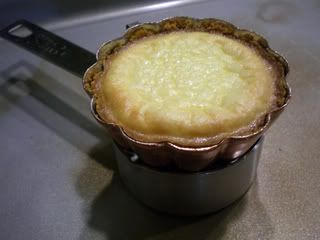
I did not choose this tart. It chose ME. As you know, I had a problem in the kitchen that prohibits me from throwing anything away. We had an almost full container of ricotta in the frig left over from dinner, so I felt obligated to use it before it went bad. Then, Daniel saw a picture of a lemon tart that he said looked good. And it just so happens that I bought a cute little copper tart pan in Italy that I had yet to use.
So it was a Done deal - I was to make a Lemon Ricotta Tart. I told you: it chose me.
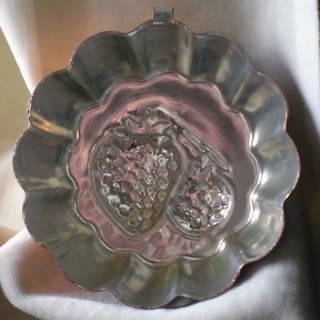
I do not have a tart pan, and even if I did, that wouldn't quite fit into my desire to make small batches. I had my tiny little tart pan from Italy, and a 4 inch springform pan that I felt would do the job.
For my recipe, I based it off of this one from Recipezaar. My adjusted recipe went like this:
Lemon Ricotta Mini Tart
About .8 C Graham Cracker Crumbs
A little less than 3 tablespoons butter, melted
1 C Ricotta
1 Egg
1/6 C Sugar
Zest of one large lemon
1.5 Tablespoons freshly squeezed lemon juice
Preheat to 375. Add melted butter to graham crumbs and stir with a fork to combine. Press this mixture firmly into the bottom and up the sides of a 4" springform pan and a little itty bitty baby tart pan from Montepulciano :) Bake until lightly browned, about 10 minutes.
Remove and let cool.
In a food processor, combine egg, ricotta, lemon juice & zest, & sugar. Pour into crusts and bake about 55 minutes, or until surface is browned in spots, and the filling is set. Let cool in the pans, then remove.
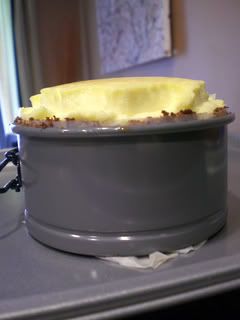
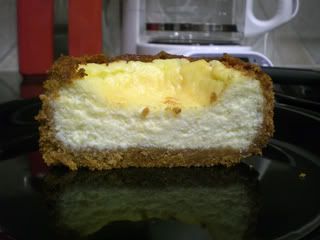
The tart in the springform pan was... well...
Chubby. When I changed it to a springform pan instead of a tart pan, I suppose I changed the filling to crust ratio, so the baking time went from the recommended 30-35 minutes to 55!! So it rose dangerously close to overflowing, and then when it cooled, it sank in the center:
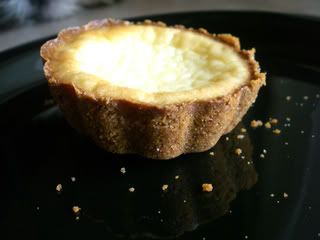
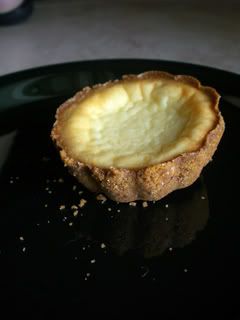
The little tart in the mini tart pan came out quite perfectly:
In the scaling down/manipulation of the recipe, things got a little altered. There was a lot of crust in these relatively small tarts. And if these were to bring to a party, I would have been a little disappointed in the appearance of the larger one because of the center sinkage. But the taste was quite good. Me and Daniel did agree though, that the lemon taste was too subtle. I would definitely try this recipe in its original measurements in a normal sized tart pan with a little more lemon zest. It was easy to make, and had a nice, light texture.
Labels:
bite sized,
lemon
Wednesday, July 9, 2008
Cupcake Shipping Experiment
Cupcake Shipping has been all over the place lately. Theres the original "Cupcake-In-A-Jar": Bangerang Bake Shop, and a whole slew of other bakeries like Mrs. Beasley's Cupcakes, Teacake Bakeshop, Babycakes NYC, Crumbs, and Chicago Cupcakes that now offer shipment of their cupcakes nation-(and sometimes world)-wide. All of these travelling cupcakes inspired me to solve a problem: I like sharing my baked goods with people I care about. Most people I know live in New York. I live in Florida. While I have people here in Florida to force my baked goods upon, my sister, Dad, mother, friends, aunts, uncles, cousins, some shih tzus, etc., all live scattered across the Empire State, 1,000 miles away. How to solve this problem... Air-Mail Cupcakes, of course!! Now, to experiment with several shipping methods, High School Lab Report Style...
Cupcake Shipping Method Number 1
Observation: A large portion of my potential cupcake samplers live too far to taste my goodies regularly.
Hypothesis: Shipping cupcakes baked into glass jars might provide a safe vessel for transport.
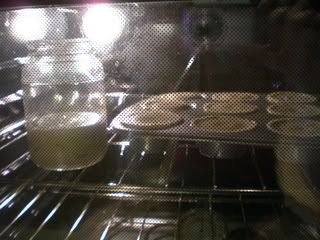
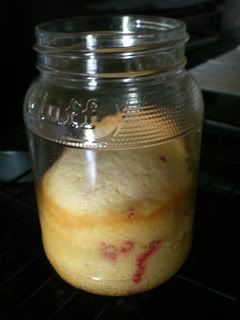
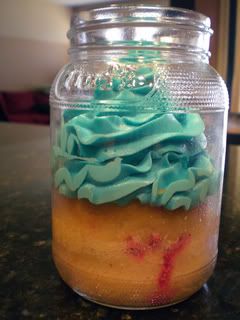
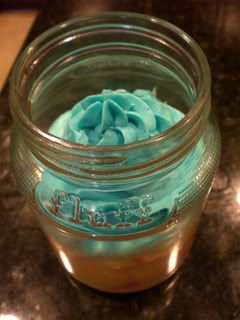
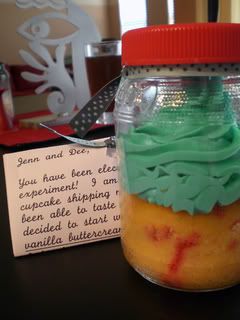
Experiment: To bake a cupcake directly into a glass jar, let it cool, frost it, seal it, and send it on its way to Jennifer and Dee in NYC with UPS.
Analysis: Partial rejection of hypothesis. Why? Well... This is what it looked like upon arrival at its destination:
Fortunately, I had the chance of being on the phone with Jennifer as she opened her surprise package. It was so badly damaged by the rough transit & extreme heat, she didn't even know what it was. When I said, "Its a CUPCAKE! Does it look like a cupcake?", Jenn quite appropriately responded by describing it as such, "It looked like someone ate a cupcake and threw it back up into the jar". Quite right, I'd say.
New Hypothesis: Not giving up on Jar shipping method yet. Next, try baking it into a much smaller jar, leaving less room for it to jiggle around, like Bangerang bakeshop does. Note: With all the unlicensed online bakeries floating around the internet, please be aware I have no intention of selling my cupcakes this way, I'd just like to be able to share them with my family and friends that live too far. :)
Fortunately, Jennifer and Dee reported that it was still delicious, despite its less than delicious-looking appearance.
And um... even Simon had some.
Though he needed to be cleaned off a little afterwards...
Well, I guess it tasted good enough! Half the beauty of the art of cupcake is their adorable little appearance. So, this experimentation with have to continue, until I reach a a positive conclusion.
Labels:
cupcake shipping
Subscribe to:
Posts (Atom)