Recent Posts

Saturday, July 30, 2011

Chewy Graham Cookies


When I make chocolate chip cookies, there always seems to be a cookie or two made from the very last bits of dough at the bottom of the bowl that have no chocolate chips in them.  And those cookies are undoubtedly Daniel’s favorite ones of the whole batch.  If you are like Daniel and sometimes just want a plain ol’ cookie without the mix-ins then these are the cookies for you. 
These remind me of what a graham cracker would taste like if it were chewy instead of crunchy.  The recipe is adapted from one created by My Kitchen Addiction.  I’ve actually made this recipe before but they served as the base for my Smore Bites with Homemade Marshmallow.  The cookie base was so good, I needed to try them in straight up cookie form.  They did not disappoint.  I did make a few changes to both the original recipe and what I did last time in the smore bites, so I’m posting the adapted recipe below.  Enjoy alone, or sandwich some more deliciousness between two of them (nutella or vanilla ice cream cookie sandwiches anyone?)
Chewy Graham Cookies, adapted from My Kitchen Addiction
Ingredients:
3/4 cup (1 1/2 sticks) unsalted butter, softened
1 1/4 cup granulated sugar
1 tsp molasses
1/8 cup light corn syrup
1/8 cup maple syrup
1 large egg
1 teaspoon pure vanilla extract
2 1/2 cups all purpose flour
1 1/2 teaspoons baking soda
1 teaspoon ground cinnamon
1/2 teaspoon cream of tartar
1/2 teaspoon salt
Approximately ¼ cup to ½ cup cinnamon sugar


Preheat to 375 F and line baking pans with parchment paper.
In the bowl of an electric mixer, cream together butter, sugar, molasses, and syrups.  Add the egg and vanilla and beat until incorporated.

In a medium bowl, whisk flour, baking soda, cinnamon, cream of tartar, and salt to combine.  Stir in the flour mixture and mix just until combined.

Using a 1 ½ Tablespoon cookie scoop, scoop out dough balls and roll them in cinnamon sugar.  Place cinnamon sugar coated cookie dough balls on the prepared baking sheets and bake for 9 – 10 minutes, when cookie is just started to turn golden at the edges.  Be sure the cookie is set but do not overbake! Allow cookies to cool for about 5 minutes on the cookie sheets before removing to a wire rack to cool completely.

Friday, July 29, 2011

Furbaby Friday and Artistic Oreos

It has been two weeks since I blogged!  We were called out of town for about five days and are just getting back into the swing of things.  As the summer winds down, The Smart Baker has been getting busier!  But there is always time to bake :)  We'll have some new posts up very soon.   

In the meantime, it's furbaby friday!


Plus, I also wanted to share this amazing Oreo art with you...
These are stunning!  

Friday, July 15, 2011

Furbaby Friday


From this profile picture, you can really appreciate how adorably flat her little face is. Don't you love it?
The weekend is here - Enjoy it!  Happy Friday everyone!

Club: BAKED - Farm Stand Buttermilk Donuts

Lately I've been baking and making all the things I've always wanted to try, but never got around to it.  I've always wanted to try making marshmallows from scratch - CHECK!  And now, thanks to Gloria of The Gingersnap Girl, I can now cross another off my list.  Gloria was our host for this week's Club Baked and she chose... drum roll please... Farm Stand Buttermilk Donuts!  
I've always wanted to try my hand at homemade donuts but I was always afraid of frying.  I assumed frying causes dangerous hot oil splatters, burns, and that it stinks up your house for weeks... and I suppose it could do all of those things... but I didn't have that problem (besides the stinky house part, because it does smell like a carnival in here now).  I heated up the 1 inch of oil in a dutch oven, and the sides were tall enough to prevent splattering and burns. So besides the funnel cake aroma lingering in the air, this really was a breeze.  This recipe was great.  The dough was simple to put together, it was sticky but easy to work with, and held together nicely when cut into a donut shape with biscuit cutters.  
I halved the recipe and made 9 medium size donuts and 13 donut holes.  The end result was quite amazing, and left me wondering - WHY hadn't I tried this sooner??  It produces a cakey donut with a great texture - not too dry or dense.  I used the cinnamon sugar coating and vanilla glaze from the Baked book and they were terrific.  


So thank you to The Gingersnap girl for finally getting me to make homemade donuts!  We enjoyed them very much. :) Be sure to visit Club Baked to see how the other bakers' donuts came out.  And stop by The Gingersnap girl for the recipe.

Thursday, July 14, 2011

3 Ingredient Coffee Granita


It's hot.  It is crazy hot.  They say, "A dome of heat will bubble over the nation's midsection through the upcoming weekend and is set to expand east next week. Extreme heat is forecast to build across the central United States through the weekend and then spread to the Atlantic Seaboard."  They add we'll probably get into the 100's in many cities.  Awesome.  Here in Florida, the short walk from the air-conditioned house to the car already has you dripping with sweat.  Yick.  What are you doing to beat the heat?  I made this super simple only 3 Ingredient Coffee Granita and it is a terrific way to cool down... only try not to eat it shortly before going to bed. :)


3 Ingredient Coffee Granita
Ingredients:
2 cups very strong coffee (or espresso)
1/2 cup granulated sugar
2 teaspoons pure vanilla

Stir hot coffee with the sugar until sugar dissolves.  Then stir in vanilla.  Place in the fridge to cool the mixture.
Transfer coffee to the bowl of your ice cream maker and freeze according to your ice cream maker's directions (mine churned 25 minutes).  
Serve with whipped cream and caramel syrup for an extra treat!


Wednesday, July 13, 2011

S'more Bites with Homemade Marshmallows


During my baking adventures on this blog, I've discovered that some recipes are more difficult than they appear, and some recipes are actually a lot easier than they would seem to be.  For example, some people make using yeast look effortless, however, I generally wind up staring at a beautiful dough ball that refuses to rise.  But on the other hand, I would have assumed that homemade marshmallows were a difficult confection to put together.  I've wanted to make them for some time, but fear of hot stickiness, 3rd degree burns, and candy thermometers made me hesitate.  Finally, I gave in.  And I'm SO glad I did because, as it turns out, homemade marshmallows are actually quite simple to make.  Plus, they're unfathomably more delicious than their store-bought evil twin counterparts.  These cloud-like vanilla bites of heaven were much less dense, more moist, and a whole lot more flavorful than the perfectly cylindrical bags of mallows from the grocery store... but don't get me wrong, I'd still eat a bag of those :) 
I can't wait to make all different flavors of marshmallows now that I know how easy they are.
 
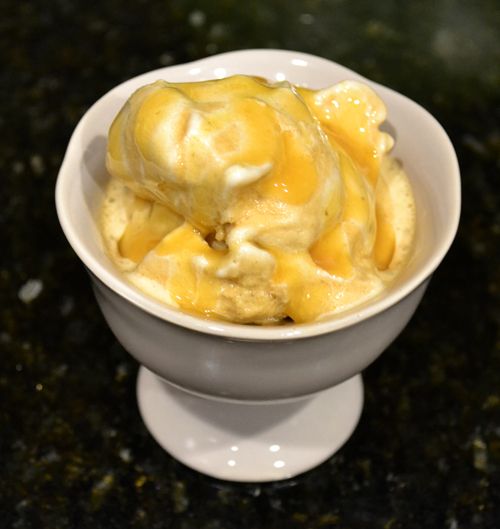
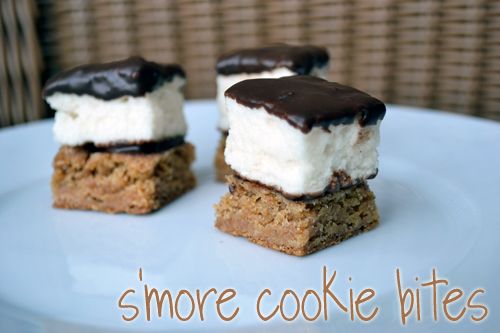
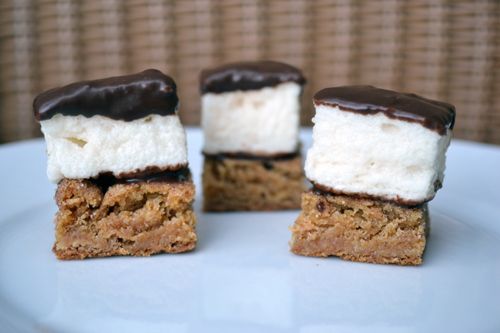
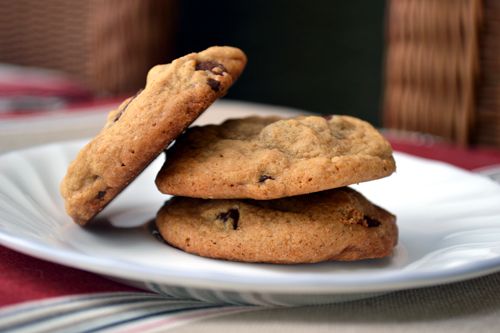
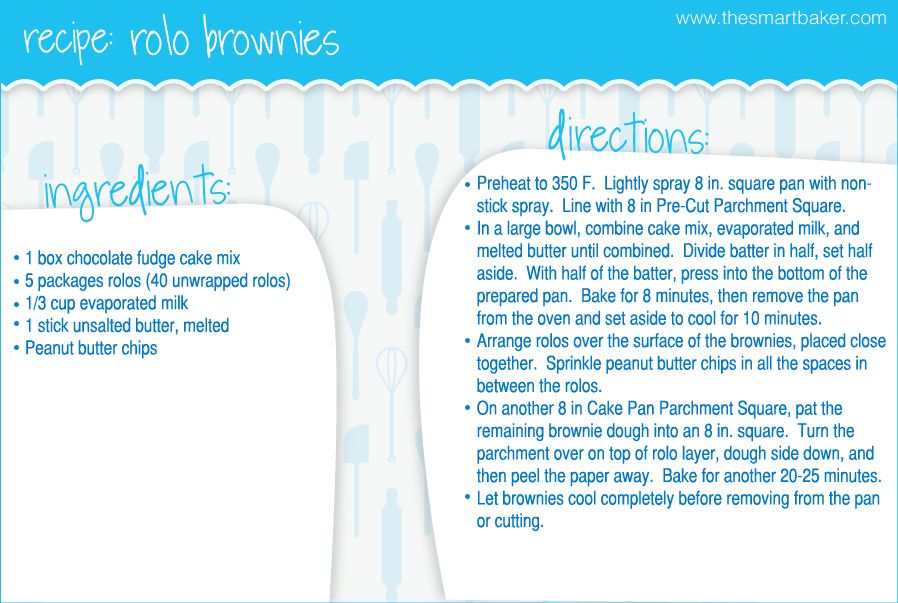
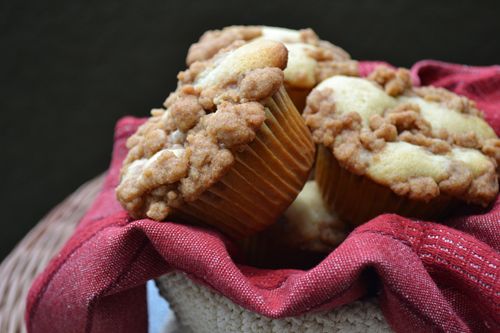
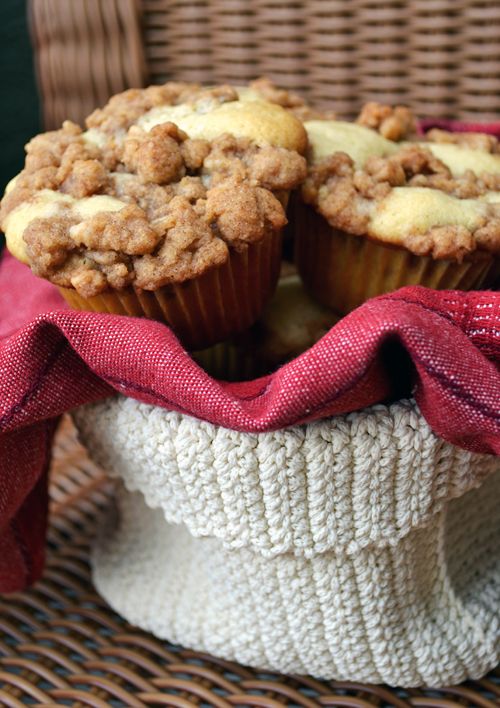
After I made the marshmallows, I decided I needed to turn them into something else.  Since many different s'more concoctions have been making their way across the food blogosphere, I hopped on the bandwagon and made bite sized s'more bites.  The bottom layer is a Chewy, Graham cookie.  A homemade marshmallow is "glued" to it with some chocolate, and some more chocolate tops off the whole thing.  Consensus?  They're amazing.  


Homemade Marshmallows, adapted from David Lebovitz
Ingredients:
2 envelopes (17g) unflavored gelatin
1/2 cup + 1/3 cup cold water
1 cup sugar
1/3 cup light corn syrup
4 large egg whites, room temperature
a pinch of salt
2 teaspoons pure vanilla extract

Marshmallow Mix:
1 cup cornstarch, 1 cup powdered sugar

In a small measuring cup, sprinkle the gelatin over 1/2 cup of cold water.  Let dissolve and soften.
In a small saucepan, mix the sugar and corn syrup with 1/3 of cold water.  Place over medium to high heat and set a candy thermometer in it.
In the bowl of an electric mixer, beat egg whites on low until frothy.  Add pinch of salt.
When the mixture on the saucepan reaches 210 F, increase the speed of the mixer to high to beat the egg whites until they are thick and fluffy.
When syrup gets to 245 F, remove from heat and slowly pour it into the whites, being careful so that the syrup doesn't fall on the whisk and splatter to the sides of the bowl.  
Add the gelatin/water to the saucepan and stir with rubber spatula to dissolve.  Pour this liquified gelatin slowly into the whites as they are whipping.  Add vanilla and whip for 10 - 15 more minutes, until the outside of the bowl feels completely cool.
*If making s'more bites and not just marshmallows, please see below for my Assembly note as I found a much easier way to do this after I was done!!
Lightly grease a 9 x 13 pan with non-stick spray.  Lay a pre-cut parchment sheet into the pan.  Using a sift or a metal strainer, generously coat the sides and bottom of the pan with the marshmallow mixture.  
Use an offset metal spatula (which has been lightly sprayed with non-stick spray) to spread the marshmallows into an even layer in the pan.  Sprinkle a layer of marshmallow mixture on top of the marshmallows.  Reserve any extra mixture.  Allow to set overnight or 24 hours.  
When marshmallows have been allowed to sit, roll a pizza cutter in the extra marshmallow mixture and cut the marshmallows to the desired size.  When cut, toss the marshmallows in marshmallow mixture and shake vigorously in a wire strainer to remove excess powder.

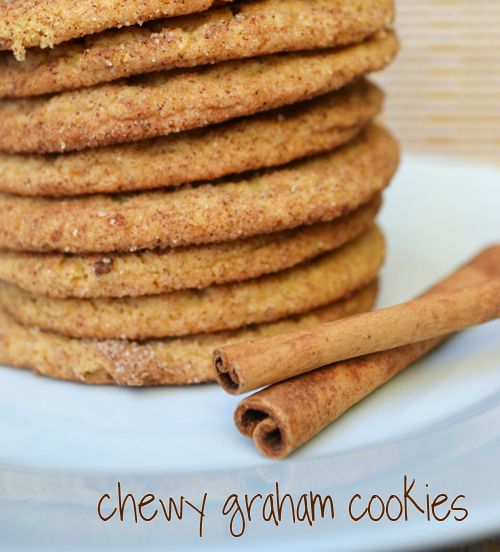
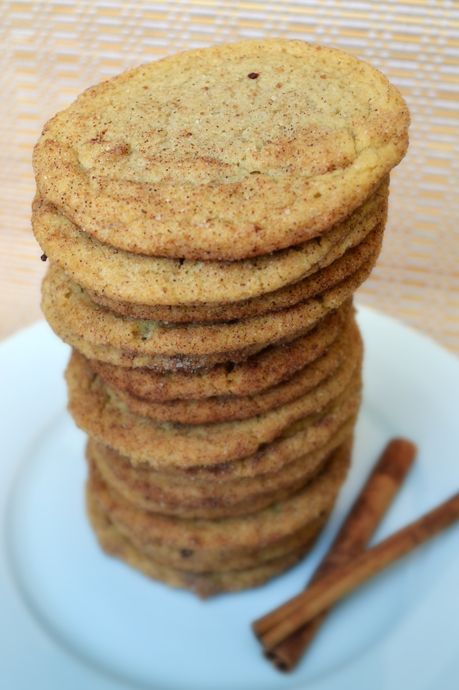
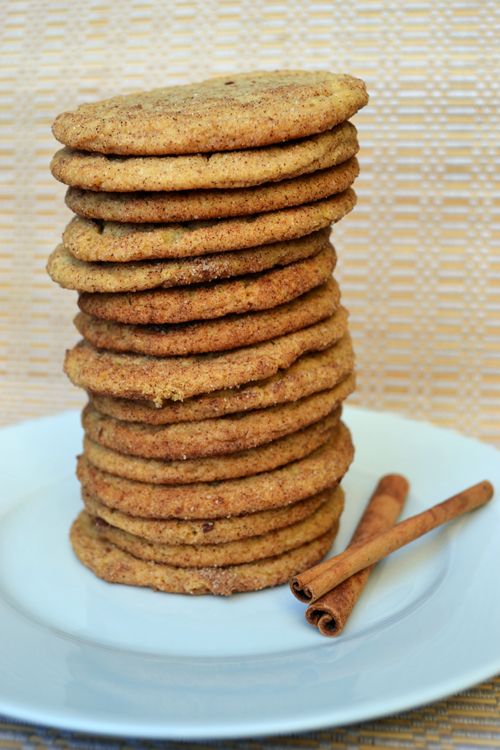
For the Chewy Graham Cookie Layer: adapted from King Arthur Flour Cookie Companion as seen on My Kitchen Addiction
Ingredients:
1 1/2 sticks unsalted butter, softened
1 1/4 cup granulated sugar
1 tablespoon molasses
1/8 cup honey
1/8 cup light corn syrup
1 1/2 teaspoons baking powder
1 teaspoon ground cinnamon
1 teaspoon pure vanilla extract
1/2 teaspoon baking soda
1/2 teaspoon fine sea salt
1 egg, room temperature
2 1/2 cups all purpose flour
Cinnamon Sugar

Lightly grease a 9 x 13 inch baking pan and line with parchment paper.  Set aside. Preheat oven to 375 F.
Put butter in the bowl of an electric mixer and turn on to mix until creamy.  Add the sugars and molasses and cream together.  Then add honey, corn syrup, baking powder, cinnamon, vanilla, baking soda and salt.  When combined, add egg and beat to incorporate.  Stir in the flour.  Using an offset spatula, spread the cookie dough into an even layer in the 9 x 13 pan.  Sprinkle the top of the cookie dough with Cinnamon Sugar.  
Bake for 12 - 18 minutes or until cookies appear set and doesn't jiggle when pan is gently shaken.  Cookie should be slightly golden.  
Allow to cool in the pan on a cooling rack for 5 minutes, then slip the parchment paper and cookie dough out of the pan and allow to cool directly on the cooling rack.  

Chocolate Layer:
Your choice!  I used a combination - (3) 2.25 ounce bars of Wilbur's Semisweet Chocolate, 6 squares of chocolate bark, and a few tablespoons of shortening (to thin for dipping).  Melt in the top of a double boiler and once melted, keep on low and stir occasionally to avoid burning or overheating.  Be sure the chocolate is not TOO hot when you are dipping your marshmallows in it, as it could cause your marshmallows to melt if it is too hot!

*To assemble:
*I cut 1 inch squares of cookie, and 1 inch marshmallow squares.  Then, I took the marshmallow, dipped the bottom in chocolate, and then used that chocolate to adhere the marshmallow to the cookie.  Once the chocolate had cooled, I picked up the s'more bite and dipped the top of the marshmallow in the chocolate mixture.  BUT an easier way to do this would have been to 
1) Bake the chewy graham cookie first and allow to cool.  
2) Pour hot marshmallow mixture directly onto the graham cookie and allow to set.  
3) Then cut into squares and dip in chocolate.  
Since I didn't know what I was going to turn the marshmallows into when I first made them, I didn't think to do this!  

Saturday, July 9, 2011

Bouchon Bakery's Chocolate Chip Cookies

Three years ago today, July 9th, a chocolate chip cookie obsession swept the nation after the New York Times posted the famed Jacques Torres Chocolate Chip Cookie recipe.  The big deal was: 1) Chilling it for 24 hours makes all the difference and 2) A small sprinkle of sea salt on top takes it up a notch from your standard chocolate chip cookie.  I made them, and I loved them.  But it made me think, sometimes, a seemingly small adjustment to a standard recipe can be intriguing enough to make people want to bake it and try.  Case in point: On May 12th, the husband was answering some emails in the morning while watching the Today Show when Thomas Keller, of Bouchon Bakery was on the show making chocolate chip cookies.  He introduced his unique technique: Adding a tablespoon of molasses while you're creaming the butter and sugar.  He says it is the key to the richness, moistness, and texture of his chocolate chip cookies. Whattttt???  I do not love molasses, at all, but since it is only 1 Tablespoon and it is really used for texture, not flavor, I needed to give this a try.  Let me just tell you... I do love the texture of these cookies.  The molasses flavor is not detectable in the final product, and the inside of the cookies is so nice and soft and chewy.  Whether or not they are better than the famous NY Times cookie, I will not know until I do a side-by-side taste test (or maybe that it just an excuse to make more cookies).  


Thomas Keller's Chocolate Chip Cookies, adapted slightly from Bouchon Bakery as seen on Today Show
Ingredients:
2 sticks unsalted butter, room temperature
1 cup dark brown sugar
2/3 cup granulated sugar
1 Tablespoon Molasses
2 large eggs, room temperature
1/2 teaspoon fine sea salt
1/2 teaspoon baking soda
3 cups all purpose flour
1 - 2 cups chocolate chips


In the bowl of an electric mixer fitted with the paddle attachment, cream butter for 30 seconds.  Scrape down the bowl and continue to beat for 2 minutes.  
While that is beating, in a medium bowl, whisk to combine the flour, salt, and baking soda.  Set aside.  
Add the sugar and molasses and beat on medium 2 minutes and scrape the bowl.  Beat for 4 more minutes, scraping the bowl half way through.  
Reduce mixer speed to low.  In a glass measuring cup or separate small bowl, whisk eggs to beat.  Then pour the eggs slowly into the butter sugar mixture.  Once fully incorporated, return mixer speed to medium and beat 2 minutes.  
Reduce mixer speed to low and add the dry ingredients.  When combined, add chocolate chips.  Stir only to incorporate, don't overmix.  
Scoop on to a parchment lined baking sheet using a 1.5 T scoop.  Bake 12 - 18 minutes or until golden brown at the edges.


Friday, July 8, 2011

Furbaby Friday

Happy Friday, everyone!  Over here on Florida's Space Coast, the last shuttle launch just took off.  It's always a pretty cool thing to get to watch it from your back yard, no matter how many times you see it.  Did anyone watch it on TV (or in the sky if you're a central Floridian?)

Because it is Friday, here are the Furbaby Friday photos.  Plus, a New Chocolate Chip Cookie recipe (with a SECRET ingredient that's all about TEXTURE) to come later on today.  No, you can never try too many chocolate chip cookie recipes.  Check back soon!


Tuesday, July 5, 2011

Customer Spotlight: How to display Cake Pops like a Pro

Not too long ago, I posted about a customer of ours in Miami whose shop we got to visit.  I think I'd like to do a regular Customer Spotlight here on the blog, showcasing some of the amazing businesses who use our products.  While we haven't been able to visit this next customer yet (notice I say YET, because each new picture they post on facebook makes me want to drive over there even more!), I still wanted to show you all a bit of what they do.

The Lollicake Queen is in Sarasota, Florida.  If you find yourself in the area, you'll have to stop in and taste some of their lollicakes.  The Lollicake Queen makes all different flavors of golfball sized cake balls.  They even make special order cake balls in a variety of custom designs and colors!  What a great gift or party favor idea, huh?  Check out some of the Lollicake arrangements they've creating using our round and square Cake Pop Stands:


Don't you just love them?!  Be sure to "like" the Lollicake Queen on facebook to keep up with all the great things they're baking up.

Monday, July 4, 2011

Rolo Brownies and Quick 4th of July Dessert Idea

Happy Fourth of July everyone!  I hope you are all enjoying your day with family and friends, eating lots of food and watching fireworks.  If you are going to a barbecue and you need something to bring, this is a great idea that can be made at the last minute.  


The second I saw these Rolo Brownies on My Baking Addiction, I knew I'd be making them at some point.  When it came time to pick what to make for a Fourth of July party, I thought these would be the perfect thing to bring.  They're pretty quick to throw together - it involves a short cut - a boxed mix, something I very rarely do! But it tastes like homemade.  If you're not a fan of boxed mix flavor, don't worry - neither am I, and these taste nothing like something you get from a box.  Plus, they're quite unique!  I doubt anyone else will be bringing Rolo-stuffed brownies to your barbecue.  


I've added the simplest, quickest Fourth of July decorating idea that will turn these brownies, or any brownie recipe for that matter, into a festive, Star-Spangled dessert.  :)  


Star Spangled Rolo Brownies from My Baking Addiction
Ingredients:
1 box chocolate fudge cake mix
1/3 cup evaporated milk
1 stick unsalted butter, melted
5 packages Rolo (or 40 rolos) unwrapped
Peanut Butter Chips


Preheat to 350 F.  Lightly spray an 8 inch square baking pan with non-stick spray.  Line with 8 in Cake Pan Pre-Cut Parchment Square.  
In a large bowl, combine cake mix, evaporated milk, and melted butter until combined.  Divide the batter in half, set half aside.  With half of the batter, press into the bottom of the prepared pan in an even layer.  Bake for 8 minutes, then remove the pan from the oven and set aside to cool for 10 minutes.
Arrange rolos over the surface of the brownies, close together.  Sprinkle peanut butter chips in all the spaces in between the rolos.  On another 8 in Cake Pan Parchment Square, pat the remaining brownie dough into an 8 inch square.  Turn the parchment over on top of the rolo layer, dough side down, and then peel the paper away.  Bake for another 20-25 minutes.
Let brownies cool completely before removing from the pan or cutting.  


Want the quickest, simplest way to decorate your dessert for 4th of July?  Take any white frosting, microwave for 10-15 seconds are stir until frosting is pourable.  Drizzle over the top of your dessert, and sprinkle with Red and Blue Star Shaped Sprinkles.  Voila!  I used this technique on the Rolo Brownies and on some Blondies I made.  


Recipe Card! Click to enlarge:


Friday, July 1, 2011

Club: BAKED - NY Style Crumb Cake


I got hooked on BAKED: New Frontiers in Baking when I made my first recipe from the book in November 2008.  Their
Brownies quickly became my favorite, and that's saying quite a bit as I've made about one and a half gajillion different brownie recipes.  So when several members of Sweet Melissa Sundays mentioned they were started a Club: BAKED baking group based around the book Baked Explorations: Classic American Desserts Reinvented, I jumped at the opportunity.  I know I'm going to love the recipes we make from the book and I'll find many new favorites.

The first recipe up in our schedule is NY Style Crumb Cake.  This is a great way to start off this group!  I'm a native New Yorker and have tasted quite a few crumb cakes.  And big buttery cinnamon-sugary crumb topping is one of my favorite things in the world.  Rather than make the full batch, since I'm baking up other things for Fourth of July in the very near future, I decided to half the recipe and make it in a cupcake tin.  This method yielded 12 individual Crumb Cakes.  Besides halving, and substituting (1/2 Cup granulated sugar + 1 Tablespoon molasses) for the Dark Brown Sugar, I made the recipe exactly as it appears in the book.  I haven't tried one yet, so I can't report on their taste!  But from the looks of them, I think they're a winner!  I'll come back here with an update once they've been sampled.  :)


I'm excited to be baking in this new group!  Make sure to visit our site to see the other bakers' versions of this classic dessert.  Visit Karen's Cookies Cakes and More for the recipe.  Thanks for hosting, Karen (and picking such an awesome recipe to start off with)!


Furbaby Friday!

It's Friday!  Pup Spotlight time.  Sadie has been enjoying having both of us home over the summer.  She's even been helping us pack orders. Gee, thanks Sades!

LinkWithin

Related Posts with Thumbnails