Recent Posts

Thursday, July 3, 2014

Buttermilk Cornbread


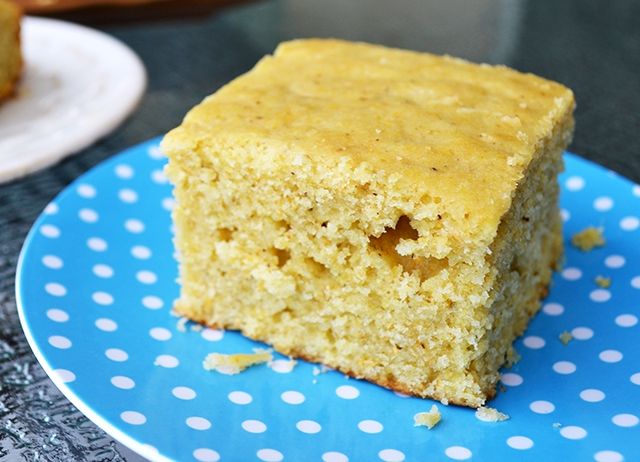
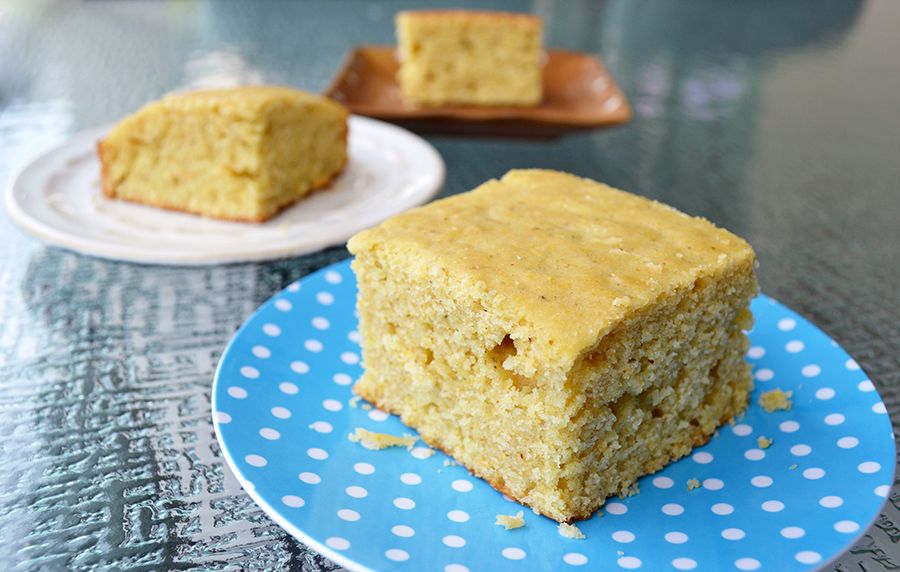
Recently, I had my sister and her boyfriend visiting from New York.  It was so much fun having them in town, I didn't want them to leave!  On their last night with us, we had an easy night in with a delicious homemade dinner and a competitive game of scrabble.  We prepared a Chicken and Spicy Sausage Paella with Mushrooms, and whipped up some Buttermilk Cornbread to go with it.  Both dishes were delicious, in fact we have made the paella a regular dish in our home.  But the Cornbread…  ooh the cornbread.  It reminded me of the corn muffins I used to eat as a kid (I have spoken of my childhood love for mass-produced corn muffins on the blog before - here).  In fact, the next morning I couldn't resist toasting up some of the leftovers with butter for breakfast.  These were a huge improvement from the Entenmann's corn muffins I ate growing up.  


Buttermilk Cornbread, slightly adapted from Allrecipes.com

  • 1 stick (1/2 cup) unsalted butter
  • 2/3 cup granulated sugar
  • 2 eggs, room temperature
  • 1 cup buttermilk (I used low fat)
  • 1/2 teaspoon baking soda
  • 1 cup cornmeal
  • 1 cup all purpose flour
  • 1/2 teaspoon fine sea salt

Preheat to 375° F. Line an 8 inch square pan with Perfect Parchment.  
In a large skillet, melt the butter. Remove from heat and stir in sugar.  Quickly add eggs and beat just until combined. 
In a measuring cup (I used the same cup I measured the buttermilk in to save from washing more dishes), combine buttermilk with baking soda.  Add to butter-sugar mixture and stir to combine.  
In another small bowl, whisk cornmeal, flour, and salt to combine.  Stir into buttermilk mixture until few lumps remain.  Pour batter into prepared pan and bake for 30 - 40 minutes, or until cake tester comes out clean.
Allow to cool most of the way before removing from the pan.


Friday, March 28, 2014

Nutella-Filled Chocolate-Nutella Cupcakes

Recently, we welcomed another niece into the family.  For the then mom-to-be's baby shower, we made cupcakes we knew the mommy would love: Nutella Cupcakes!  

In this recipe, Nutella is mixed right into the batter.  The cake itself baked up wonderfully - light, fluffy and airy.  But I wanted to make sure that the nutella flavor was unmistakable and over the top, so I hollowed out the center of each cupcake and filled it with straight up nutella.  The chocolate-nutella cupcakes with the nutella center contrasted nicely with the vanilla buttercream frosting.  For a bit of decoration and added chocolate decadence, each cupcake was topped with a chocolate peanut butter heart.

I will add more pictures soon so you can see the cupcakes in more detail.  For now, here is a sneak peek at how the cupcakes were all dolled up for this ultra girly, adorably pink baby shower.  What do you think of the personalized cupcake wrappers?  We made these to say "Welcome Mila" - our new niece's name.  These were our prototypes; these are not currently available for sale yet.  The baby shower guests loved them!  They wore them as tiaras when they were done with their cupcakes.  :) 

The simple addition of ribbon to the edges of a cupcake tower make for such an elegant display!

Nutella-Filled Chocolate-Nutella Cupcakes adapted from Gimme Some Oven
Ingredients:
1 stick unsalted butter, room temperature
1 1/2 cups granulated sugar
2 eggs, room temperature
2 tsp vanilla extract
1 1/2 cups all purpose flour
1/2 cup hershey's special dark cocoa powder
1 tsp baking soda
1/4 tsp fine sea salt
1/2 cup buttermilk
1/2 cup lukewarm coffee
1/4 cup nutella
Additional nutella for filling (optional)

Preheat to 375 and line a muffin tin with cupcake liners (around 24).  In the bowl of an electric mixer, cream together the butter and sugar until light and fluffy. Add the nutella.  Add the eggs one at a time, beating well after each addition.  Add vanilla.

In a medium bowl, whisk together the flour, cocoa, baking soda and salt.  In a separate bowl, whisk buttermilk and coffee to combine.  Add the dry ingredients to the creamed butter mixture, alternating with buttermilk mixture.  Mix just until combined. 

Fill cupcake liners about 2/3 full with batter. Bake for 15 - 20 minutes or until a cake tester comes out clean.  Cool in the pan 5 minutes before transferring to a wire rack to cool the rest of the way.

Once cupcakes are entirely cooled, using a sharp paring knife to cut a circle in the top of the cupcake.  (I do this by inserting the knife straight up and down in the cupcake center, and rotating the cupcake with my other hand.  The core will pop right out with a spoon… these are also a perfectly popable snack! :).  Scoop about 1/2 cup of nutella into a piping bag and fill the cupcakes with the nutella.

My favorite vanilla buttercream frosting recipe
Ingredients:
2 sticks unsalted butter, room temp
4 cups confectioner's sugar
2 tsp vanilla extract
pinch of fine sea salt
1/4 cup milk or heavy cream (optional)

Place butter in the bowl of an electric mixer and turn the mixer on low.  Slowly add the confectioner's sugar.  When all the sugar is in, add the other ingredients: vanilla, salt, and if desired, the milk/heavy cream (this makes it a little creamier, but also slightly less stiff for piping. It tastes great both ways).
Let mix on medium/high for 5 minutes.  Pipe onto completely cooled cupcakes with a piping bag.


Tuesday, February 25, 2014

Biscoff Blossom Cookies


On our first business trip for The Smart Baker, we flew to California to visit a new distributor's facilities. It was also my first time ever in California. It was a trip full of firsts: first visit to the Hollywood Walk of Fame, driving through the mountains in California, going to Crumbs (actually, we happened upon the grand opening of the new LA location of Crumbs!), walking the Santa Monica pier and Venice Beach, and so much more.  While the trip was memorable for being the first Smart Baker business trip and our first trip to California together, it was always very memorable because it marks the occasion of my first BISCOFF COOKIE.  Flying home, they handed us each this little individually wrapped cookie … and I fell in love.  

If you love Biscoff like me, you're sure to enjoy these cookies.  They are soft baked sugar cookies with   3/4 cup of biscoff spread mixed right into the dough.  I topped some of the cookies with a Wilbur Chocolate Bud, and others, I left without.   Both were completely wonderful, but I may have loved the ones without chocolate a little bit more. 

Biscoff Blossoms, adapted from Gimme Some Oven
Ingredients:
1/2 cup unsalted butter, room temp
3/4 cup Biscoff spread
1/3 cup brown sugar
1/3 cup sugar
1 large egg, room temp
1 tsp vanilla extract
2 cups flour
1 tsp Baking soda
1/2 tsp sea salt
Wilbur chocolate buds (or Hershey Kisses) optional
About 2/3 cups turbinado sugar for coating

Preheat the oven to 375 F.  Line a baking pan with parchment paper.  

In the bowl of a stand mixer, combine butter, biscoff, and both sugars.  Beat on medium-high until light and creamy (about 3-4 minutes).  
Add the egg and vanilla and mix until combined. 
In a separate bowl, whisk together flour, baking soda, and salt.  Add flour mixture into the butter mixture and beat until just combined.

Roll dough to approximately 1 tablespoon sized balls.  Roll each ball in turbinado sugar and place on the parchment lined sheet approximately 2 inches apart.

Bake until the cookies are just beginning to crack on the surface (around 10 minutes).  If topping with chocolate buds, gently press one into the center of each cookie immediately after removing from the oven.  After 5 minutes, remove to cool completely on a wire rack.  

Also, if you happen to be reading this on the day it was posted (February 25, 2014) please be sure to tune in to CNBC tonight at 9pm eastern time to see our episode of Shark Tank!  


LinkWithin

Related Posts with Thumbnails