Recent Posts

Friday, April 30, 2010

Thanks, Tessa!

Photobucket
Just wanted to give a big THANK YOU to Tessa of Handle the Heat! It turns out, I won a digital kitchen scale on her Blog Anniversary Give-Away! This is pretty exciting, because I've been wanting to start measuring out my ingredients. In fact, the very same day I received it in the mail, I used it! More info on that later. :)
Thanks again, Tessa!!

Tuesday, April 27, 2010

Blondies according to Dorie Greenspan... Chewy & Chunky

Photobucket


Though I do not own this book yet (YET), I have heard soooo many great things about Dorie Greenspan's Baking: From My Home to Yours. This past weekend, I got around to making her Chewy, Chunky Blondies (page 109) since we are real big blondie fans in this family. I prepared the recipe with only minor changes (I omitted the coconut and walnuts, and instead of her 6 ounces bittersweet chocolate chopped into chips, or 1 cup chocolate chips & 1 cup Heath Toffee Bits I did 3/4 C chocolate chips (mostly bittersweet with a handful of Hersheys Special Dark thrown in) and 1/2 C Peanut Butter Chips. Other than that, I stuck to her recipe so I won't post it here (But you can find it HERE and HERE).

Photobucket


These blondies came out very good. Good enough that I want to go out and buy the book now for the rest of the recipes. Though they were nothing extra-spectacular that makes them stand out from other blondie recipes I've prepared, I'd definitely make them again. They were a cinch to throw together, nice and sturdy and moist, and with some rich caramelly tones.

Photobucket


I want to take a poll... I'm considering making cupcakes for my wedding this October. I have about 75 - 90 guests, so I'd make around that many cupcakes, and I' get a mall 6 inch cake made professionally to use as the "cake cutting cake" that I put my cute little cake topper on. I'm not doing anything super fancy, just piping some frosting on and maybe throwing a gum paste flower on it (that I would purchase, not make). Does anyone have any thoughts on this? Some people say I can do it, others say I'm totally insane. Fellow bakers - what are your thoughts??? I'd love some insightful input and wisdom. :) Thanks!

Sunday, April 25, 2010

Sweet Melissa Sundays: Strawberry Cobbler Pie

Photobucket

So I'm trying out a new blog layout. I tried to neaten it up a little bit, make it look cleaner and tidier and a little less cluttered. What do you think?

Anyway, I had a lot of fun with this week's recipe for Sweet Melissa Sundays. Our host for the week, the lovely Tracey of Tracey's Culinary Adventures chose Strawberry (Rhubarb) Cobbler Pie... I left the Rhubarb out, so mine is just a Strawberry Cobbler Pie. Though I was tempted to try out Rhubarb (like many other SMS-ers, I've never tried it before!) but I'm bringing it to family dinner on Sunday night and I wasn't sure how the fam would feel about it.

I made the cobbler pie exactly as the recipe from the Sweet Melissa Baking book states, except I subbed the 2 cups of Rhubarb for an additional two cups of strawberries. Also, I prepared my biscuit dough in the food processor since I don't own a pastry cutter, and it came together just fine. I may have used a tad bit more lemon zest than Melissa calls for because I'm never sure... when a recipe calls for a teaspoon of zest, is it one teaspoon packed? But... I admit... I cheated and used a pre-bought frozen pie crust. I'm sorry! I really wanted to give the pie crust recipe a try, I was a little short on time.

Photobucket
slicing the strawberries with an egg slicer... time saver!


Photobucket
Photobucket
Daniel cutting me some star shaped biscuits


Photobucket
Very liquidy.


Photobucket
Cute! This is the pre-baked pie. The star shape totally worked!


Photobucket
I told you mine was wet!!!! Was anyone's oozey and wet like this?


Photobucket


Photobucket


It came out looking very good! I can't wait to try it tonight with the family. I wish we could just dig in now!!!
Besides the SEA of STRAWBERRY OOZE GOO that flooded out of my pie, everything when perfectly smoothly. I thought Melissa's sweet biscuit recipe was great. I wound up with a few small stars that wouldn't fit on the pie, so I brushed them with milk, sprinkled with sugar, and baked them up. Served warm with a little jam... excellenttttt. If this is any indication of the taste of the whole pie, it should be quite delicious indeed! With the remaining heavy cream left over from the biscuit dough, I plan to whip up from whipped cream to serve with the pie... and maybe even some vanilla ice cream... mmm, perfection.

Check out the other SMS bakers to see how their pies came out by visiting the blogroll. And see Tracey's blog, Tracey's Culinary adventures to see the recipe. Buon appetito!

Sunday, April 18, 2010

Sweet Melissa Sundays: Sweet Potato Bread with Cinnamon Glaze

Photobucket


Besides terrible, terrible (terrrrrrrrrible) allergies, this time of year is pretty great. The semester is rapidly coming to a close, its bathing suit weather again, and today is my wonderful fiance's birthday! The one thing that isn't so great about this time of year (besides the horrendous mind-bogglingly debilitating seasonal allergies. Spite you, tree pollen.) is the un-availability of yummy fallish ingredients. I searched and searched for canned sweet potato! But it was nowhere to be found. I thought of Pumpkin as a yummy substitute but that is out of season and nowhere here in Florida at the moment either. Not really having enough time to think about how to buy sweet potatoes and make them on my own, I bought a can of Bruce's Yams in Syrup, and opted to drain all the syrup from the can. Not really thinking about it, I bought a 15 ounce can (since I planned to halve the recipe and prepare it in a loaf pan).... but straining the syrup from the can left me with less than 15 ounces. Oh well, I had to make due on my tight schedule. I just decreased the amount of all the other ingredients I put in as well. This was kind of a winging-it kind of recipe for me. The only real change, besides messing around with the amounts of ingredients, was to use only cinnamon in the batter instead of all of the spices Melissa called for.

Photobucket


Also, I chose to do a cinnamon confectioner's sugar glaze instead of the Cinnamon-Rum-Orange Glaze the original recipe called for. We aren't big fans of orange and we don't have any rum. My glaze went something like this:
Cinnamon Glaze
3/4 C confectioners sugar
1 tsp cinnamon
1 tblspn butter, room temperature
2-4 tsp hot water
1/2 - 1 tsp vanilla, to taste
Beat all ingredients together until smooth. Pour half of the glaze over the still-warm loaf (I allowed it to cool for 20 minutes before topping with the glaze). Wait about 10 minutes, allowing the glaze to harden slightly, and then pour the remaining glaze over the loaf. This way you get a nice thick layer of the glaze. I used a pastry brush and painted the glaze on to the sides of the loaf as well.

Photobucket

Photobucket


The result was quite good, considering all the estimating I did with the ingredients. The bread was very moist and not too sweet. The spicy cinnamony glaze's sweetness complementing the bread nicely. I bet this would be good with whole wheat flour too.

Photobucket

Breakfast for the birthday boy... he got his tradition b-day breakfast, cinnamon buns, yesterday :)

Be sure to visit the SMS Blogroll to see how this one turned out for the other members. And see the host, Lorelei's blog - Mermaid Sweets, for this week's recipe.

...have you thought about Mother's Day yet? I am offering my devoted blog readers twenty-five percent off a purchase at TheSmartBaker.com. 25% Off! That's the highest discount we've done so far, but its for a limited time only (offer good until Wednesday, May 5th, 2010). Just type in MD2010 during check-out in the "Coupon Code" spot. Our clever Measurement Conversion aprons come in Burgundy, Red, Pink, Navy Blue, Forest Green, and Black and are monogrammed with your choice of Initial free. And now you can get a Measurement conversion kitchen towel to go along with it and complete the gift! Your mother will definitely appreciate it :) (offer excludes custom orders).

Friday, April 16, 2010

New Classic Brownies aka Ice Bath Brownies

Photobucket

One of the hardest things to do with brownies is to defend them from hungry brownie lovers before they cool. Its even harder to try to convince those people (Dan) that it'll taste better tomorrow. But, I have just found a recipe to change that! This interesting brownie recipe from Scharffen Berger requires you to remove the brownie pan from the oven when they are done baking, and immediately move them to an ice bath. It cools really quickly in the ice bath (ours were completely cool within about a half an hour) and Alice Medrich (author of the book "Cookies and Brownies" where this recipe is from) says this quick cooling process is key to achieving delicious, fudgy results. I have to say I believe her, because ours were fudgy and perfect after that first 30 minutes. No need to wait until tomorrow to eat these at their best! Plus, this recipe is super quick to put together - it's all made in one bowl (easy clean-up, too!). This is now probably in my top favorite brownie recipes.

Photobucket

I prepared Alice Medrich's "New Classic Brownies" exactly as seen HERE on Scharffen Berger's website, but I left out the optional nuts. Definitely put this one on your to-do list.

Photobucket

Sunday, April 11, 2010

Ladybug Cupcake Pull-Apart Cake (Baby Cupcakes!)

I love trying new things in baking! I especially like trying new things when they work out in the end. This weekend, I made a Cupcake Pull-Apart Cake for the first time, for my adorable niece's ladybug themed FIRST BIRTHDAY PARTY! If you don't know what a Cupcake Pull-Apart Cake is (which I didn't either until recently) - the concept is to make a cake out of cupcakes, so that they're still easy to serve (no knives to cut the cake needed) but decorate it as one big cake so you still get the look of a real cake. So when it comes time to serve, all you have to do is walk up and take a cupcake. Clever!

While looking at others' cupcake pull-apart cakes to figure out how to do this, I found a bunch of different ways to make them. Some people arranged cupcake liners reallllll close together in a cake pan and filled the liners much higher than you would with usual cupcakes. When they bake, the batter puffs up and touches. So, it is still individual cupcakes but they are connected at the top. Its frosted and decorated together as one cake. This technique made me nervous for a few reasons. What if you fill the liners TOO much and instead of just gently connecting at the top, it oozes all the way down the sides and you have a cupcake cake blog mess. Orrr, even if done correctly, if they're connected at the top, I thought it would make easy pull-apart a little bit less easy.

Another technique is to just make cupcakes as you normally would, then arrange them close together on a pan, and frost all together as one big cake. I found this video at Betty Crocker, and thought it looked do-able!

For the recipe, I chose a 1-year-old friendly no sugar added cupcake from Amy Berman, Executive Pastry Chef & Co-Owner of Vanilla Bake Shop. The only sweetness in these cupcakes comes from the addition of bananas and apple juice concentrate. Perfect for the little ones who aren't used to the Sugar-Loadedness of regular cupcakes! They were nice and moist due to the bananas and sturdy because of the rolled oats. Tasted like banana bread! I also used Amy's Cream Cheese frosting recipe (not quite no-sugar-added). You can see both recipes here at Holidash or here at Celebrations.com. So, Low Sugar 1st Birthday Banana & Apple Juice Cupcakes with Cream Cheese frosting it was!

I made the full batch of cupcakes, which made about 18-20 cupcakes, but I only used 17 in the arrangement.
Photobucket
After they were fully cooled, I arranged them like so. I did it like this rather than a regular rectangular cake shape so that the lines of cupcakes could kind of interlock, reducing the amount of space in between them.

After arranging them on the pan, I filled a piping bag with frosting and put an enormously generous amount on each cupcake. I repeat you NEED to use A LOT of frosting to get this to work. In order for it to not fall down in to the cracks, there needs a real thick layer of frosting (you can always scrape some off before baby gets it). So I piped a giant dollop on top of each one. Then, I went in with my offset spatula and gently coaxed the dollops to touch each other. Then we smoothed it all out and decorated.
Photobucket

Photobucket

Photobucket

The lady bug and letters were made with fondant, and the dot border is M&Ms. What do you think?

Sunday, April 4, 2010

Sweet Melissa Sundays: Pecan Shortbread Crust and Key Lime Filling

Mmm cookies. I will never turn down an opportunity to make (or eat) a cookie. So I jumped at this week's Sweet Melissa Sundays recipe, chosen by Lara of The Lab: Pecan Shortbread Cookies. My boy isn't much of a fan of dry, crumbly shortbreadish cookies, so I took Nina's idea and ran with it - use it as a crust for a bar cookie! Good idea, Nina!

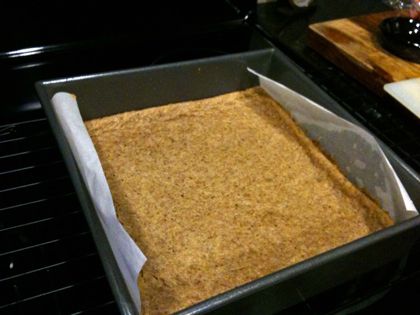
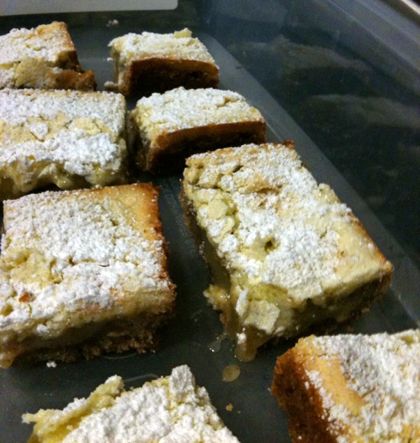
I prepared Melissa's recipe for Pecan Shortbread cookies exactly as the book stated, and spread it into the bottom of a prepared, greased and parchment-lined 8x8 pan. I baked it for about 20, 25 minutes until lightly golden. Then I let it cool completely while I prepared the filling.
Photobucket

We are big key lime fans in this house. And I've seen many recipes for Lemon and Lime bars and loved the idea but never got around to make them. So, I thought this was my opportunity! I used THIS recipe from Pat and Gina Neely for the lime filling. The Neelys' recipe was fo a 9 x 13 pan (which holds 12 ounces) and I was using a 8x8 (which holds 8 ounces) so I scaled down the recipe to use about 3/4 of the original recipe. Let me just tell you this was a bit of a disaster from the very beginning.

First, I make an ENORMOUS mistake. After I added all the ingredients, I saw the recipe said, "Pour the lime topping over the cooled crust." Well... my dough was SO THICK that it was practically busting my kitchenaid mixer open... definitely NOT pourable. It turns outttttttt, I had added 4.5 CUPS of flour, when the recipe really called for TABLESPOONS. Haha, OOPSSS. So I set aside my disaster dough for a while and re-zested limes, re-juiced limes, and re-made the filling. :) I poured it into the cooled pan and let it bake for 25 minutes. I removed it when the filling looked set.

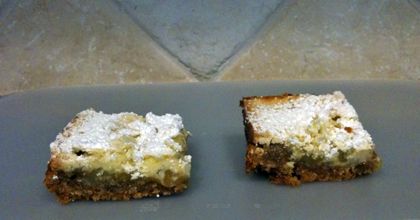
I let it cool, like the recipe said, and then tried to cut it. It seems my filling never set up right... maybe I didn't bake it long enough? Or maybe I did something wrong? I'm not sure, but it OOZED out when I tried to cut it.
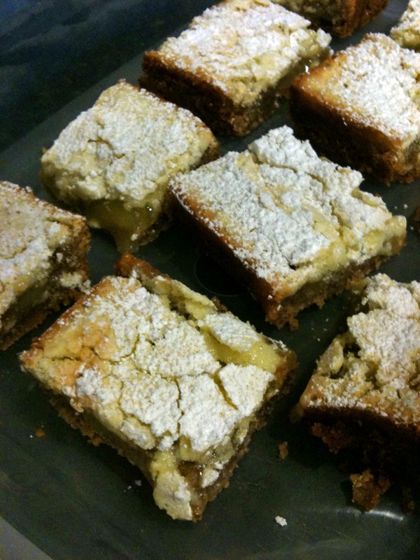
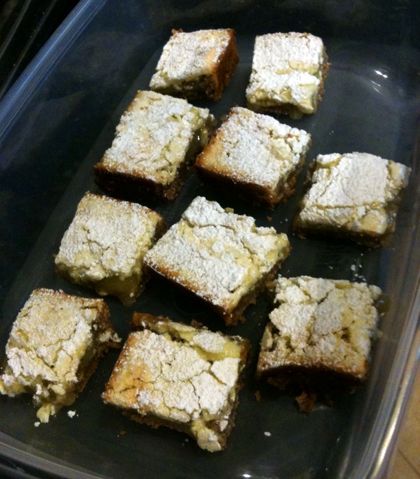
I wound up saving the dessert by transforming it into a refrigerated treat... it cut much easier and didn't ooze when it was chilled. And it still tasted quite good cold!
Photobucket

Photobucket

Photobucket

Photobucket

With the little bit of remaining Pecan Shortbread crust I had left over from making the bar cookie base, I made some regular ol' cookies the way The Sweet Melissa Baking Book said... only problem is it was wayyyy too crumbly. After baked and cooled, I could barely pick them up without them crumbling into a million pieces. Anyone else have this problem? Maybe this just wasn't my day in the kitchen. :)

So whatever happened to all the OOPS key lime dough? The one where I added CUPS instead of TABLESPOONS of flour? I had to at least try baking it before throwing it away! The result?
Photobucket
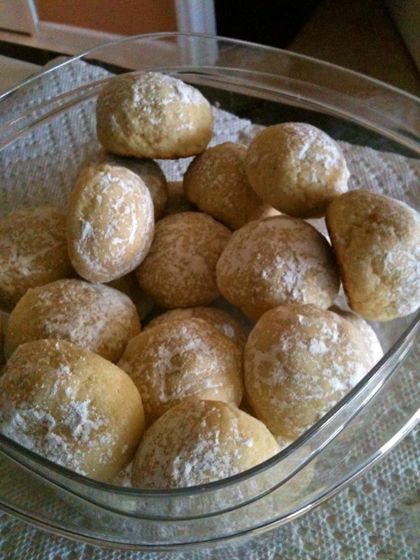
Little cookie-balls. They maintained their exact shape while baking. I rolled the balllies in confectioners sugar and let em finish cooling. They turned out kinda soft, kinda chewy and have just the right amount of tangy lime-ness. Not THE best cookies in the world, but not the worst either. :)

Today was just one of those days I needed to put the towel down and get out of the kitchen. Maybe its all the allergy medicine.

Anyway, have a HAPPY EASTER! I hope everyone else's baking went more smoothly than mine!! Check out the blogroll to see how everyone else fared with this week's recipe. And see Lara's blog for the recipe. Thanks for hosting, Lara!!

LinkWithin

Related Posts with Thumbnails