Recent Posts

Sunday, October 25, 2009

Sweet Melissa Sundays: Devils Food Cake with Peanut Butter Frosting


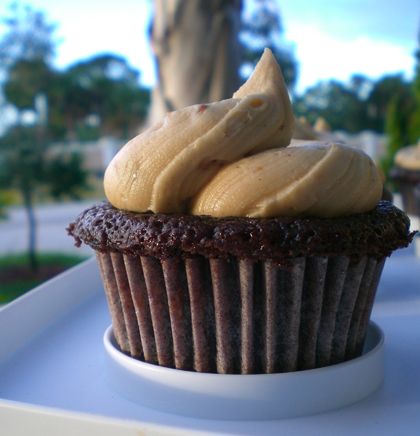
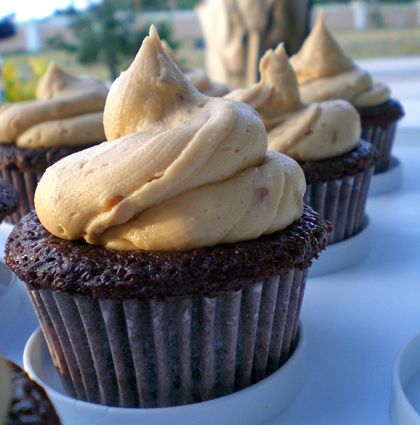
Chocolate. And Peanut Butter. A combination that will never ever ever get old. For this week's Sweet Melissa Sundays recipe, Holly of Phe/mom/enon chose Devil's Food Cake with Peanut Butter Frosting. Yesssss!!! I decided to make cupcakes instead of a full cake and let me just tell you, this new addition to our kitchen REVOLUTIONIZED the cupcake making process. Ok maybe not revolutionized but it made it considerably more efficient.


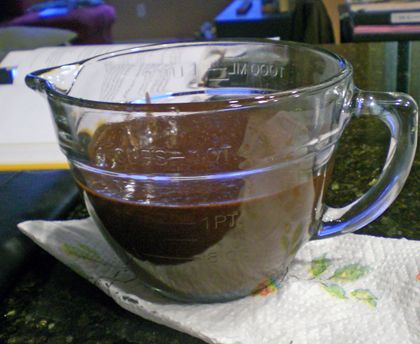
Dan's mom got us this batter bowl from pampered chef, and it made the pouring-the-batter-into-the-cupcake-pan process much quicker and easier. I used to put the batter into a large zippy bag and then sort of pipe it into the wells, but this new bowl and its little spout eliminated that unnecessary step. I'm totally loving it.

I made the recipe for the devil's food cake exactly as is, except that I used water instead of coffee. I'm a coffee-addict, but some of these cupcakes were piped with pink buttercream and were donated to Making Strides Against Breast Cancer so I didn't want to assume everyone would like or want coffee in their treat. For the other cupcakes, I made the Peanut Butter Frosting, but I chose to use chunky peanut butter, and do Karen's variation, just scaled down:

Peanut Butter Frosting ...this made enough to frost 8 cupcakes
1 stick of butter, softened
2 cups of powdered sugar
1/2 tsp vanilla
1/2 cup natural super chunky peanut butter

Combine the first three ingredients in a mixer with the whisk attachment, mix until smooth. Add the peanut butter.

The cupcakes and the frosting came out delicious. Nice choice, Holly! Be sure to visit Holly's blog, Phe/mom/enon, for the recipe or buy the Sweet Melissa Baking Book. And check out how this recipe came out for the other SMS bakers!


Sunday, October 11, 2009

Sweet Melissa Sundays: Fail! Sticky Buns - the Cinnamon Bun Variation


This week for Sweet Melissa Sundays, Jen of Not Microwave Safe chose Sticky Buns with Toasted Almonds as our recipe. Woo!! At the end of the recipe, Sweet Melissa included directions for a Cinnamon Bun variation. Well, since there is a bit of an OBSESSION in this house with Cinnamon Buns, I decided to go with those.

No matter which variation, sticky or cinnamon bun, there is yeast involved. And me and yeast do not get along. I don't know what it is! I'm going to blame it on the extreme heat and humidity here in Florida, even though I know the reality is that I just don't know what I'm doing. :( Someone needs to come over here and teach me, I want to get over this yeasty hurdle!! As I expected, it didn't rise. It never does for me! When I put them in the steamy oven to proof, some did puff up a little bit, which got me VERY excited, as it is the most success I've had with yeast EVER... but not all of them did... and they certainly didn't double in size. Oh well, I thought, I've made cinnamon buns before which didn't rise properly and were still mucho delicious. So I popped 'em in the oven for their 45-50 minute bake time. I ran to the supermarket and told Dan to check on 'em. When I got back, there was still 5 minutes left on the timer, and they were totally Too-Toasty!!!! Only 40 minutes, and these puppies were OVER DONE. I was SO upset! I frosted them anyway, and sampled, but the result was a tooooo-dry, too-done bun!! I noticed on the message board that Melissa of Lulu the Baker's only baked 25. I wish I had check them about half way through because I possible could have salvaged them!

But oh well! Lesson learned! A) Don't leave the boy to check on the buns (just kidding, he was just following instructionssss, it's not his faultttttt) B.) Never trust the baking time in recipes - always check early!

I think after I get a yeast lesson, I'll try these again because they SMELLED like they really could be delicious!

Head on over to Jen of Not Microwave Safe to see the recipe! And make sure you see how the rest of the Sweet Melissa Sunday Bakers fared!


Too toastyyyyyy!


Saturday, October 10, 2009

Sea Salted Blondies


A little while back, I saw this post for Salted Blondies on one of my very favorite blogs, 3 B'S .... Baseball, Baking, & Books. I bookmarked it and KNEW I'd have to come back to it when I had time. Her inspiration came from The Delicious Life which was a Heath Bar version. I chose to make Ingrid of 3 B's Version: White Chocolate Chip and Macadamia Nut Blondies. Yummm.

Just as both bloggers claimed, this recipe was super easy. And it came out Super, Super Delicious. Mmm. On my way home from a meeting with my professor yesterday, Daniel called and said, "I think I may need my stomach pumped... I had too many blondies". Yes, they're that good. Dan and I agree that they're cookie-er tasting than other blondies I've made...if that makes any sense. The extra touch from the coarse sea salt really put these over the top. I used my favorite go-to sea salt: Diamond Crystal All Natural Coarse Sea Salt. I use it in every recipe in place of regular salt and it adds an extra dimension to all my creations.


Sea Salted Blondies, with Macadamia Nuts and White Chocolate Chips from 3 B's & The Delicious Life
Ingredients:
1 C A.P. Flour
1/2 tsp Baking Powder
1/8 tsp Baking soda
A heaping 1/2 tsp of Diamond Crystal All Natural Coarse Sea Salt
1 C brown Sugar
1 stick butter, melted & slightly cooled
1 large egg, room temoerature
1/2 tsp Vanilla
3/4 C white chocolate chips
~1/4 C Chopped Macadamia nuts

Preheat oven to 350. Lightly grease an 8×8 baking pan, line it with parchment, and lightly grease the parchment.
In a large mixing bowl, combine the flour, baking powder, baking soda, and salt.

In a separate bowl, beat together the brown sugar and the melted butter. Add the egg and vanilla. Beat to combine.

Stir the flour mixture into the butter mixture. Before completely combined, add the white chocolate chips and the nuts (reserving about a Tblspn of the nuts to sprinkle on top). Pour batter into pan and sprinkle with remaining nuts. Also sprinkle the batter with more coarse sea salt.

Bake for 20 to 25 minutes. Let cool for 10 minute and then remove the blondies using the parchment sling to allow to cool completely on a wire rack. Enjoy as is or warmed up with ice cream on top!

Tuesday, October 6, 2009

Ducky Baby Shower Rainbow Cookie-Cake

So you all know of the famed Rainbow Cookies, right?
I've posted about them before because they are one of the family's all-time favorites...


Well, since they are an all-time fave, they were requested to be made into a dessert for Daniel's sister's baby shower. The theme of the party was Duckies! Instead of making them the traditional colors - red, green, yellow, I made it in baby colors (but since we don't know the gender yet, I used both blue AND pink).

Instead of the usual chocolate topping, I used blue candy melts to make it look like duckies in water... it achieved the look we were going for, though I must say, the cookies lacked that chocolately touch from the semi-sweet chocolate that was missing. But they were still good! Just not aaaas good.


We added the little decorative rocks to make it look like bubbles in the water.


Ehh, I'm not SO thrilled about how it came out. But the candy melts hardened VERY quickly, and I was very short on time. I wanted it to be cuter!

Sunday, October 4, 2009

Sweet Melissa Sundays: Apple Orchard Crumble

Yes, I'm finally back! I'm really glad I was able to get back in the swing of things for this week's recipe - Um, warm apples coated in cinnamon and sugar topped with brown sugary crumblies, Helloo?? Delicious!

This was a really easy recipe to throw together. The thing that took the longest was coring, peeling and slicing the apples (If only I had one of those little tools, it would have been a lot easier!). The rest came together very very quickly. When I first read through the recipe, I did so quickly, and I thought this would be made in a 10 inch pie plate. So I thought, "Yeahhh, I'll make the whole thing". Then when I had a ginormous bowl full of sugary apple slices, I re-read the recipe and found out it was a 10 inch DEEP DISH.... Ohhhh!!! Since I don't have one of those, I made it in a 9x13 pan, and it fit perfectly.

The only changes I made were to use only Golden Delicious and Mcintosh apples (couldn't find any of the others), and to omit the all-spice and sub in a little more cinnamon in its place. It came out really good! I love those easy, quick ones that taste great! (And it tasted even better with some vanilla bean ice cream and caramel sauce!!!)


Be sure to check out the other fantastic SMS Bakers, I'm sure they did some really beautiful, delicious-looking things! And thanks to Cristine of Cristine Cookies for hosting and posting the recipe!

LinkWithin

Related Posts with Thumbnails