Recent Posts

Tuesday, December 29, 2009

Hot Chocolate Cakes


I hope everyone had a great holiday, and I hope you are preparing for a great New Years! It has been a while since I've updated the blog. We travelled to NY for Christmas where we did lots of family-visiting, holiday celebrating, and wedding stuff, so I didn't get a chance to post! But I did take pictures of the things I baked while I was there. :) I apologize for my bad pictures, they were taken with my phoney!

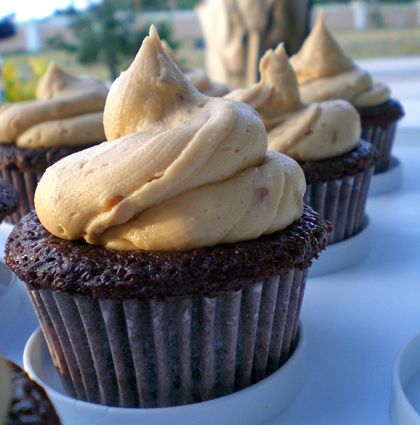
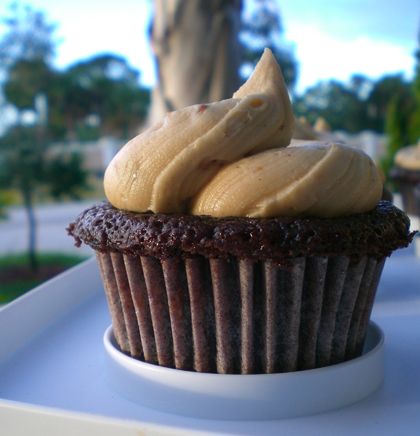
For Christmas, I made the Hot Chocolate Cake from Fine Cooking, the December 2009/January 2010 issue. The cake came out great. It was a nice and easy recipe to prepare, with delicious results. Very very rich, but very good. It really tasted like hot chocolate. This one was a crowd pleaser. I originally spotted it on The Bitten Word, but it is also available on Fine Cooking's site here. I made quite a few changes to the recipe, so I will post my version below, but be sure to check out the two sites I mentioned above for some great pictures and comments!

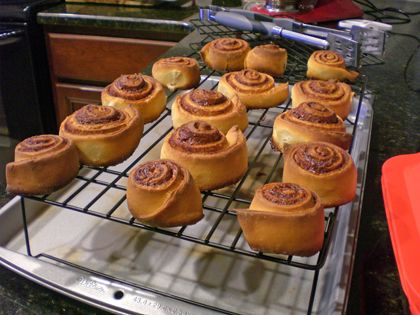
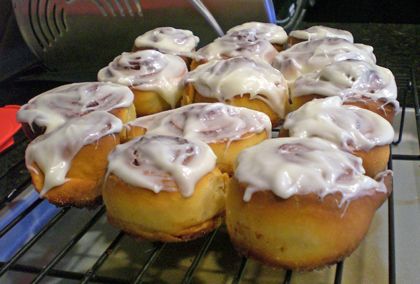
I made the same amount of cake batter that the recipe called for, but instead of dividing it into three 9x2 round cake pans, I baked it in FOUR 9x2 round cake pans. Rather than one tall 3 layer cake, I got 2 good sized two layer cakes to bring to two different houses for Christmas dessert. The cakes still came out a very good size. Plus, it is so rich that a less super-tall slice was more than sufficient. Since I was making 2 cakes instead of one, I made a batch and a half of the frosting (which I probably didn't really need to do because I had a significant amount left over, but for frosting lovers, I suggest making the 1.5 batch like I did). I also didn't make my own marshmallows like the recipe stated. I didn't have a candy thermometer where I was, so I just used store bought mini-mallows. Here's what I did!:


Hot Chocolate Cake, adapted from Fine Cooking and The Bitten Word.

For the cake
6 oz. (3/4 cup) unsalted butter + some extra for greasing the pans
3 cups unbleached all-purpose flour
3/4 cup canola oil
2 oz. bittersweet chocolate chips
2 ounces 70% dark chocolate
3 cups granulated sugar
1 cup natural unsweetened cocoa powder
3 large eggs, room temperature
1/2 cup heavy cream
1/4 cup half and half
2 Tbs. pure vanilla extract
2-1/2 tsp. baking soda
1/2 tsp. fine sea salt

For the frosting
3 3/4 cups heavy cream
9 Tbs. unsalted butter
2 tsp vanilla
9 oz. bittersweet chocolate chips
3 cups granulated sugar
9 oz. natural unsweetened cocoa powder; more for decorating
3/4 cup corn syrup
1/2 tsp. fine sea salt

Frosting:
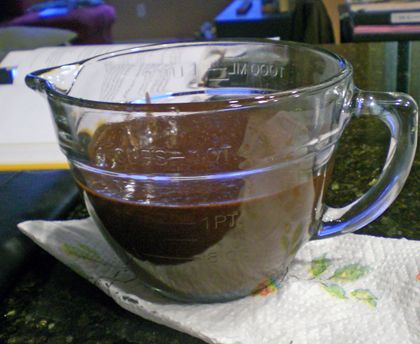
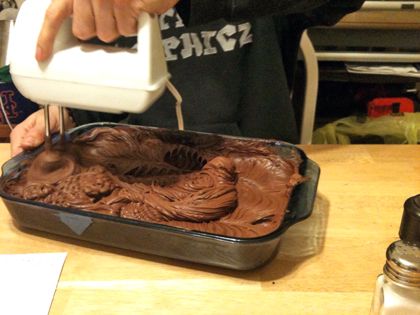
In a 4-quart saucepan over low heat, combine the cream, butter, and vanilla extract. Stir until the butter is melted and everything is combined. Stir in the chocolate chips until melted. Whisk in the sugar, cocoa powder, syrup, and salt until smooth...make sure the cocoa powder is fully incorporated. Pour into a 9x13-inch pan and freeze until firm, about 2 hours, or refrigerate overnight. I freezed it for 2 hours and then moved it to the refrigerator.

Cakes:
Preheat the oven to 350°F. Butter four 9x2-inch round cake pans and line the bottom of each with parchment. Butter the parchment. Dust with flour and knock out the extra.

In a 3-quart saucepan, combine butter, oil, chopped chocolate, and 1 cup water. Heat over medium heat until melted.

In a large bowl, whisk the flour, sugar, and cocoa powder. Pour the hot chocolate mixture into the sugar mixture and whisk until combined.
Whisk in the eggs, one at a time, then whisk in the half-and-half and heavy cream, vanilla, baking soda, and salt. Divide the batter evenly among the four prepared pans.

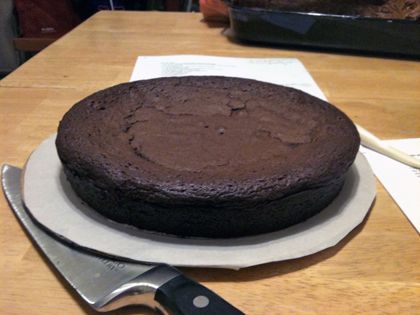
Set two pans on the middle rack, slightly spaced so they don't touch. Bake until a toothpick inserted in the center of each cake comes out clean, 35 to 40 minutes. When finished, repeat with last two cakes. Cool on racks for 10 minutes, using a knife to slide around the cake to release the sides from the pan. Invert the cakes onto the racks, remove the parchment from two of the cakes (leaving parchment on the bottom of two of the cakes) and cool completely.


Assembly:
Remove the frosting from the freezer or refrigerator, let sit for about 10 - 15 minutes. Transfer to the bowl of a stand mixer fitted with the paddle attachment and beat on medium speed for 2 minutes to soften, or use a hand mixer. Change to a whisk attachment and beat at medium-high speed until light and fluffy, about 3 minutes.


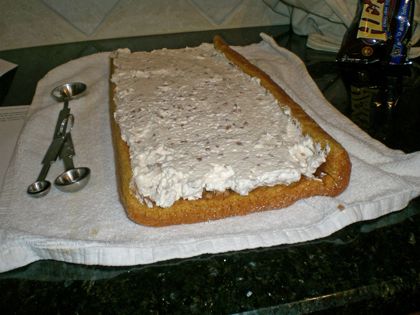
Use a sharp knife to level out the cakes. Put the cake layer still lined with parchment onto a parchment lined cardboard cake round, this will be your bottom layer. But about 1 1/2 C of frosting on top to be your filling, and spread with an offset spatula. Top with the other layer and frosting with offset spatula. If you are careful, you might not need a crumb coat (we didn't need to do one).

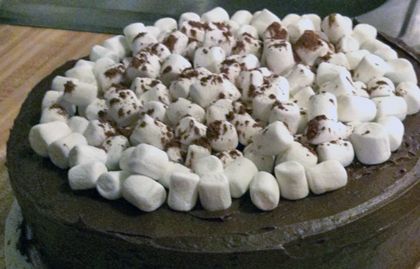
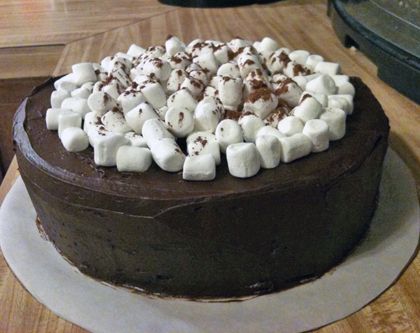
Decorate the cake with mini marshmallows, leaving about a 1 inch border around the edges of the cake. Sprinkle some extra cocoa powder for decoration.

Sunday, December 13, 2009

Pumpkin Roll

Last weekend was the Cocoa Village craft fair here in Central Florida. And we rented a booth for our aprons!


It was tremendous fun! The first day was quite rainy (ok, torrential and cold and windy is a more accurate description), but the second day was gorgeous. We had a great time meeting all the people who came to our booth. It was a success! I look forward to doing more of these types of events.

And now to the baking. School is finally over for the semester and now it's the holidays! With a little time off from school, hopefully I can catch up on some baking. But here is a long overdue dessert (I made it for Thanksgiving!)


Pumpkin Toffee Roll Cake, from Paula Deen.
I made some changes to the recipe, and posted them below. But be sure to check out Paula's original recipe HERE, and even watch a video of how she made it HERE.

Ingredients for Cake Roll:
3/4 C cake flour
1 1/2 tsp ground cinnamon
1 1/4 tsp ground ginger
1/2 tsp nutmeg
6 large eggs, room temperature. Separated.
1/3 C granulated sugar
1/3 C packed light brown sugar
2/3 C canned pumpkin
1/3 tsp coarse sea salt
Powdered Sugar

Ingredients for Toffee Cream Filling:
1 tsp unflavored gelatin
2 tablespoons grand marnier
1 C heavy cream chilled
1/4 C powdered sugar, sifted
1/3 C Heath bar pieces, and additional 1/2 C for garnishing
Powdered Sugar
Dulce de leche, made from sweetened condensed milk (notes below)
Small amount of store bought caramel sauce

Directions:
Preheat the oven to 375. Grease a jelly roll pan, line with parchment paper, and lightly grease the parchment.
Sift flour and spices together in a small bowl. In a separate bowl, beat egg YOLKS together with the two sugars until it thickens. Add the 2/3 C pumpkin to this yolk mixture. Beat on low until mixed. Add dry ingredients, and continue to beat on low until mixed. In a separate CLEAN bowl, beat the egg whites with the salt until stiff peaks form. Fold whites into the cake batter.
Use an offset spatula to spread the batter into the prepared jelly roll pan. Drop the pan on the counter a few times to release air bubbles. Bake about 15 minutes, or until toothpick comes out clean.
Remove from oven and while it is still hot, dust it GENEROUSLY with powdered sugar. Turn the cake out on to a kitchen towel, and fold one edge of the towel over 1 of the long edges of the cake. Immediately roll up and place edge down in the refrigerator for one hour. After one hour it should be cooled completely - Do not leave it in there much longer or it will crack when you attempt to unroll it!

For Filling:
Pour grand marnier into a small saucepan, and add the gelatin. Let it soften for about 5 minutes. Then stir over low heat until the gelatin dissolves. While this is cooling, beat the chilled cream with the powdered sugar until peaks form. Fold in the gelatin and 1/3 C of Heath Bar chunks.

Unroll the jelly roll cake slowly and gently. Sprinkle toffee pieces on the unrolled cake to taste, and then spread the cream-toffee filling over, using an offset spatula to smooth.

Beginning at the long edge of the cake, roll up the cake using the towel to help you. Place the cake onto a platter with the seam down. Cut small pieces off the ends of the cake to make straight edges. Dust generously with powdered sugar. Pour a small amount of the store bought caramel on top of the roll - just enough to make something sticky for additional toffee pieces to stick to. Sprinkle toffee on top to taste.

For Dulce De Leche:
Pour a can of sweetened condensed milk into a baking pan. Sprinkle sea salt on top and cover with tin foil. Place this baking pan within a larger baking pan filled with warm water. Put in a 425 degree oven and bake for about an hour - or until it turns a nice brownish caramel color. Let cool. If small chunks appear in it, add milk as needed, and use electric mixer to beat until smooth. To serve, warm in the microwave and pour over slices of cake. I didn't get any pictures of the cake with the dulce :(


The cake was a hit at Thanksgiving. It is impressive looking and really isn't that difficult to make at all! Would definitely make this again!

Sunday, November 22, 2009

SMS: Raised Waffles


Busy Busy Busy lately! As usual. School is nearing final projects time, the holidays are near, our aprons came out in the magazine, wedding planning, working... But since waffles was this week's recipe for Sweet Melissa Sundays, I made time in the schedule for a nice breakfast. :) I chose to forgo the brown sugar bananas because the waffles sounded good enough by themselves! Perhaps in the future I'll make the banana topping.


I made the recipe as is - the only difference is that I added a bit of cinnamon to the battle to go along with the nutmeg. It was actually a cinch to throw the ingredients together. Everything besides baking soda and eggs was mixed together the night before, and in the morning it was quickly ready to go into the waffle maker. I was a bit scared because it called for yeast, but I think it went ok. Did anyone's batter rise? The recipe didn't say that during the 8 hour room-temperature sitting period it was supposed to increase in volume... so when mine didn't I wasn't really discouraged. Did any one else's?


The waffles were delicious. I know Sweet Melissa said this recipe is not intended for a belgian waffle maker, but thats all I had... and they came out just fine. Perfectly fluffy and soft on the inside with a crispy outside. And when topped with powdered sugar, syrup and whipped cream - even better!!!! Daniel said of the waffle recipes we've made, this was "one of the best waffles so far".


Yum yum! Perfect Sunday morning breakfast. (We even have several left over for freezing, re-toasting, and topping with ice cream!) :) Check out Lauren of Fried Pickles and Ice Cream for the recipe or buy the Sweet Melissa Baking Book. And take a look at the rest of the SMS bakers' posts as well!!

And if you're bored, take a look at www.Salt101.com. It's fun!

Sunday, November 15, 2009

EXCITING NEWS: THE SMART BAKER APRON!


Ok! I have the most exciting news to deliver... the most exciting news this blog has EVER ever had. And now that it is OFFICIAL, I can safely put it on my blog (I haven't said anything yet because I didn't want to jinx it!).

Do you remember the apron me and Daniel invented? I've talked about it here and here. We even made a new Official Website for it: www.TheSmartBaker.com. Well, at the end of August, a representative from Food Network Magazine called us and told us they wanted to feature it in the December issue! Yes that's right. Little old us - in FOOD NETWORK MAGAZINE. We sent them my apron (a red one with an S for Stephanie on it), they did a photo-shoot and a phone interview with Daniel for all the details.

Well, the December issue hit newsstands today. We RUSHED on over to our local bookstore and picked up a copy.... or seven. :) In an article entitled, "10 Things You Need To Know" in the Food News section, is a picture and description of our apron!

Check it out:


It says, "The upside-down writing looks like a printing error, but when you're wearing the Measurement Conversion Apron you just life the bottom half to read the numbers right-side up."

Cool, huh? I never thought I'd be featured in a magazine alongside my favorite Food Network Chefs!

The December issue has a TON of cool stuff in it [ including our apron :) ] so BE SURE TO GO BUY A COPY AND CHECK IT OUT (look for us on pg 44!!!!!)

Thursday, November 12, 2009

Rice Krispies Chocolate Chip Cookies


Recently while shopping we saw one of those enormous more-than-family-sized boxes of Rice Krispies cereal and decided that we should get it... with only two people and a shih tzu at home, we must have thought it was a good idea at the time to buy 700 LBS of the same kind of cereal for some reason. I think Daniel said this would force me to make his favorite rice krispy treats more often (the mexican vanilla ones... though if we made them often enough to get rid of the box, Daniel's love for the treats would quickly fade into totally-over-it-ness). So when I saw this recipe for cookies with rice krispies in it, I bookmarked it immediately knowing I'd be able to use up some of our supply of the cereal. The original recipe is from Imperial Sugar's website, and it was adapted on Cookie Madness here. I made some more changes to the recipe.


Rice Krispy Chocolate Chip Cookies, adapted from Imperial Sugar and Cookie Madness
makes about 24 cookies
Ingredients:
1 stick unsalted butter, softened
1/2 cup light brown sugar, packed
1/2 cup granulated sugar
1 teaspoon vanilla
1 large egg, room temperature
1 1/4 cups all purpose flour
1/2 teaspoon baking powder
1/4 teaspoon baking soda
1/2 teaspoon sea salt
1 cup semi-sweet chocolate chips
1 heaping cup Rice Krispies cereal

Preheat to 350 degrees F. Line a baking sheet with parchment paper or a silicone mat.
Using an electric mixer, cream the butter and sugars together. Add the vanilla and egg, mixing just until incorporated.
In a separate bowl, whisk the flour, baking powder, baking soda and salt together to mix. Add flour mixture to sugar mixture and stir until almost blended. Add the chips and cereal and stir until mixed.
Drop by tablespoons, spacing 2 ½ inches apart, onto cookies sheets. Bake for 10-15 minutes or until slightly golden brown around edges.

The cookies came out great. The crunchy from the cereal mixes really well with the chocolate chips. And it really was a cinch to put together - very quick! Would definitely make these again! (Maybe a good Christmas cookie?)

Sunday, November 8, 2009

SMS: Pear Muffins with Gingersnap Crumble


Typical Sunday morning... when it first started. I woke up far too early and was unable to go back to sleep, Daniel and the dog were still sound asleep and cuddling, so I came downstairs to start baking. After my dry ingredients were mixed together and set aside, and the pears were diced.... we got the phone call that we had to leave. Why? Because we went to the hospital to go welcome our new nephew into the world!!!!!! Baby boy is beautiful and healthy and mommy is doing well. It is a very exciting day here in this family!!!!!!!!!!!!

So muffins seem a little boring in comparison! But I'll post them anyway. :)
I made the muffins exactly as the recipe says, minus the cranberries (we just were not feeling it). I cheated and bought pre-made old-fashioned gingersnap cookies at the store. The only change I made to the crumble was to omit the extra ground ginger - my gingersnap cookies were gingery enough.


The muffins are excellent. And the crumble is extra excellent. In fact, I think it is now currently my favorite crumble recipe. It's going to be my go-to recipe for crumble for a while (maybe with a little bit of cinnamon mixed in).


Thanks to Jennifer of Maple N’ Cornbread for choosing this week's treat and posting the recipe on her blog!!! Make sure you visit the rest of the Sweet Melissa Bakers to see how their muffins came out.

Sunday, November 1, 2009

Sweet Melissa Sundays: Sweet Almond Bread Pudding


"Stale? Really? Why do you need stale bread?"
"I don't know, its what the recipe says. I need stale bread to make it custardy, not soggy"
"Gross"

That was me & Daniel's conversation. Can you tell we've never done bread pudding before? Never made it, never even tasted it. So this was an entirely new one for us. I love that about SMS - it encourages me to try making things I've never really thought of doing before. Thanks for picking it, Candace!

Sweet Melissa's recipe for Sweet Almond Bread Pudding called for a 1LB loaf of brioche. I just assumed that the bakery at the supermarket would have one. At one supermarket, the woman stocking the freshly baked bread looked at me after I asked her if they carried brioche and said,
lady: ".....what?"
me: "Brioche?"
lady: "How do you spell that?"
me: "Bee--Arr--iiii--Ohhh-Ceee--Aychh--Eee"
lady: "...I've never heard of that before."
What?!!! A fluke, I thought, I'll go to another supermarket. NOPE. No luck. And no challah either - or else I'd have subbed that. So I bought a French sourdough loaf because I had no choice! It was either that or potato rolls. So I took my not-the-right-loaf, my heavy cream, my bag of frozen raspberries, and I headed home.

Since my bread was not stale yet, I cut it into chunks and let it sit out overnight. By morning, it reached a perfect state of stale-ness.


The recipe says to toast them a little bit, so while they were drying in the oven, I prepared my custard. This recipe was super simple and quick! By the time the bread cubes were done toasting, my custard was just starting to form little bubbles along the edges - perfect timing!


I followed the recipe exactly as the book says, except I halved it, (used the wrong bread - but its not my fault!), and topped the bread pudding before baking with almonds and cinnamon-sugar instead of just regular sugar because everything is better sprinkled with cinnamon sugar. I popped the bread pudding pan into a larger pan filled with water, and 1 hour and fifteen minutes later, out it came, smelling great.


For some reason, I completely forgot to prepare the Raspberry Sauce, even though I bought the necessary ingredients for it. Oops! I should have realized when Daniel said, "It needs something" but instead of triggering something in my head, I said, "whipped cream?" I have a lot of assignments due really soon in school, so my brain is a little preoccupied. :)


As Dan was adding some whipped cream to his, I looked away from a second, and looked back to see:

Doesn't it look like she's saying, "What? No, Mom. I didn't eat any whipped cream." And yes, she's wearing a little bit of a costume... the part she didn't shake off.

Anyway, it came out really really good. I think the addition of cinnamon-sugar was perfecto. And this would have probably come out even better if I had a) Had the right bread and b) Remembered to make the raspberry sauce. Thanks for choosing this week's recipe, Candace!! Make sure you check out her blog, Candy Girl, for the recipe. And check out the rest of the SMS bakers' versions of Sweet Melissa's Sweet Almond Bread Pudding. Hope everyone enjoyed their halloween!

**PS - I have a favor to ask! Has anyone reading this moved to the United States from a different country when you were school-aged? And received English instruction in school? For my education class in graduate school, I need to interview you! If there is anyone out there like this and would be willing to answer a few questions for me, please let me know. Thank you!

Sunday, October 25, 2009

Sweet Melissa Sundays: Devils Food Cake with Peanut Butter Frosting


Chocolate. And Peanut Butter. A combination that will never ever ever get old. For this week's Sweet Melissa Sundays recipe, Holly of Phe/mom/enon chose Devil's Food Cake with Peanut Butter Frosting. Yesssss!!! I decided to make cupcakes instead of a full cake and let me just tell you, this new addition to our kitchen REVOLUTIONIZED the cupcake making process. Ok maybe not revolutionized but it made it considerably more efficient.


Dan's mom got us this batter bowl from pampered chef, and it made the pouring-the-batter-into-the-cupcake-pan process much quicker and easier. I used to put the batter into a large zippy bag and then sort of pipe it into the wells, but this new bowl and its little spout eliminated that unnecessary step. I'm totally loving it.

I made the recipe for the devil's food cake exactly as is, except that I used water instead of coffee. I'm a coffee-addict, but some of these cupcakes were piped with pink buttercream and were donated to Making Strides Against Breast Cancer so I didn't want to assume everyone would like or want coffee in their treat. For the other cupcakes, I made the Peanut Butter Frosting, but I chose to use chunky peanut butter, and do Karen's variation, just scaled down:

Peanut Butter Frosting ...this made enough to frost 8 cupcakes
1 stick of butter, softened
2 cups of powdered sugar
1/2 tsp vanilla
1/2 cup natural super chunky peanut butter

Combine the first three ingredients in a mixer with the whisk attachment, mix until smooth. Add the peanut butter.

The cupcakes and the frosting came out delicious. Nice choice, Holly! Be sure to visit Holly's blog, Phe/mom/enon, for the recipe or buy the Sweet Melissa Baking Book. And check out how this recipe came out for the other SMS bakers!


Sunday, October 11, 2009

Sweet Melissa Sundays: Fail! Sticky Buns - the Cinnamon Bun Variation


This week for Sweet Melissa Sundays, Jen of Not Microwave Safe chose Sticky Buns with Toasted Almonds as our recipe. Woo!! At the end of the recipe, Sweet Melissa included directions for a Cinnamon Bun variation. Well, since there is a bit of an OBSESSION in this house with Cinnamon Buns, I decided to go with those.

No matter which variation, sticky or cinnamon bun, there is yeast involved. And me and yeast do not get along. I don't know what it is! I'm going to blame it on the extreme heat and humidity here in Florida, even though I know the reality is that I just don't know what I'm doing. :( Someone needs to come over here and teach me, I want to get over this yeasty hurdle!! As I expected, it didn't rise. It never does for me! When I put them in the steamy oven to proof, some did puff up a little bit, which got me VERY excited, as it is the most success I've had with yeast EVER... but not all of them did... and they certainly didn't double in size. Oh well, I thought, I've made cinnamon buns before which didn't rise properly and were still mucho delicious. So I popped 'em in the oven for their 45-50 minute bake time. I ran to the supermarket and told Dan to check on 'em. When I got back, there was still 5 minutes left on the timer, and they were totally Too-Toasty!!!! Only 40 minutes, and these puppies were OVER DONE. I was SO upset! I frosted them anyway, and sampled, but the result was a tooooo-dry, too-done bun!! I noticed on the message board that Melissa of Lulu the Baker's only baked 25. I wish I had check them about half way through because I possible could have salvaged them!

But oh well! Lesson learned! A) Don't leave the boy to check on the buns (just kidding, he was just following instructionssss, it's not his faultttttt) B.) Never trust the baking time in recipes - always check early!

I think after I get a yeast lesson, I'll try these again because they SMELLED like they really could be delicious!

Head on over to Jen of Not Microwave Safe to see the recipe! And make sure you see how the rest of the Sweet Melissa Sunday Bakers fared!


Too toastyyyyyy!


Saturday, October 10, 2009

Sea Salted Blondies


A little while back, I saw this post for Salted Blondies on one of my very favorite blogs, 3 B'S .... Baseball, Baking, & Books. I bookmarked it and KNEW I'd have to come back to it when I had time. Her inspiration came from The Delicious Life which was a Heath Bar version. I chose to make Ingrid of 3 B's Version: White Chocolate Chip and Macadamia Nut Blondies. Yummm.

Just as both bloggers claimed, this recipe was super easy. And it came out Super, Super Delicious. Mmm. On my way home from a meeting with my professor yesterday, Daniel called and said, "I think I may need my stomach pumped... I had too many blondies". Yes, they're that good. Dan and I agree that they're cookie-er tasting than other blondies I've made...if that makes any sense. The extra touch from the coarse sea salt really put these over the top. I used my favorite go-to sea salt: Diamond Crystal All Natural Coarse Sea Salt. I use it in every recipe in place of regular salt and it adds an extra dimension to all my creations.


Sea Salted Blondies, with Macadamia Nuts and White Chocolate Chips from 3 B's & The Delicious Life
Ingredients:
1 C A.P. Flour
1/2 tsp Baking Powder
1/8 tsp Baking soda
A heaping 1/2 tsp of Diamond Crystal All Natural Coarse Sea Salt
1 C brown Sugar
1 stick butter, melted & slightly cooled
1 large egg, room temoerature
1/2 tsp Vanilla
3/4 C white chocolate chips
~1/4 C Chopped Macadamia nuts

Preheat oven to 350. Lightly grease an 8×8 baking pan, line it with parchment, and lightly grease the parchment.
In a large mixing bowl, combine the flour, baking powder, baking soda, and salt.

In a separate bowl, beat together the brown sugar and the melted butter. Add the egg and vanilla. Beat to combine.

Stir the flour mixture into the butter mixture. Before completely combined, add the white chocolate chips and the nuts (reserving about a Tblspn of the nuts to sprinkle on top). Pour batter into pan and sprinkle with remaining nuts. Also sprinkle the batter with more coarse sea salt.

Bake for 20 to 25 minutes. Let cool for 10 minute and then remove the blondies using the parchment sling to allow to cool completely on a wire rack. Enjoy as is or warmed up with ice cream on top!

Tuesday, October 6, 2009

Ducky Baby Shower Rainbow Cookie-Cake

So you all know of the famed Rainbow Cookies, right?
I've posted about them before because they are one of the family's all-time favorites...


Well, since they are an all-time fave, they were requested to be made into a dessert for Daniel's sister's baby shower. The theme of the party was Duckies! Instead of making them the traditional colors - red, green, yellow, I made it in baby colors (but since we don't know the gender yet, I used both blue AND pink).

Instead of the usual chocolate topping, I used blue candy melts to make it look like duckies in water... it achieved the look we were going for, though I must say, the cookies lacked that chocolately touch from the semi-sweet chocolate that was missing. But they were still good! Just not aaaas good.


We added the little decorative rocks to make it look like bubbles in the water.


Ehh, I'm not SO thrilled about how it came out. But the candy melts hardened VERY quickly, and I was very short on time. I wanted it to be cuter!

Sunday, October 4, 2009

Sweet Melissa Sundays: Apple Orchard Crumble

Yes, I'm finally back! I'm really glad I was able to get back in the swing of things for this week's recipe - Um, warm apples coated in cinnamon and sugar topped with brown sugary crumblies, Helloo?? Delicious!

This was a really easy recipe to throw together. The thing that took the longest was coring, peeling and slicing the apples (If only I had one of those little tools, it would have been a lot easier!). The rest came together very very quickly. When I first read through the recipe, I did so quickly, and I thought this would be made in a 10 inch pie plate. So I thought, "Yeahhh, I'll make the whole thing". Then when I had a ginormous bowl full of sugary apple slices, I re-read the recipe and found out it was a 10 inch DEEP DISH.... Ohhhh!!! Since I don't have one of those, I made it in a 9x13 pan, and it fit perfectly.

The only changes I made were to use only Golden Delicious and Mcintosh apples (couldn't find any of the others), and to omit the all-spice and sub in a little more cinnamon in its place. It came out really good! I love those easy, quick ones that taste great! (And it tasted even better with some vanilla bean ice cream and caramel sauce!!!)


Be sure to check out the other fantastic SMS Bakers, I'm sure they did some really beautiful, delicious-looking things! And thanks to Cristine of Cristine Cookies for hosting and posting the recipe!

LinkWithin

Related Posts with Thumbnails