Recent Posts

Sunday, February 28, 2010

Sweet Melissa Sundays: Sugar Cookies


I do love cookies. But cookie doughs that require rolling out with a rolling pin and cutting with cookie cutters have never treated me well. Usually I find it hard to not have it stick to the rolling pin (despite my well-floured silicone rolling pin), and hard to get out of the cookie cutter, and hard to pick up and move to the cookie sheet for baking. So when I first saw that this week's recipe for Sweet Melissa Sundays was Sugar Cookies, I was excited (yey cookies!) but then I remembered (uh ohhh... time to get out the rolling pin). I thought of using it as a crust for a tart as the recipe says, but I decided to go the tricky route... and face my cookie cutter fears!

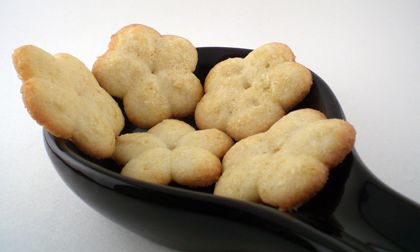
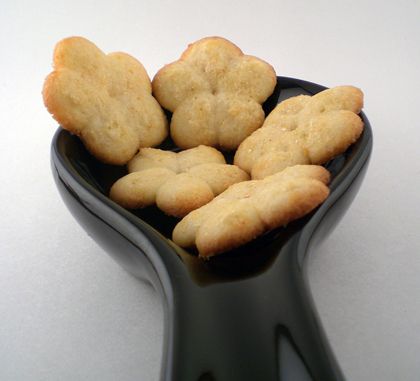
And it went well! At first I tried to roll it out too quick out of the fridge and it cracked. Then we rolled it out too thin. But once we rolled it out thick enough, and let it soften up a little bit more, it went very smoothly. I baked my 1/4 inch cookies for about 7 minutes in a 350 oven. And they came out perfectly.

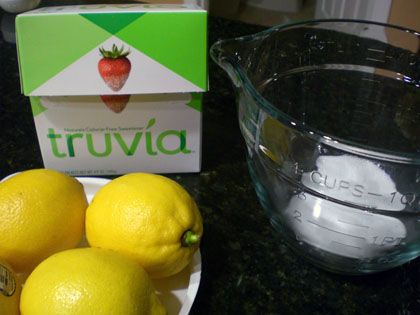
Other SMS bakers said theirs were too bland, so I heeded Michelle's advice and upped the sugar to 3/4 C (from the recipe's 1/2 C), and added 1 tsp of fresh lemon juice. I also put 1/8 tsp of almond extract in, too. They came out very tasty and soft.

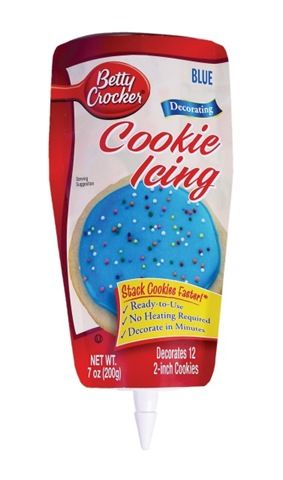
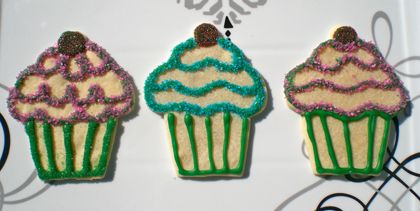
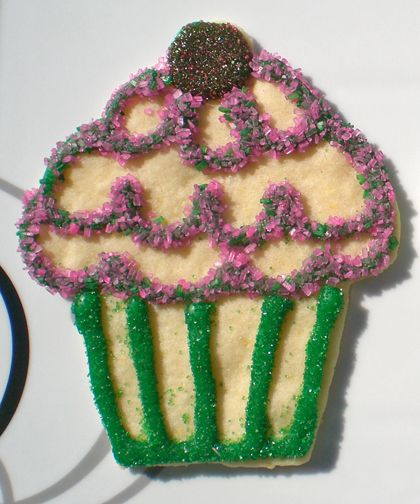
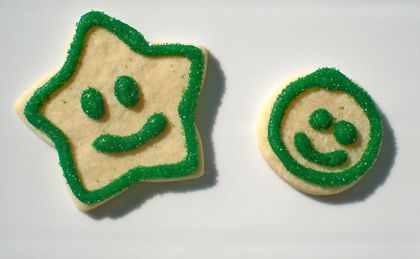
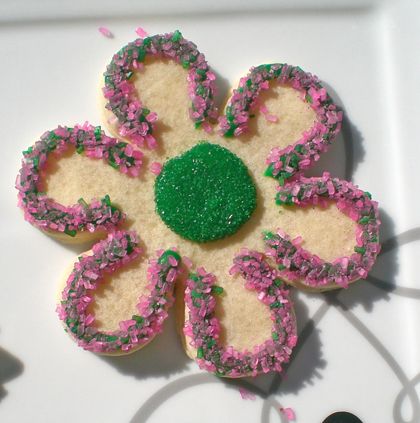
Thennnnn I used colored sugars and Betty Crocker Cookie Icing (ok, kind of cheating, but eliminated some frustration) to decorate them:

Andddddddddd maybe I went a little overboard...


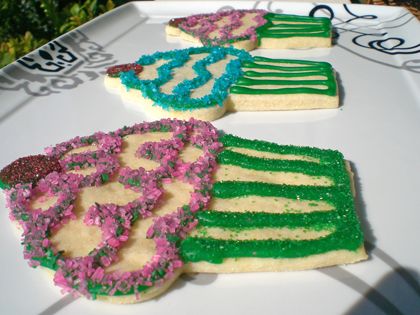
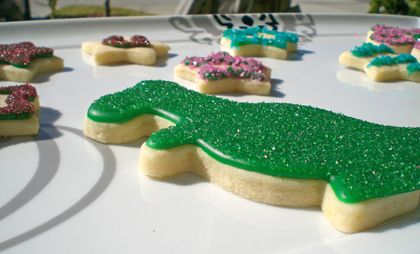
I was having fun! :) Make sure to visit Nina's blog, Nina's Cupcakes to see this week's recipe from the Sweet Melissa Baking Book: Sugar Cookies! Thanks for hosting, Nina! And check out the other SMS bakers to see how the cookies came out for everyone else!

Sunday, February 21, 2010

Sweet Melissa Sundays: Strawberry Lemonade & Strawberry Lemonade with Truvia


It is nice to put my kitchen to use for things other than brownies, cupcakes, blondies and cookies sometimes. Those are definitely the most common things to come out of my oven. Sweet, chocolately, caramelly, peanut buttery goodies. And while they are always appreciated and devoured, sometimes making something completely different is a nice, welcomed change.

In comes Strawberry Lemonade. It's not served warm straight from the oven and smothered in vanilla ice cream like many of our other favorites, but I knew it would be warmly received in my house. The entire one and a half quarts of it was gone in about two days. Perfectly sweet and tart and very refreshing.

I've made one full recipe, but divided it in half and prepared it two ways: One - standard (see the Sweet Melissa Baking Book page 85 or visit Jessica of My Baking Heart for the recipe), and Two - with Truvia Natural Sweetener substituted for sugar. I even conducted a blind taste test with the two recipes.

How do I know how much Truvia I need to replace the Sugar called for in my recipe?
1 tsp of sugar = 1/2 packet of truvia (or 3/8 tsp truvia)
2 tsp sugar = 1 packet of truvia (3/4 tsp)
1 tblspn sugar = 1 1/2 packets truvia (1 1/4 tsp)
1/2 c sugar = 12 packets (3 tblspn + 3/4 tsp)
For a full conversion chart for Truvia to Sugar, see Truvia's website HERE.


Sugar-Free Strawberry Lemonade made with Truvia
makes about 3/4 of a quart, adapted from Sweet Melissa Baking Book

Ingredients for truvia strawberry sauce
1/2 a pint of fresh strawberries, rinsed and hulled
1 1/2 packets of truvia (or 1 1/4 tsp of Truvia)
1/2 tsp fresh lemon juice
1 tablespoon cold water

In a food processor, blend the berries, truvia, lemon juice and water until smooth. Strain it into a bowl, cover it and refrigerate.

Ingredients for Truvia strawberry lemonade
12 packets truvia
1/2 cup very hot water
1/2 up freshly squeezed lemon juice
2 1/4 cup cold water
1 recipe of truvia strawberry sauce (above)

Combine 9 packets of truvia and the very hot water and stir until the truvia has dissolved. Stir in the lemon juice and cold water.
Add the truvia strawberry sauce and stir to combine. Add additional truvia to taste (I added 3 more packets at this point).


So, on to the TASTE TEST... you're really curious right?


I poured Daniel two glasses and made him guess which was which. He said he could tell which was the Truvia, but that he actually liked it BETTER. Then I made him pour me two glasses and I had to guess which was which. And I guessed wrong every time. So... its a success!

Make sure to visit Jessica's blog, My Baking Heart to see this week's recipe from the Sweet Melissa Baking Book. And check out the blogroll to see how the lemonade came out for all the rest of the bakers!

Thursday, February 18, 2010

The Wall Street Journal talks CUPCAKES


I have heard of freezing cupcakes before. You take fresh-baked mini-cake beauties, let them cool, wrap 'em in plastic wrap or foil, throw 'em in a zippy bag, or fill up some plastic storage containers with them and pop 'em in the freezer. If you're baking for a big event and need a million cupcakes, this can save considerable amounts of time and the possibility of many gray hairs. There are even some HOW-TO's available on the subject. Notably, Cupcakes Take the Cake did a cupcake freezing experiment to decide the best method. The result? Any method of storage will do, but make sure you unwrap or un-package them before letting them thaw (or else they'll get gummy) and only plain UNFROSTED cupcakes should be frozen. I emphasize this last part because I've heard it several hundred times. According to the Cupcakes Take the Cake girls, "When freezing baked cupcakes, we wanted to prevent the common problems of freezer burn, dryness, and gummy tops... the texture and consistency of frostings and icings can change drastically in the freezer..." so... save the decorating and frosting for AFTER they've thawed. Right?? Right.

But after reading this Wall Street Journal article by Abigail Pesta, I became intrigued. In it, Pesta recounts her taste-test of several different mail-order cupcakes from big shops like Georgetown Cupcake in Washington, D.C., Dean & DeLuca, Godiva and Crumbs. The thing that surprised me was that the mail-order cupcakes arrived to the customer FROZEN! Both Georgetown and Godiva shipped out there baked-goods, PRE-FROSTED, already decorated, and FROZEN. Now, I've shipped cupcakes before but used different methods. I've baked the cupcake in jars and shipped it with a separate baggy of buttercream frosting, ready for piping on by the recipient once it arrives (like THIS). I've even shipped it in the jar already frosted (like THIS and like THIS). But never like this! These actually still look like cupcakes! And Abigail reports that not only were they still pretty, but that the cupcakes were GOOD. Hmm! Has anyone frozen a frosted cupcake?? Now I'm curious. I sense an experiment of my own coming on....

Sunday, February 14, 2010

Rocky Ledge Bars


Unfortunately, there will be no Sweet Melissa Sundays for me today. I'm sorry! But I do have a recipe to share with you and it is pretty scrumptious. It's quick and easy, too - so if you forgot to get your Valentine something there's still time to whip up a batch, throw a bow on it, and pretend like you've been slaving away in the kitchen for them all morning.

What do you get when you combine a blondie, a s'more, peanut butter and nilla wafers?? Well... these Rocky Ledge Bars, based off of a Martha Stewart recipe. I scaled it back, made some substitutions, added some yummy things and left others out and ended up with this. These are a great use-whatever-you-have-on-hand kind of recipe...very substitution friendly.


Rocky Ledge Bars adapted from Martha Stewart
Ingredients:
1/2 stick unsalted butter, room temperature
1 cup + 2 Tblspn all-purpose flour
1 1/8 teaspoons baking powder
1/2 teaspoon coarse sea salt
3/4 cup packed light brown sugar
1.5 large eggs
1/2 teaspoon pure vanilla extract
1/2 cup miniature marshmallows
1/2 cup semisweet chocolate chips
1/2 cup peanut butter chips
1/4 cup crushed nilla wafer crumbs, and extra for dusting
cinnamon sugar

Preheat oven to 350 degrees. Lightly grease an 8x8 square baking pan and line with parchment.
Whisk together flour, nilla crumbs, baking powder, and salt in a medium bowl. In the bowl of an electric mixer, mix butter and brown sugar until fluffy, about 2 minutes. Add eggs and vanilla, and mix until combined. Add the flour mixture and stir until combined. Fold in 1/4 cup each of the marshmallows, chocolates, and peanut butter chips.
Spread batter in prepared pan. Sprinkle the remaining marshmallows, chocolates, peanut butter chips, and nilla crumbs on top. Sprinkle with powdered sugar to taste. Bake until golden brown and a cake tester comes out clean, about 30-35 minutes. Let cool on a wire rack.


(For SMS, visit Spike Bakes' Blog to see the recipe... They did Chocolate Mousse this week, mmmm!!!! And see how it came out for the bakers by checking out of the blogroll. Happy Valentine's Day... or Happy Anna Howard Shaw day!)

Sunday, February 7, 2010

Sweet Melissa Sundays: Red Velvet Cake (or Red Velvet Giant Cupcake)


I recently got a fabulous giant cupcake pan as a gift, but haven't got around to using it yet. I rarely make cakes because there are only two of us here, and cupcakes, cookies, brownies and other single-serve goodies are easier to give away. But I wanted to use my new pan so badly! Finally, I had an opportunity. Rosy of Rosy Lips and Lavender chose Red Velvet Cake as the recipe of the week for Sweet Melissa Sundays. As soon as I learned we were going to make a cake, I knew I'd make a GIANT JUMBO CUPCAKE! Plus, I need practice... I plan on making my own cupcake tower for my wedding in October, and topping it with one of these giant cupcakes (as the cake we can cut together).

Melissa's recipe for Red Velvet Cake was a rather simple one to put together. The only changes I made were to reduce the cinnamon to 1 tsp (only because I ran out!!) and to use apple cider vinegar instead of red wine. I also used food coloring gel, so I had to guesstimate how much of it equalled 2 tsp of the liquid stuff. In my jumbo cupcake pan, I lowered the oven temperature to 330, and it baked for about 70 - 75 minutes.

I used all the batter in the giant cupcake pan and it rose quite a bit... (which was totally fine with me because it meant I got to taste the scraps).


But it leveled out nicely.


I omitted the Classic Cream Cheese Filling & Frosting, and instead, used my favorite Vanilla Buttercream to frost it, and a Marshmallow Fluff Cream for the filling... mmm [see recipe below]. I took about 1.5 or 2 inch layer out of the middle to make room for a nice amount of filling.


With its hat on!

Now to frost it.. I was a little anxious about this. I googled pictures of giant cupcakes to see different ways of frosting it. Piping didn't seem like a good option, it looked a little silly to me. And frosting it smooth looked bizarro. I knew I had to use an offset spatula to make it look natural and billowy... and I also knew I'd get really frustrated with this. So... In comes Daniel! He's really very good to me when I get frustrated frosting things. He took over the frosting job and within 5 minutes it was done, and I love it! Good job Daniel!!


For scaling purposes, I put a normal sized cupcake liner next to it... Woah.


I will have to put up a picture of the cross section later after we cut into it!

Marshmallow Fluff Cream Filling adapted from Please Pass the Pie
Ingredients:
4 oz. Marshmallow Fluff (I recommend Non-Stick Spraying your measuring cup first... it'll plop out nice and easy!)
6 tablespoons unsalted butter, softened
3/4 cup confectioners sugar
1/2 t. of vanilla

Combine all ingredients in the bowl of an electric stand mixer. Cream together ingredients. When all are combined, turn the mixer up to medium-high and beat for about 5 minutes until nice and fluffy. Spoon onto cake and spread with a rubber spatula.

This filling was deliciously sweet and complimented the moist red velvet cake very nicely! I used this entire recipe to fill the cavity I made in the cake. It came out nice and sticky so it kept the hat on the cupcake perfectly.
Judging from the cake scraps, this cake came out very moist and had great flavor. I like the addition of cinnamon - not something I've done in a Red Velvet cake before, but I think it adds a nice touch. I can't wait to try it later all put together with the fluff filling layer and the buttercream frosting :)


Curious how it came out for the other bakers? Visit the blog roll here and see their results! And thanks to Rosy of Rosy Lips and Lavender for hosting this week (Good choice Rosy, I loved this one!) - visit her blog to see the recipe.

Tuesday, February 2, 2010

Danish Butter Cookie Copy Cats

You know those Danish Butter cookies that come in a blue tin? You knowww, the ones with those pretzel shaped cookies covered in giant crunchy sugar crystals. Yes, those. There is something soo good about those seemingly nothing-special cookies that makes me and the fiance eat through an entire tin of them every time we go to Grammy's house. (Grammy always has a these on hand). So, since Daniel is just getting over a nasty cold, and I woke up extra early (why oh why did I wake up at 5:50??) I decided to try and make a Danish Butter Cookie copy cat recipe for him as a welcome-back-to-the-world surprise.

The result? Good! Well, I guess I mean very good considering that by the time Dan called me to thank me he had eaten his way through 90% of them. According to him, the expert, he said, "They're pretty close... maybe even better" than the beloved Blue tin cookies. They definitely are more buttery and soft than the original, and there is more of a melt in your mouth crumbliness. But maybe thats a good thing. I think the key here is the egg wash and turbinado sugar topping - definitely don't skip this step! The only thing I'd do differently next time is try to make them a little bit thicker when extruding them out with the cookie press.


Danish Butter Cookie Copy Cats

1 stick unsalted butter, softened
1/3 cup granulated sugar
1/8 tsp fine sea salt
3/4 tsp vanilla
1 large egg yolk, room temp
1 scant cup all purpose flour
1 egg white beat with 2 tsp water
turbinado sugar

Preheat to 350°F. Beat butter with granulated sugar until light and fluffy. Add egg yolk, salt, and vanilla and mix until incorporated. Add the flour and beat the dough until just mixed - Don't over beat it! Spoon dough into a cookie press fitted a disk and press cookies about 1 inch apart onto ungreased baking sheets - not even parchment! Brush cookies lightly with egg wash and sprinkle generously with the turbinado sugar. Bake for 10 to 14 minutes, or until the edges are just starting to turn golden. Transfer cookies to racks immediately when taken out of oven and let cool on racks.

LinkWithin

Related Posts with Thumbnails