Recent Posts

Thursday, January 26, 2012

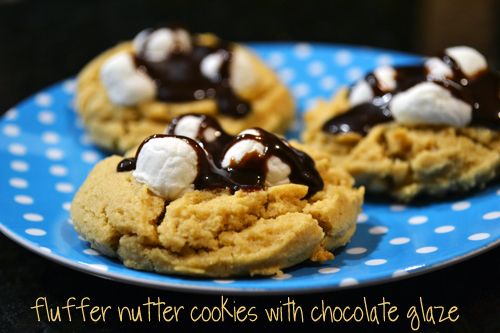
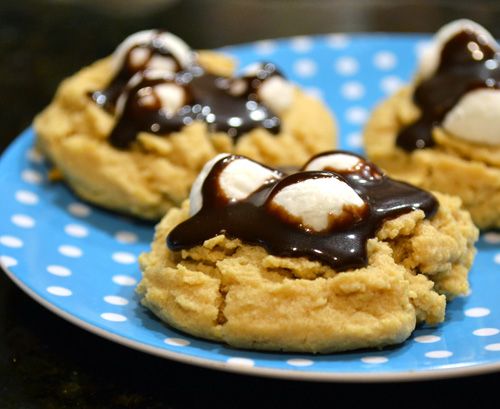
Fluffernutter Cookies with Chocolate Glaze

Growing up I enjoyed my share of Fluffernutter sandwiches.  It was a great way to eat "lunch" while simultaneously having dessert.  As an adult my palette has advanced far far beyond fluffernutters, because now I add Nutella to my peanut butter and fluff sandwiches :)  Ok, so maybe you're never too old for a fluffernutter.  These cookies have everything that makes a fluffernutter a fluffernutter: Marshmallows and Peanut Butter, with the addition of a rich chocolate drizzle.  The recipe for "Fluffernutter Chocolate Gobs" comes from Bakergirl.  These were so good, I made them twice in 3 days.  Yikes. 


Fluffernutter Cookies with Chocolate Glaze from Bakergirl
makes about 24 cookies
Ingredients for the Cookies:
1/2 cup unsalted butter, softened
3/4 cup creamy peanut butter (I used Skippy)
1/2 cup granulated sugar
1/2 cup packed brown sugar
1 egg, room temperature
1 teaspoon pure vanilla extract
3/4 teaspoon baking soda
1/2 teaspoon salt
1 3/4 cups all-purpose flour
Mini marshmallows

Ingredients for the Chocolate Glaze: 
3 tablespoons unsalted butter
2 tablespoons cocoa powder
1/2 cup powdered sugar
1/2 teaspoon vanilla extract
1-2 tablespoons milk, depending on how your desired consistency

Preheat oven to 350°F. Combine flour, baking soda, and salt in a bowl and set aside.

In the bowl of a stand mixer, beat butter, peanut butter, granulated sugar, and brown sugar for 2 minutes until light and fluffy. Add in egg and vanilla.

Gradually add in flour mixture on low speed and mix until it is just incorporated. Chill dough for 15 minutes in the refrigerator.

Using a 1.5 Tablespoons cookie scoop, place on a parchment lined cooking sheet and bake for 7-9 minutes, until edges are very lightly browned. Remove from oven and pat down the cookies with a spatula to flatten them slightly.  Place 5 or 6 mini marshmallows on top of each cookie and return to the oven for 2-3 minutes, until marshmallows are melted. Let cool completely.

When cooled completely, make the glaze by melting the butter in a small saucepan over medium heat. Stir in the cocoa powder and mix until smooth. Remove from heat and stir in vanilla.

Slowly whisk in the powdered sugar, gradually adding the milk as needed to get it the desired consistency (you want it thin enough to drizzle, but thick enough that it won't run all over- a little thicker than molasses). Whisk until no lumps remain.  Spoon a small amount over the top of each cookie.  Glaze with set slightly upon cooling.


Sunday, January 22, 2012

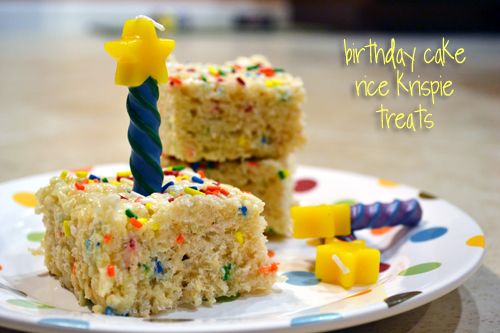
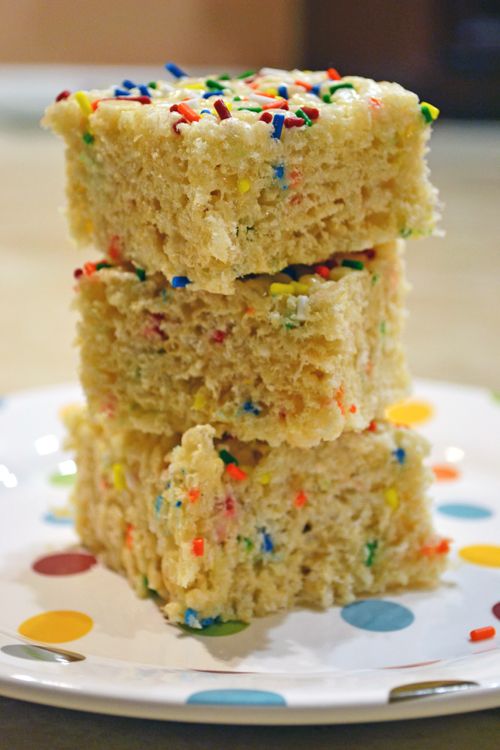
Birthday Cake Rice Krispie Treats

As it turns out, Daniel and I re-learned the other night just how addicting rice krispie treats are.  After our Bourbon Salted Caramel Rice Krispie treats disappeared after just a couple of days I decided to make another batch of Rice Krispie treats, but this time to channel our inner child (not so hard to do).  With some inspiration from Lovin' From the Oven, Birthday Cake Rice Krispies treats were born.  These were delicious, fun, and kiddy!  But I do think that next time I'll try to up the cake flavor by incorporating MORE cake mix next time.  


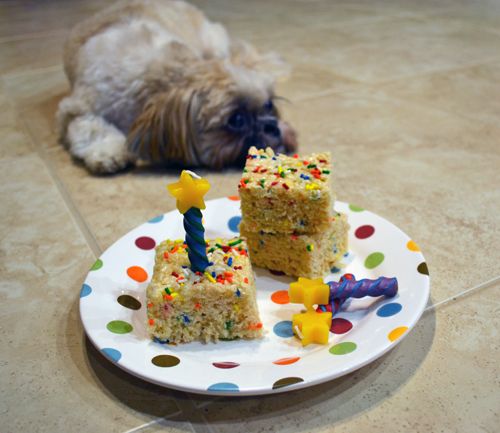
One of the risks of taking your photo's on the floor....
These are such "Please, Mom?" eyes:


Birthday Cake Rice Krispie Treats, adapted from Lovin' From the Oven
Ingredients:
3 tablespoons unsalted butter

1 (10.5) ounce bag of mini marshmallows
3/4 cup (or MORE for more cake flavor) Funfetti cake mix
6 cups Kellogg’s rice krispies cereal
3 - 4 tablespoons of rainbow sprinkles

Melt the butter in a large saucepan over low heat.
Add marshmallows and stir until completely melted.
Remove from heat and stir in the cake mix until dissolved.
Stir in the cereal and half of the sprinkles until it is evenly coated with marshmallow. 
Press the mixture into a 8 x 8 square baking dish and top with remaining sprinkles. 

Wednesday, January 18, 2012

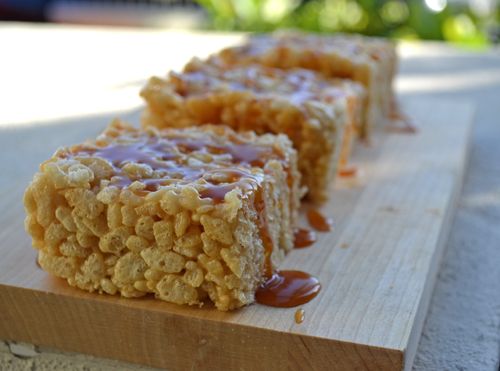
Bourbon Salted Caramel Rice Krispie Treats... Krispie Treats for Grown Ups!

It doesn't matter how grown up I get, I'll never stop loving 
Kellogg's Rice Krispies treats.  I've made Smore Krispie Treats, Mexican Vanilla Krispie Treats, Crunchy Peanut Butter Krispie Treats, and now, Bourbon Salted Caramel Krispie Treats - a treat fit for a grown up.  Since I had some extra Bourbon Salted Caramel left over from the Coffee Ice Cream Tart, and an enormous family sized box of Rice Krispies, I decided to combine the two.  The result?  Probably the most delicious krispie treat I've tried to date.  


Bourbon Salted Caramel Krispie Treats
Ingredients:
1/4 cup Homemade Bourbon Salted Caramel + additional for topping
1 Tablespoon unsalted butter
1 10 ounce bag of mini marshmallows
6 cups of Kellogg's Rice Krispies cereal

Line an 8 x 8 square pan with parchment paper. 
Melt salted caramel and butter together in a large saucepan over low heat.  Add marshmallows, stirring until marshmallows are completed melted down (this will take longer than it does with traditional kris pie treat recipes).  Stir in Kellogg's Rice Krispies cereal until well coated. Then, turn out the mixture into the square pan.  Cut into squares when completely cooled and set, and serve with a salted caramel sauce drizzle. 


Monday, January 16, 2012

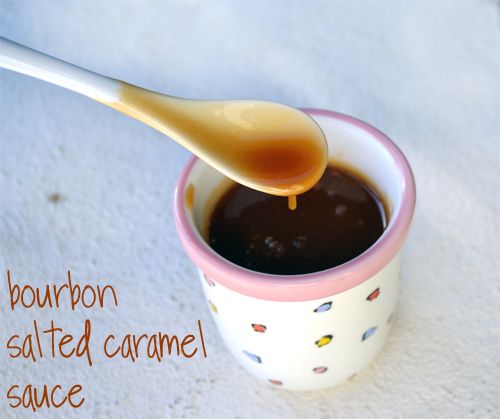
Bourbon Salted Caramel Sauce

The salted caramel sauce that topped the Coffee Ice Cream tart I made recently became the star of that dish.  Its taste fell somewhere in between butterscotch and caramel and with the addition of sea salt and bourbon, it had such a unique, grown-up taste.  It was great on the coffee ice cream tart... but I have a feeling it'd be great on nearly anything.  It can be stored in the fridge, and then microwaved and served warm.    

Homemade Bourbon Salted Caramel Sauce, adapted from Lick My Spoon
Ingredients:
1 cup granulated sugar
6 tablespoons unsalted butter
1/2 cup heavy cream
1/4 cup water
1 1/2 teaspoons diamond crystal fine sea salt
1 1/2 tablespoons Kentucky bourbon


Heat the sugar and water in a medium saucepan on medium-high heat and stir occasionally until the sugar dissolves.  Stop stirring and allow the mixture to come to a boil, swirling the pan occasionally.  
When the mixture becomes dark amber, add the butter. The mixture will foam up, whisk until the butter has melted. Once the butter has melted, remove the pan from the heat.  
Add the heavy cream and whisk to incorporate.  Add the sea salt and bourbon and stir until smooth.  
Allow to cool in the pan for a few minutes, then pour into a glass container and let cool to room temperature. Don’t worry if the sauce seems too thin at first, it will thicken as it cools. Store in the refrigerator for up to 2 weeks. Warm in the microwave before serving.

Sunday, January 15, 2012

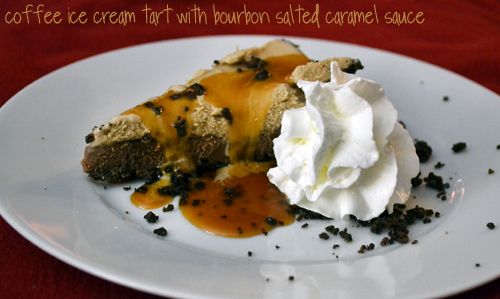
Club: BAKED - Mississippi Mud Pie AKA Coffee Ice Cream Tart

The Club: BAKED bakers are at it again.  This time the recipe we're all making (making, since no baking is required!) is Mississippi Mud Pie aka Coffee Ice Cream Tart.  It involves a homemade chocolate cookie crust with a bourbon chocolate fudge filling topped with coffee ice cream.  


The original recipe tops the whole thing off with a chocolate topping, but I thought there was enough chocolate already so I made a Bourbon Salted Caramel Sauce (Good decision! Recipe found here).  Besides the caramel sauce, the only other adjustment I made to the original recipe was to omit the nuts and use chocolate animal crackers instead of chocolate wafer cookies (like a few others, I couldn't find these at any local stores either!).  I loved the crust that resulted - it reminded me of the chocolate crunchies found in store-bought ice cream cakes... and who doesn't love those??  The whole pie was reminiscent of an Ice-Cream-Cake version of one of those frozen blended coffee drinks... yum. 


We really enjoyed this dessert, especially with the Bourbon Salted Caramel Sauce.  The saltiness provided a nice counterpart to all of the sweetness.  But hands down our favorite part of the cake was the crunchy-like cookie crust.  Be sure to visit the Club: BAKED site to see how this pie came out for the other bakers.  Stop by Jess' blog, The Saucy Kitchen, for the recipe.  Thanks for hosting, Jess!

Saturday, January 7, 2012

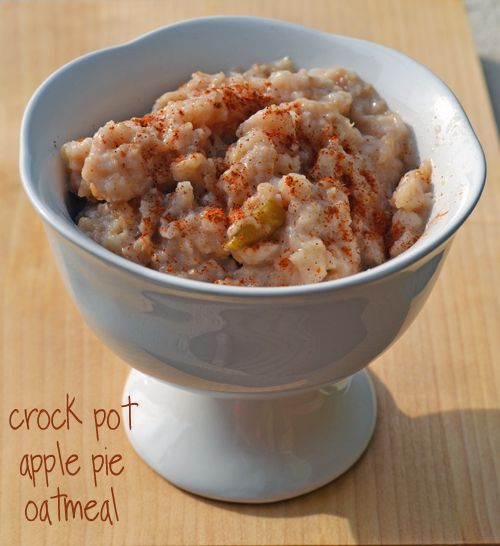
Crock Pot Apple Pie Oatmeal


I know I'm a bit late, but Happy New Year!  What are your goals for 2012?  One thing I'm trying to do this year is to eat a more nutritious breakfast.  It is so easy to grab a pre-packaged granola bar when leaving for work, but with just a little preparation, you can have individual servings of a healthier breakfast ready quick in the morning.  


This Apple Pie Oatmeal is made in a crock pot and is frozen in 1/2 cup servings.  Stick 1 serving in the refrigerator the night before, and it should be thawed by morning.  What's better is that there is less than 1 teaspoon of sugar per serving, and it is full of flavor from the granny smith apples and cinnamon.  All I do is add 2 tablespoons of low fat milk, microwave, and add a sprinkling of cinnamon and spoonable Truvia and I'm good until lunch.  I'm going to try this recipe again soon using all Truvia and no sugar.  But for now this is a good start!  


Crock Pot Apple Pie Oatmeal adapted from Kalyn's Kitchen
Ingredients:
3 medium Granny Smith apples
¼ cup brown sugar
1 1/2 tsp. cinnamon
1 tsp fine sea salt (this is my absolute favorite!)
6 cups water (depending on how thick you like your oatmeal)
3 cup rolled old fashioned oats
milk and spoonable Truvia for serving

Roughly chop apples into ¼ to ½ inch pieces, leaving the skin on. 
Spray the slow cooker lightly with nonstick spray.  Then add apples, brown sugar, cinnamon, salt, and water.  Stir together and cook on high for 2 hours.
Add oatmeal and stir ingredients together, then continue to cook on high for an additional 1 to 1 ½ hours, depending on how soft you'd like the finished oatmeal to be.
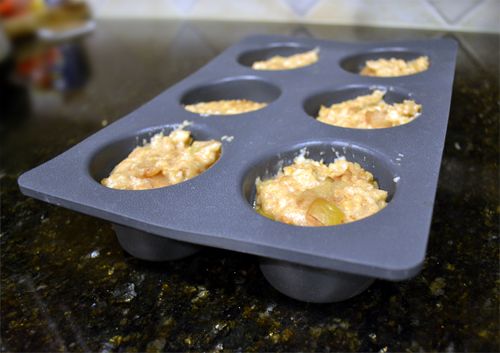
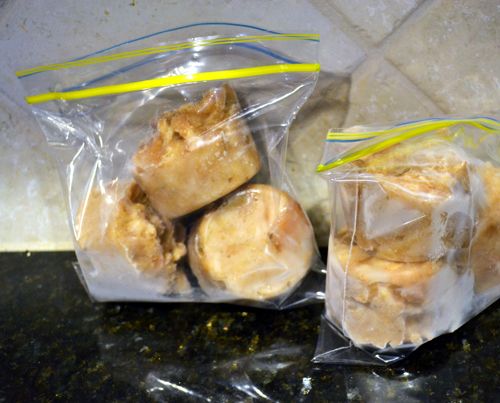
Allow to cool, and then scoop ½ cup servings into silicone muffin tins.  Freeze, then remove from the muffin tin and store in freezer in a freezer bag. 
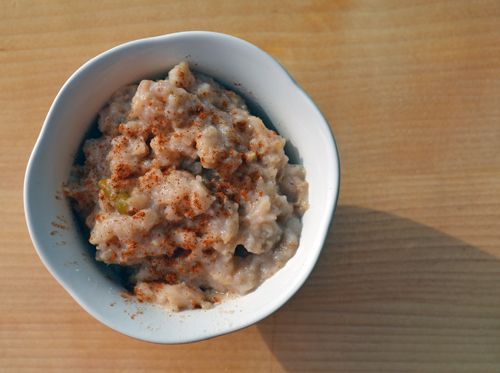
To serve, allow to thaw and then microwave with 2 Tablespoons of non fat milk.  Stir until you reach a normal oatmeal consistency.  Sprinkle with cinnamon and Truvia. 

When the oatmeal is done cooking, I scoop 1/2 cup portions into a silicone muffin pan and freeze.  

When frozen, remove the oatmeal pods from their muffin pan and store in zippy bags.

Then, just add a little milk, microwave and stir, and serve with cinnamon and Truvia. Voila!


Thursday, January 5, 2012

Cake Travel Tip

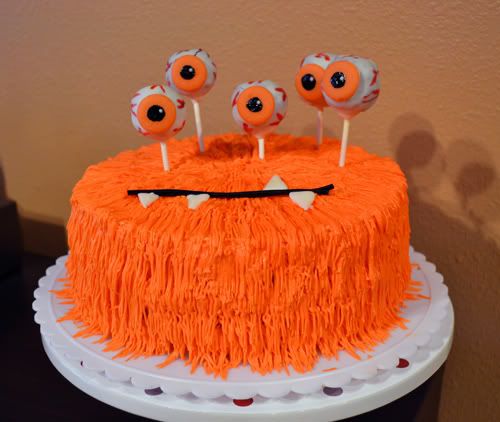
No matter how many cake carriers I have, every year there always seems to be a few odd shaped treats that doesn't fit into anything I own.  This makes transporting and keeping them fresh very difficult.  Most recently, I made this monster cake:


If I had thought it through (which I obviously never do) I would have realized not to put the eyeballs in until I reached my destination.  But I didn't.  And they were in there so securely, I didn't want to mess with them.  As a result, this monster didn't fit into any of the several cake carriers I own (it was too tall!).  Plus, the ink on the eyeballs refused to dry, so I couldn't put plastic wrap around the whole thing.  Instead, I had to hold it on my lap for the car ride to dinner, while defending the cake against my pup in the backseat who thought it smelled like the perfect appetizer.  

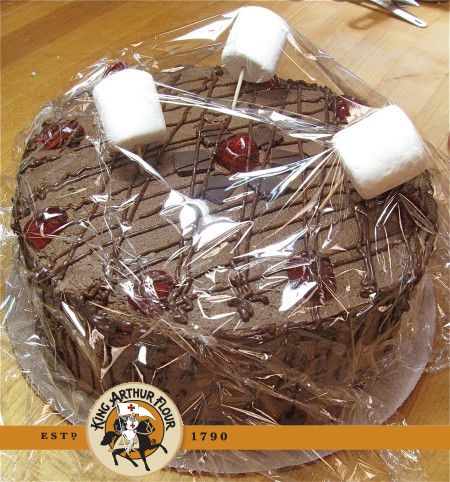
The people at King Arthur Flour are so smart!  I got a gift certificate to their online store for Christmas (yesss!), so I was perusing their site and saw this post on their blog:


Marshmallows on sticks to hold the plastic wrap from touching the cake.  Such a simple, smart solution.  I'll be sure to remember this one for my odd-ball cakes in the future.


LinkWithin

Related Posts with Thumbnails