

Recent Posts

Friday, December 16, 2011

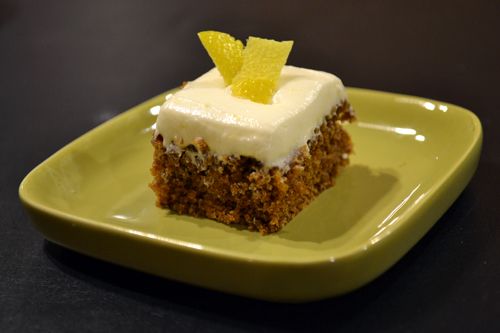
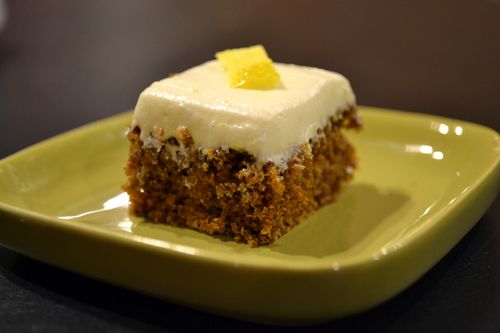
Gingerbread Cake Bites with Lemon Frosting


Around this time of year about 5 or 6 years ago, a neighbor brought over a platter of homemade petit fours for the holidays.  It had a few different flavors of cake cut into adorable little squares, each topped with a different type of frosting. I can't remember anything that was on that platter besides one: gingerbread cake with lemon frosting.  I only ate one of the tiny one inch cake bites, but it was so good I still remember it to this day.  

When I got word of Hodgson Mill's holiday recipe contest, "Have a Grain Holiday!" I felt short on good ideas.  I tried out a few different recipes using both their Bread Flour and their Whole Wheat flour but I wasn't thrilled with anything.  Finally, I thought about those gingerbread cake bites and I started trying to make my own version of the bite sized dessert.  I don't know how these would compare to those little bites from a few years ago, but these are pretty delicious.  The gingerbread cake is spicy and moist, and the tangy lemon frosting serves is a nice complement.  Plus, since it uses Hodgson Mill's Whole Wheat Graham flour, it is nutritious, too.  With this type of flour, "the entire natural bran and germ are stone ground, preserving all of the grain's natural nutrients and great taste, with no artificial colors, flavors, or preservatives." 

Gingerbread Cake Bites with Lemon Frosting, serving size: 40-50 bite sized squares.
Preparation time: approximately 2 hours
Ingredients:
1 ½ cups Hodgson Mill Whole Wheat flour
½ cup cornstarch
1 teaspoon baking powder
¾ teaspoon baking soda
½ teaspoon fine sea salt
1 teaspoon ground ginger
¼ teaspoon cinnamon
¼ teaspoon grated nutmeg
¼ teaspoon cloves
a pinch of ground pepper
¾ stick of unsalted butter (6 Tablespoons), room temperature
2/3 cup brown sugar packed
¼ cup molasses
¼ light corn syrup
1 egg, beaten
½ teaspoon pure vanilla extract
½ cup boiling water
2 Tablespoons milk

For the Gingerbread Cake:
Spray a 9 x 13 pan with nonstick spray and line with parchment paper and preheat the oven to 325 F.
Mix the flour, cornstarch, baking powder, soda, salt, spices and pepper together and set aside.
In the bowl of an electric mixer, cream the butter.  Gradually add the brown sugar and cream thoroughly. Beat in molasses and corn syrup.
In a separate bowl, beat the egg until foamy.  Then, add it to the butter mixture. Stir in the vanilla.
Add the dry ingredients to the creamed mixture and mix just until combined, being careful not to overbeat. 
Slowly, pour in the boiling water and the milk.  Mixture will be very runny.  Pour the mixture into the prepared pan and spread with a spatula.
Bake for about 30-35 minutes or until a cake tester comes out clean.  Allow to cool all the way, and then chill in the refrigerator.

For the Lemon Frosting:
2 sticks unsalted butter, softened
zest from ½ a large lemon
juice from ½ a large lemon
1/2 teaspoon pure vanilla extract
3 cups powdered sugar
Lemon peel for garnish, optional

In the bowl of an electric mixer, cream the butter until light and fluffy.  Add the zest and vanilla.  Slowly add the powdered sugar.  Add the lemon juice and beat on medium-high for 5 minutes.  When the cake is chilled and  slightly firm to the touch, spread the frosting on the cake with an offset spatula.  Using a pizza cutter, cute the cake into small squares.  If desired, top each square with a small strip of lemon zest to garnish.  

Wednesday, December 14, 2011

Contest Winner!

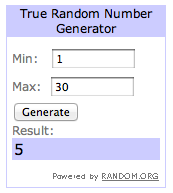
And the winner is...#5 comment, Melissa! Melissa said "My mom's date and nut bread spread with cream cheese. If she doesn't make it, I have no doubt some family members would cry!" Congratulations Melissa! You have 24 hours to claim your prize.  Please either email me at: info@thesmartbaker.com or leave a message on this post with your email address.  


Holiday baked goodie coming soon to Ice Cream Before Dinner using Hodgson Mill's high-quality flour!

Sunday, December 11, 2011

Hodgson Mill and a Giveaway

Good ingredients really makes all the difference in a recipe.  People always talk about using high quality chocolates and extracts when baking, but rarely do people talk about the type of flour they use.  After the first time I bought a higher quality flour than I had used in the past, I never went back.  


Recently, Hodgson Mill began a holiday recipe contest.  Stay tuned for a holiday treat recipe using their wonderful flours coming up on Ice Cream Before Dinner very soon!  In addition to a new holiday recipe, I'll also be hosting a giveaway for $25 to Hodgson Mill's online store!!  


To enter to win, simply post a comment on this blog post describing your family's favorite holiday treat recipe.  


For a second entry to win, write a post on Twitter or Facebook linking to this blog post saying: "I just entered to win a $25 gift certificate to Hodgson Mill at Ice Cream Before Dinner!"  Then, leave a second comment on this post saying you did so.


The contest will end Tuesday, Dec. 13th at Midnight and the winner will be contacted Wednesday.

Sunday, December 4, 2011

The Smart Baker at Cocoa Village Craft Fair

The Smart Baker blogging to you live from the Cocoa Village Holiday Craft Fair!  


You mean you don't have a fake oven?

Our towers even look nice with store bought cupcakes!  So if you're short on time planning your holiday party, you can still have an elegant dessert display.

Wednesday, November 23, 2011

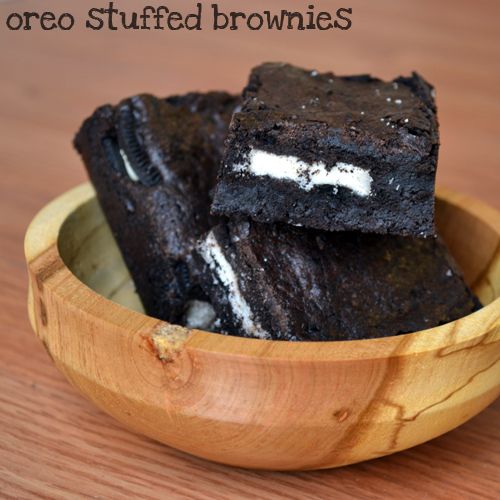
Best Oreo Stuffed Brownies


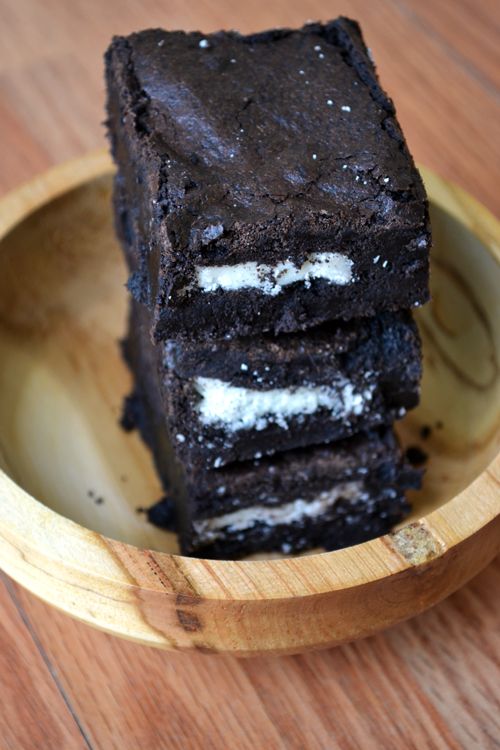
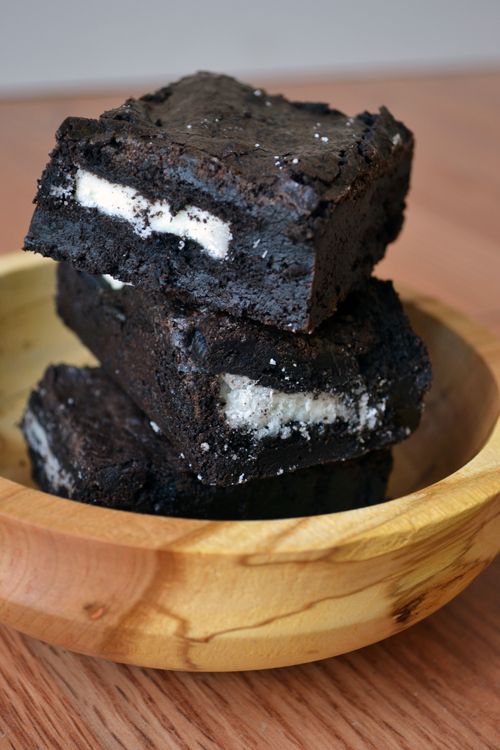
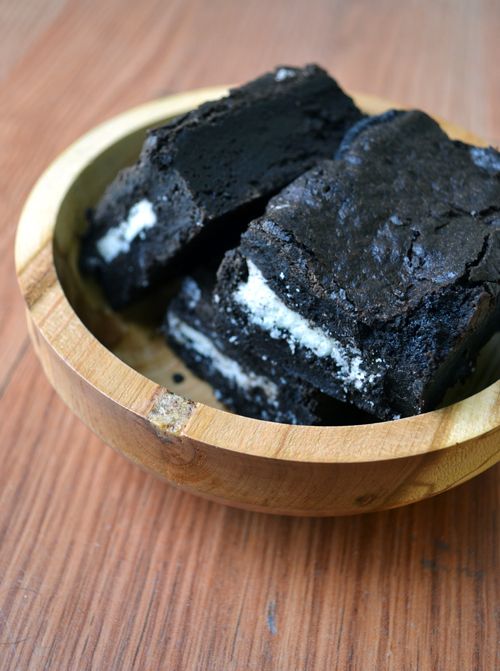
Brownies with Oreos baked right in the middle have been floating around the internet for a while now.  Being huge fans of both, I'm not sure why I haven't got around to making them until now.  It is a genius idea to bake something delicious in the middle of something else delicious.  Plus, it's such a terrific and easy way to jazz up a boxed mix or your favorite from scratch brownie recipe to surprise your taste testers.  


I used a new-to-me brownie recipe: Best Cocoa Brownies.  The recipe on Epicurious says "Cocoa brownies have the softest center and chewiest candylike top 'crust'".  I'd have to agree.  They were super fudgey, soft and moist but still had that slight crisp to the top.  I used Hershey's Special Dark cocoa powder for a super chocolatey taste.  

Best Oreo Stuffed Cocoa Brownies adapted from Epicurious
Ingredients:
10 tablespoons (1 1/4 sticks) unsalted butter
1 1/4 cups sugar
3/4 cup plus 2 tablespoons Hershey's special dark cocoa powder
1/4 teaspoon fine sea salt
1/2 teaspoon pure vanilla extract
2 cold large eggs
1/2 cup all-purpose flour
16 double stuf oreos

Directions:
Preheat the oven to 325°F. Line an 8 inch square baking pan with square pre-cut parchment paper.
Combine butter, sugar, cocoa, and salt in the top of a double boiler with the water beneath barely simmering. Stir from time to time until the butter is melted and the mixture is mixed. Remove the bowl from the skillet and set aside briefly until the mixture is only warm, not hot.
Stir in vanilla. Add the eggs one at a time, stirring vigorously after each one. When the batter looks thick, shiny, and well blended, add the flour and stir until you cannot see it any longer. Spread half of the batter in the lined pan.  Arrange oreos in a single layer on top of the batter.  Pour the remaining brownie batter on top of the oreos and spread to cover them.
Bake until a toothpick plunged into the center emerges slightly moist with batter, 20 to 25 minutes. Let cool completely on a rack.
Transfer the brownies to a cutting board. Cut into squares.


Speaking of amazing, did you see the wooden bowl my oreo brownies are styled in?  One of many things I love about doing local craft shows for The Smart Baker is getting to meet other entrepreneurs.  At our most recent show in October, our booth was next to that of a wood turner, Berkshire Bowls. His Etsy site says, "At Berkshire Bowls we try to make all of our pieces from material that was brought down by natural causes. Each time there is a wind storm, ice storm or other means, I am looking for the material for our next piece".  So they're not just beautiful, they're very green, too.  He boasts such a wide range of products such as pens, boxes, puzzles, bowls of all shapes and sizes.  I just couldn't resist this adorable little bowl.  We're currently working with Scott, the owner, on some very "smart" kitchen items.  I can't wait to share them with you!

Check out Berkshire Bowls' website for more information.  I bet there's a bowl or two that you won't be able to resist either.  


Tuesday, November 8, 2011

Glass Cleaner Foaming Spray


I started off this post by writing about how I love to bake, but that my domesticity doesn't extend into the realm of cleaning.  But really, does anyone like to clean?  Does anyone enjoy cleaning counter tops of grime, eliminating streaks and water spots from bathroom mirrors, or wiping away dirt?  I'd be willing to guess that most people do not find joy in these household chores.  


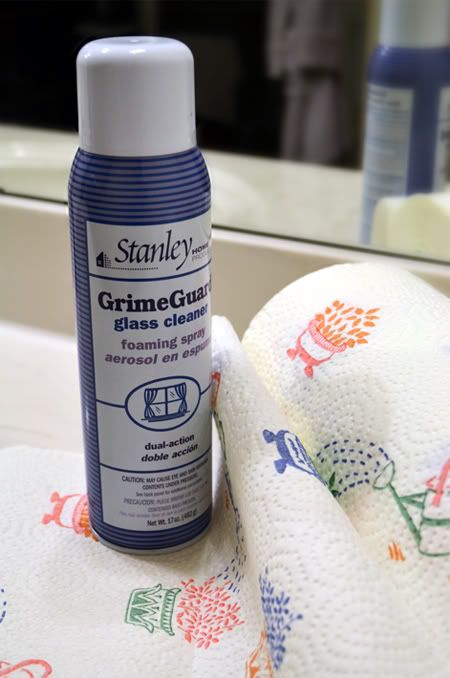
Recently, Stanley Home Products gave me the opportunity to try out their Glass Cleaner Foaming Spray.  Out of all the rooms to clean, the bathroom is probably my least favorite.    Since this cleaner stuff claims to be non-streaking, fast-drying, water-repeling and grime-guarding, why not give it a try?  


I used it on the bathroom counters first.  A quick spray on the counters, an easy wipe with paper towel, and the counter surface was spotless.  It worked on the mirrors too, and left no streaks.  The foam must do all the hard work, because all I needed to do was gently wipe away the foam and the dirt went with it.  Overall, it made the pretty un-fun task of cleaning the bathroom quicker and easier and I'll definitely be using it again.  You can purchase it online for $6.49 at Stanley Home Products.  

Tuesday, November 1, 2011

Club: BAKED - Caramel Apple Monster Cake

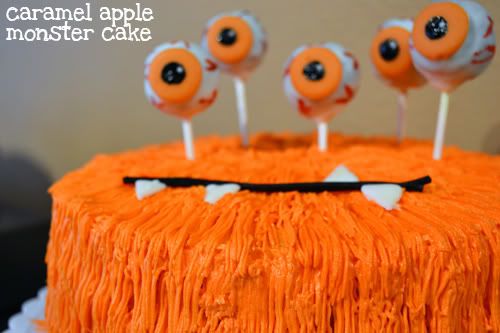
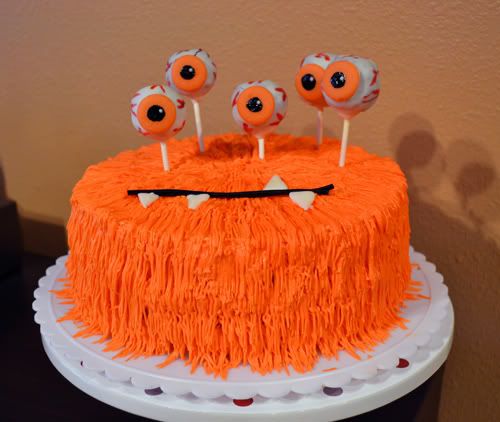
On Sunday we celebrated Halloween with the family.  I saw this Monster cake and really wanted to make it, so when I saw we were baking the Caramel Apple Cake with Club Baked, I thought how perfect!  I'd turn the Caramel Apple Cake into this furry little monster.  


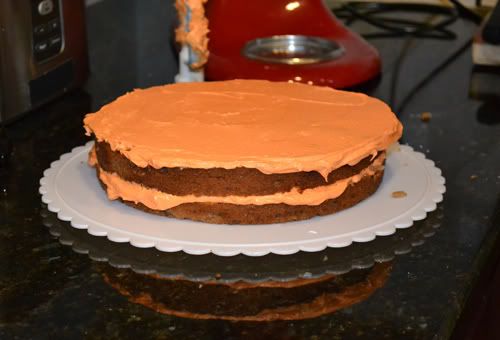
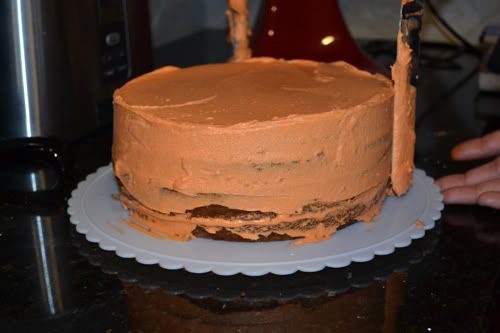
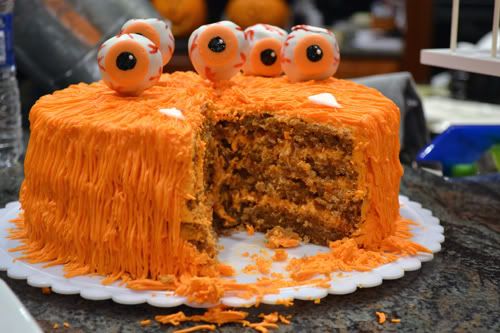
I don't have 3 round cake pans, so I made 2 nine-inch cakes, and split each into two - creating a four layer cake.  Also, I cheated with the frosting.  I saw mixed reviews of the frosting recipe on the Club Baked P&Q page, so, being short on time (I made lots of cake balls and puff pastry intestines, too... pictures to come soon), I decided to make a shortcut and just whipped up a batch of my favorite buttercream frosting - adding 1/3 cup of store bought caramel topping for ice cream.  

First we crumb-coated.  Then we (I say WE because the husband did all of the fur piping! I should really say "HE!")  used a grass tip (flat tip with several small holes in it) to pipe the orange fur in concentric rings.  His mouth is black licorice, and his teeth are made of Candy Quik that I piped into triangles on parchment, and then let harden before transferring to the monster.  
His eye balls are devil's food cake pops dipped in vanilla candy quik.  The orange bit is a Candy Melt wafer with black food coloring gel painted on with a paint brush, and a dab of Candy Quik for the little while shine.  We painted the veins on with red food coloring gel and a paintbrush.  It was time consuming, but fun!

As for the cake, everyone who tried it loved it.  My nephew had two bowls full!  What wasn't eaten at family dinner was thoroughly enjoyed at work the next day.  

Thanks for Melissa of Lulu the Baker for selecting this recipe and hosting this week!  What a great pick for this time of year, such a nice Fall spicey cake. Be sure to visit Club Baked and check out how the other Club Baked bakers did with this Caramel Apple Cake.


LinkWithin

Related Posts with Thumbnails