Recent Posts

Friday, September 16, 2011

Vintage Cookbooks

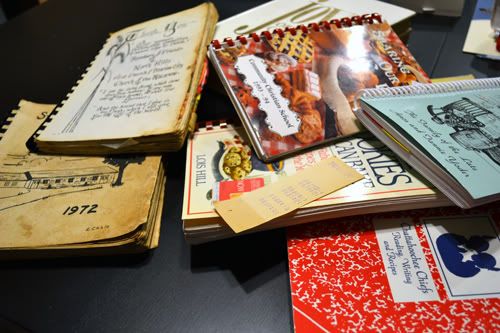
I was recently given a whole bunch of vintage cookbooks.  The new facility we're renting had two big bookshelves of cookbooks that they no longer wanted, and said we could take whichever ones we want!  It was hard to not take them ALL, but I selected about 8 or 9 of them.  I saw "Joy of Cooking" and since I don't own that yet, I had to take that one!  But I also looked for the kind that seemed like compilations of recipes from local people.  I feel like these could be the kind of thing that people contribute their family's favorite recipes to.  I found quite a few books that are collections of recipes from local church members and women's organizations.  I can't wait to start baking and find the great recipes hidden in these old books!  


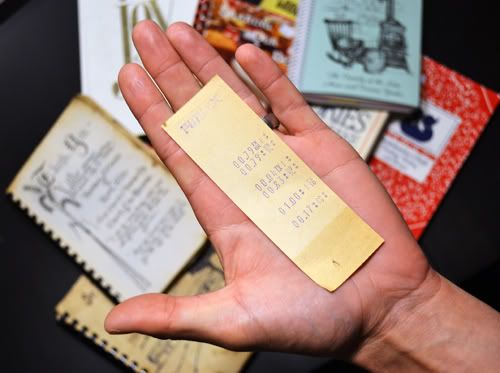
Have you ever found any recipe gems hidden in old cookbooks?  When I started flipping through the books after I got them home, I found something else hidden in one of these old cookbooks:
An old Publix receipt!  Thanks to Daniel for being my hand model.  Wouldn't you love to go to the grocery store and come home having spent less than $1? :) 

Thursday, September 15, 2011

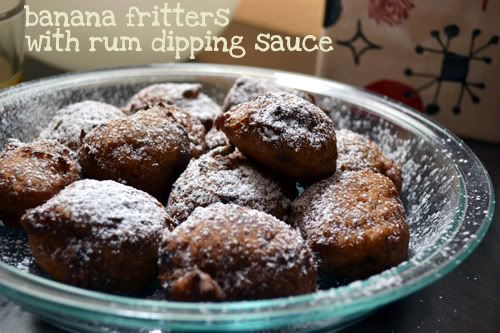
Bananas Foster Fritters - Club Baked

I love banana bread.  My grandmother used to make it all the time when I was young, and me and my sister would always look forward to having slices when we got home from school for several days after.  When I moved to Florida, she gave me her recipe.  Now, at any given time, if you were to take look in my freezer you'd find a zippy bag full of ripe bananas just waiting to be baked into something.  But very rarely do I ever actually make banana bread.  For some strange reason, the husband doesn't love banana bread.  He doesn't dislike it, but if I were to make it, it'd either sit on the counter until it went bad or until I ate the entire thing by myself. 


...but he does love doughtnuts, zeppoles and other similar blobs of fried doughy goodness.  When it was my turn to host Club Baked - I chose the Bananas Foster Fritters to make both of us happy.


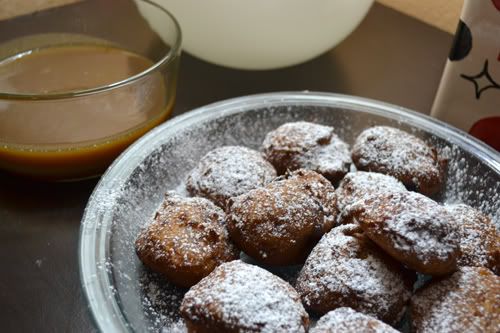
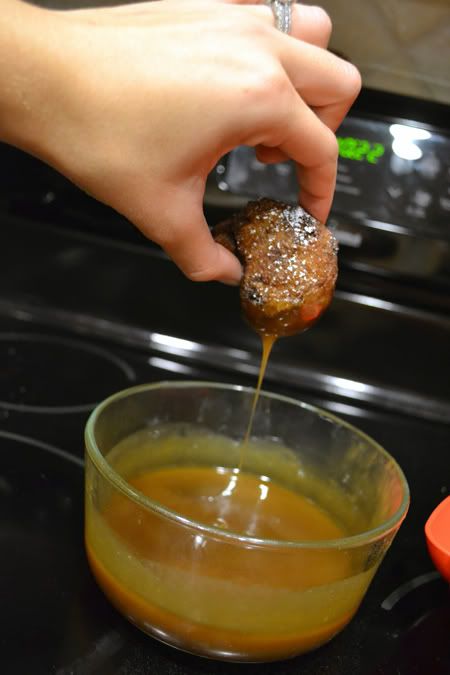
These little fritters were very well received - and very easy to make!  I made the dough and sauce in advance and chilled it in the fridge until after dinner, since I knew they were best served right away.  After dinner we heated up the oil, ice-cream scooped some dough into the hot oil and a few minutes later we had some hot, fresh banana fritters.  


My one issue was with browning.  I watched my oil temperature very carefully, but they still browned far too quickly.  It probably had something to do with the small size of my fritters. I got about 13 fritters and the recipe said 6 - 10.  At 375 F, they needed barely 1 minute per side until they were done on the outside.  Even at 355 -  360 degrees, they still didn't need a full 2 minutes per side like the recipe said.  But for some reason, they were still a tad underbaked in the middle. Oh well - that didn't take away from how much we all enjoyed them.


I opted for a different rum sauce than the one in the book (because of the ingredients I had on hand).  We loved the rum sauce, and I think it really finished these off nicely.  I'm including both recipes below.  


Bananas Foster Fritters from Baked Explorations
Ingredients for Rum Dipping Sauce (recipe I used is below):
4 Tablespoons unsalted butter, cut into 1 inch cubes

1/3 cup firmly packed dark brown sugar
1/3 cup heavy cream
1 teaspoon banana liqueur (or pure vanilla extract)
2 Tablespoons dark rum
Pinch cinnamon (optional)


For the fritter dough:
1 1/4 cups all purpose flour (+ more if needed)
3 Tablespoons firmly packed dark brown sugar
1 teaspoon baking powder
1/2 teaspoon salt
1/4 teaspoon ground allspice
1 teaspoon cinnamon
3 medium ripe bananas
1 tablespoon dark rum
1 teaspoon banana liqueur (or pure vanilla extract)
1 Tablespoon unsalted butter, melted and cooled
Vegetable oil for frying
1/4 cup confectioners sugar


Make the rum dipping sauce:
In a medium saucepan over medium heat, stir the butter and sugar together until smooth. Add the cream and bring to a boil. Remove the pan from the heat and stir in the liqueur, rum and cinnamon if using. Set aside until serving time. (The sauce can be made ahead. Allow it to cool, then cover it tightly in plastic wrap and refrigerate. Rewarm it over low heat in a saucepan or microwave it in short 15 second blasts before serving).


Make the fritter dough:
In a large bowl, whisk together flour, brown sugar, baking powder, salt, allspice, and 1/2 teaspoon of the cinnamon. Use your hands to rub the chunks of sugar into the flour mixture and whisk again (it is ok to have a few chunky sugar pieces remaining).


In another large bowl, mash the bananas with your hands or a heavy spoon and stir in the rum, liqueur and butter.


Use a eubbwe spatular to fold the dry ingredients into the banana mixture. The mix should look wet, but it should hold its shape when scooped into a small ball.  If dough is too thin, keep folding in flour 1 tablespoon at a time until it stiffens up.  Refrigerate the dough while the frying oil heats up and you prepare the sugar topping.


Pour enough oil into a deep skillet to fill it 3/4 inch to 1 inch deep.  Slowly heat the oil over medium-high heat until it registers 375 degrees F on a deep-frying thermometer.


While the oil heats, in a small bowl, whisk together the confectioner's sugar and remaining 1/2 teaspoon cinnamon. Set aside.


Fry the fritters:
Line a plate with double layer of paper towels and set it near your work area.


Using a small spatula and a small spoon, two spoons, or an ice cream scoop with a release mechanism, drop heaping spoonfuls of dough into the oil. Do not crowd the skillet. Cook until the fritters have browned on one side, 2 to 3 minutes. Using a slotted spoon or tongs, turn them over to cook for another 2 minutes or until browned. Do not overcook or burn the fritters. Use the slotted spoon to transfer the fritters to the prepared plate and continue frying dough until finished. 


Place the fritters on a serving plate and sift the cinnamon sugar over them. Serve immediately with rum dipping sauce. 


Rum sauce (the one I used), adapted slightly from Epicurious
Ingredients:

6 tablespoons (3/4 stick) unsalted butter
1 cup (packed) golden brown sugar
1/3 cup whipping cream
2 tablespoons light corn syrup
2 tablespoons dark rum


Melt butter in heavy medium saucepan over medium heat. Add brown sugar, cream and corn syrup and stir until sugar dissolves. Boil 1 minute. Remove from heat. Mix in rum. Boil 1 additional minute.  Cool slightly. (Can be made 1 day ahead. Cover and refrigerate. Rewarm before using.)

See how the other Club Baked bakers did with the fritters by visiting Club Baked's site!  

Thursday, September 8, 2011

Why Parchment is better than Silicone Mats

I used to swear by silpats and other similar silicone mats.  I lined every cookie sheet I could with them.  They're non-stick, they save your cookies by allowing them to come off of the pan without much effort, and they're green.  But gradually, I started to use Parchment more often than silicone mats.  Tonight, my belief that parchment is better than silpats was reconfirmed.  Why, you ask?


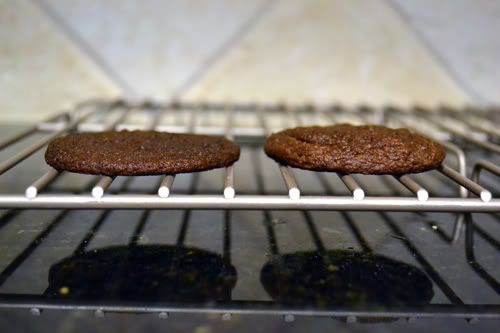
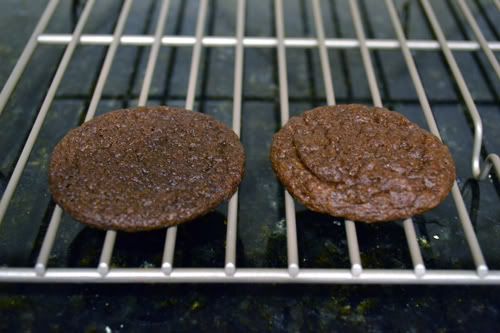
This is the same cookie batter, chilled for the same amount of time, baked for the same amount of time.  The one on the left was baked on a cookie sheet lined with a silicone mat, and the one on the right was baked on a cookie sheet lined with a parchment sheet.  I have absolutely no scientific evidence to back this up, but in my experience, cookies always spread more and fall flatter when they're baked on silicone.  Those baked on parchment always seem to maintain their thickness much more, and have a much better texture.  Maybe silicone is too non-stick and the cookie dough spreads out too easily, making it flatter?  I have no idea why.  But every time I give silicone another chance, I see why I stop using it and switch to parchment sheets.  I hate it when I ruin good cookie dough!


Oh well.  I ruined a few cookies, but I learned that I should only use my silpats when I'm baking items that I don't need to worry about spreading.  For everything else, I'll stick with my perfect parchment. 

Wednesday, September 7, 2011

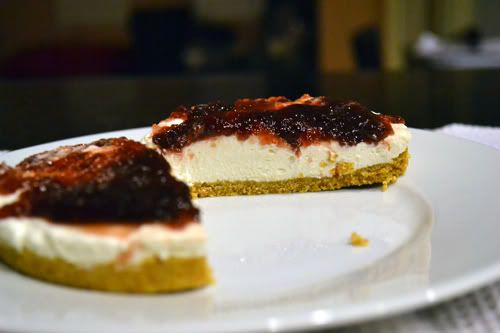
Lightest, Easiest, Quickest Cherry Cheesecake recipe ever


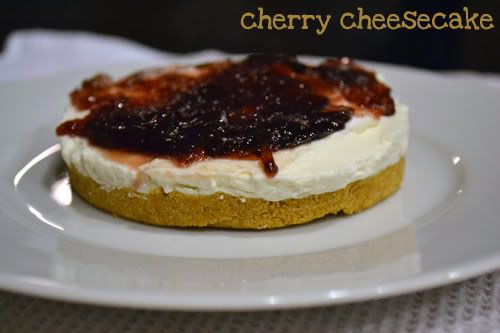
Have you ever prepared a recipe, and has it turn out totally different from what you were expecting?  But you wound up really liking it?  I was a bit careless while preparing this recipe and made a little mistake.  As a result, this quick and easy Cherry Cheesecake recipe produced a unique, light texture that I really wasn't expecting from a no-bake cheesecake.  The airiness made it actually very little like cheesecake and more like a mousse.  But everyone who tasted it absolutely loved it.  It won't be replacing my favorite cheesecake recipe just yet, but when you want something quick and easy (no baking involved!) and light, this might be the cheesecake for you.  (And no, by "light" I do not mean low in calories. Sorry!).  


Quick and Easy Light Cherry Cheesecake, adapted from Nigella Lawson
Ingredients:
1 1/4 cups graham cracker crumbs
2 tablespoons sugar
3/4 stick unsalted butter, soft
10 ounces cream cheese, room temperature
1/2 cup powdered sugar
1 teaspoon pure vanilla
1/2 teaspoon lemon juice
1 cup heavy cream
1 (1o-ounce) jar black cherry spread (or conserves)


Grease an 8 inch springform pan.  
Pulse the graham cracker crumbs in a food processor turning it into crumbs, then add the sugar and butter.  Pulse again to make the mixture clump.  Press the graham mixture into the bottom and slightly up the sides of the springform pan.
Beat together the cream cheese, sugar, vanilla and lemon juice until it is smooth.
Whip the heavy cream until it is the consistency of whipped cream (**See Note Below)
Fold the cream into the cream cheese mixture.  Spoon the cheesecake filling on top of the graham cracker crust and smooth with an offset spatula.  Refrigerate for 3 hours to overnight.
When ready to serve, un-mold the cheesecake and spread the black cherry conserves over the top.


**(This is where I strayed from Nigella's recipe.  She only lightly whipped her cream, but I got careless and overbeat it.  I think this is what added to the lightness of my cheesecake.  If you want it light, beat the cream until stiff peaks form.  If you'd like a more traditional texture, only lightly beat the cream).   

Tuesday, September 6, 2011

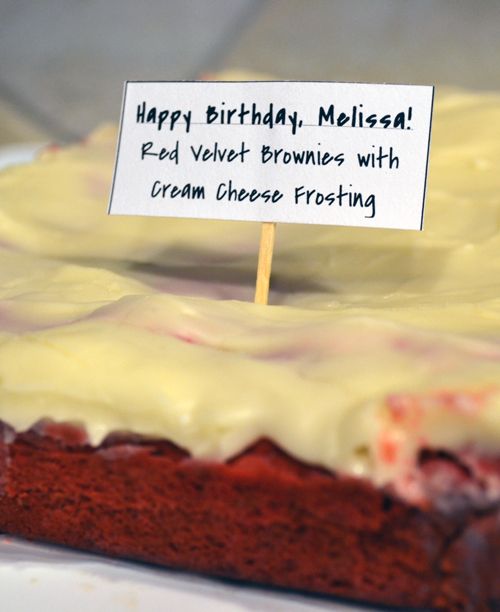
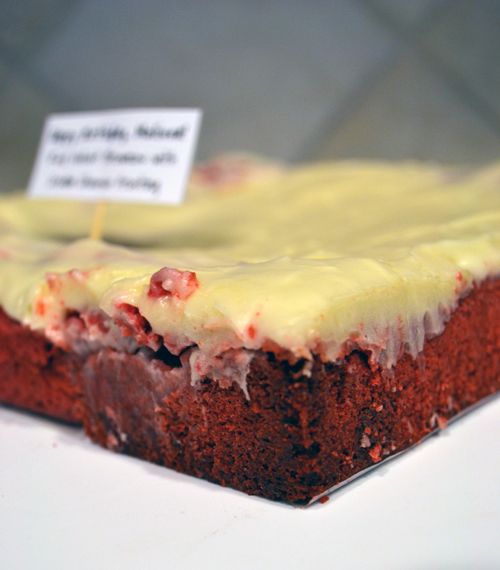
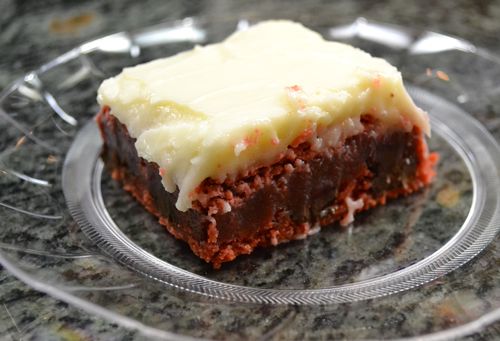
Red Velvet Brownies with Cream Cheese Icing


There have been a few different Red Velvet Brownie recipes floating around the internet for a little while.  One that I've had on my To-Do list for a long time now comes from How Sweet It Is.  I finally decided to put this one at the top of my "Things to bake" list, but I didn't want to make the White Chocolate Frosting that goes with it.  First, I don't love white chocolate.  Second, I don't know about you but I always dread having to melt down white chocolate.  It always seems to be temperamental for me.  It usually winds up chunking up and looking less than tempting.  So, I decided to skip it and go with a traditional match for Red Velvet... Cream Cheese Icing.  I whipped up my favorite cinnamon bun cream cheese frosting and spread that on top of the bars.  How'd it turn out?  Well, I did get a comment that night, "This is the best thing I've ever put in my mouth".  I'd say it went over well.  The brownies found that perfect medium between the fudgey chocolatiness of a brownie, and the only-barely-cocoa-ness of Red Velvet.  I'm glad I went with the Cream Cheese Icing because it really finished these off perfectly.


Red Velvet Brownies with Cream Cheese Icing, adapted from How Sweet It Is
Ingredients:
1/2 cup butter, room temperature
1 1/2 cups sugar
2 eggs, room temperature
2 teaspoons vanilla extract
1 1/4 cups all purpose flour
1/4 teaspoon salt
3 tablespoons cocoa powder
red food coloring gel
2/3 cups chocolate chips (optional)

Preheat the oven to 350.
Line an 8 x 8 cake pan with parchment (on sale now!)
In a medium bowl, combine flour, salt and cocoa powder.
In the bowl of an electric mixer, cream butter and sugar until fluffy. Add eggs one at a time, then add remaining teaspoon of vanilla. With the mixer on medium speed, add in the flour mixture.  Add food coloring and stir until incorporated.  Stir in the chocolate chips if using.  
Spread in the 8 x 8 pan. Bake for 25-30 minutes, or until toothpick inserted in center comes out clean. Let cool almost entirely before frosting.

My favorite cream cheese cinnamon bun frosting recipe:Ingredients:
2 ounces cream cheese, room temperature
4 tblspn unsalted butter, softened
1.5 c confectioner's sugar
1/2 tsp pure vanilla extract

Beat cream cheese and butter together until mixed and fluffy. Add sugar, mix until incorporated. Add vanilla and stir to combine. Spread on the barely warm brownies.



Sunday, September 4, 2011

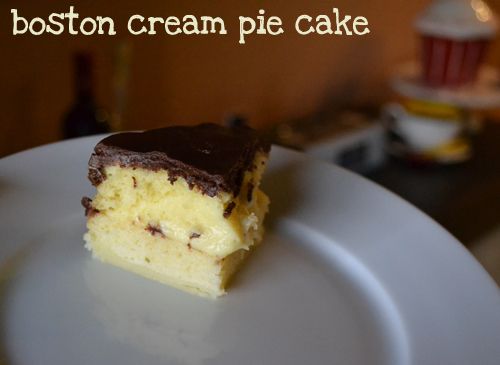
Club: BAKED - Boston Cream Pie Cake... Donut?

I honestly don't think I've ever tasted a traditional Boston Cream Pie but I've had (and thoroughly enjoyed) my share of its donut counterpart.  When Boston Cream Pie came up on our schedule for Club Baked - I knew I'd be baking along that week.  But I'm late!  I made the cake by September 1st, our date for this recipe.  But didn't get to make icing and pastry cream until yesterday


I put a tiny spin on this recipe.  Since my only real experience with Boston Cream Pie is with donuts... I made a giant Boston Cream Pie Cake in the shape of a donut!  It was the first time I got to use my Giant donut pan.  Instead of making a chocolate pastry cream and a vanilla pastry cream, I made only vanilla and put just one layer of cream in the cake.  I thought I had all the ingredients on hand after a shopping trip, only to realize I had no heavy cream for the chocolate glaze, so I improvised and made an alternate version.


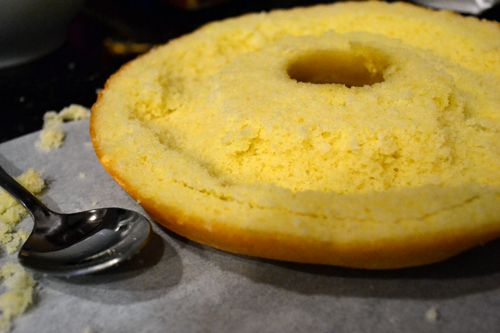
Half of the donut cake, hollowed out slightly to make room for pastry cream

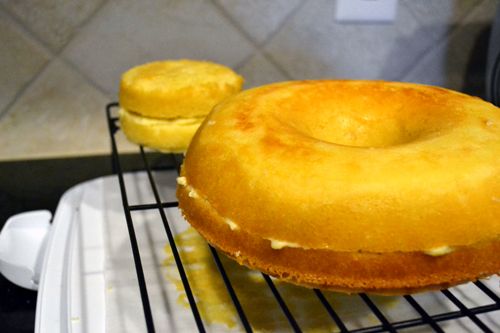
This recipe made enough for one giant donut (equivalent to 2 8-inch round cakes) and one 4 inch cake

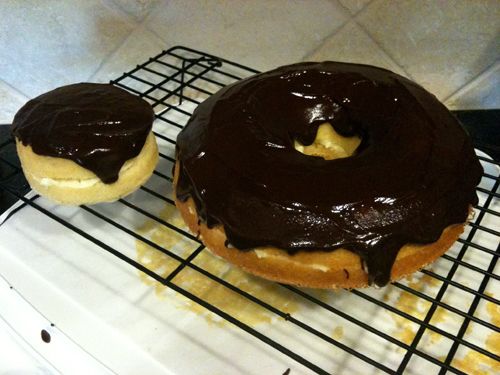
Quite a large chocolate glazed Boston Cream donut. :) And the biggest donut hole ever!


Quick and Simple Satiny Chocolate Glaze, adapted from AllRecipes

  • 3/4 cup 60% semisweet chocolate chips
  • 3 tablespoons butter
  • 1 tablespoon light corn syrup
  • 1/2 teaspoon vanilla extract

Combine all ingredients in the top of a double boiler and stir until completely smooth.  
While still warm, spread on top of cake and let drip down the sides.

Overall, this recipe was pretty good.  Anything I didn't love about it was probably my fault.  For example, We thought it was a tiny bit on the dry side, but I think that would have been better if I had more layers of pastry cream like the original recipe said.  Plus, my pastry cream was very thick.  Like thicker than pudding thick.  But I think perhaps I overcooked it.  

Be sure to check out the other Club Baked bakers' version of the Boston Cream Pie cake!

Sunday, August 21, 2011

The Cookiepedia and Crinkle Cookies

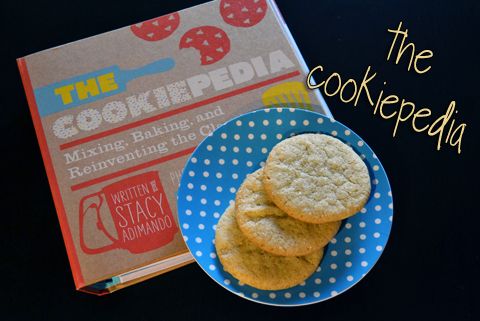
Recently I was asked to review a new cookbook, The Cookiepedia: Mixing, Baking and Reinventing the Classics by Stacy Adimando.  SURE I said, who doesn't want more cookie recipes?  Soon enough, the little book arrived in the mail, and honestly, it was so cute I couldn't wait to start making some of the recipes.  
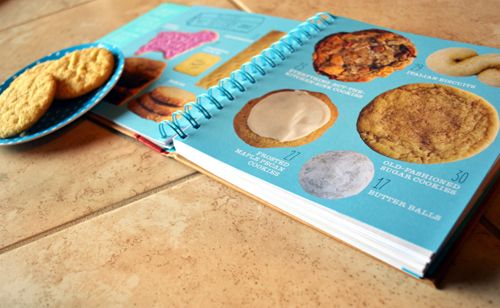
First, I noticed that the book is a spiral bound.  This one simple little thing immediately made me happy.  How many times have you been working from a typical cookbook only to have it slam closed when you're in the middle of a recipe with fingers covered in butter and eggs?  The spiral binding allowed it to lay flat on the counter and stay open throughout prep time.  
Second thing I noticed before I even started baking was how absolutely adorable the book was.  It is packed full of darling little illustrations that appear on almost every page.  And, I don't know about you, but I'm a visual person.  This book has an index of its recipe that made selecting a recipe so much easier.  There are 6 categories or chapters of cookies: Buttery, Chocolaty, Fancy, Fruity, Spicy, and Nutty & Seedy.  Each chapter has a two-page introduction that serves as an index: Each cookie in the following chapter has a portrait in this little pictorial table of contents.  They say you eat with your eyes first!  With a glance at this chapter intro, I was able to quickly pick out which cookie I wanted to make. 
i love this picture index!

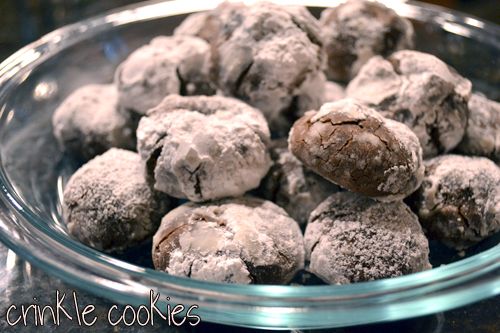
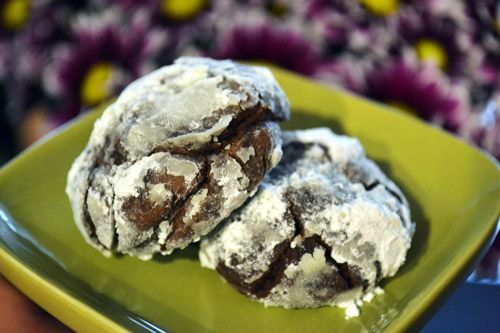
I've made two recipes from the book so far.  First up, I made the Crinkle Cookies.  I've always thought these cookies were so pretty but have never made one before because I've heard they're on the dry side.  The description in this book, though, said they have a "down-home fudgy flavor".  I was sold.  
The dough came together rather quickly.  Besides chilling time, these cookies were fast and simple.  The result?  Moist, chocolaty perfection.  They were almost truffle or brownie like.  Very unlike the dry crumbly crinkle cookies I've heard about.  I brought them to work where they were very well received (and all gone!)  The only adjustment I made to the recipe was to use a combination of bittersweet and semisweet chocolate instead of all bittersweet.  I can't wait to make them again and try the Espresso variation Adimando includes at the end of the recipe.  


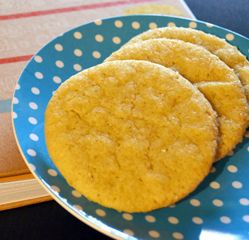
The second recipe I made was Old-Fashioned Sugar Cookies.  Once again, the dough was simple to put together.  Really!  Daniel went to help a neighbor change a fire alarm battery, and by the time he came back a few minutes later, the dough was finished and chilling in the fridge.  The only variation I made on this recipe was to dunk the top of my cookies in turbinado sugar rather than sprinkling vanilla sugar on top (but I bet that would have been so delicious!).  These came out moist, flavorful, and chewy.  They very well might have made their way into my top 3 favorite sugar cookie recipes.  

Below is the recipe for Crinkle Cookies, posted with permission from Quirk Books (recipe shown with my small alterations).  For the other recipes, pick up a copy of The Cookiepedia by Stacy Adimando.  The Cookiepedia is set to come out in September.  The "re-invented-ness" of the recipe make them perfect for a seasoned baking pro, while the helpful guides, instructions, and glossaries make it great for beginners, too.  If you want to try out some new versions of classic cookie recipes, be sure to pick up a copy when it comes out.


Crinkle Cookies, from The Cookiepedia by Stacy Adimando
Ingredients:
3 oz bittersweet chocolate, finely chopped
3 oz semisweet chocolate, finely chopped
1/4 cup + 2 Tblspn unsalted butter at room temp
1/2 cup sugar
2 eggs, room temp
1 tsp pure vanilla
1 1/2 cups all purpose flour
2 Tblspn cocoa powder
3/4 tsp baking powder
1/4 tsp salt
Powdered sugar for rolling


  1. Set a pot of water on the stove and bring to a simmer.  Place the chopped chocolate and butter into a glass or metal bowl and set the bowl over the simmering water.  Let the chocolate start to melt, then stir occasionally until it's smooth. Remove from heat and set aside.
  2. Beat the sugar and eggs on medium speed for several minutes until thick and smooth. Add vanilla and melted chocolate and continue beating on medium-low until combined.
  3. Sift the flour, cocoa powder, baking powder and salt in a separate bowl.  Add the mixture in two batches, beating each time until just combined. Cover the dough with plastic wrap and let chill for about 2 hours, or until firm enough to scoop.  Then, preheat to 325. 
  4. Line several cookie sheets with parchment. Roll 1 inch balls, then toss in powdered sugar, coating completely.  Place about 1 1/2 inches apart on the cookie sheet. Bake 8 - 10 minutes or until starting to feel firm to the touch.  Cool for 5 minutes before transferring the cookies to wire racks to cool completely.  

LinkWithin

Related Posts with Thumbnails