

Recent Posts

Saturday, October 22, 2011

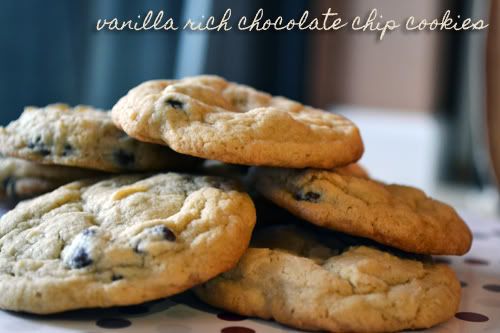
Vanilla Rich Chocolate Chip Cookies


A while back, I was catching up on my blog reading and came across Vanilla Rich Chocolate Chip Cookies on My Tasty Treasures.  It caught my eye because Daniel is a lover of vanilla, so I bookmarked to make in the near future.  That night, I was flipping through one of my mother in laws magazines as saw the same recipe in an ad for McCormick's vanilla extract.  I took it as a sign and made them that night.  SO glad I did because it is hands down, my favorite chocolate chip cookie recipe I've ever made to date...  soft and chewy and full of vanilla with just the right amount of salt in it so that you could taste it but it wasn't overpowering.  They stayed fairly thick and didn't spread out too much.  The recipe made quite a large batch but um... they didn't stick around that long.


Vanilla Rich Chocolate Chip Cookies from My Tasty Treasures
Ingredients:

3¼ cups flour
1 teaspoon baking soda
¾ teaspoon salt
1 cups butter, softened
1¼ cups granulated sugar
1 cup firmly packed light brown sugar
2 eggs
4 teaspoons Pure Vanilla Extract
1 package (12 ounces) semi-sweet chocolate chips

1. Preheat oven to 375°F. Mix flour, baking soda and salt in medium bowl. Set aside. In the bowl of an electric mixer, beat butter and sugars in large bowl on medium speed until light and fluffy. Add the eggs and vanilla; mix well. Gradually beat in the flour mixture on low speed until well mixed. Stir in chocolate chips.

2. Drop by rounded tablespoons (I used a 1 1/2 Tablespoon cookie scoop) about 2 inches apart onto parchment-lined baking sheets.

3. Bake 8 to 10 minutes or until barely beginning to brown at the edges. Cool on baking sheets 1 minute. Remove to wire racks; cool completely.

Saturday, October 8, 2011

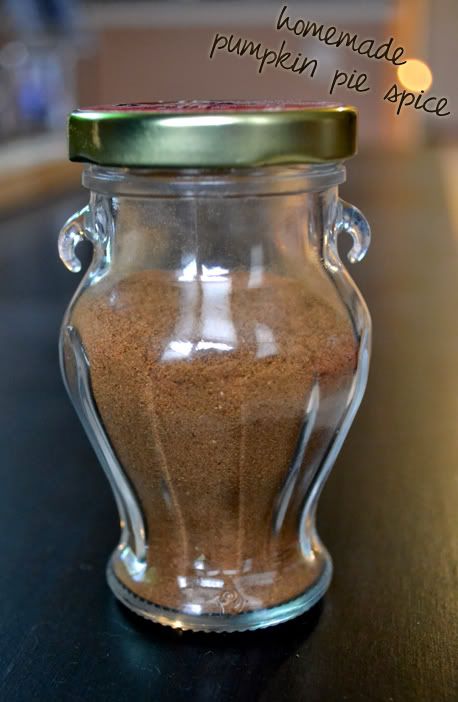
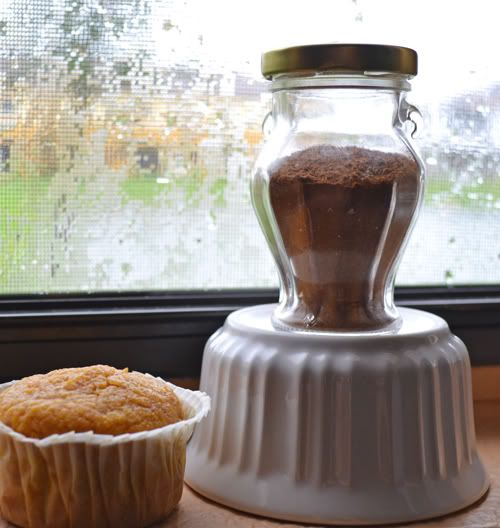
Homemade Pumpkin Pie Spice


Nothing says Fall like pumpkin flavored things.  The coffee shops are filled with pumpkin lattes, delis have pumpkin muffins, even ravioli are filled with pumpkin in the Fall.  And I love it!  Towards the end of the summer, I never can wait for Fall to get here to eat all of the pumpkin goodies.  


That being said, as much as I love pumpkin-flavored things, I've never bought pumpkin pie spice.  And today in Central Florida, it's like a monsoon.  I'm talking trees down in my neighborhood and water coming up through my tiles in the living room (but that's another story).  Not the kind of weather that makes you you want to go to the store solely to buy pumpkin pie spice.  So what do you do if you're stuck in the house and craving pumpkin goodies, with no pumpkin pie spice?  Make your own, of course!  I found this recipe for Pumpkin Pie Spice on My Baking Addiction, and I had all of the spices on hand.  You probably do, too!


Homemade Pumpkin Pie Spice from My Baking Addiction
Ingredients:
3 Tablespoons ground cinnamon
2 teaspoons ground ginger
2 teaspoons nutmeg
1 1/2 teaspoons ground allspice
1 1/2 teaspoons ground cloves

Combine all spices in a small bowl and whisk to combine.  Use a funnel to pour into a small air tight jar.  


Saturday, October 1, 2011

Club: BAKED - A Tale of 2 Pumpkin Muffins

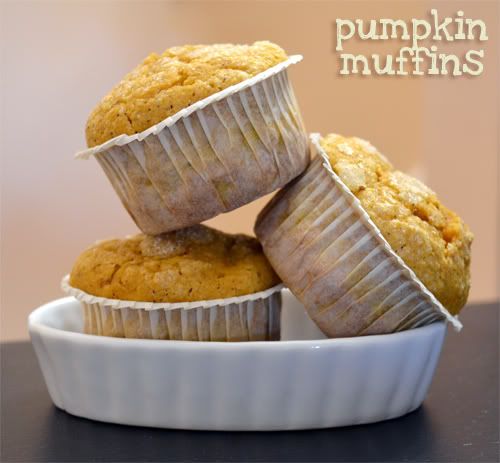
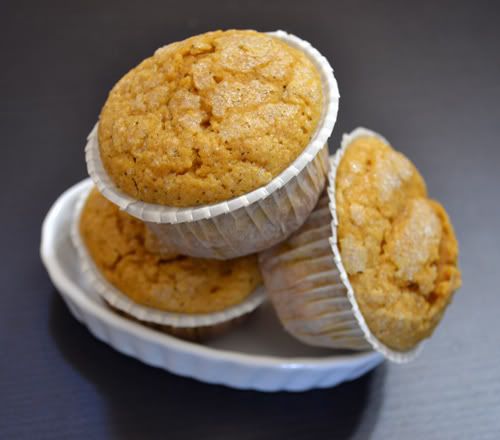
Today is October 1st.  Break out the pumpkin!  If you're looking for an excuse to buy pumpkin now that its on the shelves, try these muffins.  I altered it (drastically) from the savory Pumpkin Cheddar muffins recipe that was chosen as this week's baked goodie for Club Baked, and I'm happy with the results.  In addition to my savory to sweet adjustment, I also split my batter in half and made two varieties: Espresso Pumpkin Muffins and Pumpkin Pie Muffins.  I'm not sure which one I love more!  I've posted my recipe below as it is so different from the original, but if you're interested in the savory Pumpkin Cheddar version, see Billie of the blog Chocolate & Chakra - the host of this week's recipe.  Thanks for hosting and picking this wonderfully Fall recipe, Billie!


Pumpkin Muffins two ways: 1 with Espresso and 1 with Pumpkin Pie spice
Yields 15 cupcake-sized muffins
Ingredients:
1 cup canned pumpkin puree
3 tablespoons light sour cream
2 large eggs, room temp
1 stick unsalted butter, melted & cooled
2 cups all purpose flour
1 1/2 teaspoon baking powder
1/2 teaspoon Pumpkin Pie spice (home-made!)
1/2 teaspoon Espresso powder
1/2 teaspoon fine sea salt
3/4 cup packed light brown sugar
3/4 cup granulated sugar + extra for sprinkling


Directions:
Preheat oven to 400 F.  
In the bowl of an electric mixer, combine pumpkin and sour cream.  Add the eggs and butter and combine. 
In another bowl, add the flour, baking powder, salt and sugars, and whisk to combine.  Add to the pumpkin mixture.  
Divide the batter in half.  In one half of the batter, add the pumpkin pie spice.  In the other half, add the espresso powder.  Or, if you want an entire batch of 1 variety, simply double the amount of that spice and omit the other.  
Put in standard sized cupcake tins lined with cupcake liners.  Sprinkle the tops with granulated sugar.  
Bake for 14 - 17 minutes, or until a cake tester inserted into the center comes out clean.  Serve warm!


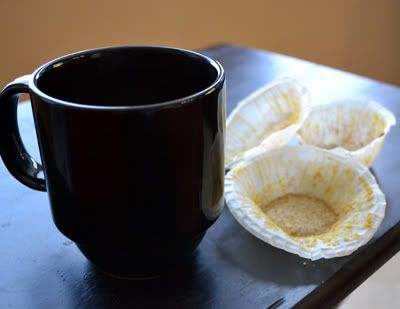
Oops! Who ate those?


Visit the other Club Baked bakers to see how their Pumpkin muffins came out!  I can't wait to see how the savory version tastes - I was too scared to try it!  

Friday, September 16, 2011

Vintage Cookbooks

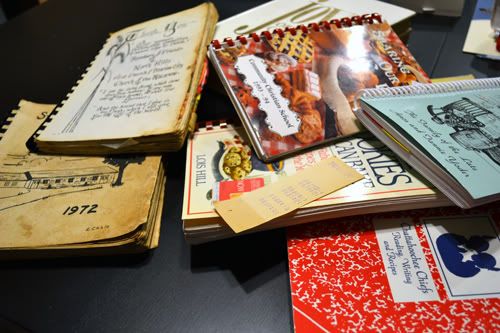
I was recently given a whole bunch of vintage cookbooks.  The new facility we're renting had two big bookshelves of cookbooks that they no longer wanted, and said we could take whichever ones we want!  It was hard to not take them ALL, but I selected about 8 or 9 of them.  I saw "Joy of Cooking" and since I don't own that yet, I had to take that one!  But I also looked for the kind that seemed like compilations of recipes from local people.  I feel like these could be the kind of thing that people contribute their family's favorite recipes to.  I found quite a few books that are collections of recipes from local church members and women's organizations.  I can't wait to start baking and find the great recipes hidden in these old books!  


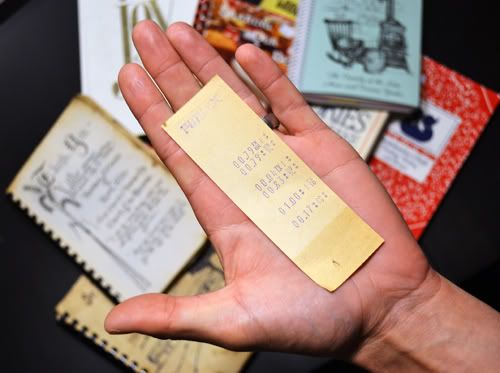
Have you ever found any recipe gems hidden in old cookbooks?  When I started flipping through the books after I got them home, I found something else hidden in one of these old cookbooks:
An old Publix receipt!  Thanks to Daniel for being my hand model.  Wouldn't you love to go to the grocery store and come home having spent less than $1? :) 

Thursday, September 15, 2011

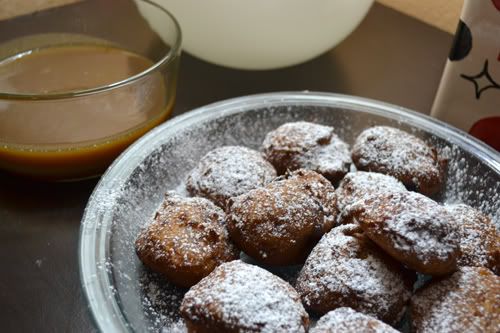
Bananas Foster Fritters - Club Baked

I love banana bread.  My grandmother used to make it all the time when I was young, and me and my sister would always look forward to having slices when we got home from school for several days after.  When I moved to Florida, she gave me her recipe.  Now, at any given time, if you were to take look in my freezer you'd find a zippy bag full of ripe bananas just waiting to be baked into something.  But very rarely do I ever actually make banana bread.  For some strange reason, the husband doesn't love banana bread.  He doesn't dislike it, but if I were to make it, it'd either sit on the counter until it went bad or until I ate the entire thing by myself. 


...but he does love doughtnuts, zeppoles and other similar blobs of fried doughy goodness.  When it was my turn to host Club Baked - I chose the Bananas Foster Fritters to make both of us happy.


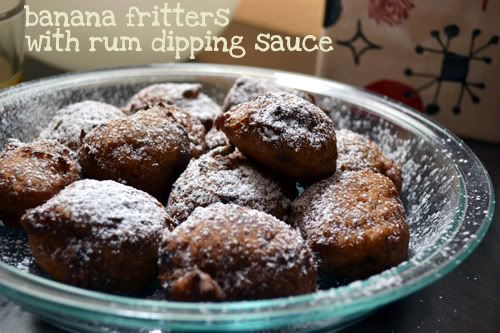
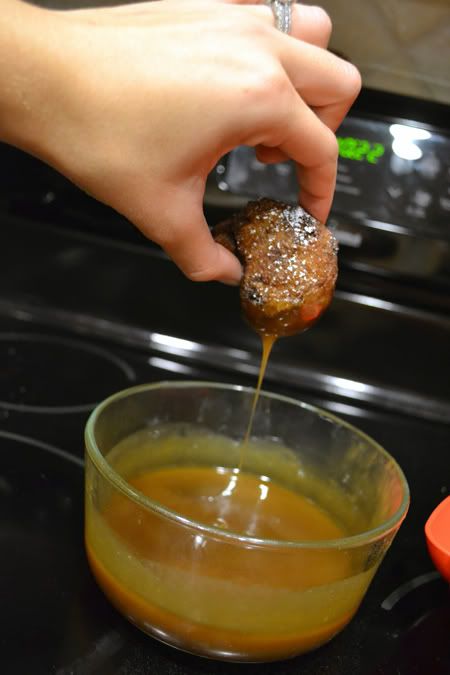
These little fritters were very well received - and very easy to make!  I made the dough and sauce in advance and chilled it in the fridge until after dinner, since I knew they were best served right away.  After dinner we heated up the oil, ice-cream scooped some dough into the hot oil and a few minutes later we had some hot, fresh banana fritters.  


My one issue was with browning.  I watched my oil temperature very carefully, but they still browned far too quickly.  It probably had something to do with the small size of my fritters. I got about 13 fritters and the recipe said 6 - 10.  At 375 F, they needed barely 1 minute per side until they were done on the outside.  Even at 355 -  360 degrees, they still didn't need a full 2 minutes per side like the recipe said.  But for some reason, they were still a tad underbaked in the middle. Oh well - that didn't take away from how much we all enjoyed them.


I opted for a different rum sauce than the one in the book (because of the ingredients I had on hand).  We loved the rum sauce, and I think it really finished these off nicely.  I'm including both recipes below.  


Bananas Foster Fritters from Baked Explorations
Ingredients for Rum Dipping Sauce (recipe I used is below):
4 Tablespoons unsalted butter, cut into 1 inch cubes

1/3 cup firmly packed dark brown sugar
1/3 cup heavy cream
1 teaspoon banana liqueur (or pure vanilla extract)
2 Tablespoons dark rum
Pinch cinnamon (optional)


For the fritter dough:
1 1/4 cups all purpose flour (+ more if needed)
3 Tablespoons firmly packed dark brown sugar
1 teaspoon baking powder
1/2 teaspoon salt
1/4 teaspoon ground allspice
1 teaspoon cinnamon
3 medium ripe bananas
1 tablespoon dark rum
1 teaspoon banana liqueur (or pure vanilla extract)
1 Tablespoon unsalted butter, melted and cooled
Vegetable oil for frying
1/4 cup confectioners sugar


Make the rum dipping sauce:
In a medium saucepan over medium heat, stir the butter and sugar together until smooth. Add the cream and bring to a boil. Remove the pan from the heat and stir in the liqueur, rum and cinnamon if using. Set aside until serving time. (The sauce can be made ahead. Allow it to cool, then cover it tightly in plastic wrap and refrigerate. Rewarm it over low heat in a saucepan or microwave it in short 15 second blasts before serving).


Make the fritter dough:
In a large bowl, whisk together flour, brown sugar, baking powder, salt, allspice, and 1/2 teaspoon of the cinnamon. Use your hands to rub the chunks of sugar into the flour mixture and whisk again (it is ok to have a few chunky sugar pieces remaining).


In another large bowl, mash the bananas with your hands or a heavy spoon and stir in the rum, liqueur and butter.


Use a eubbwe spatular to fold the dry ingredients into the banana mixture. The mix should look wet, but it should hold its shape when scooped into a small ball.  If dough is too thin, keep folding in flour 1 tablespoon at a time until it stiffens up.  Refrigerate the dough while the frying oil heats up and you prepare the sugar topping.


Pour enough oil into a deep skillet to fill it 3/4 inch to 1 inch deep.  Slowly heat the oil over medium-high heat until it registers 375 degrees F on a deep-frying thermometer.


While the oil heats, in a small bowl, whisk together the confectioner's sugar and remaining 1/2 teaspoon cinnamon. Set aside.


Fry the fritters:
Line a plate with double layer of paper towels and set it near your work area.


Using a small spatula and a small spoon, two spoons, or an ice cream scoop with a release mechanism, drop heaping spoonfuls of dough into the oil. Do not crowd the skillet. Cook until the fritters have browned on one side, 2 to 3 minutes. Using a slotted spoon or tongs, turn them over to cook for another 2 minutes or until browned. Do not overcook or burn the fritters. Use the slotted spoon to transfer the fritters to the prepared plate and continue frying dough until finished. 


Place the fritters on a serving plate and sift the cinnamon sugar over them. Serve immediately with rum dipping sauce. 


Rum sauce (the one I used), adapted slightly from Epicurious
Ingredients:

6 tablespoons (3/4 stick) unsalted butter
1 cup (packed) golden brown sugar
1/3 cup whipping cream
2 tablespoons light corn syrup
2 tablespoons dark rum


Melt butter in heavy medium saucepan over medium heat. Add brown sugar, cream and corn syrup and stir until sugar dissolves. Boil 1 minute. Remove from heat. Mix in rum. Boil 1 additional minute.  Cool slightly. (Can be made 1 day ahead. Cover and refrigerate. Rewarm before using.)

See how the other Club Baked bakers did with the fritters by visiting Club Baked's site!  

Thursday, September 8, 2011

Why Parchment is better than Silicone Mats

I used to swear by silpats and other similar silicone mats.  I lined every cookie sheet I could with them.  They're non-stick, they save your cookies by allowing them to come off of the pan without much effort, and they're green.  But gradually, I started to use Parchment more often than silicone mats.  Tonight, my belief that parchment is better than silpats was reconfirmed.  Why, you ask?


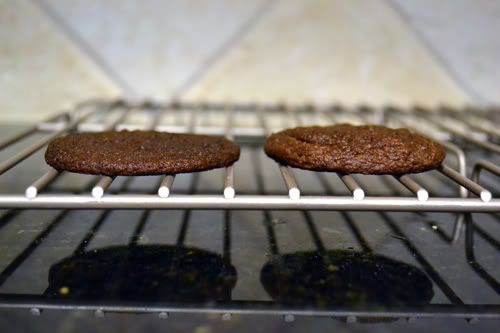
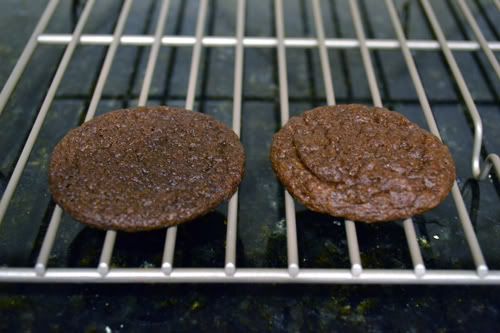
This is the same cookie batter, chilled for the same amount of time, baked for the same amount of time.  The one on the left was baked on a cookie sheet lined with a silicone mat, and the one on the right was baked on a cookie sheet lined with a parchment sheet.  I have absolutely no scientific evidence to back this up, but in my experience, cookies always spread more and fall flatter when they're baked on silicone.  Those baked on parchment always seem to maintain their thickness much more, and have a much better texture.  Maybe silicone is too non-stick and the cookie dough spreads out too easily, making it flatter?  I have no idea why.  But every time I give silicone another chance, I see why I stop using it and switch to parchment sheets.  I hate it when I ruin good cookie dough!


Oh well.  I ruined a few cookies, but I learned that I should only use my silpats when I'm baking items that I don't need to worry about spreading.  For everything else, I'll stick with my perfect parchment

Wednesday, September 7, 2011

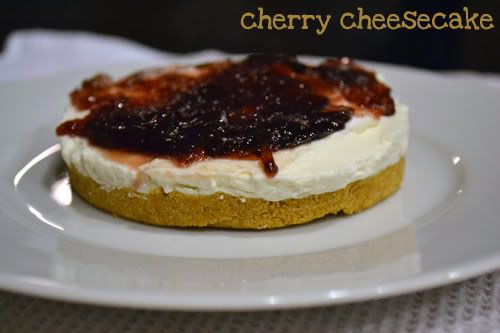
Lightest, Easiest, Quickest Cherry Cheesecake recipe ever


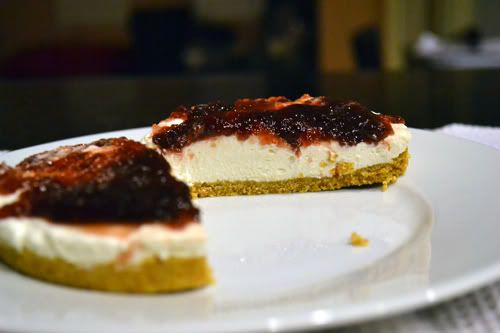
Have you ever prepared a recipe, and has it turn out totally different from what you were expecting?  But you wound up really liking it?  I was a bit careless while preparing this recipe and made a little mistake.  As a result, this quick and easy Cherry Cheesecake recipe produced a unique, light texture that I really wasn't expecting from a no-bake cheesecake.  The airiness made it actually very little like cheesecake and more like a mousse.  But everyone who tasted it absolutely loved it.  It won't be replacing my favorite cheesecake recipe just yet, but when you want something quick and easy (no baking involved!) and light, this might be the cheesecake for you.  (And no, by "light" I do not mean low in calories. Sorry!).  


Quick and Easy Light Cherry Cheesecake, adapted from Nigella Lawson
Ingredients:
1 1/4 cups graham cracker crumbs
2 tablespoons sugar
3/4 stick unsalted butter, soft
10 ounces cream cheese, room temperature
1/2 cup powdered sugar
1 teaspoon pure vanilla
1/2 teaspoon lemon juice
1 cup heavy cream
1 (1o-ounce) jar black cherry spread (or conserves)


Grease an 8 inch springform pan.  
Pulse the graham cracker crumbs in a food processor turning it into crumbs, then add the sugar and butter.  Pulse again to make the mixture clump.  Press the graham mixture into the bottom and slightly up the sides of the springform pan.
Beat together the cream cheese, sugar, vanilla and lemon juice until it is smooth.
Whip the heavy cream until it is the consistency of whipped cream (**See Note Below)
Fold the cream into the cream cheese mixture.  Spoon the cheesecake filling on top of the graham cracker crust and smooth with an offset spatula.  Refrigerate for 3 hours to overnight.
When ready to serve, un-mold the cheesecake and spread the black cherry conserves over the top.


**(This is where I strayed from Nigella's recipe.  She only lightly whipped her cream, but I got careless and overbeat it.  I think this is what added to the lightness of my cheesecake.  If you want it light, beat the cream until stiff peaks form.  If you'd like a more traditional texture, only lightly beat the cream).   

LinkWithin

Related Posts with Thumbnails