Sometimes, you just need a cheesecake. Wouldn't you agree? It's great when said cheesecake is made with Greek Yogurt, so even when you're indulging you can feel just a little bit better about it.
I'm kind of picky about my cheesecake. I'd rather not eat it if it's not amazing. Mediocre cheesecake isn't really worth it for me. Next time I'm feeling cheesecake, I think I'll go the Greek Yogurt route again because it lent the cake such a wonderful texture. It was nice and light, unlike some heavy dense cheesecakes I've eaten. The flavor from the flavored greek yogurts (raspberry and key lime) was noticeable but not over the top strong. Overall this was a great (and SUPER SUPER easy!!) dessert. We had no problem getting rid of the left overs.
Berry Key Lime Cheesecake, from Oikos
Ingredients:
Crust -
9 Graham Crackers
2 Tbsp Granulated Sugar
4 Tbspn butter, melted
Filling -
2 (5.3 oz) single serve containers of Dannon Oikos Key Lime Greek Yogurt
2 (5.3 oz) single serve containers of Dannon Oikos Raspberry Greek Yogurt
4 eggs, rom temperature
1 can sweetened condensed milk
4 Tbsp All Purpose Flour
In the bowl of a food processor, pulse graham crackers, sugar and butter. Pat the mixture into the bottom of a 9 inch spring form pan. Set aside.
In a bowl, combine key lime yogurts with 2 eggs, 2 Tbspn flour and half of the sweetened condensed milk. If desired, add food coloring.
In a separate bowl combine raspberry greek yogurts with 2 eggs, 2 Tbspn flour and half of the sweetened condensed milk. If desired, add food coloring.
Pour Berry mixture on top of the crust. Then slowly pour the key lime mixture on top of that. Swirl with a knife if desired.
Bake a 250 F for 30 - 40 minutes, until the center of set and edges are fully cooked. Refrigerate for at least 3 hours or over-night before serving.
Recent Posts
Thursday, January 31, 2013
Berry Key Lime Cheesecake with Greek Yogurt
Posted by
Stephanie
at
6:16 PM

Berry Key Lime Cheesecake with Greek Yogurt
2013-01-31T18:16:00-05:00
Stephanie
cheesecake|greek yogurt|key lime|raspberry|
Comments
Labels:
cheesecake,
greek yogurt,
key lime,
raspberry
Sunday, January 6, 2013
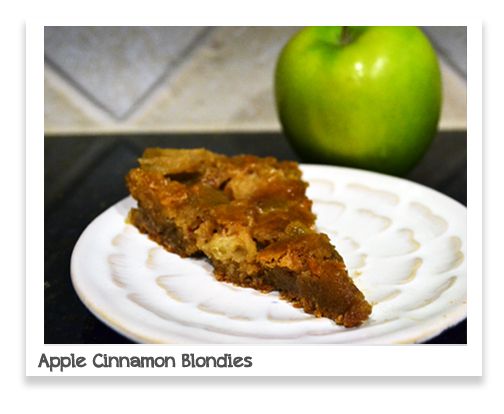
Apple Cinnamon Blondies
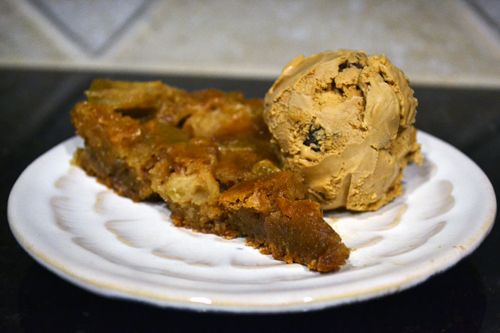
Hard to believe all the Holiday hub-bub is over. Yesterday, we took down our Christmas tree and put away the last of the decorations. I always feel a tiny bit sad when we do that, though it is nice to get that corner of the living room back. Is everyone still in sugar shock from Holiday parties and dinners? That's just not possible for us over here. So if you're like me and you're not in a giving-up-sugar stage, then you may want to make these Apple Cinnamon Blondies. It has all the comforting homeyness of apple pie, but is much much easier. The end result is a moist, sweet, flavorful blondie that is just begging to be enjoyed with a scoop of ice cream on top :) We put Sea Salt Caramel Gelato on top and that may just be one of the best decisions we made all week.
Apple Cinnamon Blondies adapted from Baked by Rachel
Ingredients:
1 1/2 cups lightly packed light brown sugar
1 stick unsalted butter
1 1/4 cups all-purpose flour
1 teaspoon fine sea salt
1/2 teaspoon cinnamon
1/2 teaspoon baking powder
2 large eggs, room temperature
1 teaspoon vanilla extract
1 1/2 cups chopped granny smith apple, skin on (approx. 1 medium apple)
1/2 cup cinnamon mini baking chips (I used King Arthur Flour)
Directions:
Pre-heat oven to 350; spray a 9.5-inch tart pan with non-stick cooking spray, and line 1 small baking dish (1 cupcake, 1 mini springform, etc.) with parchment and set on a large cookie sheet (this way if anything drips, it will fall on your cookie sheet and not the bottom of your oven). Set aside.
Pre-heat oven to 350; spray a 9.5-inch tart pan with non-stick cooking spray, and line 1 small baking dish (1 cupcake, 1 mini springform, etc.) with parchment and set on a large cookie sheet (this way if anything drips, it will fall on your cookie sheet and not the bottom of your oven). Set aside.
Melt butter and brown sugar in a heavy duty saucepan over medium heat stirring constantly; remove from heat and set aside.
In a medium bowl, whisk flour, salt, cinnamon and baking powder. In a separate large bowl, whisk eggs and vanilla. Add melted butter and sugar mixture and whisk until combined. Slowly whisk in dry ingredients just until combined. Fold in chopped apples and cinnamon chips.
Pour batter into prepared baking pans and place cookie sheet in pre-heated oven for 25-35 minutes or until a knife comes out clean from center. The small baking dish will most likely be finished a few minutes ahead of the 9.5 inch tart pan, so keep an eye on it.
Allow to cool almost entirely in the pan. When ready to cut, separate pan by carefully running a knife around the edges and then pushing up from the center of the bottom of the pan.
Sunday, December 23, 2012
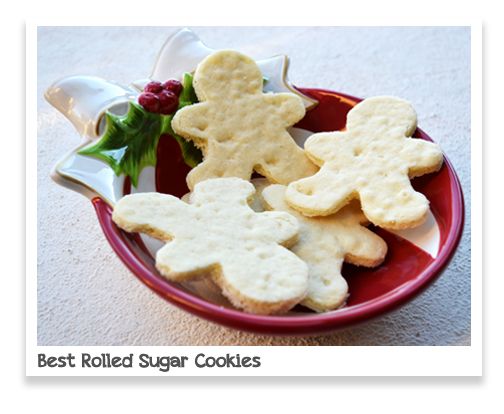
Best Rolled Sugar Cookies
Do you and your family decorate cookies for the holidays? I'm not sure if it is the extra humidity in the air here in Florida, or if it is my short temper with all things that involve a rolling pin, but the process of rolling out cookies is not one that usually occurs without some kicking and screaming. No matter how much flouring of the rolling pin and the counter that goes on, and no matter how thorough and frequent the dough chilling is, everything always sticks to what it is not supposed to and the cookie cutters never work like they're supposed to. So, Daniel and I have developed the slightly wasteful yet much less frustrating and MUCH quicker method of using cookie cutters. I wish I had taken pictures along the way, but I'll just have to explain as best as I can...
- Chill your cookie dough in the refrigerator
- Roll out cookie dough in between two sheets of Pre-Cut parchment that fit the size cookie sheet you are using. (By rolling the dough between two sheets of parchment, you won't have to worry about the dough sticking to your rolling pin!).
- Put the cookie sheet back in the fridge to re-chill a little bit. (This step helps the top layer of parchment peel off easily and cleanly so it can be re-used).
- Place cookie sheet in the preheated oven to bake one large cookie the size of your cookie sheet.
- Immediately when your cookie dough is done baking, remove from the oven and slide the parchment to a heat-proof surface (I slide it on to our granite countertops). While the cookie is still soft, use the cookie cutters to cut cookie shapes out of the baked cookie dough.
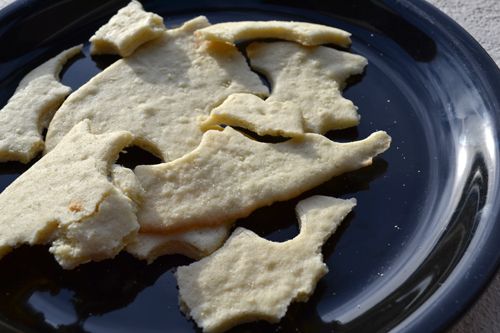
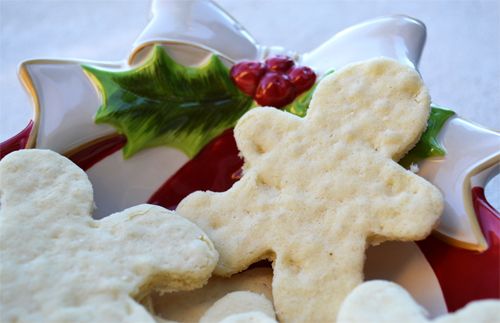
Not only is this method quicker and easier, but you end up with tons of cookie scraps to eat! Ok, so it does "waste" some cookie dough, but I use the term "waste" lightly because Daniel and I ate the cookie scraps for days after. Another nice thing about this method is that you don't have to worry about the cookie dough puffing during baking and ruining the cute cookie-cutter shape you worked so hard to cut.
What do you think? Is this method too wasteful for you or do you think it would keep the peace during all of your holiday baking? For me, I find it saves my sanity so it is worth losing a few cookies worth of dough due to the cookie scraps byproduct.
Cookie scraps!
Anyway, this is a new-to-me cookie recipe that I'm quite happy with. The cookies are nice and soft (a quality many people commented on, "how do you get them so soft??") and flavorful. I'd say this is a very good basic sugar cookie recipe.
The Best Rolled Sugar Cookies adapted from Allrecipes.com
Ingredients:
1 1/2 cups unsalted butter, softened
2 cups white sugar
4 eggs, room temperature
1 1/4 teaspoon pure vanilla extract
5 cups all purpose flour
2 teaspoons baking powder
1 teaspoon fine sea salt
In the bowl of an electric mixer, cream together butter and sugar until smooth. Beat in eggs and vanilla. Stir in the flour, baking powder, and salt. Cover, and chill dough for at least one hour.
Place about 1/3 of the dough in between two 9x13 sheets of parchment paper. Using a rolling pin, roll out the dough to about 1/4 inch thickness. Place dough back on a cookie sheet and place in the fridge for a few moment to re-chill the dough and allow the top layer of parchment to peel off cleanly.
Preheat oven to 350 degrees F. Bake cookies about 8 to 12 minutes or until the dough just barely starts to brown at the edges. Remove from oven, slide the parchment on to a heat proof surface such as granite countertops or a wooden cutting board and immediately cut the soft cookie into shapes with any cookie cutter. Place on a cooling rack to cool completely.
Posted by
Stephanie
at
9:05 AM

Best Rolled Sugar Cookies
2012-12-23T09:05:00-05:00
Stephanie
cookies|sugar cookies|
Comments
Labels:
cookies,
sugar cookies
Sunday, December 2, 2012
Little Girl Cupcake Towers
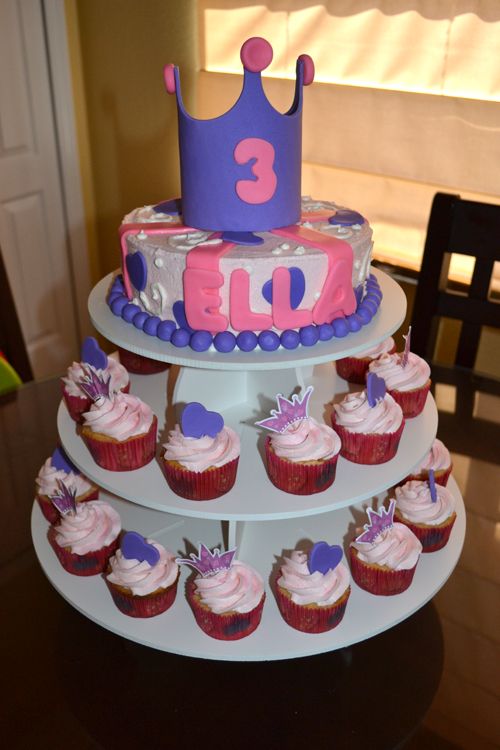
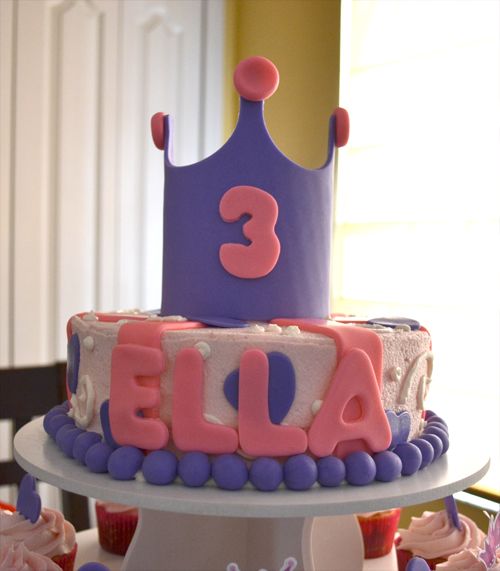
Not sure why I never posted these photos! In April, both of our nieces have their birthdays. This year, we celebrated a third birthday, and the girl of honor wanted a pink and purple Princess themed Cupcake Tower. This is the Princess Cupcake Tower we made for her big day:
We used an 8 inch cake as the top tier...
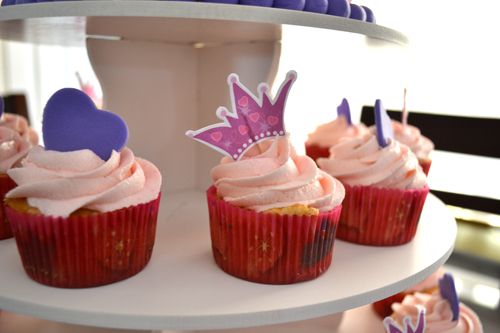
And cupcakes with paper and fondant toppers as the next two tiers...
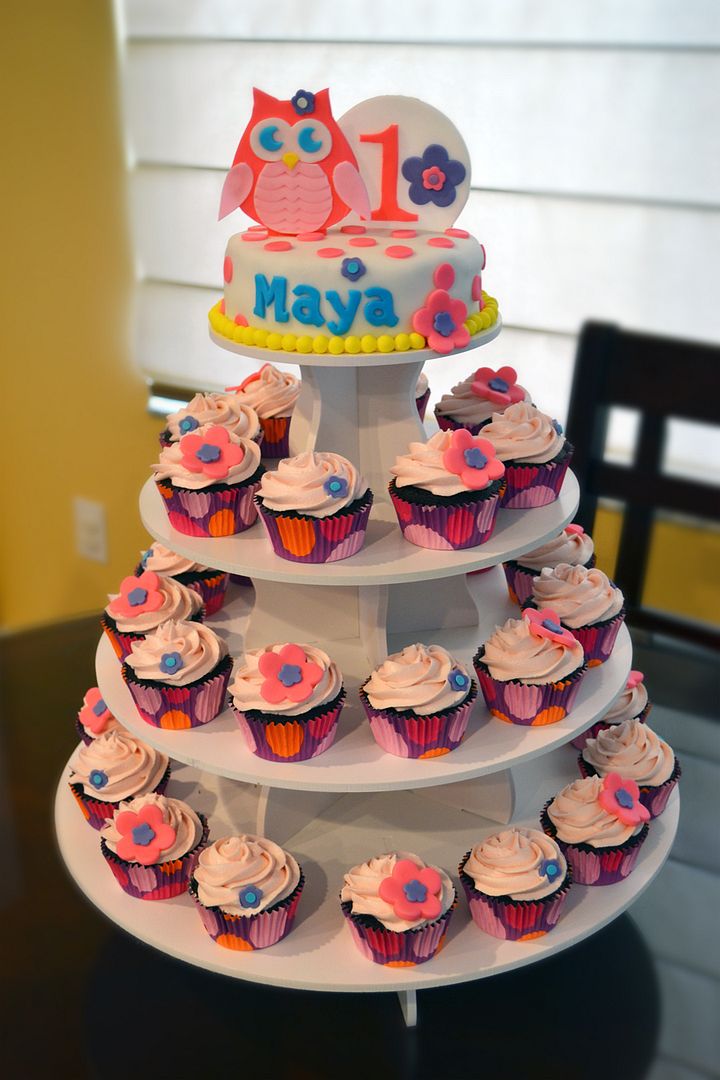
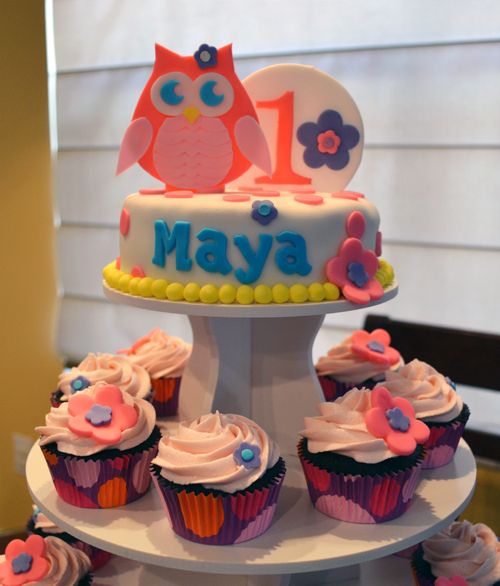
We also celebrated a first birthday! For this, we made an Owl theme cupcake display with a similar color scheme. This is the Owl First Birthday Cupcake tower we created for this special little girl...
This one had a 6 inch cake as the top tier with a fondant Owl and a fondant One cupcake topper. The cupcakes all have little fondant flower toppers, too.
For both of these, I used The Smart Baker's Five Tier Round Cupcake Tower. It was so much fun to work with such girly colors and themes! I'm so excited to continue using their girly party themes as cake inspiration as the years go on!
Monday, November 19, 2012
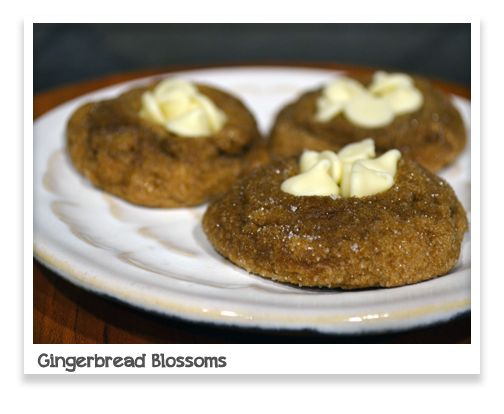
Soft Gingerbread Blossoms
I live practically across the street from a grocery store. Two grocery stores in fact. They're less than a 1/4 of a mile away. Many, many times I have had to turn the kitchenaid mixer off while preparing a dough or batter to make a quick run to go get more eggs or milk that I forgot to buy. Case in point - these cookies. I didn't realize until the last minute, after 4 hours of dough chilling, that I needed white chocolate chips to stuff in the freshly baked cookies. At this point, it was already getting "late" (well, late for me) and I needed to have these finished for work the next day. Ug! But luckily, I'm able to hop on over to the store and be back in the kitchen baking within 10 minutes. Over the almost 5 years of living in this house, I would have ruined many a bowl of batter if I didn't live so close. Anyone else do this? I do it a few times a month!
These cookies are definitely worth a trip to the grocery store, even if it's more than 1/4 mile away. They are soft and tender, and not overly gingery or molassesy. They're more like a hybrid of gingerbread and a snickerdoodle. Even non-gingerbread lovers enjoyed these cookies. Perfect for the upcoming holidays! Maybe these will find their way to your cookie platters this season.
Gingerbread Blossoms adapted from Culinary Concoctions by Peabody
Ingredients:
3 cups flour
2 tsp. ground ginger
1 tsp. ground cinnamon
1 tsp. baking soda
1/4 tsp. ground nutmeg
1/4 tsp fine sea salt
1 1/2 sticks unsalted butter, at room temperature
3/4 cup firmly packed light brown sugar
1/4 cup molasses
1/4 cup maple syrup
1 egg
1/4 cup granulated sugar
1 tsp. pure vanilla extract
approx. 1 cup white chocolate chips
In a large bowl, whisk to combine flour, ginger, cinnamon, baking soda, nutmeg and salt.
Beat butter and brown sugar in the bowl of an electric mixer on medium speed until light and fluffy.
Add molasses, maple syrup, egg and vanilla; beat well. Gradually beat in flour mixture on low speed. Wrap top of bowl in plastic wrap and refrigerate at least 4 hours.
Preheat oven to 350°F. Shape dough into 1-inch balls. Roll in granulated sugar. Place 2 inches apart on parchment-lined baking sheets.
Bake 8 to 10 minutes or until edges of cookies just barely begin to brown. Immediately press about 5-6 white chocolate chips into center of each cookie. Allow to cool completely.
Posted by
Stephanie
at
9:38 PM

Soft Gingerbread Blossoms
2012-11-19T21:38:00-05:00
Stephanie
cookies|Gingerbread|
Comments
Labels:
cookies,
Gingerbread
Sunday, October 28, 2012
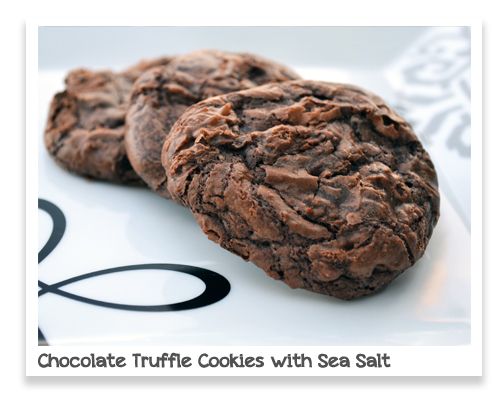
Chocolate Truffle Cookies with Sea Salt
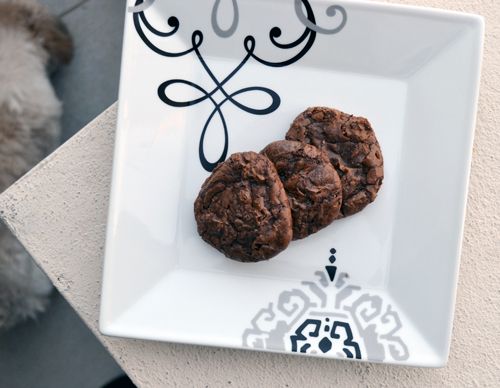
Today is October 28th. Halloween is just around the corner... and there are already Christmas decorations and advertisements all over the stores and TV. It does feel like Fall gets a little bit rushed, especially after Halloween is over. Oh well, might as well start planning those Christmas cookies now then, right? :)
These unique Chocolate Truffle Cookies would be a great addition to any Christmas cookie platter. They have a nice shiny "crust" (similar to the top of a brownie) and the inside has a texture that combines a chocolate cookie, a rich fudgy brownie, and a chocolate truffle. And BONUS - they're super easy to make.
do you see the napping doggy in the picture above?
Chocolate Truffle Cookies with Sea Salt, adapted from Ghirardelli
Ingredients
- ¼ cup all purpose flour
- ¼ teaspoon baking powder
- ¼ teaspoon salt
- 1 ½ cups dark chocolate chips
- 2 tablespoon unsalted butter
- 2 eggs, room temp
- ½ cup granulated sugar
- 1 teaspoon pure vanilla extract
- fine Diamond Crystal sea salt for sprinkling
- additional 1/3 cup dark chocolate chips (optional) for mixing into prepared dough
Prepare cookie sheets with Precut Parchment paper. Set aside.
In the top of a double boiler, melt chocolate and butter until smooth. Turn off the heat and let chocolate sit over warm water.
In a small bowl, combine flour, baking powder and salt and mix to combine.
In another bowl, whisk together sugar and eggs. Slowly add the warm chocolate mixture. Stir to combine.
Add vanilla and mix. Stir in flour mixture, mixing just until incorporated, do not over mix.
If adding chocolate chips to the batter, allow to cool for a few minutes (if batter is too warm, the chocolate chips will melt). Stir in chocolate chips. Then chill for at least 10-15 minutes.
Preheat oven to 350°F. Scoop rounded tablespoons of batter and place on prepared cookie sheet. Sprinkle each cookie lightly with sea salt. Bake for approximately 7-8 minutes until the outside looks slightly cracked. Do not over bake because they will continue to bake a little as they cool once removed from the oven. Cookies should be soft and gooey in the center.
Friday, October 26, 2012
Friday Giveaway!
It's Facebook Friday Giveaway time! We are excited to announce our first super duper collaborative Giveaway from The Smart Baker AND Just Sugar Coat It. Just Sugar Coat It, the place for all things baking, carries baking cups, cookie cutters, tulip cups, and individual cupcake stands and much more! Check out some of the goodies they carry and enter for your chance to win a $40 credit to Just Sugar Coat It. All you have to do is go to www.justsugarcoatit.com and comment on our facebook post with what you would get from them if you won the gift certificate AND like them on Facebook (www.facebook.com/justsugarcoatit). While you’re there be sure to enter their giveaway for your chance to win a $40 credit from The Smart Baker. Winner will be announce on Friday Nov. 2nd, so get your entry in. (Winner will be chosen at random and must comment on this post and be a "liker" of Just Sugar Coat It)
Also, Facebook has recently changed how fan pages are able to reach out to their audience. Only about 10% of our fans are currently receiving posts. TO CONTINUE TO RECEIVE OUR POSTS, move the mouse near the "Like" button on the gear symbol ... Click on it and select "ADD TO THE INTEREST LISTS"...This will allow you to continue receiving our posts. Thanks everyone!
Subscribe to:
Posts (Atom)


