Recent Posts

Sunday, October 28, 2012

Chocolate Truffle Cookies with Sea Salt

Today is October 28th.  Halloween is just around the corner... and there are already Christmas decorations and advertisements all over the stores and TV.  It does feel like Fall gets a little bit rushed, especially after Halloween is over.  Oh well, might as well start planning those Christmas cookies now then, right? :)

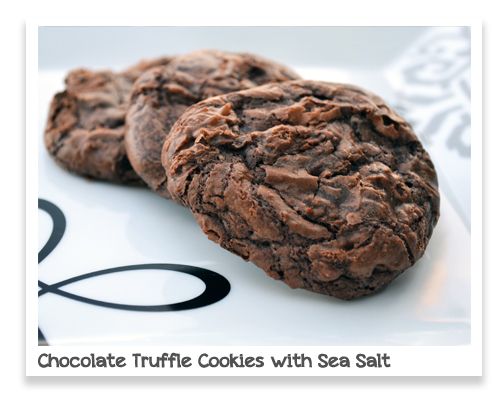
These unique Chocolate Truffle Cookies would be a great addition to any Christmas cookie platter.  They have a nice shiny "crust" (similar to the top of a brownie) and the inside has a texture that combines a chocolate cookie, a rich fudgy brownie, and a chocolate truffle.  And BONUS - they're super easy to make.  

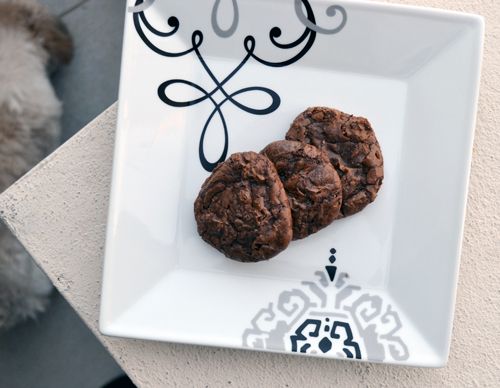
do you see the napping doggy in the picture above?

Chocolate Truffle Cookies with Sea Salt, adapted from Ghirardelli
Ingredients
  • ¼ cup all purpose flour
  • ¼ teaspoon baking powder
  • ¼ teaspoon salt
  • ½ cups dark chocolate chips
  • 2 tablespoon unsalted butter
  • 2 eggs, room temp
  • ½ cup granulated sugar
  • 1 teaspoon pure vanilla extract
  • fine Diamond Crystal sea salt for sprinkling
  • additional 1/3 cup dark chocolate chips (optional) for mixing into prepared dough

Prepare cookie sheets with Precut Parchment paper. Set aside.
In the top of a double boiler, melt chocolate and butter until smooth. Turn off the heat and let chocolate sit over warm water. 
In a small bowl, combine flour, baking powder and salt and mix to combine. 
In another bowl, whisk together sugar and eggs.  Slowly add the warm chocolate mixture. Stir to combine. 
Add vanilla and mix. Stir in flour mixture, mixing just until incorporated, do not over mix. 
If adding chocolate chips to the batter, allow to cool for a few minutes (if batter is too warm, the chocolate chips will melt). Stir in chocolate chips. Then chill for at least 10-15 minutes.
Preheat oven to 350°F. Scoop rounded tablespoons of batter and place on prepared cookie sheet. Sprinkle each cookie lightly with sea salt. Bake for approximately 7-8 minutes until the outside looks slightly cracked. Do not over bake because they will continue to bake a little as they cool once removed from the oven. Cookies should be soft and gooey in the center.


Friday, October 26, 2012

Friday Giveaway!


It's Facebook Friday Giveaway time! We are excited to announce our first super duper collaborative Giveaway from The Smart Baker AND Just Sugar Coat It. Just Sugar Coat It, the place for all things baking, carries baking cups, cookie cutters, tulip cups, and individual cupcake stands and much more! Check out some of the goodies they carry and enter for your chance to win a $40 credit to Just Sugar Coat It. All you have to do is go to www.justsugarcoatit.com and comment on our facebook post with what you would get from them if you won the gift certificate AND like them on Facebook (www.facebook.com/justsugarcoatit). While you’re there be sure to enter their giveaway for your chance to win a $40 credit from The Smart Baker. Winner will be announce on Friday Nov. 2nd, so get your entry in. (Winner will be chosen at random and must comment on this post and be a "liker" of Just Sugar Coat It)


Also, Facebook has recently changed how fan pages are able to reach out to their audience. Only about 10% of our fans are currently receiving posts. TO CONTINUE TO RECEIVE OUR POSTS, move the mouse near the "Like" button on the gear symbol ... Click on it and select "ADD TO THE INTEREST LISTS"...This will allow you to continue receiving our posts. Thanks everyone!

Monday, October 15, 2012

Honey Corn Muffins

When I was younger, I lived on Entenmann's Corn Muffins.  My mom would cut them in half, butter then, and put them in the broiler until they were perfection.  The little brown toasty bits at the edges were my favorite, I'd pick those off and eat those first.  Sometimes, instead of those corn muffins, I'd eat Thomas' Toast R Cakes Corn Muffins (or as little Stephanie referred to them, "flat corn muffins").  I guess you could have called my younger self a mass produced corn muffin connoisseur. 

Grown-up Stephanie still appreciates a good corn muffin.  I'm not going to pretend I didn't ask my mom to pick up a box of my beloved flat corn muffins when I went home to NY this past summer.  But for some reason, I've never made them from scratch before.  After baking this recipe from Baked Explorations, I have no idea why, seeing as they were so quick to throw together.  

This recipe baked up delicious little corn muffins.  I'm not sure I'll ever need to try another recipe since this one was just so good.  Buttery with a perfectly dense crumb.  I ate one (or two) plain without butter or honey, but I think if I were to toast and butter one up, I might just experience flashbacks to my afternoons after getting home from Kindergarten sitting on the couch in my den watching Match Game re-runs.  

Rather than baking them in standard cupcake liners, I used these adorable mini brioche style liners from Just Sugar Coat It.  Instead of 12, I was able to get 18 small muffins (perfect size!).  Let me tell you, I love these liners! They are stiff and hold up well, and make something as plain as a corn muffin look quite fancy.

For the recipe, look to Baked Explorations, or Karen's Cookies Cakes and More. Make sure you visit the blogroll and see how these muffins came out for the other Club Baked bakers. 

Saturday, October 6, 2012

Brown Butter Snickerdoodle Cookie Bars

Are you a soft, chewy cookie person or a crunchy person?  I'm both (darn. I just love cookies) but Daniel is a soft cookie person true and true.  We both love cinnamon so soft cinnamon-sugary Snickerdoodles are a favorite around here.  But to be honest, a lot of the time I am just too lazy to individually roll each dough ball in cinnamon sugar.  It takes a while and I usually make quite the mess in the process (though, to be fair, I make a mess in the kitchen no matter what I'm doing).  So recently when I was in the mood for snickerdoodles but just couldn't get the motivation to go through the cinnamon sugar rolling process, I decided to just press the dough into a 8 inch cake pan.  What a beautiful decision that turned out to be because these Snickerdoodles came out nice and tall and soft.   Lesson learned - take the easy, lazy way out and sometimes, just sometimes, it works out.


Brown Butter Snickerdoodle Cookie Bars, adapted from BAKED Elements, Matt Lewis and Renato Poliafito
Ingredients:

2 sticks unsalted butter
2 3/4 cups all-purpose flour
2 ½ tsp cream of tartar
1 tsp baking soda
1 Tablespoon plus 2 tsp. cinnamon, divided
¾ tsp freshly ground nutmeg
½ tsp fine sea salt
2 large eggs, room temp
1 Tablespoon whole milk
1 cup plus 3 Tablespoon granulated sugar, divided
½ cup firmly packed light brown sugar
In a medium skillet, melt butter over medium heat swirling the pan occasionally until the foam subsides and the butter browns, about 8 to 10 minutes. Pour the browned butter through a strainer directly into the bowl of a standing mixer fitted with a paddle attachment. Beat the butter on low speed to release the heat and bring it to room temperature, approximately 5 to 7 minutes. 
In a large bowl, whisk together the flour, tartar, baking soda, 1 tsp cinnamon, nutmeg and salt.
In a small bowl, combine eggs and milk.  Whisk lightly.
Once butter has cooled, turn off mixer and add 1 cup of the granulated sugar and the brown sugar, and beat on medium for about 2 minutes. Scrape down the sides and bottom of the bowl and beat again for a few seconds. Turn the mixer to low and stream in the egg mixture, continue beating on medium until thoroughly combined.
Add the flour mixture in three parts, beating after each addition for 10 to 15 seconds, or until just barely incorporated. Scrape down the sides of the bowl and gather the dough into a mound in the middle. Cover the bowl and refrigerate for at least 1 hour.
Preheat the oven to 350 degrees F. Line an 8 inch cake pan with pre-cut parchment paper.
Gently press the cookie dough into the prepared cake pan.  In a small bowl, whisk the remaining 3 tablespoons of sugar and 1 tablespoon plus 1 teaspoon of cinnamon until the mixture is uniform in color.  Sprinkle over the cookie dough.  
Bake until a cake tester inserted into the dough comes out clean.  I think mine took about 20 minutes, but I would start checking at about 15 minutes if you want a soft, not dry cookie.
Set the pans on wire racks to cool for 10 minutes. Use the parchment tabs to lift the cookie out of the pan and transfer to a cooling rack to cool completely.

Monday, October 1, 2012

Burnt Sugar Bundt Cake with Caramel Rum Frosting

Burnt Sugar cake?  I've never tasted anything with "Burnt" intentionally in the name (though I've sampled my share of accidentally "burnt" recipes).  The title had me intrigued.  Browed butter (which is kind of "burnt" I guess) adds a delicious nutty flavor to recipes, so I thought Burnt Sugar must do something similarly magical, right?

In this recipe from Baked Explorations, the directions said to melt sugar (just sugar) slowly on medium heat on the stove top.  I was a little scared that I'd burn it, even though the recipe is called "Burnt Sugar Bundt Cake".   I think I've always had something else in with the sugar when I've melted it, like corn syrup or water so the idea of melting sugar and sugar alone had me concerned.  But my fears were all unwarranted because it really was simple.  The sugar melted slowly and without one single problem.  It turned into a delicious smelling caramel after the addition of coconut milk, heavy cream and lemon juice.

The rest of the cake went off without a hitch, too.  Half of the homemade caramel is added right into the cake batter, and the other half is turned into a frosting (though mine was much runnier, and more of an icing or a glaze than a frosting).  With a somewhat intimidating sounding title, the cake really was pretty easy to put together.

I let it rest for one day before serving it (willpower!).  We found it deliciously simple, and I mean that in a good way.  The cake itself it is like a moist, but not at all dense pound cake with a subtle taste of caramel/burnt sugar.  The frosting is very sweet and compliments the cake perfectly.  Everyone will enjoy the flavor of this cake, even the kiddies if you choose to make the caramel rum frosting into a caramel vanilla frosting like I did...simply use 1 tsp pure vanilla instead of 2 Tbsp rum.  


Burnt Sugar Bundt Cake Recipe
Ingredients
For the Burnt Sugar Liquid
½ cup granulated sugar
½ cup heavy cream
approx. 3/4 cup coconut milk
1 ½ tablespoons fresh lemon juice

For the Bundt Cake
3 cups all-purpose flour
1 teaspoon baking powder
½ teaspoon baking soda
1 teaspoon salt
1 ¼  cups unsalted butter (2 ½ sticks), room temperature
2 cups granulated sugar
4 large eggs, room temperature
1 teaspoon pure vanilla extract
Burnt Sugar Liquid (see above)

For the Caramel Rum Frosting
1/2 cup (1 stick) unsalted butter
2 tablespoons dark rum (OR 1 tsp pure vanilla extract for an alcohol free version)
2 1⁄3 cups confectioners’ sugar
Burnt Sugar Liquid (see above)

Make the Burnt Sugar Liquid
In a medium saucepan over medium heat, slowly melt the sugar. Use a wooden spoon to stir it continuously to ensure even melting. When the sugar turns a dark caramel color, remove the pan from the heat and slowly stream in the cream while continuing to stir (don’t worry if mixture starts to clump). Return the pan to medium heat and stir until completely combined; cook for 2 minutes longer, stirring. Transfer the burnt caramel mixture to at least a 2-cup heatproof liquid measuring cup (like Pyrex) and add enough coconut milk to make 1 1/4 cups liquid. Add the lemon juice. Whisk to combine, divide the mixture in half, and set both portions aside.

Make the Bundt Cake
Preheat the oven to 325 degrees F. Generously spray the inside of a 10-inch Bundt pan with nonstick cooking spray; alternatively, butter it thoroughly, dust it with flour, and knock out the excess flour. In a medium bowl, whisk together the flour, baking powder, baking soda, and salt.  Set aside. In the bowl of a standing mixer fitted with the paddle attachment, beat the butter and sugar until pale and fluffy. Scrape down the bowl and add the eggs, one at a time, beating until each is incorporated. Add the vanilla and beat for 5 more seconds. Retrieve one of the reserved portions of burnt sugar liquid. Add the flour mixture in three parts, alternating with the burnt sugar, beginning and ending with the flour mixture. Scrape down the sides and bottom of the bowl and beat again for 10 seconds. Pour the batter into the prepared pan and bake for 45 to 50 minutes, or until a small sharp knife inserted into the center of the cake comes out clean. Transfer the pan to a wire rack to cool completely. Gently loosen the sides of the cake from the pan and turn it out onto the rack.

Make the Caramel Rum Frosting
Put the butter, rum, confectioners’ sugar, and remaining portion of burnt sugar liquid in a food processor. Pulse in short bursts until the frosting is shiny and smooth. Use an offset spatula to spread the frosting over the crown of the Bundt in a thick layer. Let the frosting set before serving.

Be sure to check out the other Club Baked bakers' versions of this Baked Explorations twist on a traditional Bundt!  I hope they enjoyed it as much as I did. 

LinkWithin

Related Posts with Thumbnails