I still haven't figured out if there is a difference between cinnamon buns and cinnamon rolls. After looking a little bit, many people claim there is no difference - Toe-mate-oh, Toe-maht-oh. Others say a cinnamon roll is a spiral and its bun counterpart may not be. Yet others say the difference is in the icing; that a cinnamon bun has icing while a cinnamon roll does not. So, in conclusion, I have no idea what the difference is. I'm going to continue using the terms interchangeably and eating as many of both of them as I possibly can. Because no matter what you call it, it's absolutely delicious.
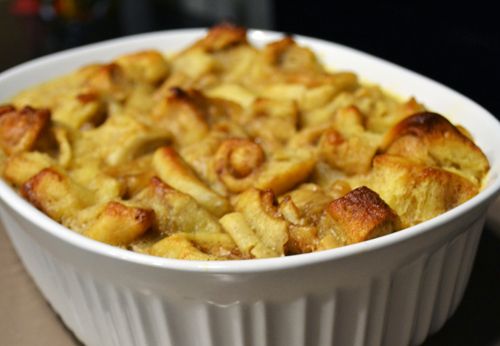
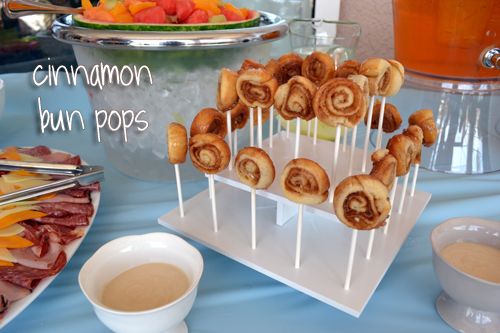
You may remember I made Mini Buttermilk Cinnamon Bun Pops for father's day brunch, and I told you the recipe made far more cinni buns that I needed. I found myself with a 5.5 cup container filled with mini cinnamon buns, and heavy cream and buttermilk in the refrigerator... can you hear the gears in my head turning? How could you NOT make Cinnamon Bun Bread Pudding?!? The only other thing I could have done would be to make Cinnamon Bun Cake Pops... crumble up cinnamon buns, mix it with the vanilla icing, and dip it in candy coating. Oooh, maybe next time. But for now, I leave you with possibly the most indulgent thing I've made in quite some time, and that is saying a lot... What possessed me to make a custard-soaked cinnamon bun bread pudding during bathing suit season?!
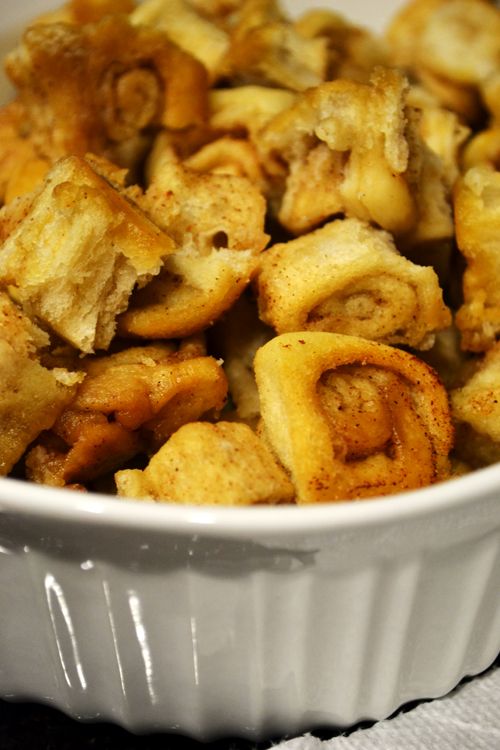
cinnamon buns waiting for their custard bath
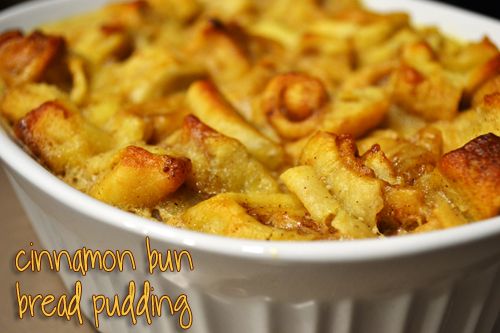
Cinnamon Bun Bread Pudding
Ingredients:
5 1/2 cups of stale mini cinnamon buns (either make them from scratch or from store-bought cinnamon buns and let them sit out and get a little stale)
1/2 cup heavy cream
1 1/2 cups buttermilk
1 cup 2% milk
4 large eggs
2 teaspoons pure vanilla extract
2/3 cup sugar
3/4 teaspoons cinnamon
Butter a 1.5 quart baking dish or casserole dish. Arrange the mini cinnamon buns in the dish.
In a medium sized bowl, whisk together eggs, milk, buttermilk, heavy cream, vanilla, sugar and cinnamon. Pour over the cinnamon buns slowly and press the buns down into the liquid.
Let cinnamon buns soak in the baking dish while you preheat your oven to 325. Place the baking dish on a baking sheet and bake in the middle of the oven for 35 - 45 minutes. When the edges of the cinnamon buns on top are light golden brown and a toothpick test comes out with no runny custard, you can remove to a cooling rack.
Serve warm (reheat in microwave if necessary) and store in the refrigerator.