Recent Posts

Sunday, May 29, 2011

Sugar Cookies for Baby - The foolproof way to decorate cookies


I've never been one of those people who could make adorably decorated cookies.  First, I could never get the cookies cut nicely with a cookie cutter.  Once the dough was cut, the cookie would never stay in the cookie cutter so I could transport it to the baking pan.  Nor could I get a spatula under it to move it safely without destroying its shape.  Second, I had never had a good experience with royal frosting.  It always dried up too quickly, despite putting a wet towel on top.  Plus, I could never get it to the right consistency.  It was always either too stiff (and would clog and not come out at all, or crack after I piped it out) or it was too wet, and wound up oozing all over my cookies.  Seeing the oodles of perfectly piped and decorated cookies all over the internet, it urked me that I couldn't do the same!  After all, I have an art degree, I should be able to make extra cute cookies!  So yesterday I put to work and finally solved all those cookie-making problems.  I no longer fear the cute decorated cookie.  And I came to a few conclusions of how to make the process easier along the way.


Friday, May 27, 2011

Frosting in my cookie dough??


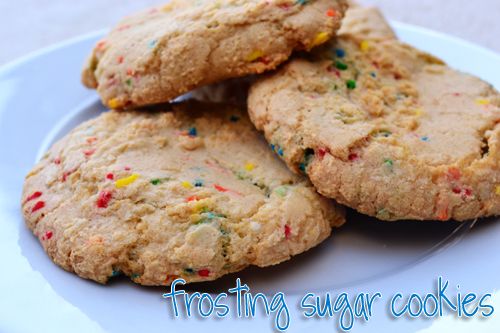
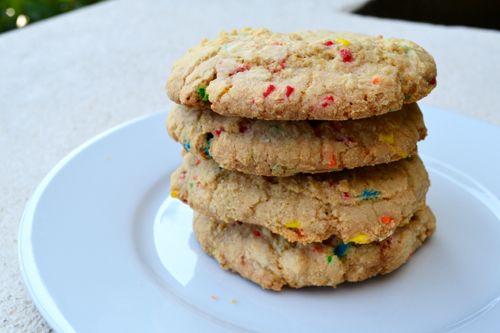
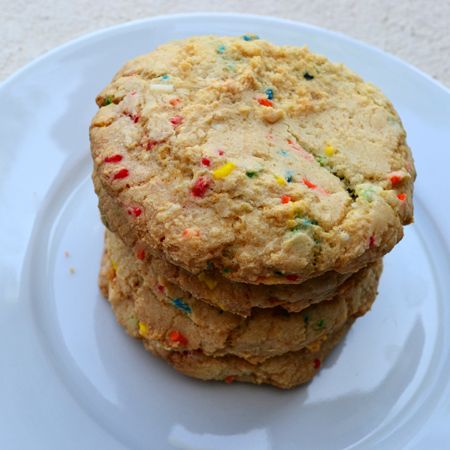
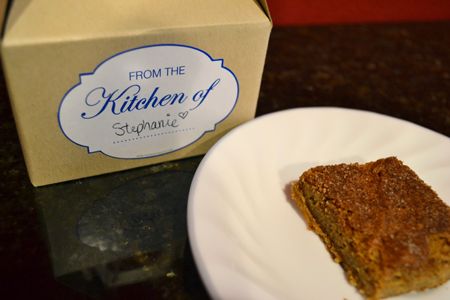
When you think cookies and frosting, you imagine cookie-cuttered cookies in cute shapes that are nicely decorated cookies with royal frosting. Well, not these cookies.  The Caramel Cookie had the amazing idea to mix frosting into the cookie dough before baking.  What Katie's Baking adapted the recipe and added melted white chocolate into the cookie dough, too.  I used my favorite homemade Vanilla Buttercream that I use to frost cupcakes, and instead of regular white chocolate melted and mixed into the dough like Katie did, I used Wilton Candy Melts (because that's what I had on hand).  The result?  Delicious!  The husband said these taste just like the sugar cookies you can get at the bakery.  I think that's a good reaction!  But my favorite thing about these cookies has got to be the adorable-ness created by mixing rainbow sprinkles right into the dough.  My slightly adapted recipe is below, but be sure to see both What Katie's Baking's version and The Caramel Cookie's original version too.


Frosting Sugar Cookies
Ingredients:
1 1/2 cups all purpose flour
1/4 tsp sea salt
1/2 tsp baking soda
3/4 cup + 1 tablespoon vanilla buttercream frosting
1/2 cup of Wilton white candy melts
1 large egg, room temperature
1/2 tsp vanilla extract
1/4 cup granulated sugar

Directions
Preheat to 350.  Line a cookie sheet with parchment paper.
In a medium bowl, whisk together the flour, salt and baking soda.
In the bowl of an electric mixer, beat together the frosting, vanilla and sugar.  Then add egg and beat for two minutes on medium speed.
Add frosting mixture to the flour mixture and stir until combined.  Once combined, add the melted Candy Melts while mixer is set to low speed.  Finally add sprinkles and mix just to incorporate, don't over-beat.
Using a 1 1/2 Tablespoon cookie scoop, make dough balls and place on lined cookie sheet.  Bake 10-13 minutes or until edges of cookies are lightly browned.  Do not remove too early or cookies will sink in the middle and crack.


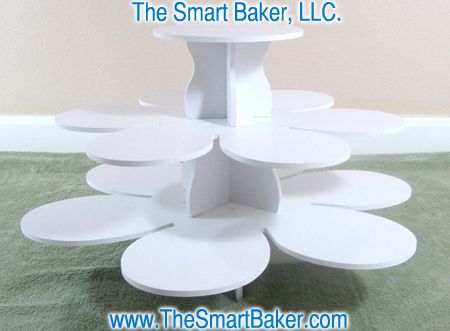
In other news, May has been a record breaking month for The Smart Baker's Cupcake Tower sales!  To celebrate this achievement and the holiday weekend, we have a Memorial Day Sale going on.  Go to The Smart Baker now to take advantage of a 10% off site wide Coupon Code!  Limited time offer, good until May 30, 2011.

Furbaby Friday!


It's Friday! Happy Memorial Day Weekend, everyone! Make sure your volume is on for this edition of Furbaby Friday. :)
I borrowed the idea of Furbaby Friday from Culinary Concoctions by Peabody. Head over to her blog to see her beautiful Furbabies!

Thursday, May 26, 2011

The Encyclopedia of Sandwiches


Sandwich (n): a food item, typically consisting of two or more slices of bread with one or more fillings between them.

Ok, I know you know what a sandwich is.  But if you look at the definition of a sandwich, you realize it's pretty impossible for someone to not like sandwiches.  The definition leaves room for a lot of creativity: one can use a variety of types of bread, and put an infinite amount of things in between.  Even by quickly breezing through Susan Russo's The Encyclopedia of Sandwiches, you see just how endless the combinations of bread + fillings can be.  For example, on one page is the traditional Classic Breakfast Sandwich: Eggs, cheese, bacon on an English muffin.  On another page, the much less traditional Doughnut Sandwich: Ham, cheese, and fruit spread in between two halves of a glazed doughnut.  So no matter how traditional or non-traditional your tastes are, everyone can find a sandwich to enjoy in The Encyclopedia of Sandwiches.  

I was recently given the chance to review this book, and, being a sandwich-lover myself, I jumped at the opportunity.  I sometimes fall into a Nutella+Fluff+Peanut Butter, or a Buffalo Chicken + American cheese rut, so I'm more than willing to expand my sandwich repertoire.  This book reminds me I can stick almost anything between two glorious pieces of carb and enjoy it for any meal.  

The first sandwich I made from Russo's book (by the way, Susan Russo also has several other delicious books and a fabulous blog that has been a necessary element in my google reader for some time now) was her Chicken Cutlet Sandwich.  I've had Chicken Cutlet sandwiches for years, but never thought to put Crushed Red Pepper infused Rappini on it.  What a delightful, spicy edition to a classic sandwich.  


So even if you're just looking for a way to spice up your favorite sandwich, The Encyclopedia of Sandwiches can provide some extra spice to your usual sammy routine.  Next up... I'm thinking I'll sample one of her sweet sandwich ideas (um, hello Banana Bread sandwich!)

Sunday, May 22, 2011

Need an Easy and Delicious Chocolate Cookie recipe?


Ever since I made these Double Chocolate Cookies in January, I've been a little obsessed with Chocolate Cookies.  Not any chocolate cookie mind you, but fudgy, moist brownie-like cookies.  I love Chocolate, but the husband doesn't love it.  He's more of a vanilla guy.  But these cookies didn't just taste like Chocolate, they tasted like Brownies.  And who doesn't like a Brownie?  Even Dan, the vanilla man, loves brownies.
We brought those Double Chocolate cookies to a family dinner where we ran out of room in our bellies and everyone took some home instead of eating them then.  Then, a week or two later, when I had kind of forgotten all about the cookies, our tasters mentioned how GREAT those cookies were.  It is a rare thing when people remember a few weeks later how good a dessert was, especially when it's just a plain old cookie!  So ever since, I've had Brownie Cookies on the brain.
I decided to give another recipe a go.  This new one comes from A Full Measure of Happiness.  This calls for all simple ingredients that you more than likely have in your pantry.  These can be thrown together very quickly - you don't even have to melt any chocolate.  So if you need Brownie-like Chocolate Cookies and you need them NOW, I suggest giving this recipe a try.
Lauren calls these Double Trouble Chocolate cookies, but I'm going to call them Double Trouble Brownie cookies, because that's what they taste like, and I know Daniel will eat more of them if I call them Brownie Cookies instead of Chocolate Cookies :)  I kept her same ingredients list, but adapted the preparation method slightly.  I'll have to re-make those Double Chocolate Cookies and do a side-by-side comparison to see which of these two recipes we like best (or maybe that's just an excuse to make both of these again).


Double Trouble Brownie Cookies, adapted from A Full Measure of Happiness
Ingredients:
1 stick unsalted butter, softened
¾ C sugar
¼ t salt
1 t vanilla
1/3 unsweetened cocoa powder
1 large egg
1 C flour
½ t baking soda
½ - 1 C semisweet chocolate chips (to taste)


Directions:
Preheat to 350.  In the bowl of an electric mixer, beat butter.  Slowly add in sugar.  Add in the egg and beat until combined.  
In a separate bowl, combine flour, baking soda, salt and cocoa powder.  Add flour mixture to butter mixture and beat just to combine.  Add in chocolate chips and stir just to incorporate – don’t overmix.  
Using a cookie scoop (I used a 1 ½ Tablespoon scoop), place dough balls on a parchment lined cookie sheet, leaving about 2 inches between them.  Flatten slightly with your palm and bake in the preheated oven for 10 minutes.  Remove from oven (even if they look slightly undercooked) and allow to sit on cookie sheet for 5 or more minutes.  

Thursday, May 19, 2011

Cherry Syrup for Cherry Clafoutis Tart

Back when I made the Cherry Clafoutis tart, I found myself with leftover frozen Dark Sweet Cherries and no plan of what to do with them.  I decided to whip up a quick and easy tart cherry sauce topping to serve with the clafoutis.  I'm so glad I did because the cherry clafoutis was perfectly complemented by the super tartness of this topping combined with the sweetness of the homemade whipped cream.  In fact, I really don't think I would have enjoyed the clafoutis nearly as much without these toppings.  With both the sauce and the whipped cream, the whole clafoutis was happily eaten up at our family dinner.
Frosty dark sweet cherries


Quick and Easy Tart Cherry Sauce Topping: adapted from epicurious
10 ounces frozen pitted dark sweet cherries, thawed
3/4 of a lemon, cut into thirds (1 lemon cut into quarters, discard one quarter piece)
2 tablespoon cornstarch mixed with 2 tablespoon water

Combine cherries and lemon in a saucepan over medium heat, stirring occasionally, until cherries are tender (approx. 5 minutes).  Add cornstarch mixture and bring to a boil stirring constantly.  Discard the three lemon pieces and allow to cool.  Store chilled in the refrigerator but remove and reheat into microwave prior to serving.  

Snickerdoodle Blondies Revisited


Not too long ago I finally made a batch of Snickerdoodle Blondies and the result was perfect - just as I'd hoped it would be.  Who wouldn't love the combination of a moist vanilla blondie + a cinnamon sugary snickerdoodle cookie??  The entire 9 x 13 inch tray was quickly eaten up and enjoyed.  I wanted to make them again, but found myself dangerously low on cinnamon (how did THAT happen?!?).  Instead of making something else entirely as I was tempted to do, I decided to use a tried and true blondie recipe that makes a smaller batch (9 x 9 inch pan), and adapt it to be Snickerdoodley.  The result this time was also perfect... but I suppose it'd be hard to go wrong with a cinnamon sugar blondie.  If you find yourself needing a little slice of snickerdoodle heaven to plop some vanilla ice cream on and don't want to have an entire 9 x 13 inch pan lying around (because let's face it, the whole pan will be gone in a matter of  days  hours no matter how large the pan), then bake up a batch of these.  They're dense, fudgey and perfectly Snickerdoodley.  


If you decide to be generous enough to give these to friends, our new product can help you do that in a chic and heartfelt way.  Check out our "From the Kitchen Of" stickers in use.  In this case, I put the stickers on our Small Kraft Gable boxes and they are all ready to be given out to friends, neighbors, co-workers or party guests.  The stickers would also be cute on cellophane baggies filled with treats, mason jars, bakery style boxes and more.  Occasionally we like to leave desserts on family members' doorsteps as a surprise (ring and run! - we're weird that way), so these stickers are very handy for quickly packaging and letting recipients know where their gift came from.  How do you give your homemade desserts to family and friends?  

Snickerdoodle Blondies
Ingredients:
1 1/2 sticks unsalted butter
1 1/2 C all purpose flour
1 tsp Baking Powder
1/2 tsp salt
1/2 tsp ground cinnamon
1 C light brown sugar
1/2 C dark brown sugar
2 Large Eggs
1 1/2 tsp vanilla
Cinnamon Sugar topping:
1 tsp cinnamon
1 heaping tablespoon sugar

Directions:
Preheat over to 350 F. Non-stick spray a 9 x 9 pan, and line with parchment.
In a medium bowl, combine flour, baking powder, cinnamon and salt. Whisk to combine.
Melt the butter in a small saucepan. When melted completely, add the sugars and whisk until the sugar is fully melted (about 3 - 5 minutes). Transfer this butter mixture to a medium bowl and let cool slightly. Then, whisk in the eggs and then the vanilla just until incorporated. Add flour, mix until just incorporated, don't overmix. Transfer this mixture into the preprared 9 x 9. Sprinkle the cinnamon sugar over the top of the batter.

Bake for 30 - 35 minutes or when a toothpick inserted comes out with only moist crumbs, no raw batter. Allow to cool in the pan on a wire rack.


Recipe Card!  Click to enlarge.

Friday, May 13, 2011

Furbaby Friday!


No, the picture above is not a remarkably lifelike dog-shaped cake.  No, this post isn't about food.  Yes, I know this is a dessert blog.  Though I do have a few baked goodies to blog about in the near future, today's post is about my pup!
One of my favorite blogs, Culinary Concoctions by Peabody posted today: Furbaby Fridays!  I am a proud pup mom, too, and while Sadie has made a few guest appearances on this blog, I think it's about time she gets her own post.  So here it is: The first edition of Furbaby Fridays!
Happy Friday everyone!


Sunday, May 8, 2011

SMS: Cherry Clafoutis Tart


Happy Mother's Day to all of the mothers out there!! I hope your day began with breakfast in bed and that it was prepared with lots of love!  :) 


This week for Sweet Melissa Sundays, Tess of Cookin' Chemist hosted and chose something I've never made (or even heard of) before.  We made a Cherry Clafoutis Tart - a perfect treat to bring to your mother for Mother's day... well, I think so.  It looks beautiful, but I haven't actually tried it yet... because I'm bringing it to Mother's Day dinner!

It was fairly easy to put together.  The crust was a little troublesome (a bit on the sticky side!) but the custard was very quick to make.  I had no idea what on creation a "Clafoutis" was until this week.  And even then, I was pronouncing it "Cla-fow-tis" up until yesterday when I googled it and found out it was really pronounced "Klah-foo-tee".  A traditional Clafoutis is a baked French dessert of cherries arranged in a dish and covered with a thick flan-like batter.  The Sweet Melissa recipe is a tiny bit different I guess, because it has a sugar cookie crust.  We'll see later how it tastes!  I made a cherry sauce and some freshly whipped cream to go with it - more pictures later!

I didn't have a deep dish tart pan, so I had some extra custard:
Click here to see how the other bakers' Cla-foo-tee's baked up.  And happy mother's day!

Sunday, May 1, 2011

Experiments with Xylitol

Xylitol?  What is Xylitol?  Until recently, I had never heard of the stuff.  I've come to learn that Xylitol is, "Xylitol is an all natural sweetener that looks and tastes like sugar. Xylitol is naturally occuring in many fruits and vegetables. Once extracted and processed it yields a white, crystalline granule that can be used in any recipe that calls for sugar." (Source: Emerald Forest Sugar).  The people at Emerald Forest sent me a sample of their sweetener and I put it to the test in two recipes.  I'm not being compensated for mentioned this item on my blog, but I did receive the product for free.  The following represents my opinion based on using the product in two recipes.

First, I used the "Best Brownies" recipe found on their website here.  I wanted to use a website directly from the source the first time before I began experimenting.  The only change I made was to use regular all purpose flour instead of whole wheat pastry flour.  I also omitted the nuts, and used butter instead of vegetable oil (the recipe said either/or).  Additionally, I skipped the cream cheese frosting that was also in the recipe.
The results?
The resulting brownies were much more cake-like than brownie-like.  They were pretty dry and a bit on the bitter side.  Though, perhaps that is because I skipped the cream cheese frosting, which I'm sure would have helped in those areas.  If I were eating these because I was diabetic and needed a low or no sugar brownie recipe, this would not be the recipe to satisfy my brownie craving.  


Since I wasn't overly excited with the results of my first Xylitol experiment, I decided to make cookies, too.  This time, I adapted a recipe for Peanut-Butter Cookies with Xylitol liberally.  The original can be found here.  The change I made was to add unsweetened cocoa powder and add a small amount of vegetable oil to make up for the extra dry ingredients.  To get a true comparison, I prepared the dough with everything besides the Xylitol.  Then I split the dough in half.  In one half I used real sugar and in the other I used Xylitol.  I kept this a secret though, as I didn't want to influence my taste tester!

Here is a side by side of the two cookies:
on the left is the Xylitol cookie, on the right is the cookie with real sugar
You can see a color difference between the two cookies.

The biggest difference in the cookies, though, was consistency.  While the real sugar brownies seemed to bake normally and dry out a bit, the Xylitol cookie seemed to remain unchanged after its time in the oven.  Even after baking (with extra time added to the recipe) the dough was still very wet and seemingly raw-dough-like.

I gave the husband the moister Xylitol one to sample first.  Then I gave him the real sugar cookie.  He didn't know I used Xylitol in the cookies at all!  Surprisingly, he said while he didn't like the flavor of either of the cookies, he said he preferred the first cookie (Xylitol cookie) over the second one.

So, as you can see, I'm still really undecided about using Xylitol in baked goods.  I think it affects the consistency and texture of baked desserts considerably.  I'll have to give it another try before I make up my mind about it.  However, I do think this would be good in drinks, like Sweet Tea or even a homemade Lemonade.  I intend to try this out soon and will post the results here!

Emerald Forest was nice enough to offer bloggers and blog readers a coupon code for use on their website.  So, if you are interested in giving Xylitol a try make sure to enter the coupon code "FIRST" at checkout on Emerald Forest's website.  

Cupcake Tower Giveaway

Happy Weekend everyone!  


We have selected a winner for the Cupcake and Dessert Tower Giveaway.  We used Random.org to select a winner.  
And the winner is... Drum roll please......

Congratulations, Anash!  You are the lucky recipient of a Free Flower Tower:
For those of you who are interested in purchasing one of our Cupcake and Dessert Towers or any other item from The Smart Baker, we are offering a Site-Wide Coupon Code:
Simply enter Spring2011 at checkout for 20% off your purchase
Expires May 8, 2011


In other news, very soon I will have some recipes with Xylitol coming up on the blog.  The kind people over at Emerald Forest sent me a sample of their Xylitol and I have been experimenting with it in my baked goodies.  According to their website, Xylitol, "is an all natural sweetener that looks and tastes like sugar. Xylitol is naturally occuring in many fruits and vegetables. Once extracted and processed it yields a white, crystalline granule that can be used in any recipe that calls for sugar". The jury is still out on how I feel about it.  I've made two Xylitol desserts, but I think I need to make at least one more to be fully convinced about using it in baking. Here is a sneak peek:

LinkWithin

Related Posts with Thumbnails