Recent Posts

Sunday, January 31, 2010

Sweet Melissa Sundays: Butterscotch Pudding


There are many things I have learned to make from scratch since starting this blog. I began as a novice baker, and now, I've baked all kinds of cakes, cookies, brownies, blondies, frostings, fillings, ice creams, truffles, and more. One thing, however, I had not tried until yesterday, was pudding. The instant kind is so easy, I just never saw the need to make my own. But when it came up in Sweet Melissa Sundays and I saw how simple the recipe looked, I decided to give it a try.

The one thing that made me nervous was boiling the granulated sugar and water down to an amber colored syrup. I have tried in the past and wound up with clumpy, burnt, sticky messes far too many times. This time, though, everything went smoothly. I watched it like a hawk and stirred it constantly (even though the recipe didn't say to... but I was afraid of it sticking!). When it started to turn the color of clover honey, I immediately took it off the heat and it was fine.


I made the recipe according to the book with two minor changes. One, I used fine sea salt instead of table salt (much yummier). Second, I used all half-and-half instead of heavy cream and milk.

Judging by Daniel's reaction, I'd say my first pudding-making was a success! It is very sweet, but very good. Perfectly smooth consistency and mild butterscotchy-caramelly flavor.


Don't forget to see how it came out for the other SMS bakers! And make sure to visit Jennifer's blog, Maple N' Cornbread, to see the recipe for Melissa's Butterscotch Pudding.


PS - Just wanted to let you all know we have a Valentine's apron on TheSmartBaker.com. We have added a cute little heart detail to the pocket of the monogrammed aprons! Go check it out!

Saturday, January 30, 2010

Cute little cupcakes

No new recipes yet. Just some cute little cupcake pictures to share!


Hope everyone is enjoying their weekend! :)

Sunday, January 24, 2010

Sweet Melissa Sundays: Black Bottom Brownies


I have seen Black Bottom Brownies in so many blogs and magazines. Brownies with Cheesecake on top? Sounds delicious! But for some reason I've never got around to making them. For me, cheesecake is one of those things I'll eat and enjoy if it's on the holiday dessert table, but other than that it's not something I crave. Maybe that's why I've never made them. So I'm glad that this week for Sweet Melissa Sundays Cynthia of Bakingtherapist picked Sweet Melissa's Black Bottom Brownies as the recipe for the week. It forced me to finally try these goodies!


I baked just as the recipe stated. I was trying to think of a fun way to flavor the cheesecake (coffee? caramel?), but I couldn't come up with anything that really struck me so I made the basic cheesecake recipe. Melissa said to just pour the cheesecake mixture on top and sprinkle with chocolate chips, but I decided to swirl it together a little bit. By the way - What did your chocolate chips do? When I put them on top they just sank! I used less than half of the chips she called for in the recipe (12 ounces!) and it was more than enough.
Fortunately I had read the P&Q on the SMS site, and saw that some people baked for only an hour. I'm glad I saw this because mine were ready to go after 60 minutes rather than the 75 stated in the book.

The result was great. The brownies are very dense (maybe because I swirled it a bit) and the chips add a nice occasional crunch. If I try these again, I might do what I originally intended and flavor the cheesecake... mmm maybe bailey's???

Check out Cynthia's blog, Bakingtherapist, for the recipe. And take a peek at the other Sweet Melissa Sunday bakers' results here!

Tuesday, January 19, 2010

Less-than-an-hour Cinnamon Bun Bliss


When family is visiting and you have a bit of time to kill in the morning before everyone is awake, what do you do? Prepare this recipe for Quick, Delicious Yeast-Free Cinnamon Buns, of course! My First Kitchen's Buttermilk Cinnamon Rolls is a fast, easy way (no yeast required, yey!) to get warm, homemade cinnamon buns on to the table and ready to eat in under an hour. They don't puff up like yeast cinnamon buns and they aren't as flaky as the more time intensive, laborious variety, but they do get you that ooey-gooey doughy, cinnamon-sugary, cream cheese frosted goodness you look for in a good cinnamon bun recipe. I'd go as far as to say that this might be my new go-to recipe for cinnamon buns for a while. All without having to wait for yeast to make the dough rise and get frustrated when it doesn't. Sweet indeed.


Less-Than-An-Hour Cinnamon Bun Bliss, adapted from My First Kitchen
makes anywhere from 7 - 12 depending on how you roll out your dough and how thick you slice your rolls!

Ingredients:
dough:
2 3/4 cup all purpose flour, plus extra for dusting
2 tbsp sugar
1 1/4 tsp baking powder
1/2 tsp baking soda
3/4 tsp. fine sea salt
5 tablespoons refrigerated buttermilk powder
6 tbsp melted butter
3/4 cup water, room temp

filling:
4 tbsp. melted butter
3 tbsp. sugar
2 tbsp. cinnamon
pinch of salt

my favorite cream cheese cinnamon bun frosting recipe:
2 ounces cream cheese, room temperature
4 tblspn unsalted butter, softened
1.5 c confectioner's sugar
1/2 tsp pure vanilla extract

Preheat to 425°F. Butter a small baking dish (a pie plate, or loaf pan would probably be sufficient). In a bowl, whisk together flour, sugar, baking powder, baking soda, buttermilk powder and sea salt.
Stir in the butter and water.
The dough will be very sticky, so put a very generous amount of flour on to your counter or work space. Plop your sticky dough on to this surface and give it another generous dusting of flour on top.
With floured hands, gently knead the flour into the dough (adding more flour if necessary) until the dough is fairly smooth and without cracks
Using a rolling pin, roll dough out into a .5 inch thick rectangle.

In a small sauce pan, melt the butter for the filling. When it is completely melted, add the sugar and whisk. Finally add the cinnamon and stir. Using a pastry brush, spread on to the dough doing as close to the edges as you can, but leaving a small border on one of the long ends of the dough rectangle.
Roll the dough from the longer side, keeping it as tight as possible as you roll it up. Cut the dough in to sections about 2 inches thick.
Place the rolls in a lightly greased pan, and bake for about 17-20 mins, or until the edges have just begun to turn golden.

While it is baking/cooling on the rack, make your cream cheese frosting. Beat cream cheese and butter together until mixed and fluffy. Add sugar, mix until incorporated. Add vanilla and stir to combine. Spread on still-warm-from-the-oven buns.

Saturday, January 16, 2010

Sweet Melissa Sundays: Lemon Walnut Sour Cream Pound Cake


Sour Patch Kid Pound Cake. That's what I'm calling this. No one else on the P&Q for Sweet Melissa Sundays said their Lemon Walnut Sour Cream Pound Cake's glaze was super duper duper sour and tart, so perhaps something in mine didn't come out right? But the top of my pound cake, where all the glaze is concentrated, is soo tart it makes my face go all squinchy when I eat it. Mine and Daniel's lips puckered, our eyes closed uncontrollably, and all this from us sour lemon lovin' people! So maybe my glaze was sour-er than everyone else's. Not sure! I'm interested to see everyone else's results.
UPDATE: Ok, I re-tasted the cake a day or so later, and it tasted much less sour! Maybe when we initially tried it, it was toooo fresh and the lemon glaze didn't have a chance to mingle with the other flavors of the cake yet. Now it tastes pleasantly lemony! Yey! I have my Dad and brother here visiting, and everyone enjoyed it.


Lemon Walnut Sour Cream Pound Cake was chosen by Raeann of Basically, Baby Boots for this week's Sweet Melissa Sundays recipe. Like many others I subbed in Pecans for the Walnuts (Yum). Be sure to check our her blog for the recipe! I thought the pound cake itself was very very good. It had a nice crumb, it was nice and moist, and it was not too heavy and dense, and not too light either. Though I think next time I might either use only a very small amount of glaze, or I'd leave the glaze off entirely. Or maybe even use just a plain ol' powdered sugar and water glaze, mmm.


Be sure to see what the other SMS Bakers came up with - visit the blogroll!

Friday, January 8, 2010

SMS: Chocolate Pie Crust + Brownie Pie


For Sweet Melissa Sundays this week, the recipe of choice was Chocolate Pie Crust, the pick of Donna from L'Amour de Tarte. And we could choose whatever filling we like to put in it. Nice choice, Donna! I love that this recipe left a lot of room for creativity. It is so much fun to check out everyone else's post in creative ones like this and see the different things we all came up with.

That being said, I was totally scared to do this. I have never made a pie crust, and judging by the amount of tutorials and advice on how to make a pie crust that flood the internet, I assumed it was a difficult and delicate process. So, I just avoided it all together. That, coupled with the fact that the fiance likes his fruit cold and crunchy, not cooked, soft and squishy, I never had the reason to make my first pie crust. But when it came up next on the list for SMS, I decided to give it a go. Before attempting my pie crust, I tried to read up all about it. I watched this and this. I looked at this step by step (with a different recipe) and a few others to see how the dough is supposed to look as it is coming together. I know the Sweet Melissa book said not to use a food processor, but I don't have the pastry cutter thingy (yet) and in the video, Alton made his in the same food processor I have! So I gave it a go with the Cuisinart. And it came out very nicely! I took about a gajillion pics of this one... of the process and the final product.


I did the squeeze test, and it stuck together perfectly. Time for making into a bally and chilling!


It rolled out perfectly! (with Dan's help, of course. There are certain things I am not good at and Daniel always help me when I get frustrated... rolling out dough, kneading, and crumb coating to name a few! <3 He's the best)


Going into the pie plate


So impressed with ourselves!


So for the FILLING... what to do! We could choose any filling we like. Since Daniel doesn't like cooked, soft, squishy fruit, Cherry, Apple. etc. were out. So I went searching for inspiration on Food Network. When I came across Paula Deen's "Corrie's Kentucky Pie", I knew I found THE ONE! The user comments and reviews on this one were very positive, and many described it as, a "Brownie Pie". Mmm, since the New Year's Brownies were such a big hit, and Daniel was still craving brownies, I chose Paula's "Corrie's Kentucky Pie" as my filling. Since her recipe made 2 pies, I just halved the recipe. I just made a few small changes to the filling, which I listed below. But also make sure to click here and check out the original recipe, and the multitude of positive reviews of this pie!

BUT.... before I made the batter.... I added a small secret layer to my already decadent Brownie Pie with Chocolate Pie Crust....


Because isn't every chocolate recipe a little better with a bit of peanut butter???

Brownie Pie with Chocolate Pie Crust, adapted from Paula Deen's "Corrie's Kentucky Pie"
enough to fill one 9.5" pie plate

Ingredients
2 large eggs, room temperature
1 cup sugar
4 oz semisweet chocolate. chopped
2 oz bittersweet chocolate, chopped
1/2 cup all purpose flour
3/4 tsp baking powder
1/4 tsp fine sea salt
1 stick unsalted butter, melted and allow to cool slightly
1 Chocolate Pie Crust, from the Sweet Melissa Baking Book
handful of peanut butter chips.

Preheat to 350 F. In a large bowl, combine eggs and sugar and beat. Add melted chocolate and stir. In a separate small bowl, whisk together flour, baking powder and salt. Add to chocolate mixture, mixing just until incorporated. Stirring in remaining ingredients except for pie shell and peanut butter chips.
Lay your prepared pie crust into an ungreased 9.5 inch pie plate. Sprinkle with peanut butter chips. Add brownie pie batter. Bake 50 -55 minutes. Use toothpick to test for doneness.


The end product was fantastic. The crust was a breeze to put together - So happy! And I thought it had a great taste. Not very sweet, but I think that mixes well with the sweetness of the filling. And the filling.... amazing. Nice gooey inside with a slight crust to the top. And after it has been allowed to cool and sit, it slices very nicely and cleanly. Perfect served warm with some ice cream. :)


Crust shots!!!!

Really good pick, Donna! Be sure to check our her blog, L'Amour de Tarte, for the recipe. And visit all the SMS bakers' sites to see their results and crust+filling combo's!

Wednesday, January 6, 2010

Oreo Cookie Cookies; Snickerdoodles; & Soft Sugar Cookies

If I didn't keep this blog, there would be no way I'd remember which recipes I've made. I wouldn't be able to re-make anything if it were a big hit because I wouldn't be able to find the recipe I made it from. I have about a gajillion bookmarked on the computer, and I'd never be able to remember which one it was. That was the original reason I started this blog - to keep track of all the things I've made - along with pictures to remind me, and a short little commentary about how it came out. Of course I have a few tried and true recipes that I have written on recipe cards, but even then, those sometimes get lost or dirty and the bloggy is a great fall back. In fact, I think I have temporarily misplaced my handwritten recipe card from a hundred years ago for one of my absolute favorite recipes, and if it weren't for me having posted it on the blog it might have been lost forever... which in this recipe's case would have been a great tragedy. Does anyone else out there rely on their blog in this way? That is one of my favorite things about having this little hobby. It's like a baking diary. It makes me feel a little bit organized, even though when it comes to making things in the kitchen, that really couldn't be farther from the truth :)

I made these cookies quite a few weeks ago (well before Christmas) so I am impressed with myself for not having lost the recipe by now! All of them were made from recipes by fellow bloggers. With each recipe, I put links to the lovely blog from which I borrowed the recipe. The first is 
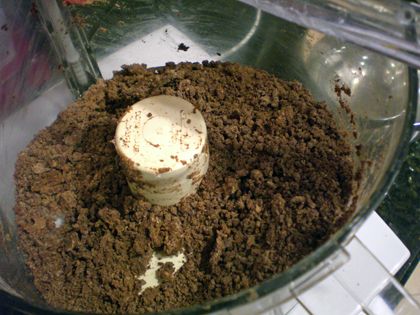
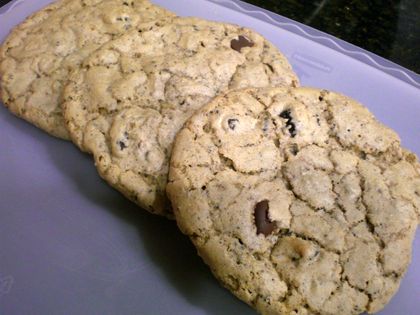
Giant Oreo Cookie Cookies - using chopped up, ground oreo's as an ingredients. I found it on Sugar Cooking, and knew immediately I'd have to make it for us oreo lovers. One response to this cookie was, "Now this is a cookie!" These were a big hit... the oreo is a subtle but delicious addition to a great chocolate chip cookie recipe. The only real changes I made were the crush the cookies more finely than just rough chunks, reduce the amount of oreos, and lessen amount of chocolate chips.


Giant Oreo Cookie Cookies adapted from Sugar Cooking
the recipe states it makes about 20-30 cookies, but using 1/4 of dough, i only got about 12 - 14 of them!
Ingredients
2 cups all-purpose flour
1/2 teaspoon baking soda
1/2 teaspoon salt
3/4 cup unsalted butter, melted, and set aside to cool slightly
1 cup packed light brown sugar
1/2 cup granulated sugar
1 tablespoon pure vanilla extract
1 egg
1 egg yolk
1 cups semisweet chocolate chips
15 oreos, ground

Preheat to 325. Line cookie sheets with parchment.
Sift flour, baking soda and salt together and set aside.
In a medium bowl, cream together the melted butter, brown sugar and granulated sugar until well blended. Beat in the vanilla, egg, and egg yolk until light and creamy. Mix in the sifted ingredients until just blended.
Add in the crushed oreos. Beat on low to incorporate.
Stir in the chocolate chips. Drop cookie dough 1/4 cup at a time onto the prepared cookie sheets. Cookies should be about 3 inches apart.
Bake for 14 to 17 minutes in the preheated oven, or until the edges are lightly toasted. Cool on baking sheets for a few minutes before transferring to wire racks to cool completely.


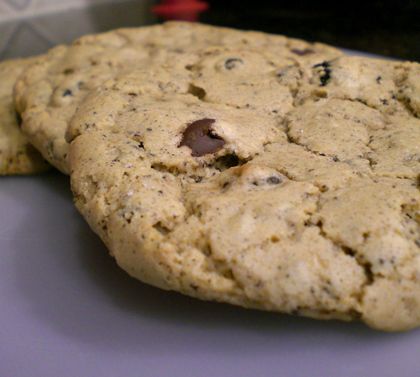
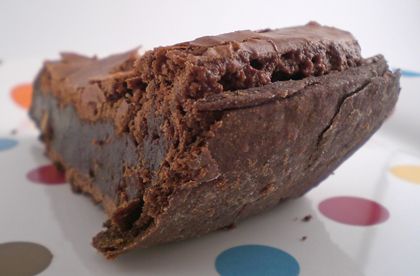
Close up! You can see the dark flecks of oreo - Yum...


The second cookie recipe is based on Snickerdoodle Blossoms from 3 B's, adapted from Keeper Worthy Recipes & Lick the Bowl Good.

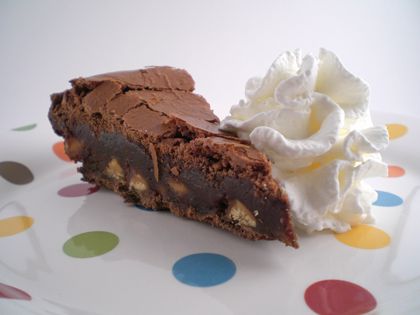
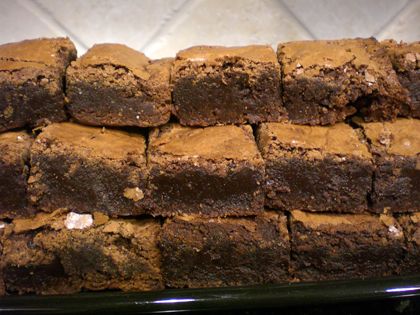
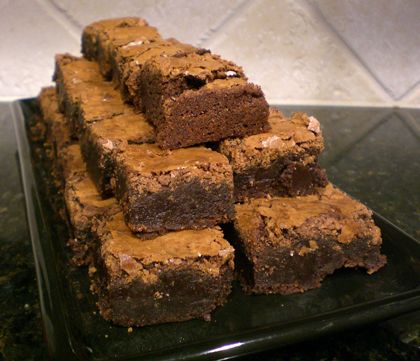
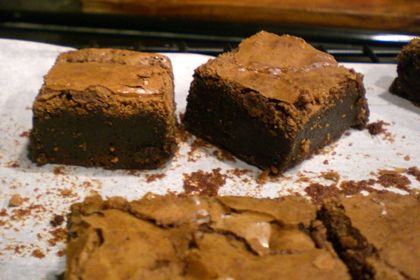
I made them as cookies, on a cookie sheet instead of doing them in the muffin tins... but I wish I had done the muffin idea! This recipe was so good I will definitely try them again and make them into a cute mini muffin shape next time. I swapped out the hershey kisses and opted instead for Chocolate Covered Brownie Dough Bites...yummm. I used the brownie bites in some and made others just as plain ol' snickerdoodles. Mine baked out kind of flat... they spread a lot and flattened out. But they were still incredibly SOFT and delish. A definite would-make-again.


Snickerdoodle Not-So-Blossoms from Snickerdoodle Blossoms of 3 B's, adapted from Keeper Worthy Recipes & Lick the Bowl Good.
makes about 4 dozen
Ingredients:
1/2 cup granulated sugar
1/2 cup firmly packed light brown sugar
2 sticks unsalted butter, soft
1 egg, room temp
1 teaspoon pure vanilla extract
1/4 teaspoon fine sea salt
2 cups all-purpose flour
1 teaspoon baking soda
48 chocolate candies of your choice (chocolate kisses, chocolate covered brownie dough, etc)
For the cinnamon sugar:
1/4 cup sugar
1 tablespoon ground cinnamon

Preheat 375 F.
Combine 1/2 cup sugar, brown sugar and butter in large mixer bowl. Beat on medium until creamy. Add egg, vanilla and salt and beat until mixed. Reduce speed to low; add flour and baking soda. Beat until well mixed.

Refrigerate about 1 hour, or until firm enough to shape into 1 inch balls. Work fast before they get soft! Combine the 1/4 cup sugar and cinnamon in a small bowl. Roll dough balls in cinnamon sugar.
Place 2 inches apart onto parchment lined cookie sheets. Bake for 8 to 10 minutes or until very lightly golden brown. Immediately press 1 chocolate kiss in center of each cookie. (OOPS - I added my chocolate candy to the center of the cookie BEFORE baking. But I think either way they would have spread out flat.) Remove from cookie sheets; cool completely on a wire rack.

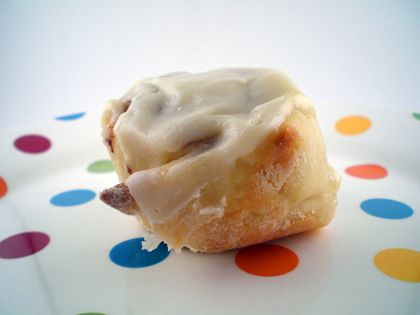
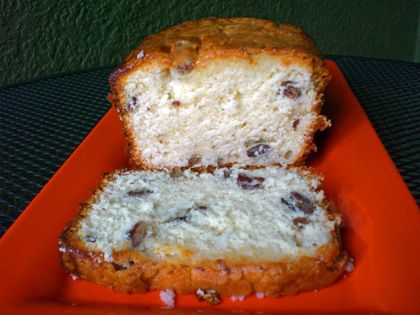
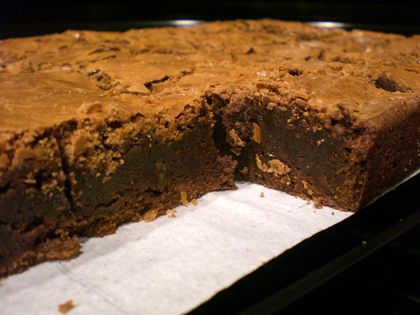
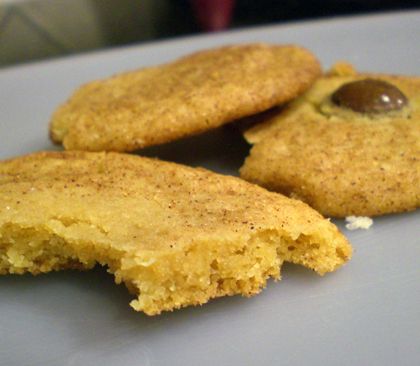
And FINALLY, the last cookie recipe is for 
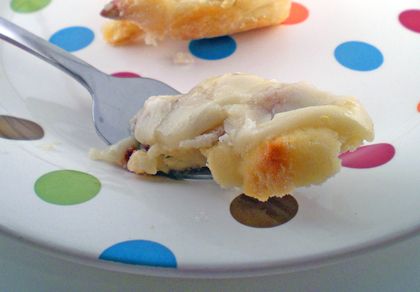
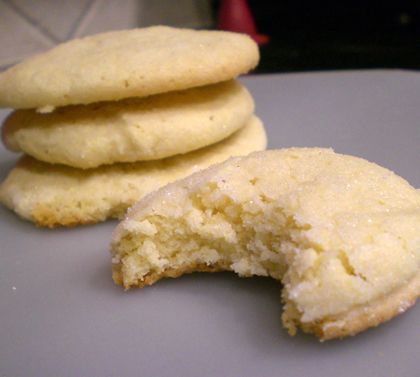
Soft Sugar Cookies. These were by far the softest sugar cookies I have ever made. And possibly even my favorite sugar cookie I've ever prepared. They maintained their height nicely without spreading too much. My only beef is that the dough is thin and even after a little chilling (which the recipe doesn't call for) is hard to roll into a ball to roll in the sugar. But non-stick spraying a cookie scooper helped a lot with this process. I saw these on Delish Blog, which they adapted from America’s Test Kitchen Family Cookbook, 2006. The only change I made was to add some turbinado sugar to the granulated sugar used for rolling the dough balls in for some extra crunch. They came out perfectly SUPER-SOFT on the inside, with a sugary crust on the outside. Definitely would make these again!!


Softest Sugar Cookies from Delish Blog, adapted from America’s Test Kitchen Family Cookbook, 2006.
makes about 2 dozen cookies
Ingredients:
2 1/2 cups all-purpose flour
2 cups granulated sugar
1/2 tsp baking powder
1/2 tsp salt
1 3/4 sticks unsalted butter, softened
1 Tbsp pure vanilla extract
2 large eggs, room temp
extra granulated sugar mixed with some turbinado sugar for rolling

Preheat to 350 F. Mixed 1/2 cup of the sugar with some turbinado sugar in a small bowl for coating. Set aside. In a separate bowl, whisk flour, baking powder, and salt together. Set aside. Beat butter and rest of the sugar (1 1/2 cups) together in a large bowl using an electric mixer on medium speed until light and fluffy. Beat in the vanilla, then the eggs one at a time, until combined, only about 30 seconds. Reduce the speed to low and mix in the flour mixture until just combined. Chill the dough for about 30 minutes. Line cookie sheets with parchment. Using wet hands, roll 2 Tablespoons of dough into balls, then roll in sugar to coat. Place balls on sheets, spaced about 2 inches apart. Very slightly flatten cookies with a flat surface (the bottom of a glass, measuring cup, spatula, etc).
Bake cookies until edges are set and just barely beginning to brown but the centers are still soft and puffy, about 10-12 minutes. To keep these soft, you DON'T want to overbake them! Leave cookies on baking sheet after removing from oven for 10 minutes, then transfer to a wire rack and let cool completely.

Friday, January 1, 2010

Nearly Perfect Brownies


No matter how many delicious brownie recipes I find, for some reason I'm always more than willing to try out new ones. Rather than stick with the tried and true, taste test approved brownies I've made in the past, I often find myself looking for new ones to experiment with. Sometimes the results are disappointing and I wish that I'd stuck with a personal favorite. But other times, such as this one, the new recipes produces some terrific results. I recently came across, "Better than Ultimate Brownies" on Gourmeted.com. What struck me was the photos - super fudgey, moist looking inside, while they still had those crisp tops - YUM. These "Better than Ultimate" brownies were adapted from the original recipe found here for "Ultimate Brownies" on about.com. I made a few more substitutions and changes to the recipe from Gourmeted, and have posted my changes below.


They came out great - exactly like they appeared in the picture. That perfect thin crust top, with a perfectly moist, fudgey center.
They were enjoyed by all at the New Year's Party. :)


Nearly Perfect Brownies! adapted from "Better than Ultimate Brownies" on Gourmeted.com
Ingredients:
4 (1) oz squares of unsweetened chocolate
3 oz of semi-sweet chocolate chips
3 tablespoons natural unsweetened cocoa powder
1 cup unsalted butter
5 eggs
2 3/4 cups sugar
1 tbsp vanilla
1 1/2 cups all purpose flour
1 tsp sea salt

Grease one 9 x 13 pan. Line the bottom with parchment and lightly grease the parchment.
In a small saucepan over low heat, melt chocolate squares, chips, cocoa powder, and butter. Set aside after it has melted and combined.
Beat eggs, sugar and vanilla at high speed for 10 minutes. Put the guard on your stand mixer bowl - this gets splashy! Add the melted chocolate mixture, salt and flour and mix until just blended. Let the batter sit on the counter for 20 minutes before pouring into the greased pan (half way through this would be a good time to preheat the oven to 375). Let air bubbles escape by dropping the pan on to a counter a few times.
4.Bake for 30 minutes and test with a toothpick. If it comes out clean with only a few crumbs, remove to a cooling rack. Let cool completely before cutting.

LinkWithin

Related Posts with Thumbnails