Recent Posts

Thursday, April 30, 2009

Wilton Cake Decorating Course 3, Finale Cake

So, last night was the final class for Wilton Cake Decorating Course 3, Fondant & Tiered Cakes. I have really enjoyed these classes a lot! At times, it got frustrating and time consuming, but I am very glad that I did it. I learned a lot, and got over a lot of decorating fears. I would definitely recommend these classes at Michael's to anyone interested in learning the basics of cake decorating (well, at least in my area of Central Florida, my teacher was awesome).

The finale night was a free for all! We were allowed to make a cake of our choosing - decorating it as we wish. During class, the customers & workers of Michael's voted on a class fave. I was not happy with the outcome of my cake initially... it did NOT come out like I had envisioned. The color scheme was NOT what I was going for. I really wanted an Argyle pattern on the bottom, but it didn't work. There are a ton of imperfections. And my little wire ballies didn't come out like I had hoped. But guess what? I tied for first place! It was shocker. I personally thought my cake looked like a female alien robot wearing a pearl necklace. The other cakes were really very stunning, I definitely should not have won! I had two personal faves of other girls in the class, and I was rooting for them to win. If I had seen them for sale in a bakery, I would buy them in a second! All the students' cakes looked very professional. It was fun and interesting to see everyone's take on cake decorating - seeing everyone's personal vision for their cake. Very cool!

Here are some pictures of my cake:


Anyway, I hope I get the opportunity to make cakes in the future, so that I can keep practicing my decorating and fondant skills and get better!

Sunday, April 26, 2009

Sweet Melissa Sundays #4: Granola Breakfast Cookies


For the Sweet Melissa Sundays baking group this week, our host, Jessica of A Singleton in the Kitchen chose Granola Breakfast Cookies (p.36) which was a 2 part recipe as it called for the book's Granola recipe (p. 34) to be prepared as well. I think some chose to use store bought granola, but I figured I would give Melissa's recipe a shot and make my own (though as usual, I altered the recipe a bit - both to suit my own personal preferences and because of necessity). The changes I made to the granola recipe included quartering the recipe, leaving out the allspice, reducing the amount of almonds, using sliced instead of whole, reducing the amount of raisins, using regular raisins instead of golden, leaving out all of the other dried fruit and seeds/nuts, and using all oats (sadly, I could not find any rye flakes). For the cookie recipe, I pretty much followed the recipe in the book, except for subbing in some maple syrup for honey as I ran out :(


Overall, I thought the cookies were so - so. The flavor was a little too molassesy for my taste, and Daniel didn't like them at all. (When asked to sample one, he took one bite, frowned, handed it back to me and said, "Sorry"). When dunked in coffee, they are OK. I have been eating one or two along with my morning coffee for breakfast.

Be sure to check out the results of the other SMS Bakers!!! Hopefully their cookies came out slightly more attractive than my lumpy bumpy cookies :)

Sunday, April 19, 2009

Sweet Melissa Sundays #3: Not-so-Caramel-Apple Turnovers


This week's recipe, chosen by Tracey of Tracey's Culinary Adventures, was for Caramel Apple Turnovers with Sweet Ricotta Filling (p. 25 of the Sweet Melissa Baking Book). Since Daniel doesn't like his apples warm or cooked (he only likes 'em cold and crispy - fresh and straight from the fridge), I decided to adapt the recipe in honor of his birthday. Yesterday was his actual birthday, but as he spent the past two days sick, I decided to make these the way he would like for the first day he could eat normally again.

Instead of Caramel Apple filling, I decided to substitute strawberries in for the apples.

by the way, if you ever need to make perfectly sized strawberry slices, and make them quick, use an egg slicer...


Like a few other people, I had trouble getting my water & sugar to turn amber without turning into crystallized chunky sugar clumps. The first attempt ended in total gloppy madness. The second attempt went slightly better, though I wound up having to add all the water in before adding the strawberries to avoid a second clumpage. I just decided to go with it when it turned amber, even though I did it out of order. And I too had some trouble assembling... it was difficult to get the edges to seal, but I think it's my own fault, because of overfilling, and filling to close to the edges. Oh wells!

They baked up nicely, and since I made mine a bit smaller than the original recipe called for, mine were totally done in 20 minutes.


The result was quite good. I really enjoyed the strawberry filling... it was a bit like jam. Very good. Though I didn't really taste the ricotta filling. Maybe the strawberry flavor was too overpowering.

With the remaining scraps from trimming my puff pastry sheets, I brushed with egg wash, and sprinkled with cinnamon sugar...


Though the Turnovers were tasty, Dan probably would have been just as happy if I just made these simple little scraps!

Be sure to check out the rest of the Sweet Melissa Sunday's Bakers' posts to see their results!

Thursday, April 16, 2009

My First Fondant Cake!: Birthday Present Cake

Wilton Cake Decorating Course 3 is underway! Yesterday was Lesson #2 of Course 3 (Fondant and Tiered Cakes) and we got to Fondant our first cake! We were required to bring an iced/frosted 2 layer square cake. In class, we were to assemble it into a birthday present... and since Daniel's birthday is this Saturday, it was perfect! I made one that he would like: the bottom layer is a giant blondie, theres a layer of buttercream, and it's topped with his favorite white cake recipe. This was the end result. Overall, I think I did a pretty good job for my first one! I really like working with fondant and am excited to do more things with it in the future.


Sunday, April 12, 2009

Sweet Melissa Sundays #2: Brooklyn Blackout Cake


This week's selection from The Sweet Melissa Baking Book was chosen by Elyse of Confectionery Creations. She picked the chocolatey Brooklyn Blackout Cake on page 111. It is a rich, chocolatey Devil's Food-ish chocolate cake, iced with ganache and a Brownie Crumble. This means the recipe also involved making the chocolate cake on page 111 and the Brownies from page 82. Mmm, Mmm, Mmm.

As usual, I changed it up a wee bit. Since Daniel isn't such a chocolate fan, I didn't want to waste a ton of cake, so I opted to halve the recipe. Instead of one smaller cake, I made 2 little 4 inch cakes, 1 little mini angel food / bundt shaped cake, and 1 cupcake. But I did make the full amount of Brownies because... well, were both totally OK with having extra brownies around. First, I made the brownies. I baked them Saturday afternoon so they'd have enough time to cool and chill out before I chopped them to add to the ganache for the cake.

Chocolate Walnut Brownies (minus the Walnuts), pg 82


The Brownies came out incredibly good. Normally, my brownies, no matter what recipe I use, tend to be a little on the dry side the first day, but improve greatly the next day. These brownies were moist and perfect that very same night. By 10 oclock, just a few hours after they were made, we sampled and were both pleasantly surprised by them. And yes, they were even better the next day. I would definitely make this recipe again. The only difference I made from the original recipe was to omit the walnuts and to bake in an 8 x8 dish instead of a 9 x9.

And the Cake... well, it's really UGLY.


I didn't spread the frosting on the sides of the cake. And I could not get the layers to lay flat and even. My brownie crumble was so chunky that I could not get an even layer of it, so when the top layer was laid on top, it didn't sit straight. Oh well, so it's ugly. It'll still probably taste good! I suppose we shall see tonight!


Be sure to check out the rest of the Sweet Melissa Sundays members' posts on Brooklyn Blackout Cake - hopefully theirs came out cuter than mine!

Sunday, April 5, 2009

Sweet Melissa Sundays: Honey Beescotti & Honey Unscotti


I have always wanted to join in on some of the weekly baking events that go on in the Foodie Blogosphere like Tuesdays with Doris and Hey Hey It's Donna Day, but I was too intimidated: they already had so many members, and had existed for so long that I thought it was too late and complicated to jump on the bandwagon. When I saw that Lorelei of Mermaid Sweets had created a new Baking Group in honor of The Sweet Melissa Baking Book, I saw the opportunity to participate in a group from the very beginning. Today is the group's very first post, so it was perfect timing for me to join! The generous and super cool Elyse of Elyse's Confectionery Creations offered to email me the first recipe (since my copy of the book would not have arrived in time for the group's first post) and I was set! I think this baking group will be a good opportunity to get me to try recipes that I normally may not chose on my own.

The very first recipe chosen for Sweet Melissa Sundays was Honey Beescotti. Be sure to check out Lorelei's blog, Mermaid Sweets for this week's recipe! And see all of the Sweet Melissa Sunday's members' posts of Honey Beescotti as well!

The recipe called for Candied Orange Peel, either store-bought or homemade. I opted to make mine myself, but chose to do Candied LEMON peel instead of orange, because we are not big fans of Orange flavor in our desserts in this household. [see here for instructions on making Candied Citrus Peel, it's really rather easy!] One other change I made was to reduce the amount of almonds from 1/2 C to 1/4 C, and to use sliced almonds instead of whole, chopped almonds. And since Dan doesn't love almond flavored things, I altered the amount of extracts called for in the original recipe - instead of 1.5 tsp of Vanilla and 1.5 tsp of Almond extract, I used only vanilla and reduced the amount of extract to 2 tsp. Aaanndd I also chose to leave out the carraway seeds.

I didn't really have a super-spreading-out problem like some of the other members. And my dough WAS super sticky, but not unmanageable with lots of extra flour for dusting. Maybe because I chilled it sufficiently? After initially preparing the dough, I chilled it not just for the 1 hour the book called for, but actually overnight because it was getting late. Then the next morning, I made two logs, refrigerated another 30 min and baked. Perhaps that helped?


As you may or may not know, the italian cookies "Biscotti" get their name from thei method of baking: it is baked twice to get that crunchy, dry texture -- thus the "Bi" prefix ("Scotti" from cooked/burned/scaled - so it literally means something close to "cooked twice"). The recipe from the Sweet Melissa Baking Book calls for the same basic procedure. The recipe makes enough dough to get two logs, which are then baked, sliced and baked again. Since Daniel is not a fan of dry, crunchy cookies, I made one log in the traditional biscotti fashion: baked twice; and made the other log into "Unscotti" cookies: I only baked them the first time the recipe called for. I thought, HEY if it doesn't work out - I'll still have the other log's worth of cookies. But it certainly worked out. My Unscotti's were less dry and more soft, and the Biscotti's came out like your typical biscotti - crunchy and perfect for dunking in coffee. Both were successful. And I must say, if this recipe is any indication of the rest of the recipes in the book - then I am very excited that I joined this group! Both versions of the cookie were absolutely delicious! This is definitely not a recipe I would have chosen on my own to make, but I certainly am glad I made it. See? Getting out of your comfort zone every now and then is a good thing!

Thursday, April 2, 2009

Reese's Peanut Butter Cup Chocolate Chip Cookies


A little while back, we bought a large amount of mini Reese's cups to mix in to brownies. Since we only used about 12 reese's cups in that recipe, there's still quite a few left. Besides for the occasional snack, they were just sitting idly in the pantry. When Dan requested I make cookies, he suggested I mix in reese's cups instead of chocolate chips (he's a genius, right?). So, we promptly sat on the couch and had a reese's peanut butter cup unwrapping party. 30 minutes and what looked like about 500 foil wrappers later, we had about 43 reese's cups in a bowl. How tempting it was to just sit there and eat it like popcorn.... but alas, our willpower won (well, MINE did, I can't say the same for Daniel... he ate about every other one that he unwrapped), and we stuck the bowl in the frig. I measured out the ingredients for my cookies and waited for my butter to soften while my reese's cups were chilling in the freezer. When chilled enough that they were hard, I put them in my food processor and pulsed until it looked like this:


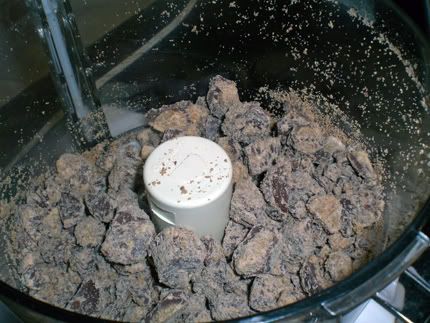
Perfect for mixing in to cookies!

For the cookie recipe, I chose Martha Stewart's Soft Chocolate Chip Cookies because I've been reading such good reviews on it lately. The only change I made was to sub in my chopped reese's cups for both the semisweet and milk chocolate chips called for in the recipe.

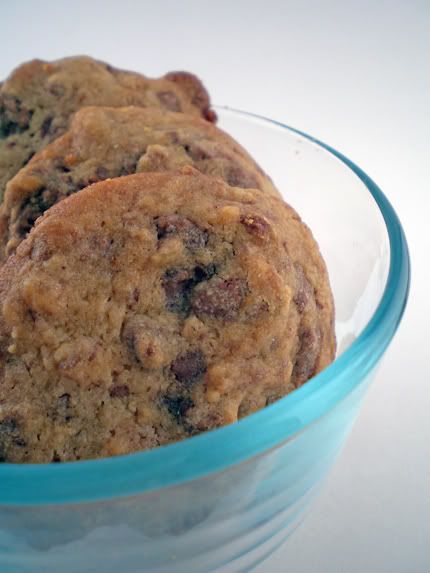
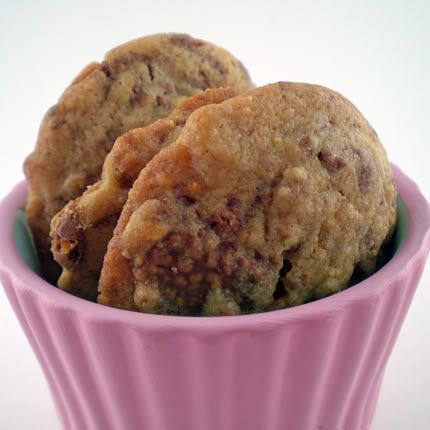
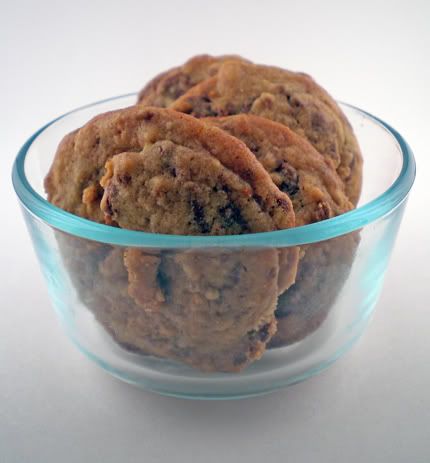
The cookies came out very good. Martha's recipe produced a very nice, soft, kind of light and cakey cookie, and the reese's cup flavor is excellent. Next time, I would repeat the Reese's Cup add-in idea, but would probably use a sturdier, more dense & chewy cookie. But don't get me wrong, they're still delicious! I might also pulse the food processor a little less and use slightly bigger chunks.

I did not flatten the cookies out like the recipe said, so my cookies are kinda lumpy and ugly... but who says ugly can't be tasty?


Reese's Peanut Butter Cup Cookies adapted from Martha Stewart's Soft Chocolate Chip Cookies.
Ingredients:
1 1/4 C All purpose Flour
1/2 tsp salt
1/4 tsp baking soda
7 tblspn unsalted butter, softened
1/4 C granulated sugar
1/4 C packed light brown sugar
1 large egg, room temp
1 tsp vanilla
3 tablespoons sour cream
~43 miniature reese's peanut butter cups, frozen and chopped

Directions:
Preheat to 350. Whisk flour, salt, and baking soda together to combine. Cream the butter and sugars together until pale and fluffy. Beat in the egg and vanilla. Reduce speed to low and add the flour mixture in 2 batches alternately with the sour cream. Beat until just combined - Don't overbeat! Stir in reese's cups. Cover, and chill for at least 10 minutes.

Using a 1 to 1 1/2 inch cookie scoop and drop on to parchment lined baking sheets (you will probably need a teaspoon to ease the sticky dough out of the scoop and on to the baking sheet. Bake 12 - 15 minutes, until cookies are slightly golden.

LinkWithin

Related Posts with Thumbnails