Sorry it has been so long since the last post, but I have been busy cruising around the Mediterranean, & training our new beautiful puppy. Ok that sounded boasty… and it was. I had an amazing time cruising from Spain to France, to various places around Italy, and back to Spain with my dad, sister and Daniel.

After the cruise, we flew back to NY to spend a few days there getting over jetlag and hanging out with the family before coming home to Florida. And we spent that time wisely… by eating great NY food (you cannot find a canola in Florida, nor an Eggplant parmigiana like Domenico’s has…not that we hadn’t eaten more than enough on our trip) and also buying a little shih tzu puppy named Sadie.

I’m pretty sure everyone is sick of me talking about her since that is all I do, so I’ll get on with it.
This is the first baking we’ve done since returning home because with puppy-face around, we’ve been too tired to stay up past 10 oclock. It took us 3 days to watch the first Godfather movie, that’s how quickly we fall asleep. But a few days ago me and Daniel were acting like our old selves and decided that we were going to have a ridiculously extravagant dessert later on. Generally that results in freshly made brownies, served warm, and smothered in icecream, whipped cream, chocolate syrup, sprinkles, etc.. (you name it, we’ve had it on a sundae!) I’ve been calling these our OOPS! Brownies since we had to stray from the recipe a few times because… well…oops. I blame it on the fact that we were both so exhausted. This time, we used a different recipe than usual. Jenn had sent this to me months ago, and I finally got around to making it: you can find it
here. So we set out to make our brownies, and we were getting all of the ingredients out and measured when we realized, OOPS, we’re out of the chocolate we normally use in brownies. Ok, no biggie. We had a few Dove 71% dark chocolate bars from Dad that we could melt down, these would have to be dark chocolate brownies instead of the usual. Then, OOPS, we only have light brown, no dark brown sugar. Oh well, fine. Then, we had everything all mixed and prepared, and in the buttered pan when OOPS! I realized I never put the vanilla extract in. I quickly went to get it when I realized OOPS AGAIN! We used the last of it right before vacation. So, we used almond extract instead. So, our brownies turned out to be dark chocolate almond brownies. But HEY, upon trying them we realized they were pretty darn good. You could taste the almond, and the dark chocolate definitely gave them a much deeper richer chocolate flavor. Daniel doesn’t usually like almond, and he really doesn’t like dark chocolate, and even he ate almost the whole thing (plus tons the days after we made them, since they really do taste best the day after) So, anyway, here is the recipe, with the OOPS ingredients, not the real ones.
2 sticks unsalted butter
8 ounces dark chocolate
4 large eggs
1/2 teaspoon salt
1 cup granulated sugar
1 cup light brown sugar
2 teaspoons almond extract
1 cup all-purpose flour
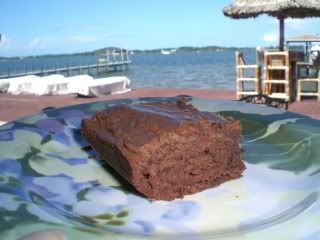
Don't you just love that brownie in paradise picture?
1. Preheat the oven to 350.
2. Melt the butter and the chocolate together on low power in a microwave, stirring after every thirty seconds to make sure it doesn’t burn.
3. Whisk eggs together in a large bowl. Then whisk in the salt, followed by the sugars and finally the almond extract (ya, don’t forget that part like I did). Once the chocolate-butter-ganachey type mixture is smooth, stir that into the egg mixture.
4. Fold in the flour.
5. When there are no more clumps in the batter and the flour is fully incorporated, spread evenly in the prepared pan.
6. Bake 35-40 minutes, or until a toothpick comes out clean. Cool in the pan on a cooling rack. For yummiest results, try your hardest to wait til tomorrow until eating!